1. Introduction
This manual provides detailed instructions for the installation, operation, and maintenance of your BANVIE Car Alarm System with Remote Starter and Engine Start Stop Push Button, Model 806-newDS. Please read this manual thoroughly before installation and use to ensure proper function and safety.
Important Safety Information:
- Professional installation by a qualified technician is highly recommended for this product.
- If your vehicle uses chip keys (immobilizer), an immobilizer bypass module (e.g., ASIN: B075TH5B91) may be required for the remote engine start function. This module is not included and is sold separately.
- A method to bypass the chip without a dedicated bypass module may be available; consult the installer for details.
2. Package Contents
Verify that all components are present in the package:

Image: Overview of the BANVIE Car Alarm System components, including the main control unit, various wiring harnesses, the engine start/stop push button, and two remote key fobs.
- Main Control Unit
- Engine Start/Stop Push Button
- Two Remote Controls
- Wiring Harnesses
- Shock Sensor
- LED Indicator
- Reset Button
3. Specifications
| Component | Specification |
|---|---|
| Main Unit System | |
| Working Voltage | DC 12 V ± 3 V |
| Static Current | ≤ 15mA |
| PKE Emission Current | 40mA |
| Working Frequency | 433 - 434 MHZ |
| ACC / Start Current | 30A |
| Remote Control | |
| Working Voltage | DC 3V |
| Operation Current | 8uA |
| Static Current | ≤ 15mA |
| PKE Emission Current | 40mA |
| Battery Type | CR2032 (2 CR2 batteries included with product) |
| General | |
| Item Weight | 1.5 pounds |
| Package Dimensions | 7.8 x 5.2 x 2.64 inches |
| Model Number | 806-newDS |
| Compatible Devices | Cars |
| Wireless Remote | Yes |
4. Setup and Installation
Installation of this system requires advanced automotive electrical knowledge. It is strongly recommended that installation be performed by a certified professional to ensure correct wiring and functionality, and to prevent damage to the vehicle or the system.
4.1 Main Control Unit Placement
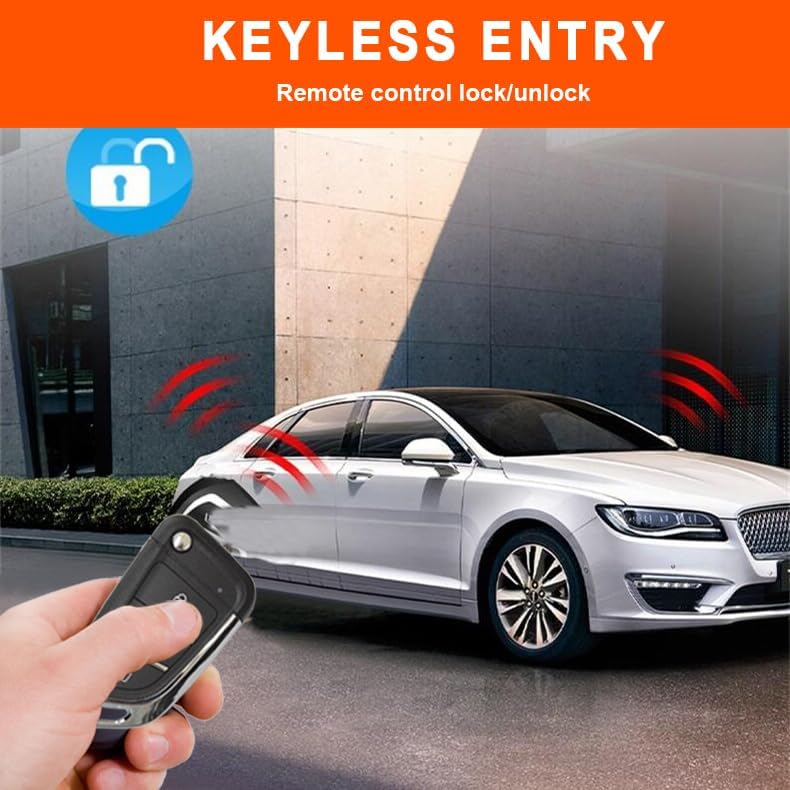
Image: A detailed view of the BANVIE main control unit, showing its casing and connection ports.
The main control unit should be securely mounted in a hidden, dry location within the vehicle's cabin, away from direct heat or moisture. Ensure all wiring harnesses can reach their respective connection points without strain.
4.2 Wiring Connections
Refer to the detailed wiring diagram provided with your product for specific connections. Key connections typically include:
- Power (12V constant, ignition, accessory)
- Ground
- Door lock/unlock outputs
- Engine start/stop outputs
- Brake pedal input
- Horn output (for alarm siren, if connecting to car horn)
- Shock sensor input
- LED indicator output
Note: This system is designed to connect to your car's existing horn for alarm sound, as it does not include a separate siren.
4.3 Immobilizer Bypass (If Applicable)
For vehicles equipped with a factory immobilizer system (chip keys), an immobilizer bypass module is necessary for the remote start and push-button start functions to operate correctly. Install the bypass module according to its specific instructions. Alternatively, consult a professional installer for methods to bypass the chip without a dedicated module.
5. Operating Instructions
5.1 Keyless Entry (Arm/Disarm)

Image: A hand holding the BANVIE remote control, demonstrating the keyless entry function with a car in the background.
- Arm/Lock: Press the lock button on the remote control once to arm the alarm system and lock the vehicle doors. The vehicle's horn will sound once, and the turn signals will flash.
- Disarm/Unlock: Press the unlock button on the remote control once to disarm the alarm system and unlock the vehicle doors. The vehicle's horn will sound twice, and the turn signals will flash.
- Central Door Locking Automation: The system can be configured to automatically lock doors when the ignition is turned on or the vehicle reaches a certain speed, and unlock when the ignition is turned off.
5.2 Engine Start/Stop Push Button

Image: A close-up of a finger pressing the illuminated 'ENGINE START STOP' button, indicating the keyless push-button ignition feature.
- To Start the Engine: With the system disarmed, press and hold the push button until the engine starts. If the engine does not start on the first attempt, release and press again.
- To Stop the Engine: With the engine running, press and hold the push button until the engine stops.
- Push Button Auto-lock: Approximately 30 seconds after the engine is stopped, the push button will automatically lock to prevent unauthorized use.
5.3 Remote Engine Start/Stop

Image: A remote control being used to start a car in a snowy environment, demonstrating the remote engine start feature for pre-warming or pre-cooling.
- To Remote Start: Press the designated remote start button on your remote control. The engine will start, and the vehicle will remain locked. This feature allows for pre-warming in winter or pre-cooling in summer.
- Automatic Engine Cut-off: If the user does not step on the foot brake pedal within 15 minutes of remote starting, the engine will automatically cut off.
- To Remote Stop: Press the designated remote stop button on your remote control.
5.4 Alarm System Functions

Image: An illustrative depiction of a shock sensor anti-theft alarm activating when a car is tampered with.
- Shock Sensor Alarm: If the vehicle body experiences a shock while armed, the alarm will sound for 8 seconds.
- Door/ACC Triggered Alarm: If an illegal door opening or ACC (Accessory) trigger occurs while armed, the alarm will sound for 25 seconds.
- Panic Code/Car Finding: Press the designated button on the remote control to activate the car finding function, which will sound the horn and flash the lights.
- Emergency Override: In case of remote control loss or malfunction, an emergency override procedure can be performed. Consult the installation professional or the full wiring diagram for specific steps.
- Note: The remote controller does not feature a silent arm button, therefore, silent arm functionality is not available with this product.
5.5 Remote Trunk Release
Press and hold the designated button on the remote control to remotely release the vehicle's trunk. Ensure the area around the trunk is clear before activation.
5.6 Window Closing Function (Optional)
If a window closer module is installed in your vehicle and integrated with this system, the windows may automatically close upon arming the system. Refer to the window closer module's instructions for specific operation.
5.7 Code Learning
The system supports code learning for new or replacement remote controls. Refer to the detailed installation manual or consult a professional for the specific procedure to pair new remotes.
6. Maintenance
- Remote Control Batteries: The remote controls use CR2032 batteries. Replace them when the remote's range decreases or it stops responding. To replace, carefully open the remote casing and insert a new battery, observing polarity.
- System Check: Periodically test the alarm and remote start functions to ensure proper operation.
- Cleaning: Keep the main control unit and push button free from dust and moisture. Use a soft, dry cloth for cleaning.
7. Troubleshooting
| Problem | Possible Cause | Solution |
|---|---|---|
| Remote control not working. | Dead battery in remote. Out of range. Remote not paired. | Replace remote battery. Move closer to the vehicle. Perform code learning procedure. |
| Engine does not remote start. | Vehicle immobilizer active. Hood pin switch open. Brake pedal pressed. Low fuel. | Ensure immobilizer bypass is correctly installed. Check hood pin switch. Ensure brake pedal is not pressed. Check fuel level. |
| Push button start not working. | System armed. Push button auto-locked. Wiring issue. | Disarm the system. Wait for auto-lock to disengage or disarm. Consult installer for wiring check. |
| Alarm triggers unexpectedly. | Shock sensor sensitivity too high. Faulty sensor. | Adjust shock sensor sensitivity (consult installer). Inspect sensor for damage. |
| Doors do not lock/unlock. | Wiring issue to door locks. Actuators faulty. | Consult installer to check wiring and door lock actuators. |
For complex issues or if troubleshooting steps do not resolve the problem, contact a professional automotive technician or the product manufacturer for assistance.
8. Contact and Support
For technical support, warranty information, or further assistance, please contact BANVIE customer service through their official channels or the retailer where the product was purchased.
Note: Specific warranty terms and conditions may vary. Please retain your proof of purchase.