ELLO&ALLO 6025-F1-07-07-02-S04
ELLO&ALLO LED Shower Panel Tower System User Manual
Model: 6025-F1-07-07-02-S04
Introduction
The ELLO&ALLO LED Shower Panel Tower System is designed to provide a luxurious and functional showering experience. Constructed with high-quality SUS304 stainless steel and featuring an attractive brushed black finish, this shower panel offers multiple functions including rainfall, waterfall, massage body jets, a hand shower, and a water spout. Its innovative design allows for simultaneous function operation and variable controls, enhancing your daily routine.
This manual provides essential information for the safe installation, operation, and maintenance of your new shower panel. Please read it thoroughly before installation and keep it for future reference.
Safety Information
Always adhere to local plumbing and electrical codes during installation. If you are unsure about any step, consult a qualified professional.
- Ensure the main water supply is turned off before beginning any installation or maintenance.
- Verify that all connections are secure and leak-free after installation.
- Do not use abrasive cleaners or harsh chemicals on the stainless steel finish, as this may damage the surface.
- The LED lights are powered by water flow; no external power or batteries are required. Do not attempt to modify the internal wiring.
- Keep small children away from the installation area.
Components and Specifications
Included Components:
- Shower Panel
- Mounting Accessory Box
- Hand Shower
- 59" Chrome Hand Shower Hose
Product Specifications:
| Brand: | ELLO&ALLO |
| Model Number: | 6025-F1-07-07-02-S04 |
| Color: | Brushed Black |
| Material: | SUS304 Stainless Steel, Brass, PVC, ABS |
| Finish Type: | Brushed |
| Number of Handles: | 3 |
| Mounting Type: | Wall Mount |
| Product Dimensions: | 18.1 x 7.87 x 51 inches (46 x 20 x 129.5 cm) |
| Item Weight: | 22.1 pounds (10.02 kg) |
| Functions: | Rainfall, Waterfall, Massage Body Jets, Hand Shower, Water Spout |
| LED Power Source: | Water Flow (Hydro-electric) |
Setup and Installation
The ELLO&ALLO Shower Panel is designed for wall-mounted installation. While plumbing components are included for a straightforward setup, professional installation is recommended if you are not familiar with plumbing work.
- Preparation: Turn off the main water supply to your bathroom. Clear the installation area and ensure you have all necessary tools (e.g., drill, level, wrench, sealant).
- Mounting Bracket Installation: Determine the desired height for your shower panel. Mark the positions for the mounting brackets on the wall. Drill pilot holes and secure the mounting brackets firmly using appropriate wall anchors and screws.
- Water Connections: Connect the hot and cold water supply lines from your wall to the corresponding inlets on the back of the shower panel. Ensure all connections are tight to prevent leaks. The shower panel uses standard plumbing connections.
- Panel Mounting: Carefully lift the shower panel and align it with the installed mounting brackets. Slide the panel down onto the brackets until it is securely seated.
- Hand Shower Hose Connection: Connect the 59-inch chrome hand shower hose to the designated outlet on the panel and to the hand shower unit.
- Testing: Slowly turn on the main water supply and check for any leaks at all connection points. Test each function of the shower panel to ensure proper operation.
Important Note: The LED display and lights are powered by the water flow. No batteries or electrical wiring are needed for these features to operate.
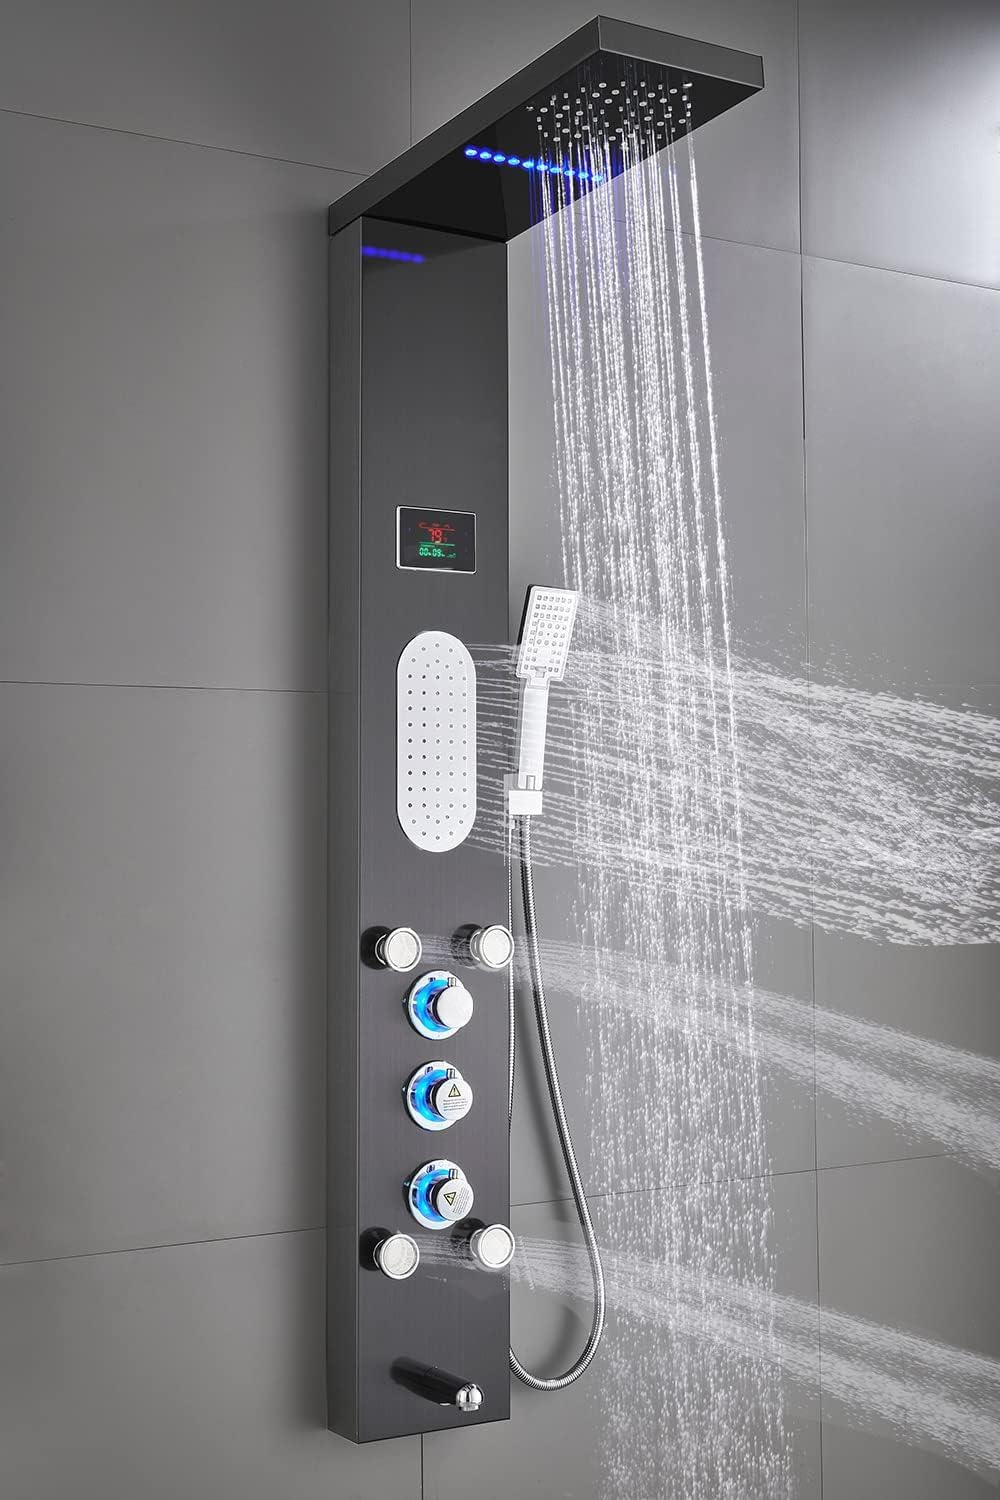
Image: ELLO&ALLO Shower Panel installed, demonstrating the rainfall and body jet functions.
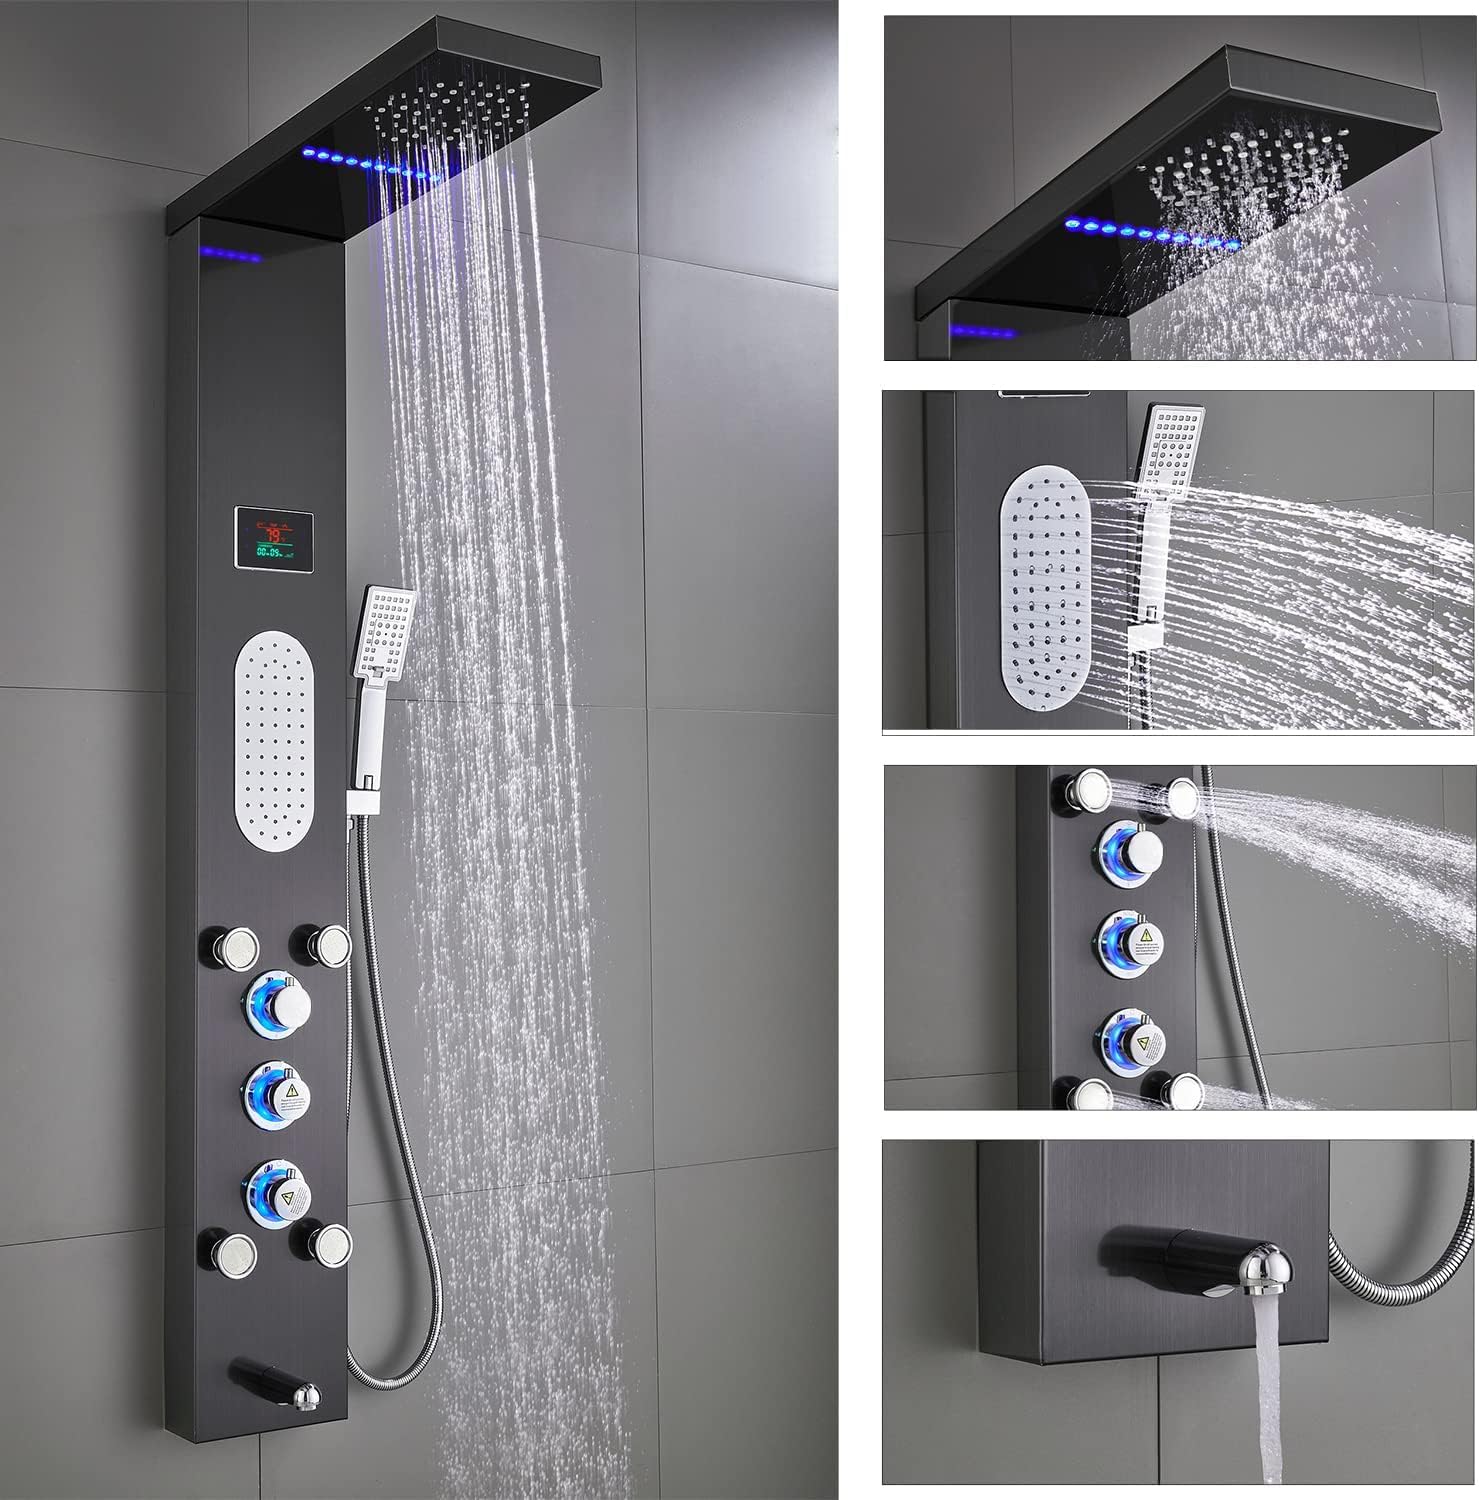
Image: Detailed views of the shower panel's various components and water outputs.
Operating Instructions
Your ELLO&ALLO Shower Panel offers five distinct showering modes, controlled by a single handle switch for extremely easy operation. All shower functions work independently to maintain optimal water pressure.
- Temperature Control: Use the main handle to adjust water temperature. The integrated LED display shows the current water temperature in Fahrenheit, assisting you in selecting your preferred setting.
- Function Selection: Rotate the lower diverter knobs to select or combine the desired shower functions.
- Rainfall Shower Head: Provides a wide, gentle rain-like spray from the top shower head.
- Waterfall Shower: Delivers a broad sheet of water from the top, ideal for a cascading effect.
- Massage Body Jets: Activates the adjustable body jets for a targeted, invigorating massage spray.
- Hand Shower: Directs water through the flexible handheld shower unit for focused rinsing or cleaning.
- Water Spout: Engages the lower spout, suitable for filling tubs or buckets.
- LED Display: The digital display shows water temperature and the duration of your shower, powered solely by water flow.
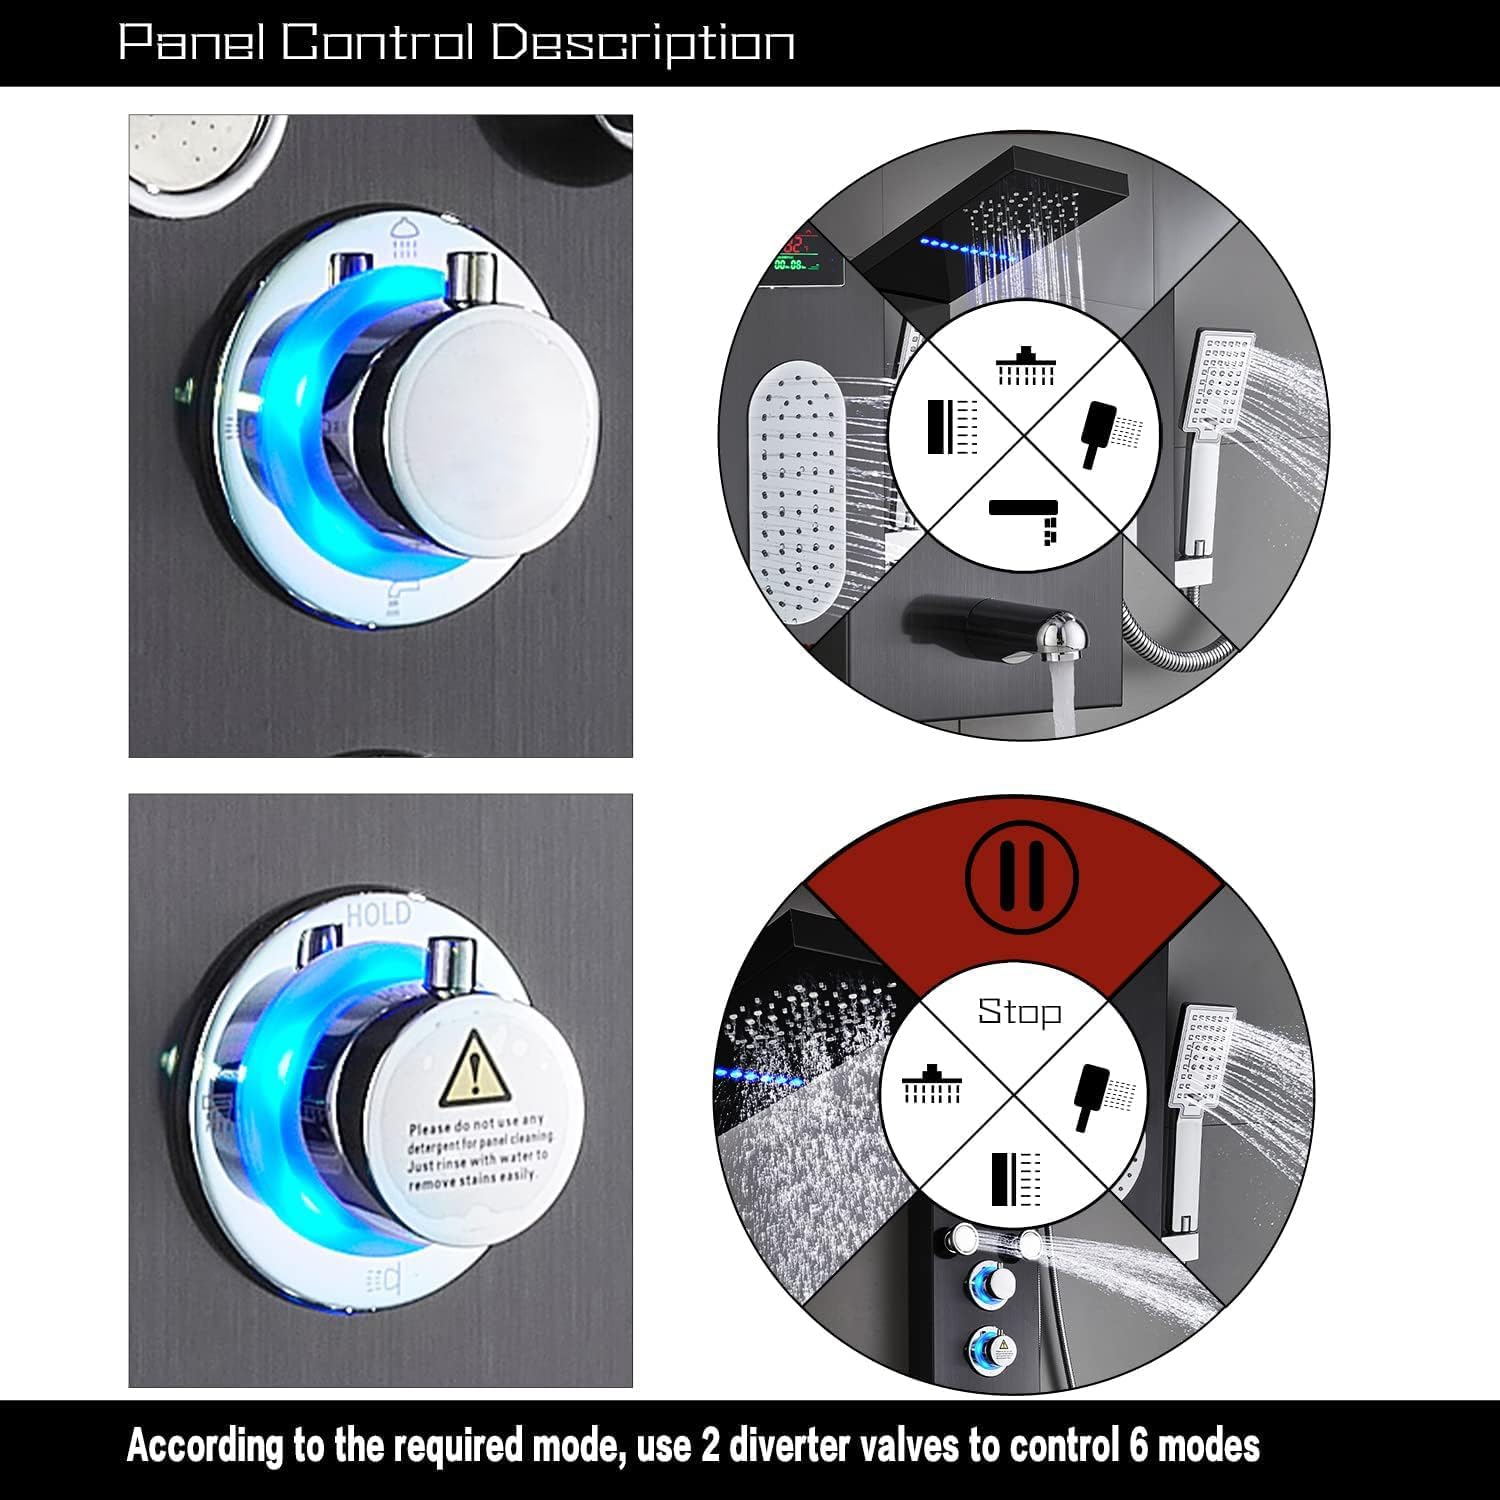
Image: Panel Control Description, illustrating how to use the diverter valves to control the various shower modes.

Image: Diagram outlining the five distinct shower functions available on the panel.
Maintenance
Regular maintenance will ensure the longevity and optimal performance of your ELLO&ALLO Shower Panel.
- Cleaning the Surface: The brushed black finish is fingerprint-free. To clean, simply wipe the panel with a soft, damp cloth. For stubborn spots, use a mild, non-abrasive soap solution and rinse thoroughly. Avoid using harsh chemicals, abrasive cleaners, or scouring pads, as these can damage the finish.
- Maintaining Water Pressure: If you experience decreased water pressure, it may be due to impurities or mineral buildup in the filter. Refer to the manual for instructions on how to access and clean the water filter. Regular cleaning of the filter will help maintain consistent water flow.
- Nozzle Cleaning: For shower heads and body jets with rubber nozzles, gently rub them with your finger to dislodge any mineral deposits that may affect spray patterns.
- Hose Inspection: Periodically inspect the hand shower hose for any signs of wear, kinks, or leaks. Replace if necessary.
Troubleshooting
| Problem | Possible Cause | Solution |
|---|---|---|
| Low Water Pressure | Clogged water filter or nozzles; insufficient main water supply pressure. | Clean the water filter and rub the rubber nozzles to remove deposits. Ensure main water supply valves are fully open. |
| LED Display Not Working | Insufficient water flow to power the hydro-electric generator. | Increase water flow. Ensure water pressure is adequate. The LED system does not require batteries. |
| Leaks from Connections | Loose connections or damaged seals. | Turn off water supply. Tighten all connections. Inspect and replace any damaged washers or seals. |
| Water Not Switching Functions Properly | Diverter valve issue or debris. | Ensure the diverter knobs are fully rotated to the desired position. If issue persists, contact customer support. |
Warranty and Support
ELLO&ALLO provides a Limited 2 Year Parts Warranty from the date of purchase for this shower panel.
Important: This warranty is void if the product has been purchased from an unauthorized distributor. Please retain your proof of purchase for warranty claims.
For assistance, troubleshooting not covered in this manual, or to inquire about replacement parts, please contact ELLO&ALLO customer service. As a factory proprietary store, we are committed to providing the best customer service.
Contact information can typically be found on the product packaging or the official ELLO&ALLO website.
Ask a question about this manual
Ask about setup, troubleshooting, compatibility, parts, safety, or missing instructions. Manuals+ will review the question and use this page’s manual context to help answer it.