1. Introduction
Thank you for choosing the KeeKit Weather Station WA88. This device provides accurate indoor and outdoor temperature and humidity readings, weather forecasts, and additional environmental indices. Please read this manual carefully before use to ensure proper operation and longevity of your device.
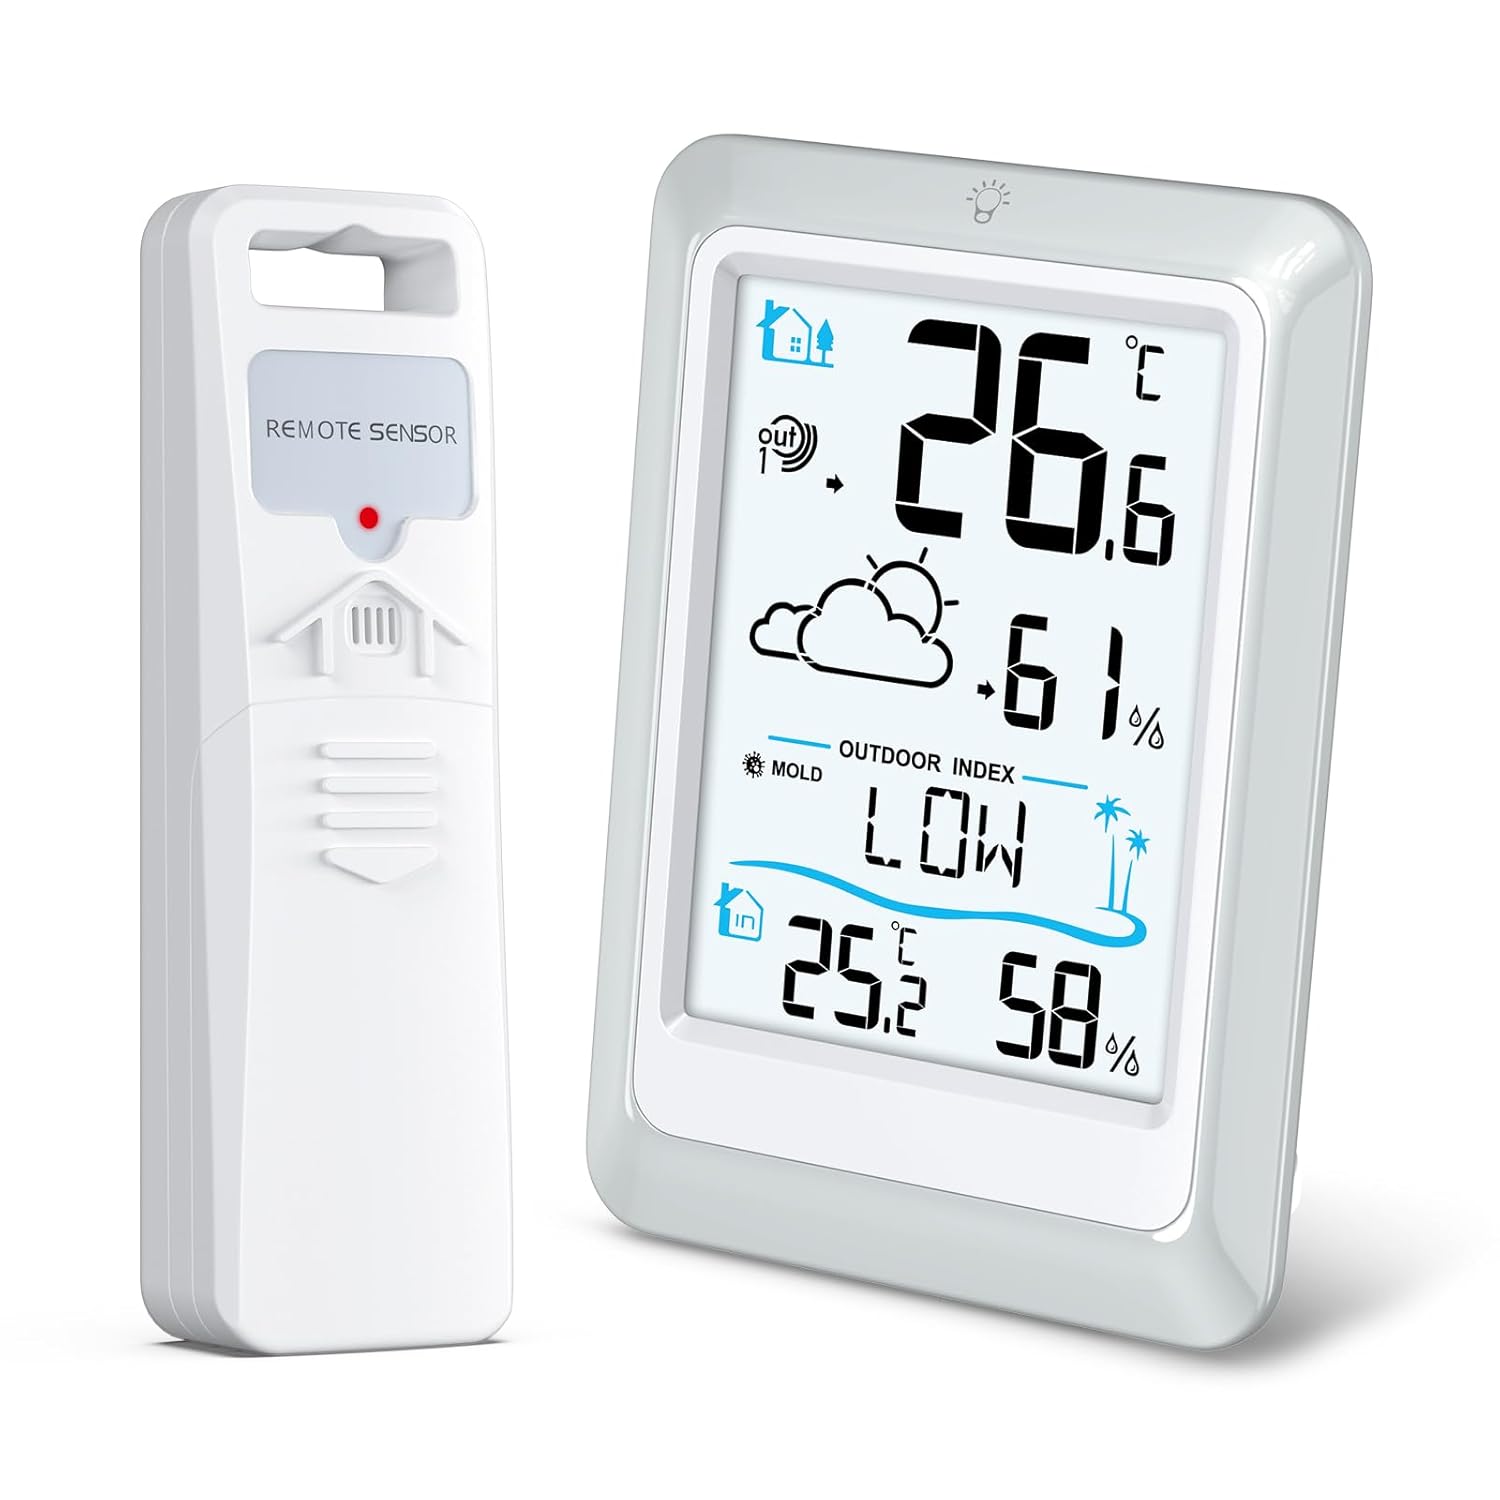
Image 1.1: The KeeKit Weather Station main display unit and its wireless remote sensor.
2. Package Contents
- 1 x KeeKit Weather Station Main Unit
- 1 x Wireless Remote Sensor
- 1 x User Manual
- Note: Batteries are not included.
3. Product Overview
3.1 Main Display Unit

Image 3.1: Front view of the main display unit with key features labeled, including outdoor temperature, outdoor humidity, weather forecast, outdoor index, indoor temperature, indoor humidity, and the touch backlight button.
- Outdoor Temperature: Displays the temperature measured by the remote sensor.
- Outdoor Humidity: Displays the humidity measured by the remote sensor.
- Weather Forecast: Icons indicating predicted weather conditions for the next 12-24 hours.
- Outdoor Index: Shows Mold Index, Dew Point, or Heat Index.
- Indoor Temperature: Displays the temperature measured by the main unit.
- Indoor Humidity: Displays the humidity measured by the main unit.
- Touch Backlight Button: Activates the display backlight for 10 seconds.
3.2 Remote Sensor
The remote sensor wirelessly transmits outdoor temperature and humidity data to the main unit. It features a compact design and can be mounted outdoors.

Image 3.2: Illustration showing the indoor station on a table and the outdoor remote sensor mounted on the exterior of a house, demonstrating wireless transmission.
4. Setup
4.1 Battery Installation
- Open the battery compartment on the back of both the main unit and the remote sensor.
- Insert the required batteries (typically AAA, refer to device markings) into each unit, observing the correct polarity (+/-).
- Close the battery compartments securely.
Important: For optimal performance, insert batteries into the remote sensor first, then into the main unit. Allow a few minutes for the units to establish a connection.
4.2 Sensor Placement
- Main Unit: Place the main unit indoors on a flat surface or mount it on a wall in a central location, away from direct sunlight or heat sources, to ensure accurate indoor readings.
- Remote Sensor:
- Mount the remote sensor outdoors in a shaded, dry location, protected from direct rain and sunlight.
- Ensure it is within the 330ft (100m) transmission range of the main unit.
- Avoid placing it near large metal objects or electronic devices that could interfere with the wireless signal.
5. Operating Instructions
5.1 Initial Synchronization
After battery installation, the main unit will automatically search for the remote sensor. This process may take a few minutes. Once connected, the outdoor temperature and humidity will appear on the display.
5.2 Display Backlight
To activate the backlight, gently touch the backlight button located at the top of the main display unit. The backlight will illuminate for approximately 10 seconds, improving readability in low-light conditions.

Image 5.1: Comparison of the display unit in a well-lit environment (left) and with the backlight activated in a darker setting (right), demonstrating improved visibility.
5.3 Switching Outdoor Index Display
The main unit can display Mold Index, Dew Point, or Heat Index. Refer to the device's specific buttons (if any) or touch the "INDEX" area on the screen to cycle through these displays.

Image 5.2: The display unit showing different outdoor index readings: Mold Index (LOW), Dew Point (20.9°C), and Heat Index (32.1°C).
6. Features
- Multifunction Display: Shows indoor/outdoor temperature and humidity, trend icons, low battery indicator, heat index, dew point, and mold index.
- High-Precision Sensor: Equipped with a Swiss-made SENSIRION sensor for accurate readings.
- Temperature Accuracy: ±0.2℃ / ±0.5℉
- Humidity Accuracy: ±2%
- Weather Forecast: Predicts weather conditions for the next 12 to 24 hours based on built-in barometer data.
- Long-Range Transmission: Wireless transmission of temperature and humidity data up to 330 feet (100 meters). Data refreshes every 30 seconds.
- Clear Backlit Display: A 4-inch display with a touch-activated backlight for easy reading in various lighting conditions.

Image 6.1: Various weather forecast icons displayed on the unit, including Sunny, Partly Cloudy, Overcast, Rainy, Stormy, Snow, and Snowstorm, indicating predicted conditions for the next 12-24 hours.
7. Specifications
| Parameter | Value |
|---|---|
| Indoor Temperature Range | -10℃ to 60℃ (14.2℉ to 122℉) |
| Outdoor Temperature Range | -40℃ to 70℃ ((-40℉ to 158℉) |
| Humidity Range | 1% to 99% RH |
| Temperature Accuracy | ±0.2℃ / ±0.5℉ |
| Humidity Accuracy | ±2% |
| Data Refresh Rate | Every 30 seconds |
| Wireless Transmission Range | Up to 330 feet (100 meters) |
| Power Source | Battery Powered (Batteries not included) |
| Dimensions (Main Unit) | Approx. 12.5 cm (4.9 in) H x 9 cm (3.55 in) W |
| Model Number | WA88 |
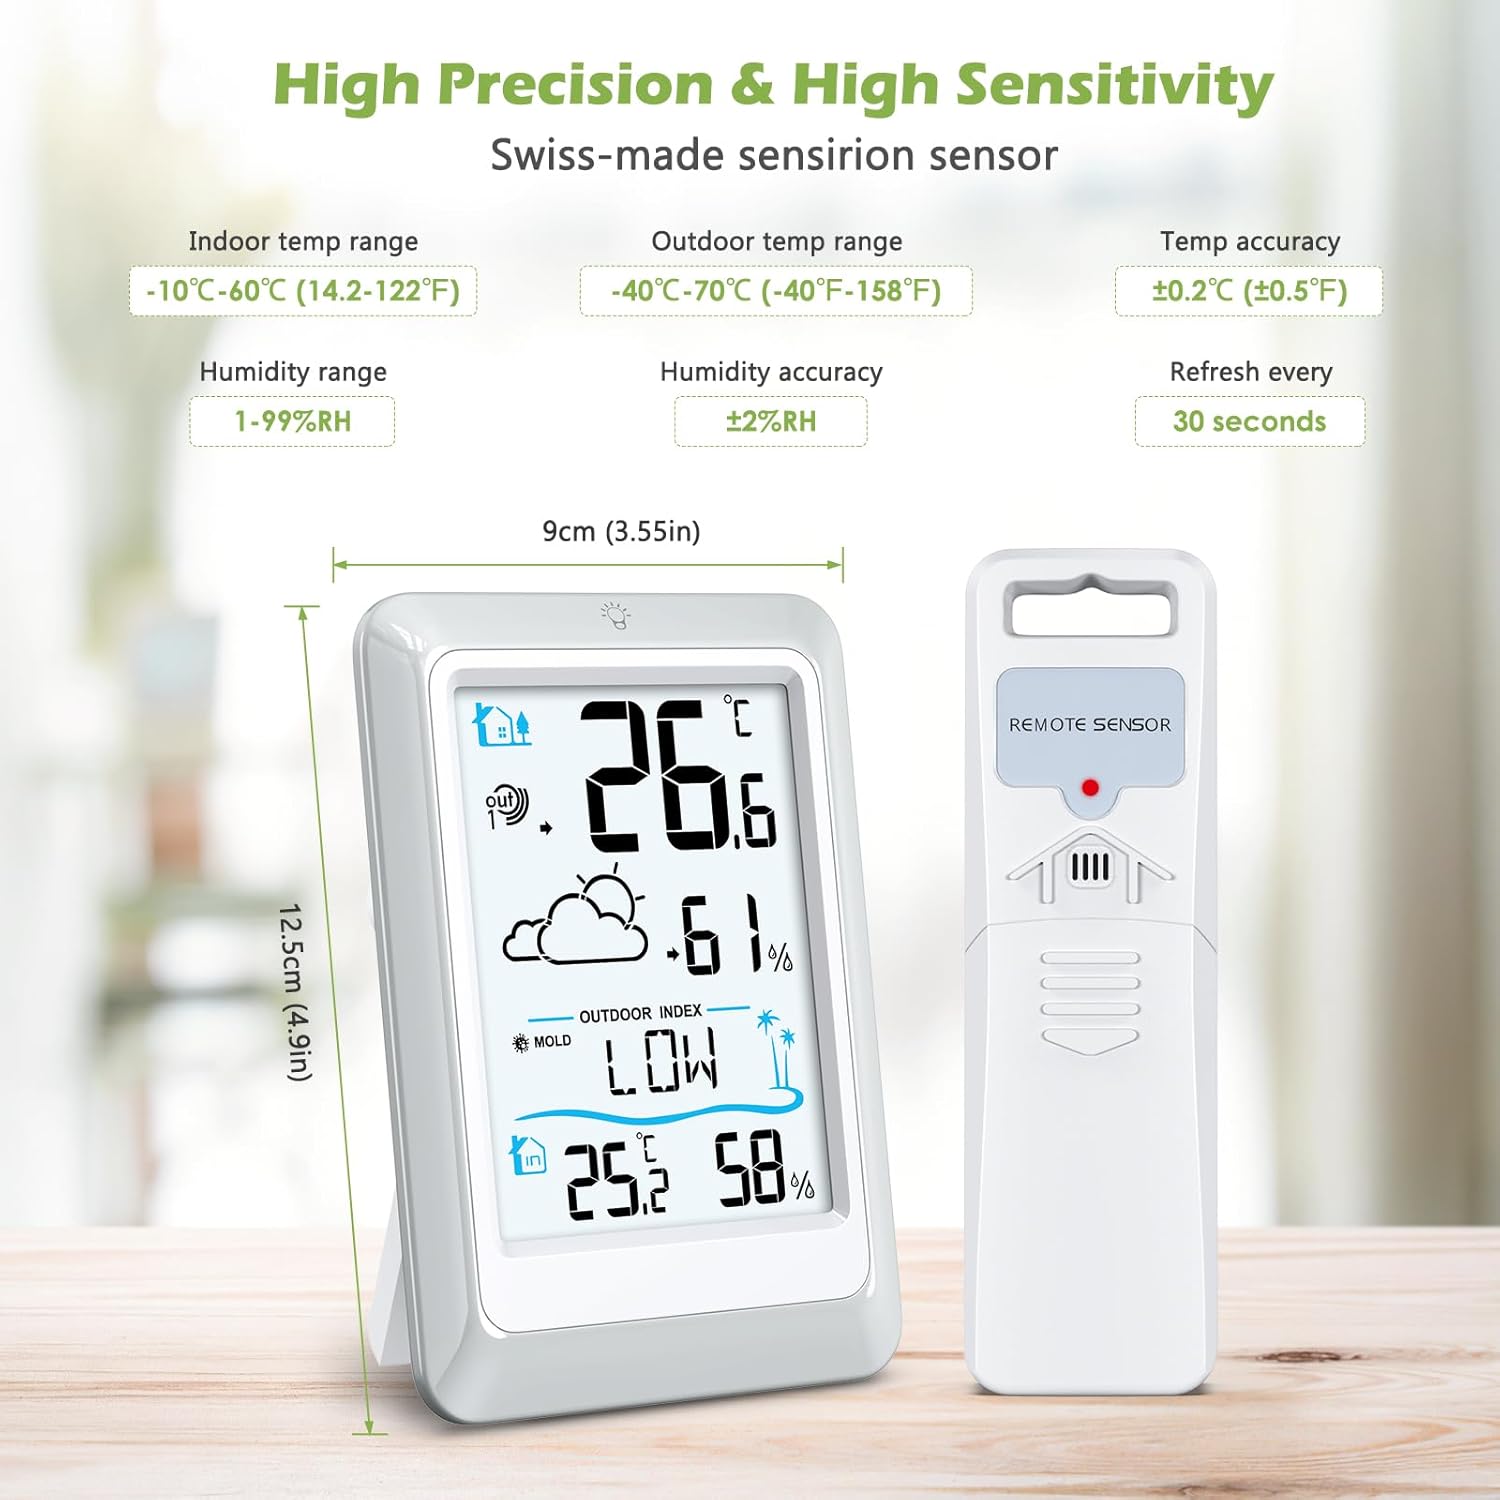
Image 7.1: Detailed specifications including indoor and outdoor temperature ranges, humidity range, temperature and humidity accuracy, refresh rate, and main unit dimensions.
8. Troubleshooting
| Problem | Solution |
|---|---|
| No outdoor reading / "---" displayed |
|
| Inaccurate readings |
|
| Display is dim or blank |
|
9. Maintenance
- Cleaning: Wipe the units with a soft, damp cloth. Do not use abrasive cleaners or solvents.
- Battery Replacement: Replace batteries when the low battery indicator appears on the display. Always replace all batteries at the same time.
- Sensor Protection: Ensure the remote sensor remains protected from direct exposure to heavy rain, snow, and prolonged direct sunlight to maximize its lifespan and accuracy.
- Storage: If storing the device for an extended period, remove all batteries to prevent leakage.
10. Warranty and Support
KeeKit products are designed for reliability and performance. For warranty information or technical support, please refer to the contact details provided with your purchase or visit the official KeeKit website.
Manufacturer: KeeKit
Model: WA88
Date First Available: May 24, 2023