1. Introduction
The Ralcam 360° Articulating Borescope is a professional inspection camera designed for detailed visual inspection in hard-to-reach areas. Featuring a 6.2mm slim probe with 4-way 360-degree articulation, it provides clear visibility for non-destructive testing. This device is equipped with a 1080P camera, adjustable LED lighting, and a 4.3-inch IPS screen for optimal viewing. Its user-friendly design, including a joystick-controlled handle, makes it suitable for various applications such as automotive, HVAC, plumbing, and general mechanical inspections.

Figure 1: Ralcam 360° Articulating Borescope
2. What's in the Box
Upon opening the package, verify that all the following components are included:
- 1 x Industrial Endoscope (Main Unit with 3.3FT Flexible Cable)
- 1 x USB Charging Cable
- 1 x Carrying Case
- 1 x User Manual
- 1 x Cleaning Wipe
- 1 x 16GB MicroSD Card (pre-installed or included separately)

Figure 2: Package Contents
3. Key Features
3.1 4-Way 360° Articulating Probe
The flexible probe can bend and rotate 360 degrees in four directions, allowing for comprehensive inspection without dead spots. The articulation can be locked at any desired angle for precise examination of intricate areas.

Figure 3: 360° Articulation Capability
3.2 6.2mm Slim Camera Probe
Equipped with a slender 6.2mm diameter probe, this borescope can easily navigate through narrow openings and tight spaces, making it ideal for detailed non-destructive testing in confined environments.
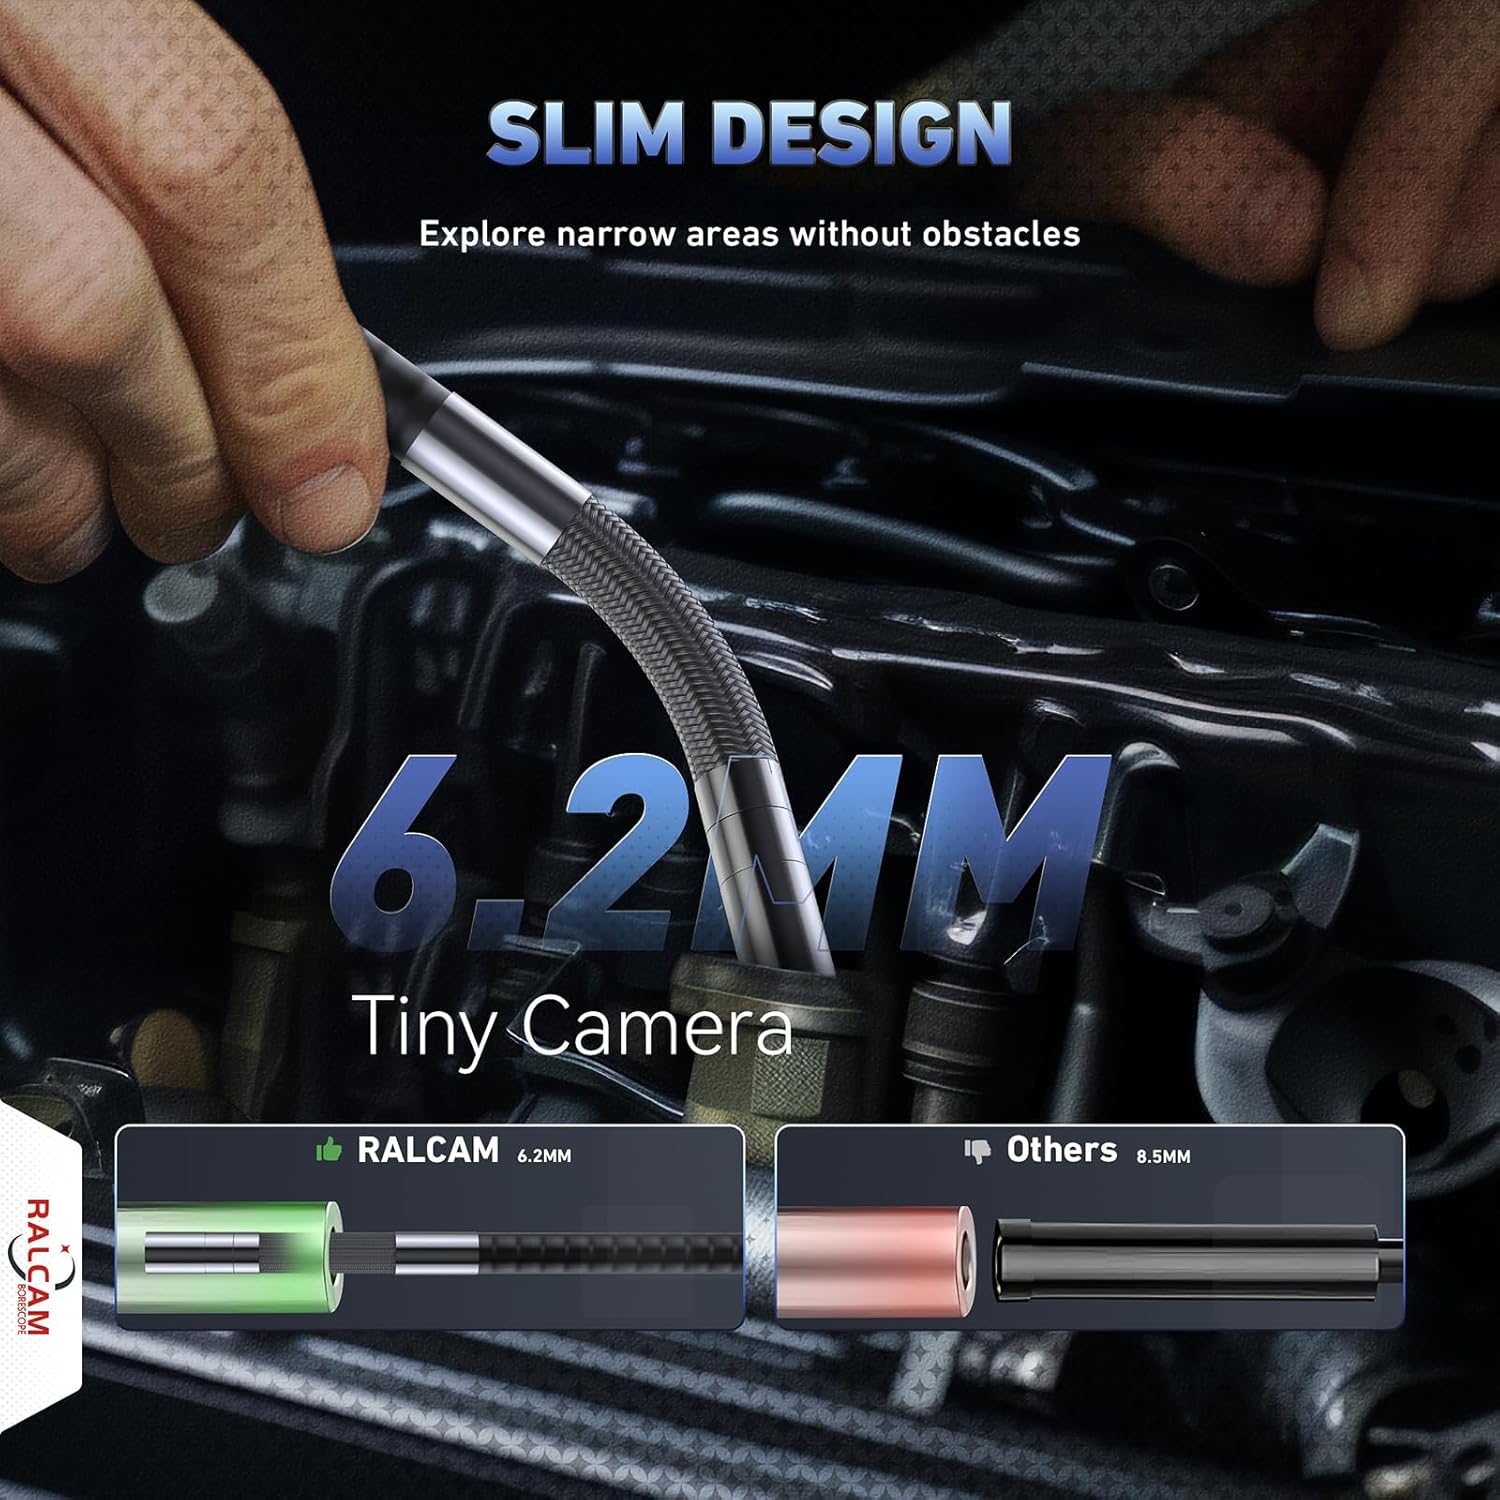
Figure 4: Slim Probe Design
3.3 High-Resolution 1080P IPS Screen
The 4.3-inch IPS screen displays clear 1080P images and videos with true-to-life colors, ensuring every detail is visible for accurate inspection and analysis.

Figure 5: 4.3" IPS Screen
3.4 Adjustable LED Illumination
Six high-visibility LEDs surround the probe, providing ample illumination in dark or wet environments. The brightness is adjustable to four levels (0%, 60%, 80%, 100%) to suit various lighting conditions.

Figure 6: LED Illumination
3.5 Ergonomic Design and Ease of Use
The ergonomic handle with a joystick control simplifies operation, allowing for comfortable single-handed use. No external phone, Wi-Fi, or app is required, ensuring a hassle-free experience.
3.6 High Capacity Rechargeable Battery
A built-in 5200mAh rechargeable battery provides up to 4 hours of continuous operation, reducing the need for frequent recharging during inspections.

Figure 7: High Capacity Battery
3.7 Durable Construction
The probe features a tightly-knit tungsten wire mesh for enhanced flexibility and durability, designed to withstand over 20,000 bends. It is also IP67 waterproof and oil-proof, suitable for challenging environments.

Figure 8: Tungsten Wire Mesh Durability
3.8 High Temperature Protection
The device includes a unique high-temperature protection feature that automatically shuts down the unit if the probe temperature exceeds 95°C, preventing damage and ensuring longevity.

Figure 9: High Temperature Protection
3.9 Integrated Storage and Data Transfer
Capture and record inspections in JPG and AVI formats directly to the built-in 16GB MicroSD card. The device supports voice memo recording via an integrated microphone and speaker. Data can be easily transferred to a PC using the provided USB-C cable.
4. Setup Guide
Unpack the Device: Carefully remove all components from the carrying case. Ensure the main unit, flexible probe, USB cable, and user manual are present.
Assemble the Borescope:
- Attach the 4.3-inch IPS screen to the top of the main handle unit by screwing it into place. Ensure it is securely fastened.
- Connect the flexible probe cable to the designated port on the main handle unit. Twist to lock it in place if applicable.
Charge the Battery: Before first use, fully charge the borescope. Connect the provided USB-C cable to the charging port on the device and the other end to a suitable USB power adapter (not included) or a computer USB port. The charging indicator will show the charging status.
Insert MicroSD Card: The device comes with a 16GB MicroSD card. Locate the MicroSD card slot (usually on the side of the screen unit) and insert the card with the gold contacts facing down until it clicks into place. This card is essential for saving images and videos.
5. Operating Instructions
Power On/Off: Press and hold the power button (usually located on the main handle or screen unit) for a few seconds to turn the device on. Repeat to turn off.
Probe Articulation: Use the joystick control on the handle to articulate the probe tip. Move the joystick in the desired direction (up, down, left, right) to bend the probe. The probe can be locked at a specific angle by holding the joystick in position or using a dedicated lock button if available (refer to specific button layout on device).
Video 1: Demonstration of probe articulation and use in a remote control car. This video illustrates how the flexible probe can be maneuvered into tight spaces and articulated using the joystick control to view different angles, showcasing its utility for detailed inspections.
Adjust LED Brightness: Use the dedicated LED brightness control buttons (often labeled with a light bulb icon or up/down arrows) on the screen unit to cycle through the four brightness levels. Adjust as needed for optimal visibility in varying light conditions.
Capture Images/Videos:
- To take a photo, press the "OK" or camera icon button once. The image will be saved to the MicroSD card.
- To start video recording, press the video recording button (often a play/record icon). Press it again to stop recording. Videos are saved in AVI format.
Voice Memo Recording: If supported, activate the voice memo function (refer to specific button on device, often a microphone icon) to record audio notes during your inspection. These will be saved alongside your visual media.
Reviewing Media: Use the navigation buttons (up/down arrows) to browse through saved images and videos. Press the "OK" or play button to view a selected file.
Data Transfer: To transfer files to a computer, connect the borescope to your PC using the provided USB-C cable. The device should appear as a removable storage device, allowing you to copy files directly.
6. Maintenance
Cleaning the Probe and Camera: After each use, especially in dirty or oily environments, gently wipe the probe and camera lens with the provided cleaning wipe or a soft, dry cloth. For stubborn residue, a slightly damp cloth can be used, ensuring no liquid enters the camera head or connections. Ensure the probe is dry before storage.
Battery Care: To prolong battery life, avoid fully discharging the battery frequently. Recharge the device when the battery indicator is low. If storing for an extended period, charge the battery to approximately 50% and recharge every 3-6 months.
Storage: Store the borescope and its accessories in the original carrying case in a cool, dry place, away from direct sunlight and extreme temperatures. Ensure the probe is not sharply bent or kinked during storage.
Temperature Protection: The device is designed with high-temperature protection. If the probe reaches 95°C, the unit will automatically shut down. Allow the probe to cool down before resuming operation to prevent damage.
7. Troubleshooting
| Problem | Possible Cause | Solution |
|---|---|---|
| Device does not power on. | Low battery; Power button not held long enough. | Charge the battery fully. Press and hold the power button for 3-5 seconds. |
| No image on screen. | Probe not connected properly; Camera lens obstructed. | Ensure the probe cable is securely connected. Clean the camera lens. |
| Image is blurry or dark. | Insufficient lighting; Dirty lens; Out of focus range. | Adjust LED brightness. Clean the camera lens. Adjust distance to object (optimal focus range is typically 0.8-4 inches). |
| Cannot save images/videos. | MicroSD card full or not inserted; Card error. | Check MicroSD card insertion. Delete old files or replace card. Format the card if necessary (data will be lost). |
| Probe articulation is stiff or unresponsive. | Probe mechanism obstructed; Damage to cable. | Ensure the probe is not kinked or obstructed. If problem persists, contact customer support. |
| Device shuts down unexpectedly. | Overheating; Low battery. | Allow the probe to cool down. Recharge the battery. |
8. Specifications
| Feature | Detail |
|---|---|
| Model Number | F-6 |
| Probe Diameter | 6.2mm / 0.24in |
| Cable Length | 3.3 FT (Flexible Cable) |
| Articulation | 4-Way 360° Joystick Control |
| Screen Size | 4.3-inch IPS |
| Video Capture Resolution | 1080p |
| Lighting | 6 Adjustable LEDs |
| Battery Capacity | 5200mAh |
| Continuous Use Time | Up to 4 hours |
| Storage Media | Micro SD Card (16GB included) |
| Product Dimensions | 3.94 x 0.79 x 1.06 inches |
| Item Weight | 3.35 Pounds |
| Waterproof Rating | IP67 (Probe) |
| High Temperature Protection | Automatic shutdown at 95°C |
9. Warranty and Support
Ralcam products are manufactured to high-quality standards. For specific warranty details, please refer to the warranty card included with your product or visit the official Ralcam website. If you encounter any issues or require technical assistance, please contact Ralcam customer support through the contact information provided in your product documentation or on the Ralcam brand store page on Amazon.
For further assistance, you may visit the Ralcam Store on Amazon.