1. Introduction
This manual provides essential information for the safe and efficient use of your Whirlpool OMR58HR0X 71L Electric Built-in Oven. Please read these instructions carefully before installation, first use, and maintenance. Keep this manual for future reference.
2. Safety Information
General Safety:
- This appliance is intended for household use only.
- Do not allow children to play with the appliance.
- Ensure the appliance is disconnected from the power supply before any maintenance or cleaning.
- Always use oven mitts when handling hot dishes or oven components.
Installation Safety:
- Installation must be carried out by a qualified technician in accordance with local safety regulations.
- During installation, exercise extreme caution when handling the oven. Some edges may be sharp and can cause injury. It is recommended to wear protective gloves.
- Ensure the appliance is properly secured in its cabinet to prevent tipping.
Electrical Safety:
- Verify that the voltage indicated on the rating plate matches your household's power supply.
- Do not use extension cords or multiple adapters.
- If the power cord is damaged, it must be replaced by the manufacturer, its service agent, or similarly qualified persons to avoid a hazard.
3. Product Overview
The Whirlpool OMR58HR0X is a 71-liter electric built-in oven featuring multiple cooking functions and a SmartClean system. Below are key components and their descriptions.
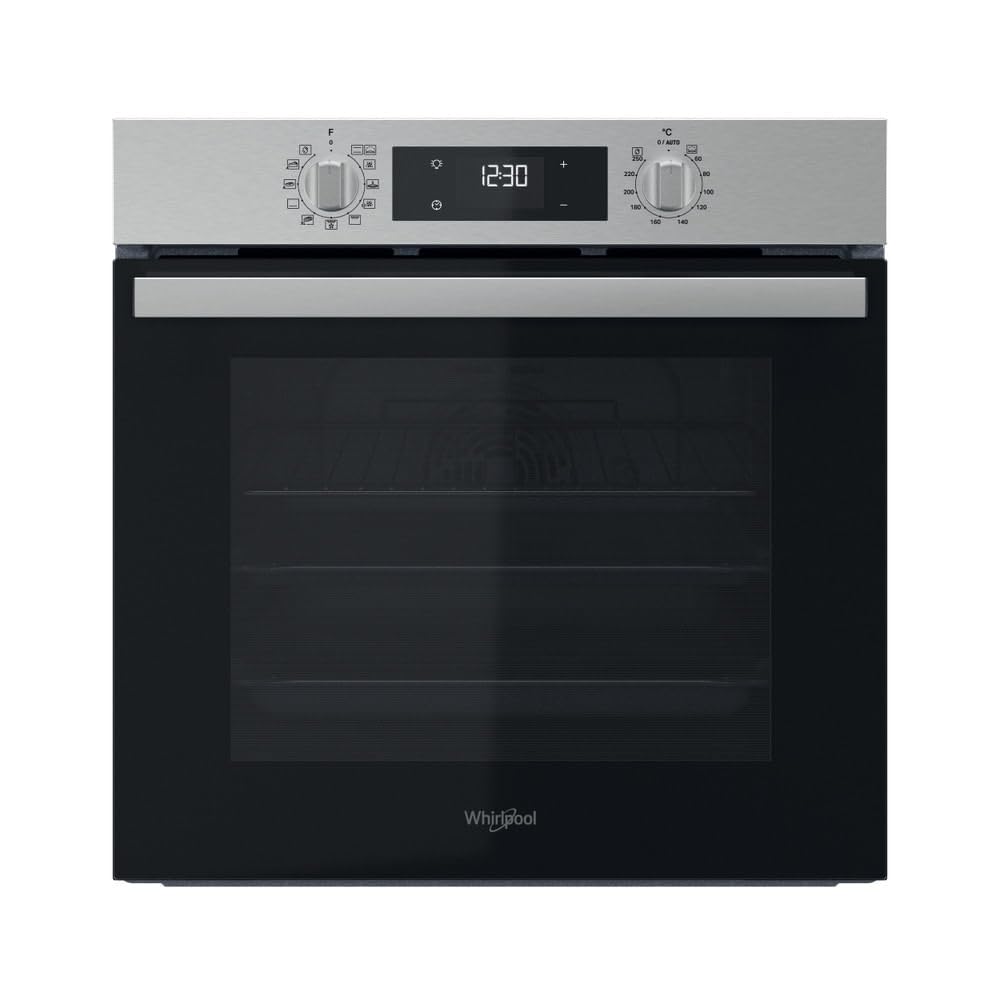
Figure 1: Front view of the oven with the door open, revealing the interior cavity, wire racks, and baking trays.

Figure 2: Detailed view of the oven's control panel, featuring a digital display for time and temperature, and two rotary knobs for function selection and temperature/timer settings.
4. Setup and Installation
Unpacking:
- Remove all packaging materials. Dispose of packaging responsibly.
- Check for any damage to the oven. If damaged, do not install and contact customer support.
Positioning the Oven:
- The oven is designed for built-in installation into a kitchen cabinet.
- Ensure adequate ventilation around the appliance.
- Refer to the installation template (if provided) for precise cabinet dimensions.

Figure 3: Side view of the oven, illustrating its compact design for built-in integration.
Electrical Connection:
- Connect the oven to a grounded electrical outlet.
- The electrical connection must comply with local wiring regulations.
First Use Preparation:
- Before first use, clean the oven interior with a damp cloth and mild detergent.
- Heat the empty oven at maximum temperature for approximately one hour to burn off any manufacturing residues. Ensure the kitchen is well-ventilated during this process.
5. Operating the Oven
Your Whirlpool OMR58HR0X oven offers 8 cooking programs and various functions for versatile cooking.
Control Panel:
- The left knob selects the cooking function.
- The right knob sets the temperature or timer.
- The digital display shows time, temperature, and selected settings.
Setting the Clock:
- Upon first connection, the display will flash.
- Use the appropriate buttons (refer to display symbols) to set the current time.
- Confirm the setting.
Selecting a Cooking Function:
- Turn the left knob to select the desired cooking function (e.g., Conventional, Forced Air, Grill Turbo, Maxi Cooking, Cook3).
- Turn the right knob to set the desired temperature.
- The oven will begin preheating.
Key Cooking Functions:
- Forced Air: Distributes hot air evenly for perfect cooking of various dishes simultaneously. Ideal for roasts and desserts, maintaining consistency and moisture.
- Grill Turbo: Combines grilling with forced air for rapid and uniform cooking, suitable for pizza and large meals.
- Maxi Cooking: Designed for cooking large quantities of food.
- Cook3: Allows cooking up to three different dishes at the same time without mixing flavors.
Using the Timer:
- The oven features a timer function. Consult the display symbols for setting cooking duration or a delayed start.
- The oven will automatically switch off once the set time has elapsed.
6. Maintenance and Cleaning
Regular cleaning and maintenance ensure optimal performance and longevity of your oven.
SmartClean Function:
- The SmartClean system uses steam to remove residues.
- Pour a small amount of water into the bottom of the oven cavity.
- Select the SmartClean function (refer to the control panel symbols).
- After the cycle, wipe the interior with a damp cloth to remove softened food debris.
General Cleaning:
- Exterior: Clean the stainless steel exterior with a soft cloth and a non-abrasive cleaner specifically designed for stainless steel.
- Interior: For stubborn stains not removed by SmartClean, use a specialized oven cleaner, following the product instructions carefully. Ensure the oven is cool before cleaning.
- Door Glass: Clean with a soft cloth and glass cleaner. Avoid harsh abrasives that can scratch the glass.
- Accessories: Racks and trays can be washed in warm soapy water or in a dishwasher.
Replacing the Oven Lamp:
- Ensure the oven is disconnected from the power supply and completely cool.
- Unscrew the protective glass cover.
- Replace the old bulb with a new one of the same type (check specifications for bulb type).
- Screw the protective cover back on.
7. Troubleshooting
If you encounter issues with your oven, refer to the following common problems and solutions before contacting customer service.
| Problem | Possible Cause | Solution |
|---|---|---|
| Oven does not turn on | No power supply | Check the circuit breaker and ensure the oven is plugged in correctly. |
| Oven not heating | Incorrect function/temperature setting | Verify that the correct cooking function and temperature are selected. |
| Food not cooking evenly | Improper rack position or overloaded oven | Use the recommended rack position for your dish. Avoid overcrowding the oven. |
| Smoke or odor during first use | Residues from manufacturing | This is normal. Ensure good ventilation and run the oven empty at high temperature for an hour. |
| SmartClean not effective | Insufficient water or heavy soiling | Ensure correct amount of water is used. For heavy soiling, pre-scrape large debris before running SmartClean. |
8. Specifications
| Feature | Detail |
|---|---|
| Model | OMR58HR0X |
| Brand | Whirlpool |
| Capacity | 71 Liters |
| Installation Type | Built-in |
| Fuel Type | Electric |
| Heating Method | Conduction |
| Color | Stainless Steel |
| Material | Stainless Steel |
| Item Weight | 27 Kilograms |
| Special Features | Timer, SmartClean |
| Door Opening Direction | Drop-down |
9. Warranty and Customer Support
Product Warranty:
The Whirlpool OMR58HR0X oven comes with a product warranty of 2 years for private individuals and 1 year for companies. Please retain your proof of purchase for warranty claims.
Customer Support:
For technical assistance, spare parts, or warranty service, please contact Whirlpool customer support. Refer to the official Whirlpool website or your purchase documentation for contact details specific to your region.


