1. Introduction
Thank you for choosing the Rowood Homey Kitchen Miniature House Kit. This DIY kit provides a rewarding experience in crafting a detailed miniature kitchen scene. Designed for adults, this kit allows you to assemble a charming display piece with intricate details and LED lighting. Please read this manual carefully before beginning assembly to ensure a smooth and enjoyable building process.

Image 1.1: The completed Rowood Homey Kitchen Miniature House Kit.
2. Safety Information
- This kit contains small parts. Keep out of reach of small children to prevent choking hazards.
- Exercise caution when using sharp tools such as scissors or tweezers during assembly.
- If using additional glue, ensure proper ventilation and follow the glue manufacturer's safety instructions.
- Handle electrical components (LED lights, wires) with care. Do not expose to water.
- Batteries (AAA/LR03/AM4 1.5V) are not included. Insert batteries correctly, observing polarity (+/-). Do not mix old and new batteries or different types of batteries.
3. Package Contents
Before starting assembly, verify that all components are present in your kit:
- Wood Sheets (pre-cut pieces for structure and furniture)
- Instruction Book (this manual)
- Plastic components (for windows, covers, or small details)
- Fabric, paper, and other decorative materials
- LED lighting components and wiring
- Tools (e.g., tweezers, small screwdriver, glue) - Note: Some kits may include basic tools and glue. Additional glue may be required for optimal adhesion.

Image 3.1: Product information detailing components and dimensions.
4. Setup and Assembly
Follow the detailed step-by-step instructions provided in the included instruction book. The assembly process involves connecting pre-cut wooden pieces, applying decorative elements, and installing the LED lighting system.
4.1 General Assembly Tips
- Organize Parts: Before starting, sort all wooden pieces, paper cutouts, and other materials according to the numbering or labeling in your instruction book.
- Read Instructions: Carefully read each step before proceeding. Refer to diagrams and illustrations.
- Use Proper Tools: Utilize tweezers for handling small parts and scissors for cutting paper or fabric. A ruler and craft knife may also be helpful for precise cuts.
- Adhesion: While some connections are snap-on, glue is often required for permanent assembly of smaller details and structural integrity. Apply glue sparingly.
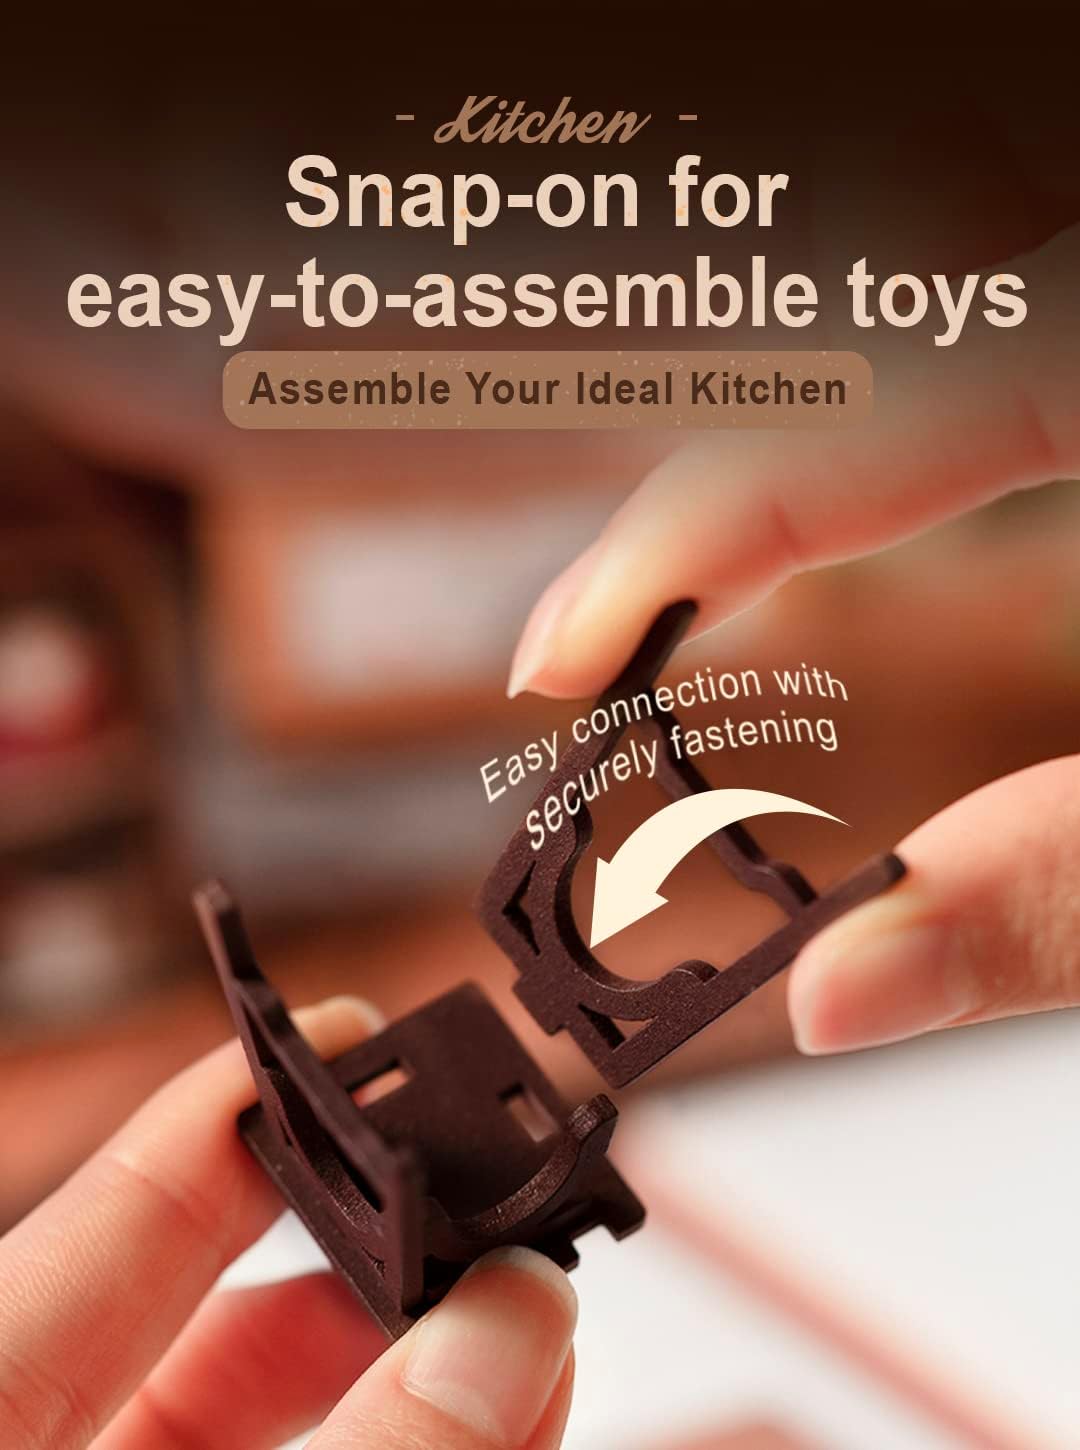
Image 4.1: Example of snap-on connection for easy assembly.
4.2 LED Lighting Installation
The kit includes components for LED lighting to illuminate your miniature kitchen. Follow the specific wiring diagrams in your instruction book for correct installation.
- Battery Requirement: This model kit requires 2 AAA/LR03/AM4 1.5V batteries (not included). Ensure you have these ready before installing the lighting.
- Polarity: Pay close attention to the positive (+) and negative (-) terminals when inserting batteries into the battery box.
- Wire Connections: Carefully connect the wires as indicated in the manual. Secure connections to ensure proper electrical flow.

Image 4.2: The miniature kitchen illuminated by LED lights.
4.3 Assembly Demonstration Video
Video 4.1: A brief demonstration of the assembly process for the Homey Kitchen Miniature House.
5. Operation
Once assembled, the primary operational feature is the LED lighting. Locate the battery box and switch, typically positioned discreetly on the back or side of the miniature house. Flip the switch to turn the lights on or off.

Image 5.1: Detailed views of the miniature kitchen's various sections.
6. Maintenance
- Cleaning: Use a soft, dry cloth or a small brush to gently remove dust from the miniature house. Avoid using water or cleaning solutions, as they may damage the materials.
- Storage: If storing the kit, keep it in a dry place away from direct sunlight and extreme temperatures to prevent warping or fading of materials.
- Battery Replacement: If the LED lights dim or stop working, replace the batteries. Ensure the battery box is securely closed after replacement.
7. Troubleshooting
- Lights Not Working:
- Check if batteries are inserted correctly with the correct polarity.
- Ensure batteries are new and fully charged.
- Verify all wire connections are secure and not loose or broken.
- Confirm the power switch is in the 'ON' position.
- Missing or Broken Parts: If you discover any missing or broken parts upon opening the kit, please contact Rowood customer support immediately for assistance.
- Difficulty with Assembly: Refer to the detailed diagrams in the instruction book. If a step remains unclear, review previous steps or seek assistance from online communities or Rowood support.
8. Specifications
| Feature | Detail |
|---|---|
| Product Name | Homey Kitchen Miniature House Kit |
| Model Number | DG159 |
| Assembly Size (L x W x H) | 6.6"L x 7.1"W x 7.4"H (190 x 171 x 185mm) |
| Number of Pieces | 196 pcs |
| Main Material | Wood, Paper, Plastic |
| Assembly Required | Yes |
| Battery Type | 2 x AAA/LR03/AM4 1.5V (not included) |
| Recommended Age | Adults (14+ years) |

Image 8.1: Detailed product dimensions and material information.
9. Warranty and Support
Rowood provides a 90-day warranty against manufacturer defects. If you encounter any issues with your kit, including missing or broken parts, or require assistance with assembly, please contact Rowood customer support. Refer to the contact information provided in your product packaging or on the official Rowood website.


