Introduction
Thank you for choosing the Meidase P200 WiFi Trail Camera. This manual provides detailed instructions for setting up, operating, and maintaining your camera to ensure optimal performance. The P200 is designed for capturing high-quality images and videos of wildlife and outdoor activities, featuring advanced connectivity and night vision capabilities.
Package Contents
Please verify that all items listed below are included in your package:
- 1 x Meidase P200 Trail Camera
- 1 x External Antenna
- 1 x Mounting Strap
- 1 x Mini-USB Cord
- 1 x Instruction Manual (this document)
Product Overview
Familiarize yourself with the components and controls of your Meidase P200 Trail Camera.
Front View

This image displays the front of the Meidase P200 camera, highlighting the main lens, the two passive infrared (PIR) motion sensors, and the array of no-glow infrared LEDs for night vision. The external antenna port is visible at the top.
Internal View (Open)

This image shows the camera with its front cover opened, revealing the internal 2.4-inch LCD screen, the navigation buttons (Menu, OK, Start), and the power switch (OFF, ON, SET). The SD card slot and USB port are also visible at the bottom, and the battery compartment is on the right side.
Key Components:
- Main Lens: Captures 48MP still images and 1296p video.
- PIR Motion Sensors: Detects movement to trigger recording.
- Infrared LEDs: Provides invisible illumination for night vision up to 100ft.
- LCD Screen: For menu navigation, settings adjustment, and image/video playback.
- Control Buttons: Menu, OK, directional arrows, and Start button for operation.
- Power Switch: Selects OFF, ON (operating mode), or SET (setup mode).
- SD Card Slot: Supports standard SD cards for storage.
- USB Port: For connecting to a computer.
- External Antenna: Enhances WiFi and Bluetooth signal stability.
- Battery Compartment: Holds 8 AA batteries.
Setup
1. Battery Installation
The Meidase P200 requires 8 AA batteries for operation. For best performance and battery life, we recommend using high-quality alkaline or lithium batteries.
- Open the camera's front cover by unlatching the side clips.
- Locate the battery compartment on the right side.
- Insert 8 AA batteries according to the polarity indicators (+/-) inside the compartment.
- Ensure the battery compartment door is securely closed.
2. SD Card Installation
A standard SD card (not included) is required to store photos and videos. The camera supports up to 256GB SD cards.
- With the camera cover open, locate the SD card slot at the bottom left.
- Insert the SD card with the metal contacts facing up until it clicks into place.
- To remove, push the card in again until it springs out.
Note: Format the SD card using the camera's menu settings before first use and periodically to ensure optimal performance.
3. Antenna Installation
The external antenna provides a more stable wireless connection for app control.
- Screw the external antenna clockwise into the antenna port located at the top of the camera until it is finger-tight.
- Ensure it is securely attached for best signal reception.
4. Mounting the Camera
The camera can be mounted using the included strap or a wall mount.
Tree Mounting
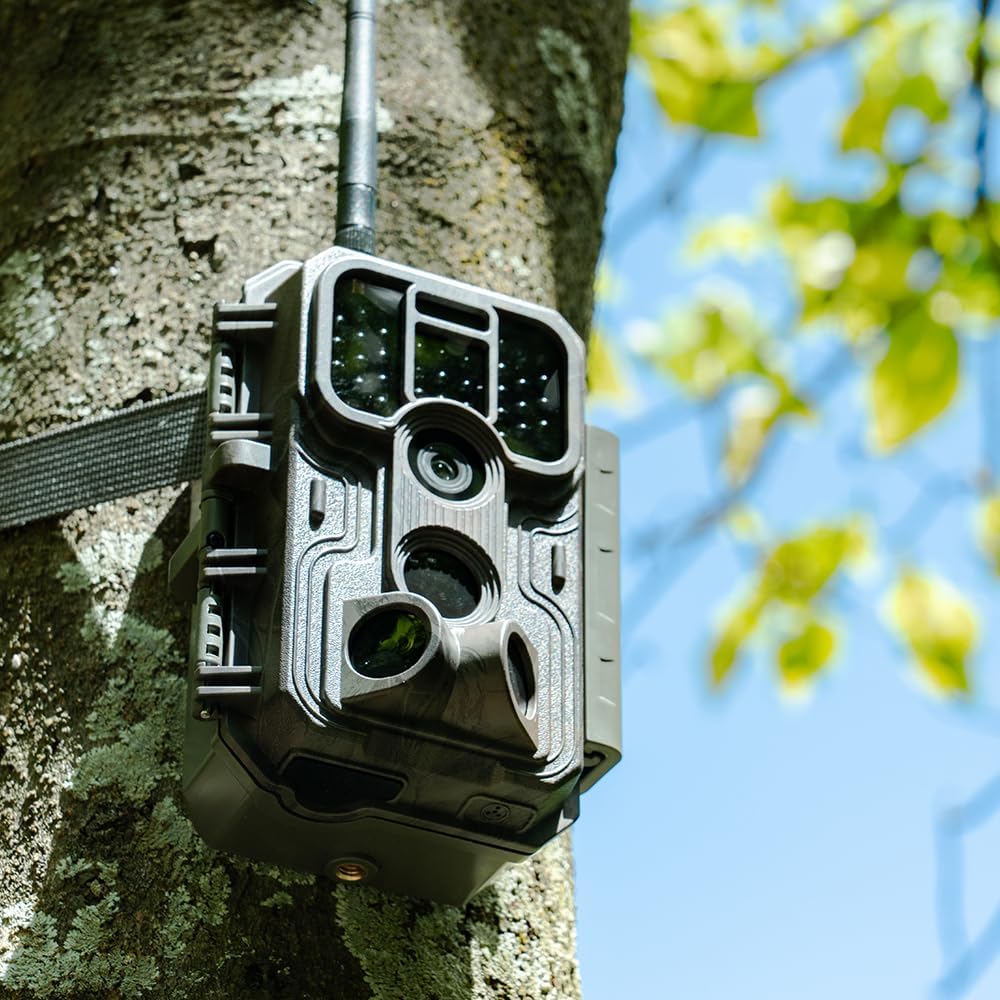
This image shows the Meidase P200 camera securely attached to a tree trunk using the provided mounting strap. The strap wraps around the tree and through the camera's mounting points, holding it firmly in place.
- Thread the mounting strap through the slots on the back of the camera.
- Wrap the strap around a tree or pole at the desired height.
- Secure the strap tightly to prevent camera movement.
Optimal Placement

This image illustrates a Meidase P200 camera mounted on a tree in a residential setting, demonstrating its versatility for both wildlife observation and property monitoring. The WiFi signal icon indicates active wireless connectivity.
- Mount the camera approximately 3-6 feet (1-2 meters) from the ground.
- Ensure the camera is stable and not prone to swaying in the wind.
- Clear any branches or tall grass that might obstruct the view or trigger false detections.
Operating Instructions
1. Powering On/Off and Mode Selection
The power switch has three positions:
- OFF: Powers off the camera.
- SET: Enters setup mode. The LCD screen will turn on, allowing you to configure settings.
- ON: Activates the camera for recording. The LCD screen will turn off after a few seconds, and the camera will enter motion detection mode.
2. Menu Navigation and Settings
In SET mode, use the control buttons to navigate the menu and adjust settings.
- Press the MENU button to access the main settings menu.
- Use the Up/Down arrow buttons to scroll through options.
- Press the OK button to select an option or confirm a setting.
- Use the Left/Right arrow buttons to change values or navigate sub-menus.
- Press MENU again to exit the menu.
Key Settings to Configure:
- Mode: Choose between Photo, Video, or Photo+Video.
- Photo Resolution: Set to 48MP for highest quality.
- Video Resolution: Select 1296p or 1080p.
- PIR Interval: Time delay between detections.
- Sensitivity: Adjust PIR sensor sensitivity (High, Medium, Low).
- Time Lapse: Set intervals for time-lapse photography.
- Date & Time: Set current date and time for accurate timestamps.
- Format SD Card: Erases all data on the SD card.
3. Connecting to the Mobile App (WiFi & Bluetooth)
The Meidase P200 can be controlled and media can be viewed via a dedicated mobile app (iOS and Android).
App Connectivity

This image demonstrates the camera's WiFi connectivity, showing the camera mounted on a tree and a smartphone displaying a live feed or captured image of a hawk, indicating remote access via the mobile application.
- Download the "Meidase Trail Camera" app from your device's app store.
- Ensure Bluetooth is enabled on your smartphone.
- Turn the camera's power switch to the ON position.
- Open the app and follow the on-screen instructions to connect via Bluetooth. This will activate the camera's WiFi.
- Once WiFi is active, connect your phone to the camera's WiFi network (SSID and password will be displayed on the camera screen or in the app).
- You can now view live feed, change settings, and download media directly to your phone.
4. Photo and Video Capture
The camera automatically captures images or videos when motion is detected in ON mode.
Image and Video Quality

This composite image highlights the camera's capability to capture high-resolution 48MP still images, as shown with the deer, and clear H.264 video, exemplified by the heron in the water. This illustrates the camera's excellent image and video quality.
Fast Trigger Speed

This image captures a cat in mid-air, demonstrating the Meidase P200's impressive 0.1-second trigger speed, which ensures that fast-moving subjects are captured without significant delay.
- The camera features a 0.1-second trigger speed to capture fast-moving subjects.
- Set the desired mode (Photo, Video, or Photo+Video) in the SET menu.
- Ensure the camera is in a stable position and the PIR sensors have a clear line of sight to the target area.
5. Night Vision
The P200 utilizes no-glow infrared technology for discreet night capture up to 100 feet.
Night Vision Example
This black and white image of a fox cub captured at night showcases the camera's effective no-glow infrared night vision, providing clear details in low-light conditions without disturbing wildlife.
Day and Night Comparison

This image provides a comparison between the camera's night vision and daytime capture. The top portion shows a deer clearly visible in a black and white infrared image at night, while the bottom shows a vibrant color image captured during the day, highlighting the camera's versatility across different lighting conditions.
- The camera automatically switches to night vision mode in low-light conditions.
- Ensure no obstacles are directly in front of the IR LEDs to avoid reflections.
Maintenance
1. Cleaning the Camera
- Use a soft, dry cloth to clean the camera body.
- For the lens and PIR sensors, use a lens cleaning cloth or a soft brush to gently remove dust and debris. Avoid abrasive materials.
- Do not use harsh chemicals or solvents.
2. Battery Replacement
- Replace all 8 AA batteries when the battery indicator shows low power.
- Always replace with a fresh set of batteries to ensure consistent performance.
- Dispose of old batteries responsibly according to local regulations.
3. SD Card Management
- Regularly check the SD card capacity.
- Download important media to your computer or phone and then format the SD card in the camera to prevent data corruption and ensure smooth operation.
4. Waterproofing Care
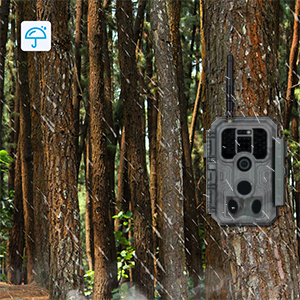
Weather Resistance

This image shows the Meidase P200 camera mounted on a tree in a forest setting, with rain falling, illustrating its robust IP66 waterproof design that allows it to withstand various outdoor weather conditions.
- The camera has an IP66 waterproof rating, making it resistant to dust and strong jets of water.
- Ensure the side clips are always securely latched to maintain the waterproof seal.
- Avoid submerging the camera in water.
Troubleshooting
| Problem | Possible Cause | Solution |
|---|---|---|
| Camera not powering on. | Low or dead batteries; incorrect battery polarity. | Replace all batteries with a fresh set, ensuring correct polarity. |
| No photos/videos captured. | SD card full or corrupted; PIR sensitivity too low; camera in OFF mode. | Format or replace SD card; increase PIR sensitivity; switch camera to ON mode. |
| Poor night vision images. | Obstruction in front of IR LEDs; camera too far from subject. | Clear obstructions; reposition camera closer to the target area. |
| Cannot connect to mobile app. | Bluetooth/WiFi not enabled; incorrect WiFi password; camera not in ON mode. | Ensure Bluetooth is on; re-enter WiFi password; switch camera to ON mode. |
| False triggers. | PIR sensitivity too high; moving branches/grass in detection zone. | Decrease PIR sensitivity; clear vegetation from detection area. |
Specifications
| Model | P200 |
| Image Resolution | Up to 48 MP |
| Video Resolution | 1296p, 1080p (H.264) |
| Night Vision Range | 100 Feet (No-Glow IR) |
| Trigger Speed | 0.1 seconds |
| Connectivity | Wi-Fi, Bluetooth (App Control) |
| Power Source | 8 x AA Batteries (DC 12V) |
| Storage | SD Card (up to 256GB) |
| Waterproof Rating | IP66 |
| Dimensions (L x W x H) | 4.2 x 2.86 x 5.6 inches |
| Weight | 0.68 Pounds (approx. 10.9 ounces) |
| Included Components | Camera, Antenna, Mounting Strap, Mini-USB Cord, Manual |
Warranty and Support
Meidase products are designed for reliability and performance. For warranty information, technical support, or customer service inquiries, please refer to the contact information provided on the official Meidase website or the product packaging.
You can also visit the Meidase Store on Amazon for additional resources and product information.