1. Introduction
Thank you for purchasing the Sentinel RIOBOT VRS-077F Intruder Gate 1/12 Scale Transforming Action Figure. This highly detailed and articulated figure is based on the popular Genesis Breaker series, featuring a unique design by Shinji Aramaki and Hidoki Kishimuma. It boasts a complete transformation mechanism between its Rider Armor mode and Armor Cycle mode, utilizing a durable die-cast variable frame. This manual provides essential information for assembly, operation, maintenance, and safety to ensure you get the most out of your product.
2. Product Overview
The VRS-077F Intruder Gate is a 1/12 scale pre-painted complete action figure. It represents a dedicated gate rider unit, customized for reconnaissance and rapid deployment. Key features include:
- Complete Transformation: Seamlessly transforms between Rider Armor (robot) mode and Armor Cycle (motorcycle) mode.
- Die-cast Frame: Incorporates die-cast parts in the variable frame for enhanced strength and stability during transformation and posing.
- Weaponry: Equipped with 1.8 inch (45 mm) fast-shooting beam cannons on both sides.
- Reconnaissance Drone: The tail section in Armor Cycle mode detaches to form a reconnaissance drone.
- High Articulation: Designed for dynamic posing in both modes.

Figure in Rider Armor mode, showcasing the integrated motorcycle components.

The Intruder Gate figure alongside its Armor Cycle mode, demonstrating the two forms.
3. Setup and Initial Inspection
Upon unboxing your Sentinel RIOBOT VRS-077F Intruder Gate, please perform the following steps:
- Carefully remove all components from the packaging.
- Inspect the figure for any visible damage or missing parts. Refer to the product images for a complete view of all components.
- Familiarize yourself with the articulation points and transformation joints. Some joints may be stiff initially; gently move them to loosen.
- Ensure the reconnaissance drone (tail part) is securely attached or detached as desired.

Detailed view of the Rider Armor's head and upper body.
4. Operating the Figure (Posing and Articulation)
The Intruder Gate figure is designed for extensive posing. Handle with care to avoid damage.
- Joints: The figure features multiple articulation points in the neck, shoulders, elbows, wrists, waist, hips, knees, and ankles. Move joints slowly and deliberately.
- Accessories: The 45mm fast-shooting beam cannons are integrated into the arms. Ensure they are properly positioned for display.
- Reconnaissance Drone: The drone can be detached from the figure's back (in Rider Armor mode) or tail section (in Armor Cycle mode) for separate display or integration into dynamic poses.

Figure in a dynamic action pose.

Figure posed as if flying or hovering.

Figure in a kneeling action stance.
5. Transformation Instructions
The VRS-077F Intruder Gate features a complex yet robust transformation mechanism. Follow these steps carefully to convert between Rider Armor mode and Armor Cycle mode. Apply gentle, even pressure during transformation. Do not force any parts.
5.1. Rider Armor to Armor Cycle Mode
- Ensure the figure is in a neutral standing pose.
- Detach the reconnaissance drone from the back if it is currently attached.
- Fold the arms inward and secure them against the torso.
- Collapse the legs and articulate the hip and knee joints to form the motorcycle frame.
- Rotate and position the shoulder sections to form the front wheel assembly.
- Adjust the back section to form the rear wheel and seat.
- Reattach the reconnaissance drone to the designated tail section of the motorcycle.
- Ensure all locking tabs and connection points are securely engaged.

The Intruder Gate in its Armor Cycle mode.
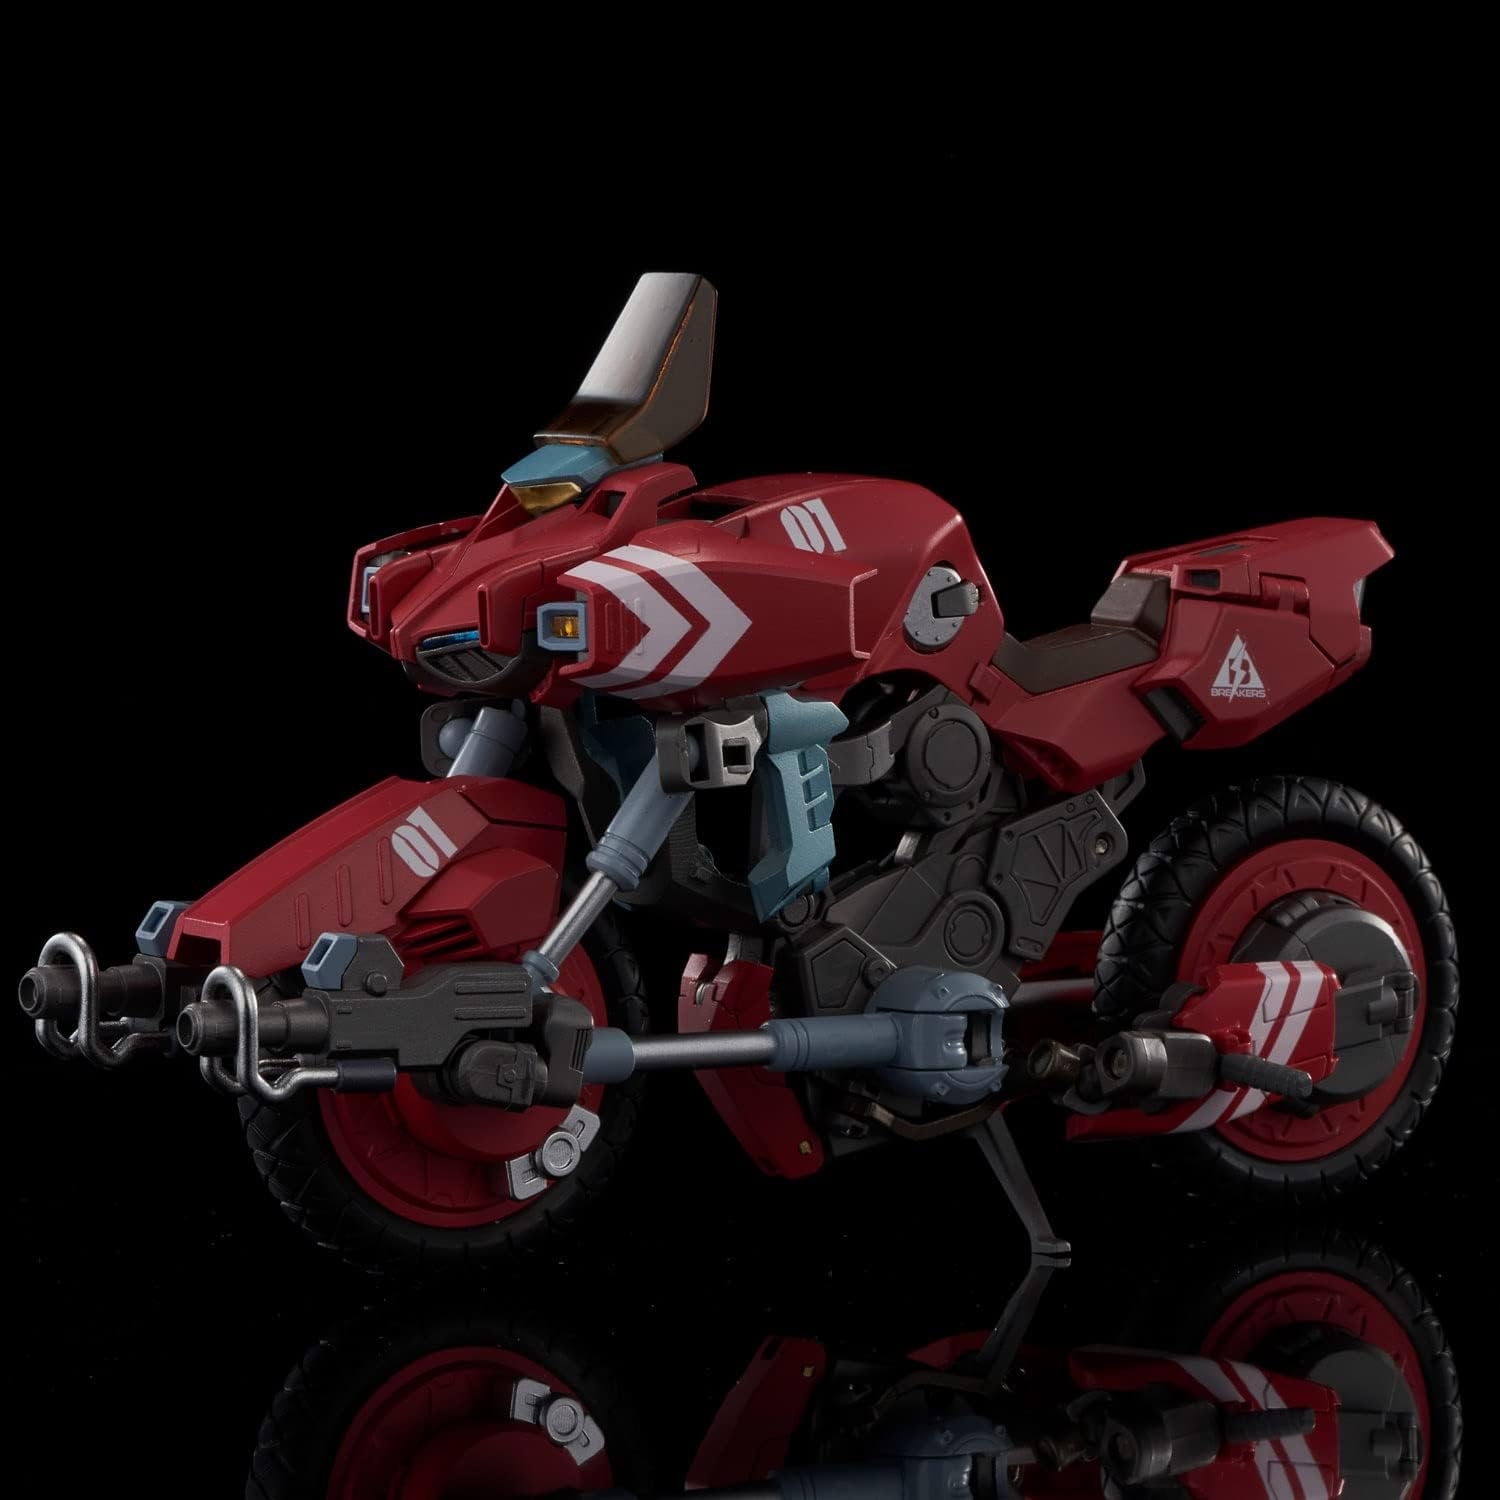
Front three-quarter view of the Armor Cycle mode.

Rear three-quarter view of the Armor Cycle mode.
5.2. Armor Cycle to Rider Armor Mode
- Ensure the figure is in a stable Armor Cycle configuration.
- Detach the reconnaissance drone from the tail section.
- Carefully disengage the locking tabs and unfold the rear wheel and seat section to form the figure's back.
- Unfold the front wheel assembly to form the shoulder sections.
- Extend the legs from the motorcycle frame and articulate the hip and knee joints.
- Extend the arms and position them.
- Reattach the reconnaissance drone to the figure's back if desired.
- Ensure all parts are fully extended and locked into their Rider Armor positions.

Figure posed riding the Armor Cycle.

Armor Cycle mode performing a dynamic wheelie.

Figure with the reconnaissance drone detached.

Detail of the reconnaissance drone and its display stand.

Figure riding the Armor Cycle while detaching the reconnaissance drone.
6. Maintenance
Proper maintenance will help preserve the quality and longevity of your action figure.
- Cleaning: Use a soft, dry cloth to gently wipe away dust. For stubborn dirt, a slightly damp cloth can be used, but avoid excessive moisture. Do not use harsh chemicals or abrasive cleaners.
- Storage: Store the figure away from direct sunlight, extreme temperatures, and high humidity to prevent discoloration or material degradation.
- Joint Care: If joints become loose over time, a small amount of clear nail polish or a specialized joint tightener can be applied to the ball joints and allowed to dry. If joints are too stiff, gently work them or apply a tiny amount of silicone lubricant.
- Handling: Always handle the figure by its main body parts, avoiding excessive pressure on small or delicate components.
7. Troubleshooting
If you encounter any issues with your figure, refer to the following common solutions:
| Problem | Possible Cause / Solution |
|---|---|
| Parts do not fit or transform smoothly. | Ensure all previous steps in the transformation sequence are correctly executed. Do not force parts; check for obstructions or incorrect alignment. Refer to the transformation steps again. |
| Joints are too stiff. | Gently work the joint back and forth to loosen it. A very small amount of silicone-based lubricant can be applied if necessary, but avoid getting it on painted surfaces. |
| Joints are too loose. | For ball joints, carefully apply a thin layer of clear nail polish or a specialized joint tightener to the ball part and allow it to dry completely before reassembling. |
| Figure falls over easily. | Adjust the pose to ensure a balanced center of gravity. Check that all leg and foot joints are securely positioned. Consider using a display stand (not included unless specified) for more dynamic poses. |
8. Specifications
| Feature | Detail |
|---|---|
| Product Name | RIOBOT VRS-077F Intruder Gate |
| Brand | Sentinel |
| Model Number | 4571335882778 |
| Scale | 1/12 |
| Total Height | Approx. 5.9 inches (150 mm) |
| Materials | ABS, PVC, POM, Die-cast |
| Finish Type | Glossy |
| Assembly Required | Yes (minor assembly/transformation) |
| Number of Pieces | 1 (main figure, with detachable drone) |
| Batteries Required | No |
| Product Dimensions | 5.91 x 3.94 x 5.91 inches |
| Item Weight | 1.23 pounds |
9. Safety Information
- Choking Hazard: This product contains small parts and is not suitable for children under 3 years of age.
- Sharp Edges: Some parts may have sharp points or edges. Handle with care to avoid injury.
- Adult Supervision: Adult supervision is recommended during assembly and play, especially for younger users.
- Avoid Force: Do not apply excessive force to joints or transformation points, as this may cause breakage.
- Keep Away from Heat: Do not expose the figure to high temperatures or open flames, as this may deform or damage the plastic and painted surfaces.
10. Warranty and Support
This product is manufactured by Sentinel. For any inquiries regarding manufacturing defects or product support, please contact the retailer where the product was purchased or refer to the official Sentinel website for customer service information. Please retain your proof of purchase for any warranty claims.