1. Important Safety Instructions
Please read all instructions carefully before using this appliance. Failure to follow these instructions may result in electric shock, fire, or serious injury.
- Always ensure the coffee urn is placed on a stable, level, heat-resistant surface, away from edges.
- Do not immerse the appliance, cord, or plug in water or other liquids.
- Close supervision is necessary when any appliance is used by or near children.
- Unplug from outlet when not in use and before cleaning. Allow to cool before putting on or taking off parts, and before cleaning the appliance.
- Do not operate any appliance with a damaged cord or plug, or after the appliance malfunctions or has been damaged in any manner. Contact VEVOR customer service for assistance.
- The use of accessory attachments not recommended by the appliance manufacturer may result in fire, electric shock, or injury to persons.
- Do not use outdoors.
- Do not let the cord hang over the edge of a table or counter, or touch hot surfaces.
- Do not place on or near a hot gas or electric burner, or in a heated oven.
- Always add water to the coffee urn before use to prevent dry burning and potential fuse issues.
- Exercise extreme caution when moving an appliance containing hot liquid.
- The anti-scald handle and lid are designed to protect your fingers from burns during operation and handling. Use them as intended.
- This appliance is for commercial use.
2. Product Overview
The VEVOR Commercial Coffee Urn is designed for efficient and large-volume coffee brewing and dispensing. It features a durable stainless steel construction and user-friendly controls.
Key Features:
- Fast Brewing: Brews approximately one cup per minute.
- Large Capacity: 110-cup (16.5L) capacity suitable for large gatherings.
- Durable Construction: Double-wall tank with inner 304 SUS and outer 430 stainless iron.
- Integrated Filter: Stainless steel filter eliminates the need for paper filters.
- Efficient Dispensing: Unique step design at the spout allows for complete emptying without tilting. Two-way dispensing lever for single press or continuous flow.
- Temperature Control: Maintains coffee temperature between 90-98 ℃ (194-208.4 ℉).
- Indicator Lights: Red light for heating, orange light for keeping warm.
- Safety Features: Auto shut-off, spill-proof lid, anti-scald handle and lid.
- Convenience: Viewable water gauge and removable drip tray.
Components:
- Coffee Urn Body (with heating element, water gauge, and spigot)
- Lid
- Brew Basket with Stainless Steel Filter
- Drip Tray
- Power Cord

Figure 2.1: The VEVOR Commercial Coffee Urn, ready for use.

Figure 2.2: Coffee urn maintaining optimal serving temperature in a commercial kitchen environment.
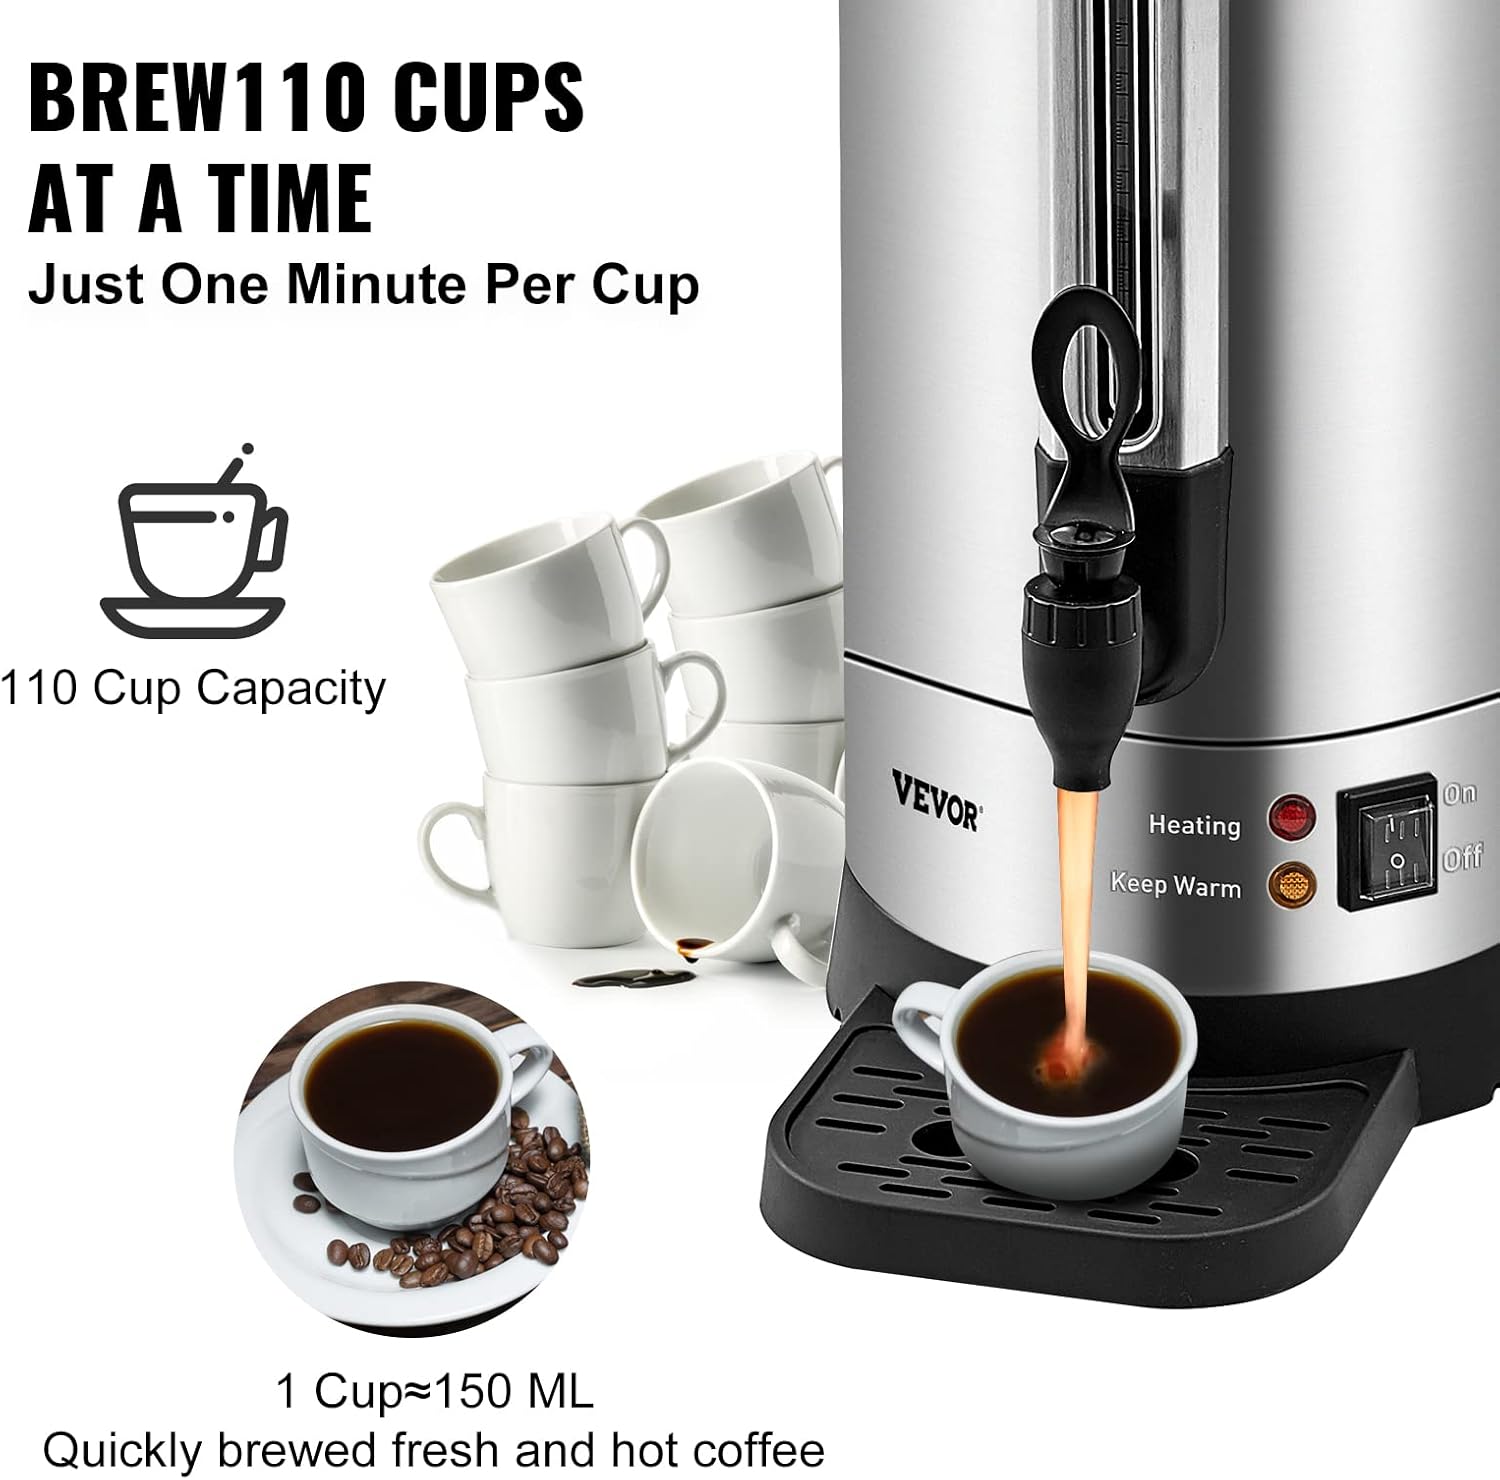
Figure 2.3: Illustration of the urn's brewing speed and capacity.

Figure 2.4: Two-way dispensing mechanism for user convenience.

Figure 2.5: Innovative design elements for ease of use and maintenance.

Figure 2.6: Internal structure and components of the coffee urn.
3. Setup
3.1 Unpacking
- Carefully remove all components from the packaging.
- Inspect the appliance for any damage. Do not use if damaged.
- Retain packaging for future storage or transport.
3.2 Initial Cleaning
Before first use, clean all parts that will come into contact with coffee or water.
- Wash the lid, brew basket, and drip tray with warm, soapy water. Rinse thoroughly and dry.
- Wipe the interior and exterior of the urn body with a damp cloth. Do not immerse the urn body in water.
- Run a cycle with only water to flush out any manufacturing residues. Fill the urn with clean water, brew, and dispense. Discard this water.
3.3 Placement
- Place the coffee urn on a stable, level, and heat-resistant surface.
- Ensure there is adequate clearance around the urn for ventilation and to prevent heat damage to surrounding surfaces.
- Position the urn near a grounded electrical outlet.
3.4 Power Connection
Ensure the power switch is in the 'OFF' position before plugging in the appliance.
- Plug the power cord into a grounded 120V AC outlet.
4. Operating Instructions
4.1 Brewing Coffee
- Fill with Water: Remove the lid and brew basket. Fill the urn with cold, fresh water up to the desired level, indicated by the water gauge. Do not overfill.
- Add Coffee Grounds: Place the brew basket with the stainless steel filter into the urn. Add the desired amount of coarse-ground coffee into the filter. Do not use fine-ground coffee as it may clog the filter.
- Secure Lid: Place the lid securely on the urn. Ensure it is properly seated to prevent spills and maintain heat.
- Start Brewing: Flip the power switch to the 'ON' position. The red indicator light will illuminate, signifying that the urn is heating and brewing.
- Brewing Process: The urn will begin heating the water and dripping it through the coffee grounds. Brewing time will vary based on the volume of water. The red light will turn off when brewing is complete, and the orange 'Keep Warm' light will illuminate.
4.2 Dispensing Coffee
The urn features a two-way dispensing spigot.
- Single Serve: Push the spigot lever in one direction (e.g., downwards) to dispense a single serving. Release the lever to stop the flow.
- Continuous Flow: Push the spigot lever in the opposite direction (e.g., upwards) to lock it into an open position for continuous dispensing. Push it back to the center to stop the flow.
- Ensure a cup or carafe is placed under the spigot before dispensing. The removable drip tray helps catch any drips.
4.3 Keep Warm Function
After brewing, the urn automatically switches to 'Keep Warm' mode, indicated by the orange light. This function maintains the coffee temperature between 90-98 ℃ (194-208.4 ℉).
5. Maintenance
5.1 Daily Cleaning
Clean the coffee urn after each use to ensure optimal performance and hygiene.
- Unplug the urn and allow it to cool completely.
- Remove the lid, brew basket, and stainless steel filter. Discard used coffee grounds.
- Wash the lid, brew basket, filter, and drip tray with warm, soapy water. Rinse thoroughly and dry.
- Wipe the interior of the urn with a damp cloth to remove any coffee residue. For stubborn stains, use a soft brush.
- Wipe the exterior of the urn with a damp cloth. Do not use abrasive cleaners or scouring pads.
- Ensure all parts are completely dry before reassembling or storing.
5.2 Descaling
Mineral deposits from water can build up over time, affecting performance. Descale the urn regularly, depending on water hardness and frequency of use.
- Fill the urn with a solution of equal parts white vinegar and water (e.g., 50% vinegar, 50% water).
- Place the brew basket (without coffee) and lid back on the urn.
- Turn the urn 'ON' and allow the solution to heat for approximately 20-30 minutes. Do not brew.
- Turn the urn 'OFF' and unplug it. Let the solution sit in the urn for at least 1 hour, or longer for heavy buildup.
- Drain the solution through the spigot.
- Rinse the urn thoroughly by filling it with clean water and dispensing it several times until the vinegar odor is gone.
6. Troubleshooting
If you encounter issues with your VEVOR Commercial Coffee Urn, refer to the following table for common problems and solutions.
| Problem | Possible Cause | Solution |
|---|---|---|
| Urn does not heat or brew. | Not plugged in; Power switch off; Circuit breaker tripped; Dry burning protection activated. | Ensure power cord is securely plugged in. Turn power switch to 'ON'. Check circuit breaker. Ensure water is always added before turning on. |
| Coffee brews too slowly. | Too much coffee grounds; Fine-ground coffee used; Mineral buildup. | Reduce amount of coffee grounds. Use coarse-ground coffee. Perform descaling procedure. |
| Coffee tastes weak or bitter. | Incorrect coffee-to-water ratio; Water not hot enough; Urn not cleaned. | Adjust coffee amount. Ensure urn completes brewing cycle. Clean the urn and filter thoroughly. |
| Spigot is leaking. | Spigot not properly tightened; Seal damaged or worn. | Ensure the spigot is securely tightened. If leaking persists, contact customer support for replacement parts or service. |
| Water gauge is unclear. | Mineral buildup or residue. | Perform descaling procedure to clear the water gauge. |
If the problem persists after attempting these solutions, please contact VEVOR customer support.
7. Specifications
Technical specifications for the VEVOR Commercial Coffee Urn.
| Feature | Specification |
|---|---|
| Brand | VEVOR |
| Model Name | HLB180S-A2K (Commercial Coffee Urn) |
| Capacity | 110 Cups / 16.5 Liters |
| Voltage | 120 Volts |
| Power | 1500 Watts |
| Dimensions (D x W x H) | 8.7" x 8.7" x 19.3" (22 cm x 22 cm x 48.9 cm) |
| Item Weight | 11.66 lbs (5.3 kg) |
| Material | Double-wall Stainless Steel (Inner 304 SUS, Outer 430 Stainless Iron) |
| Keep Warm Temperature | 90-98 ℃ (194-208.4 ℉) |
| Special Feature | Auto Shut-Off |
| UPC | 840349957210 |
| ASIN | B0C53D35CS |

Figure 7.1: Product dimensions and versatility for various hot beverages.
8. Warranty and Support
For warranty information, please refer to the documentation included with your product or visit the official VEVOR website. VEVOR is committed to providing quality products and customer satisfaction.
If you require technical assistance, have questions about operation, or need to report a defect, please contact VEVOR customer support through their official channels.
You can find more information and contact details on the VEVOR Store Page.