1. Introduction
Thank you for choosing Plusmart 10 Inch Drawer Slides. These full extension ball bearing drawer slides are designed for smooth, stable, and durable operation in various applications. This manual provides essential information for proper installation, operation, maintenance, and troubleshooting to ensure optimal performance and longevity of your drawer slides.
Package Contents:
- 2 Pairs (4 pieces) of 10 Inch Cold-Rolled Steel Drawer Tracks
- 24 Mounting Screws
- 8 Spare Screws
- Instruction Manual
2. Product Features
- Smooth and Stable Operation: Equipped with double rows of solid steel ball bearings for effortless opening and closing.
- High Durability: Constructed from high-grade cold-rolled steel with a galvanizing surface, offering anti-corrosion and anti-rust properties. The inner rail thickness of 1.42mm supports up to 150 pounds.
- Full Extension Design: Three-fold full extension allows complete access to the drawer contents.
- Quiet Performance: Features a rubber mute pad to reduce noise during operation, keeping it as low as 35 decibels.
- Easy Installation: Detachable snaps with flexible install tabs and release levers simplify installation and adjustment.
- Versatile Applications: Suitable for various household drawers, heavy-duty glides, cabinets, goods shelves, toolboxes, industrial drawers, RVs, and vending machines.
3. Setup and Installation
3.1 Choosing the Correct Size
Before installation, accurately measure your drawer length. The recommended drawer slide length should be 1 inch shorter than the drawer length without the frame board. Ensure the slide length does not exceed the cabinet case depth.
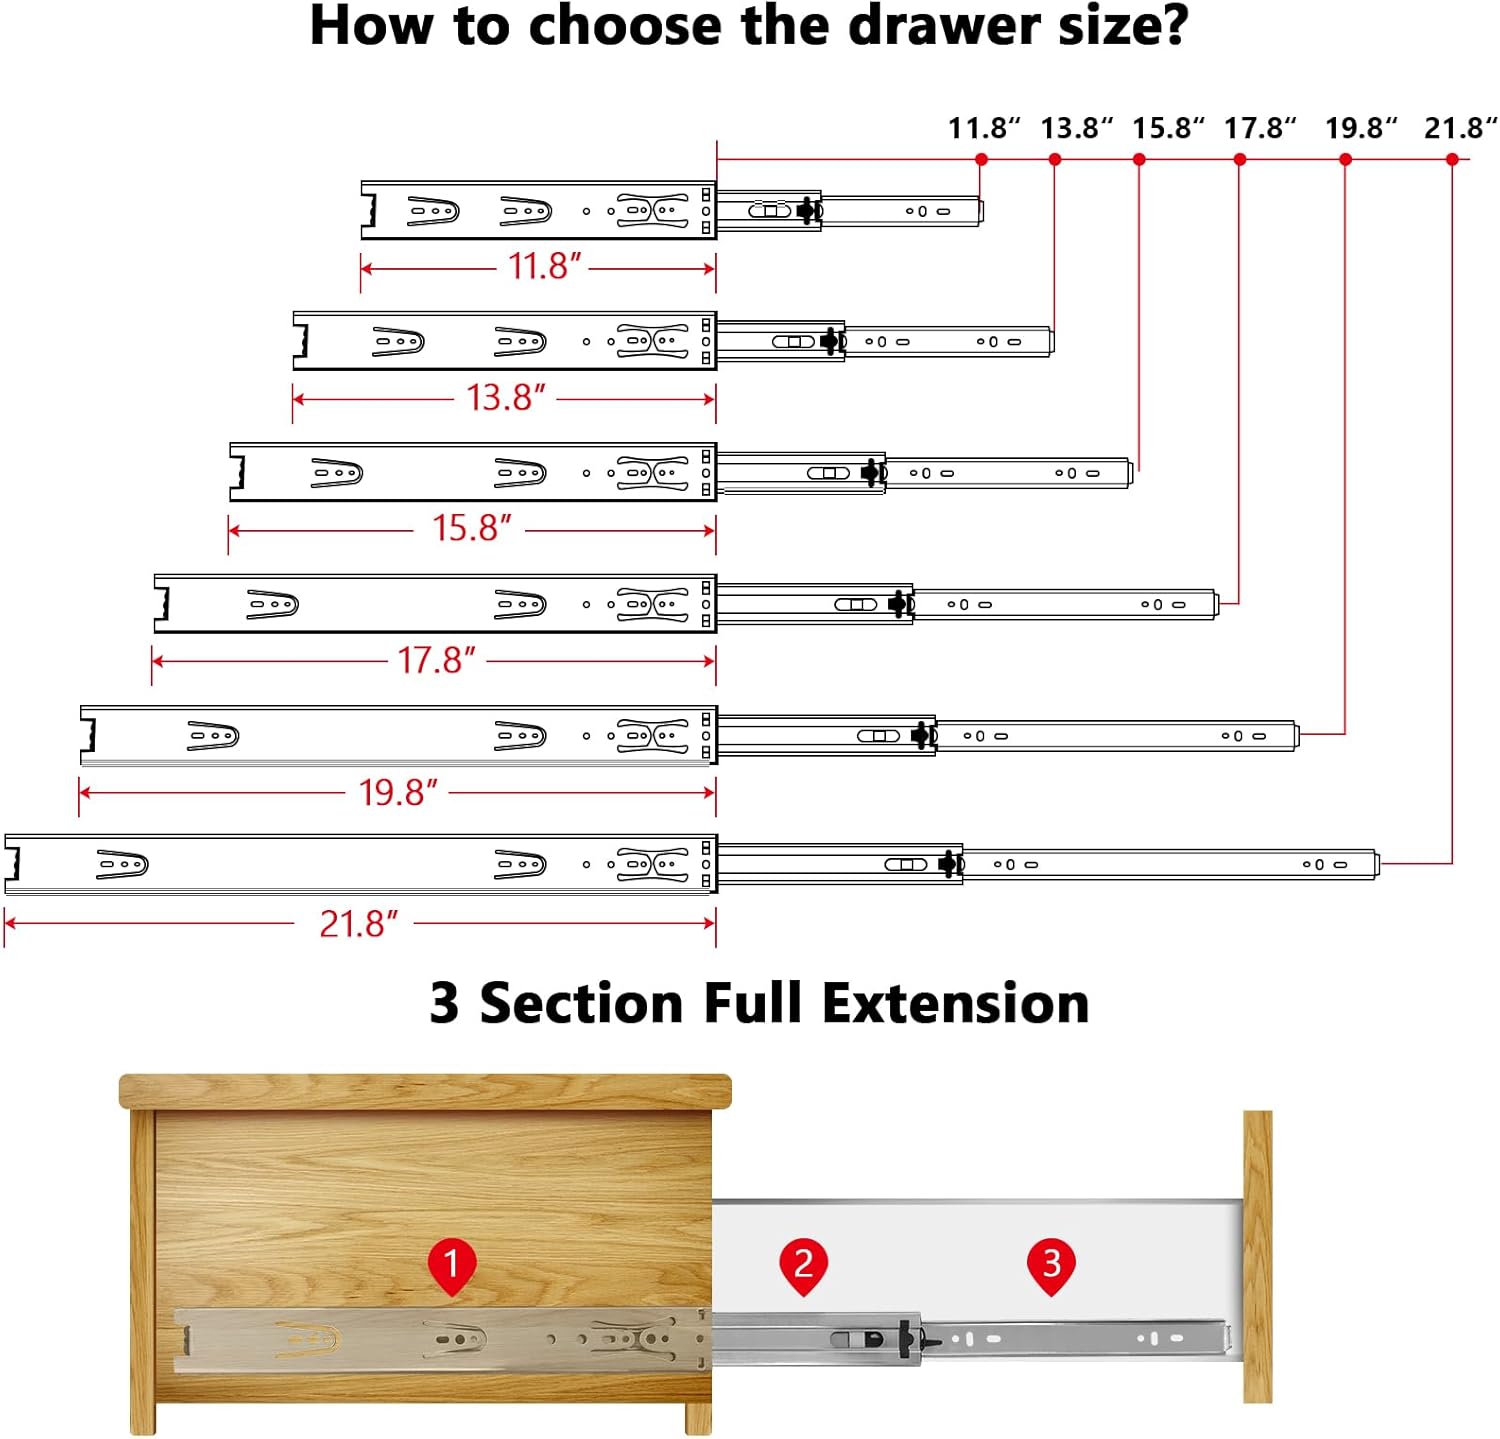
Image: This diagram illustrates how to measure your drawer and cabinet to select the correct drawer slide length. It shows various slide lengths (11.8", 13.8", 15.8", 17.8", 19.8", 21.8") and their corresponding full extension measurements, along with a visual of a 3-section full extension slide installed in a drawer.
3.2 Installation Steps
The drawer slides are designed for side mount installation. Follow these general steps for proper setup:
- Separate the Slide Components: Each drawer slide consists of three sections. Use the flexible install tab and release lever to separate the inner rail (attaches to the drawer) from the middle and outer rails (attaches to the cabinet).

Image: This close-up shows the detachable snap mechanism, highlighting the flexible install tab and release lever that allows for easy separation of the drawer slide components for installation.
- Mount the Outer Rail to the Cabinet: Position the outer rail horizontally inside the cabinet opening. Ensure it is level and aligned correctly. Mark the screw holes and attach the outer rail using the provided mounting screws. Repeat for the other side of the cabinet.
- Mount the Inner Rail to the Drawer: Attach the inner rail to the side of the drawer. Ensure it is flush with the front edge of the drawer and level. Mark the screw holes and secure it with the provided mounting screws. Repeat for the other side of the drawer.
- Reassemble the Drawer: Carefully align the inner rail (attached to the drawer) with the middle rail (part of the cabinet-mounted assembly). Gently push the drawer into the cabinet until the slides engage and lock into place. You should hear a click.
- Test Operation: Open and close the drawer several times to ensure smooth movement and proper alignment. Adjust if necessary.
4. Operating Instructions
These drawer slides are designed for smooth and quiet operation. To operate, simply pull the drawer open to access its contents. The full extension feature allows the drawer to extend completely, providing full visibility and access. When closing, gently push the drawer until it is fully recessed into the cabinet. The ball bearings and rubber mute pads ensure a quiet and stable glide.
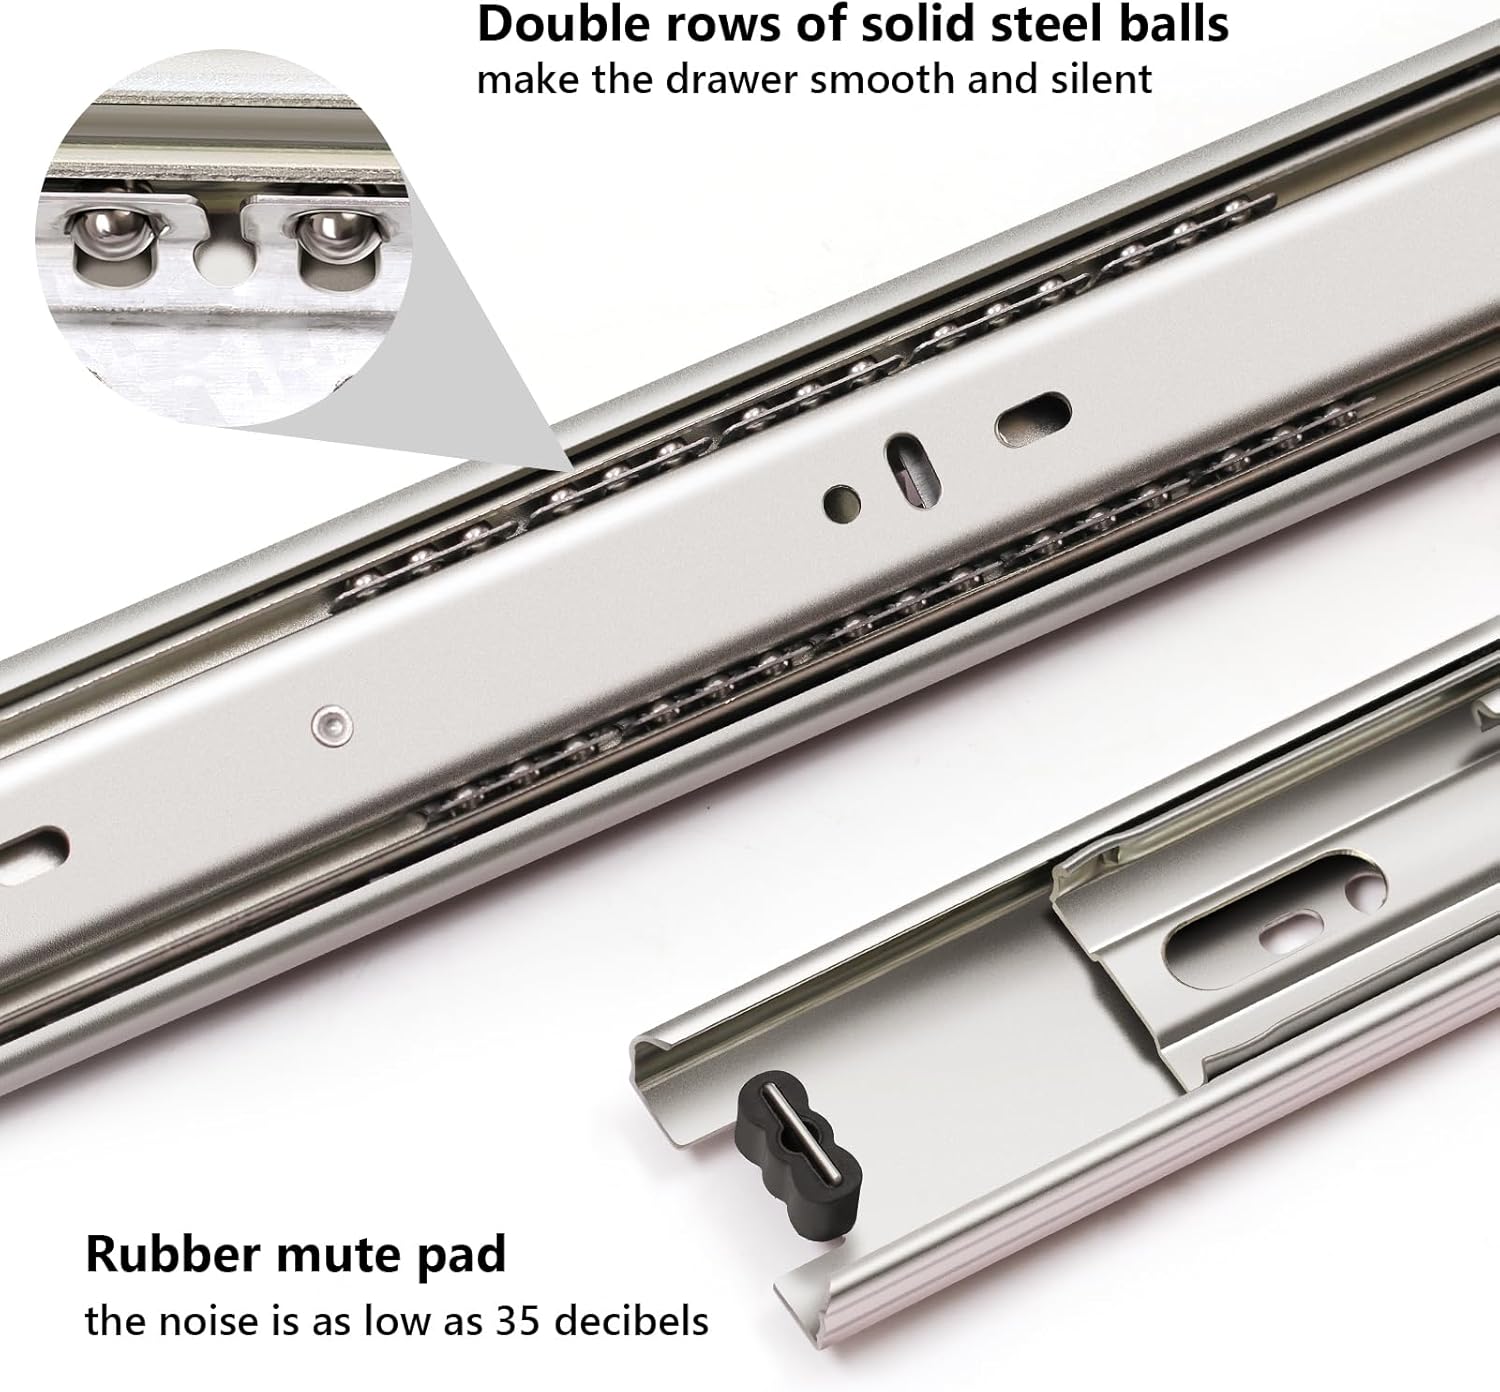
Image: This image provides a detailed view of the drawer slide's internal mechanism, highlighting the double rows of solid steel balls that ensure smooth and silent operation, along with the rubber mute pad designed to minimize noise.

Image: This image presents an overview of the drawer slide, accompanied by icons that represent its key operational benefits: smooth movement, quiet operation (mute), construction from high-quality metal, and anti-rust properties.
5. Maintenance
Plusmart drawer slides are designed for low maintenance. To ensure continued smooth operation and longevity:
- Regular Cleaning: Periodically wipe the slides with a clean, dry cloth to remove dust and debris. Avoid using abrasive cleaners.
- Lubrication (Optional): While not typically required, a light application of silicone-based lubricant can be applied to the ball bearings if you notice any stiffness over time. Avoid oil-based lubricants as they can attract dust.
- Check Fasteners: Occasionally check that all mounting screws are tight. Loose screws can affect performance and stability.
- Avoid Overloading: Do not exceed the maximum weight capacity of 150 pounds per pair to prevent damage and ensure smooth operation.
6. Troubleshooting
If you encounter issues with your drawer slides, consider the following:
- Drawer is Sticking or Not Sliding Smoothly:
- Check for debris or obstructions in the slide mechanism. Clean as necessary.
- Verify that the slides are properly aligned and level. Misalignment can cause friction.
- Ensure the drawer is not overloaded, exceeding the 150-pound weight limit.
- Drawer Does Not Close Completely:
- Inspect for any items obstructing the drawer's path inside the cabinet.
- Check if the slides are fully engaged. Sometimes a gentle push is needed to fully seat the drawer.
- Excessive Noise During Operation:
- Ensure the rubber mute pads are intact and properly positioned.
- Clean the ball bearings to remove any accumulated dust or grit.
- Drawer Feels Loose or Wobbly:
- Tighten all mounting screws on both the drawer and cabinet sides.
- Confirm that the slides are securely attached to both the drawer and cabinet.
7. Specifications
| Feature | Specification |
|---|---|
| Model Number | PM-FDS-10-2 |
| Size | 10 Inch Drawer Slides |
| Style | 2 Pairs |
| Mounting Type | Side Mount |
| Weight Limit | 150 Pounds |
| Material | Alloy Steel |
| Finish | Zinc Plated |
| Item Weight | 3.05 pounds |
| Product Dimensions (L x W x Th) | 9.3 x 1.7 x 0.5 inches |
| Manufacturer | Plusmart |

Image: This image shows a close-up of the drawer slide with a digital caliper measuring its 1.42mm inner rail thickness, emphasizing its sturdiness. Below, a drawer containing three 50-pound kettlebells illustrates the 150-pound weight capacity.
7.1 Applications

Image: This composite image displays four common applications for these drawer slides: a standard household drawer, a heavy-duty industrial drawer, a toolbox drawer, and a pull-out RV drawer, demonstrating their versatility.
8. Warranty and Support
Plusmart provides a 45-day money-back guarantee and a 2-year warranty for replacement or refund in case of quality issues with your drawer slides.
For any questions, concerns, or support needs regarding your Plusmart drawer slides, please contact the seller directly through your purchase platform or visit the official Plusmart store for further assistance.
Thank you for choosing Plusmart.