1. Introduction
Thank you for choosing the SPECSTAR 110V 1/4 HP 4.5 CFM Single Stage Rotary Vane HVAC Air Vacuum Pump and the 220LB High Precision Electronic Digital Refrigerant Charging Weight Freon Scale. This comprehensive manual provides essential information for the safe and efficient operation, setup, and maintenance of your new equipment. Please read this manual thoroughly before use and retain it for future reference.
This product combines a powerful vacuum pump for HVAC system evacuation and a precise digital scale for accurate refrigerant charging and recovery. Proper use will ensure optimal performance and longevity of the units.

Figure 1.1: SPECSTAR Vacuum Pump and Refrigerant Scale Combo. This image displays both the yellow and black vacuum pump on the left and the black carrying case containing the digital refrigerant scale on the right, showcasing the complete product package.
2. Safety Information
Always observe the following safety precautions to reduce the risk of injury or damage to the equipment.
2.1 General Safety
- Read all instructions before operating the equipment.
- Wear appropriate personal protective equipment (PPE), including safety glasses and gloves, when handling refrigerants or operating the vacuum pump.
- Ensure the work area is well-ventilated to prevent the accumulation of refrigerant vapors.
- Do not operate the equipment in wet or damp conditions.
- Keep children and unauthorized personnel away from the equipment during operation.
- Disconnect power before performing any maintenance or cleaning.
2.2 Electrical Safety
- Ensure the power supply voltage matches the specifications of the vacuum pump (110V).
- Do not use damaged power cords or plugs.
- Avoid using extension cords unless absolutely necessary, and ensure they are rated for the equipment's power requirements.
- Never immerse the vacuum pump or scale in water or other liquids.
2.3 Refrigerant Handling Safety
- Refrigerants can cause frostbite upon contact. Avoid direct skin or eye contact.
- Always use approved refrigerant recovery and charging procedures.
- Do not mix different types of refrigerants.
- Ensure all connections are secure before starting any procedure involving refrigerants.
3. Product Overview
3.1 SPECSTAR 4.5 CFM Vacuum Pump
The vacuum pump is designed for efficient evacuation of HVAC and refrigeration systems, removing moisture and non-condensable gases. It features a robust motor and durable construction.
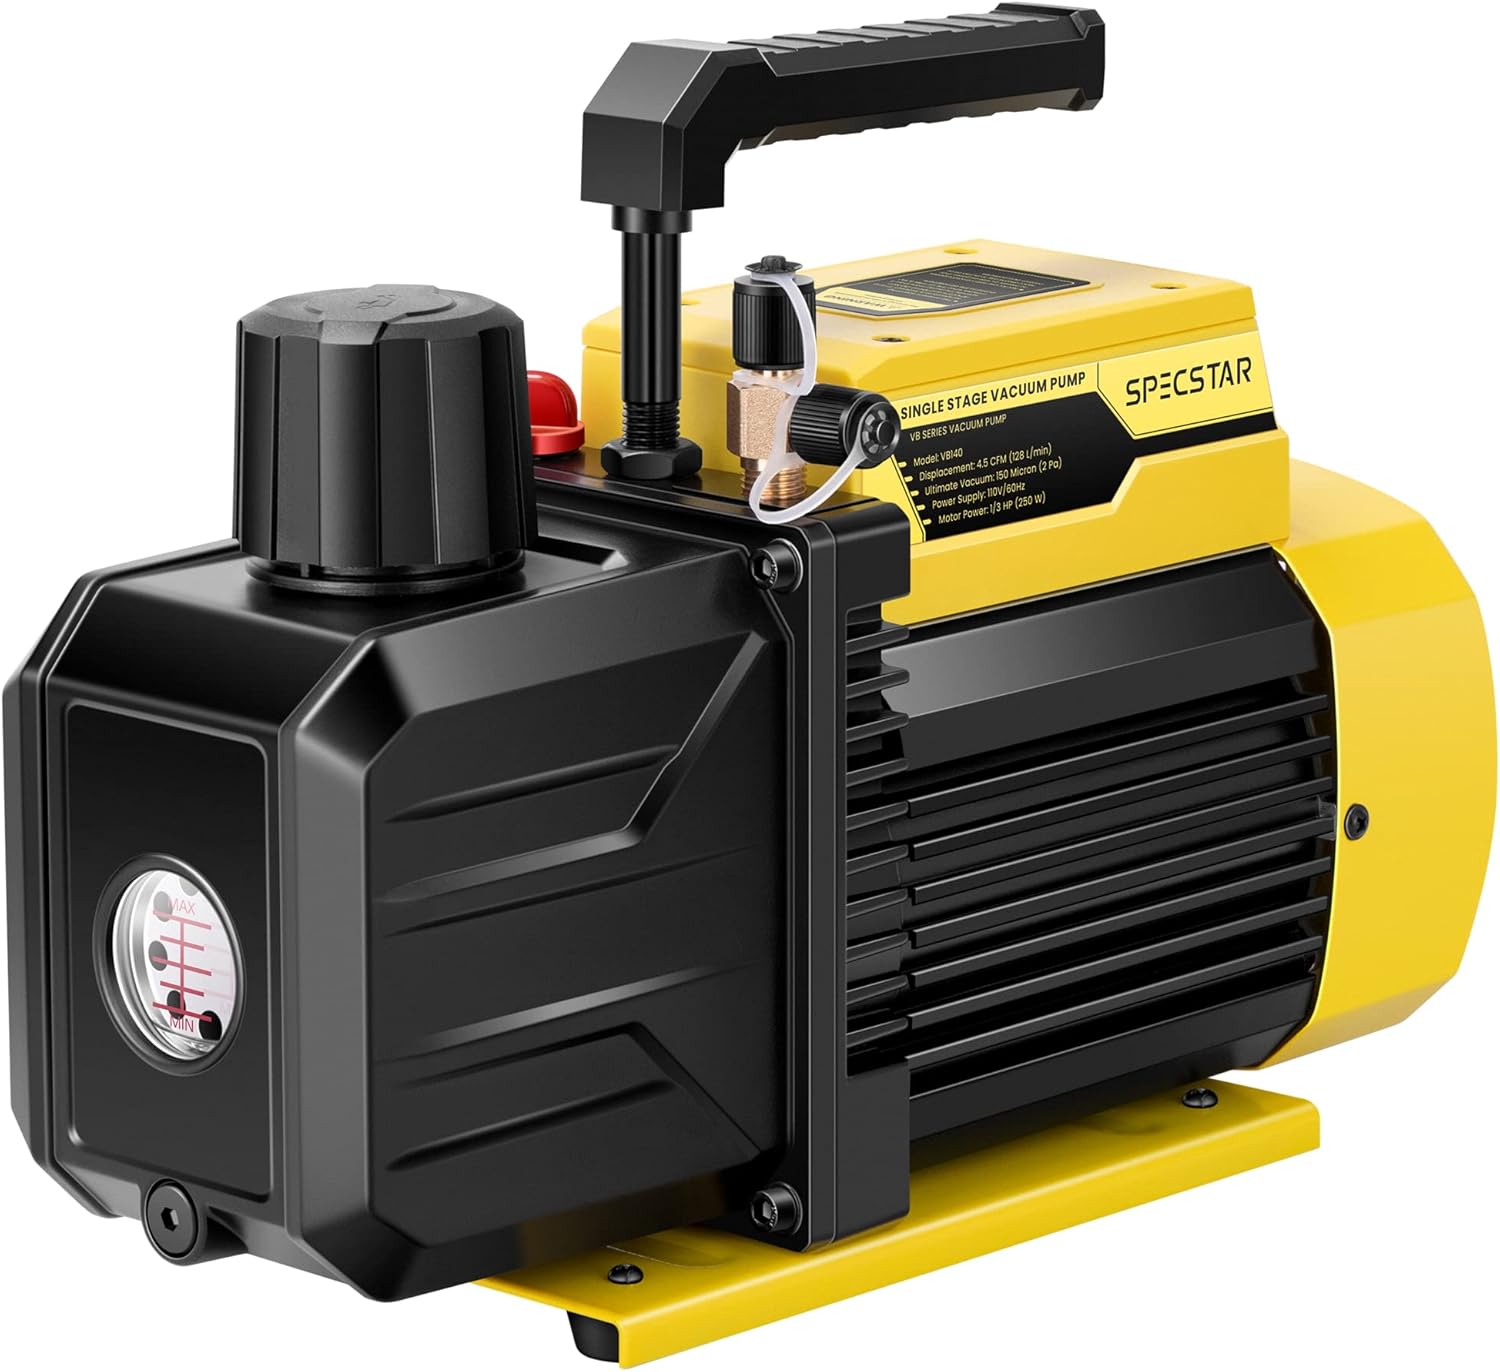
Figure 3.1: SPECSTAR 4.5 CFM Single Stage Vacuum Pump. This image shows a detailed view of the yellow and black vacuum pump, highlighting its main body, oil reservoir cap, and intake port.
Key Features:
- Powerful Performance: 1/4 HP motor, 4.5 CFM flow rate, ultimate vacuum of 2 Pa (150 Microns).
- Durable Construction: High-quality die-cast aluminum housing and non-slip rubber base.
- Versatile Compatibility: Suitable for R134a, R12, R22, R502, and R410a (with adapter).
- Efficient Cooling: Strong motor and fan for prolonged operation.
- Intake Filter: Prevents impurities from entering the pump.
- Oil Mist Trap: Separates oil mist from exhaust gas.
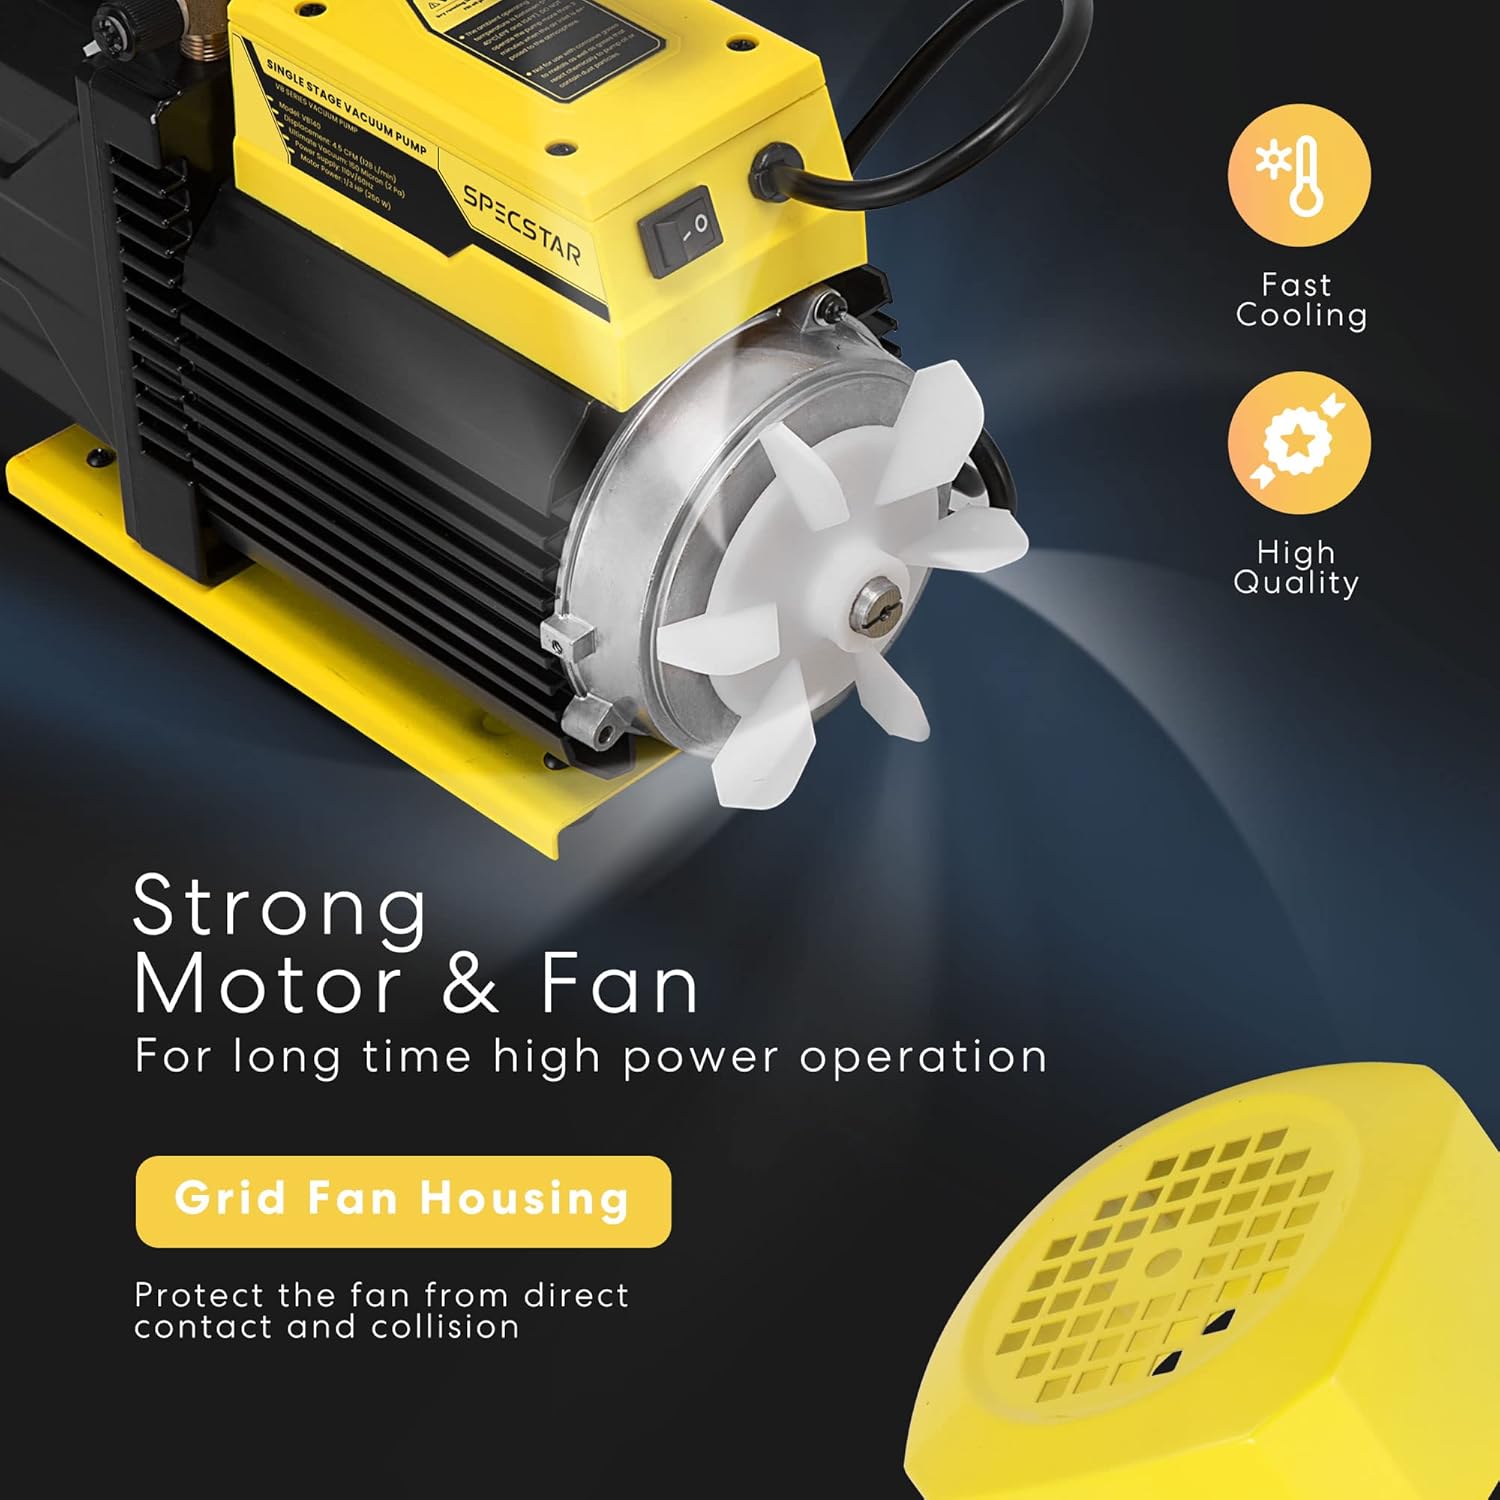
Figure 3.2: Vacuum Pump Motor and Fan. This image highlights the internal fan and motor housing of the vacuum pump, illustrating its cooling mechanism and robust construction for sustained operation.
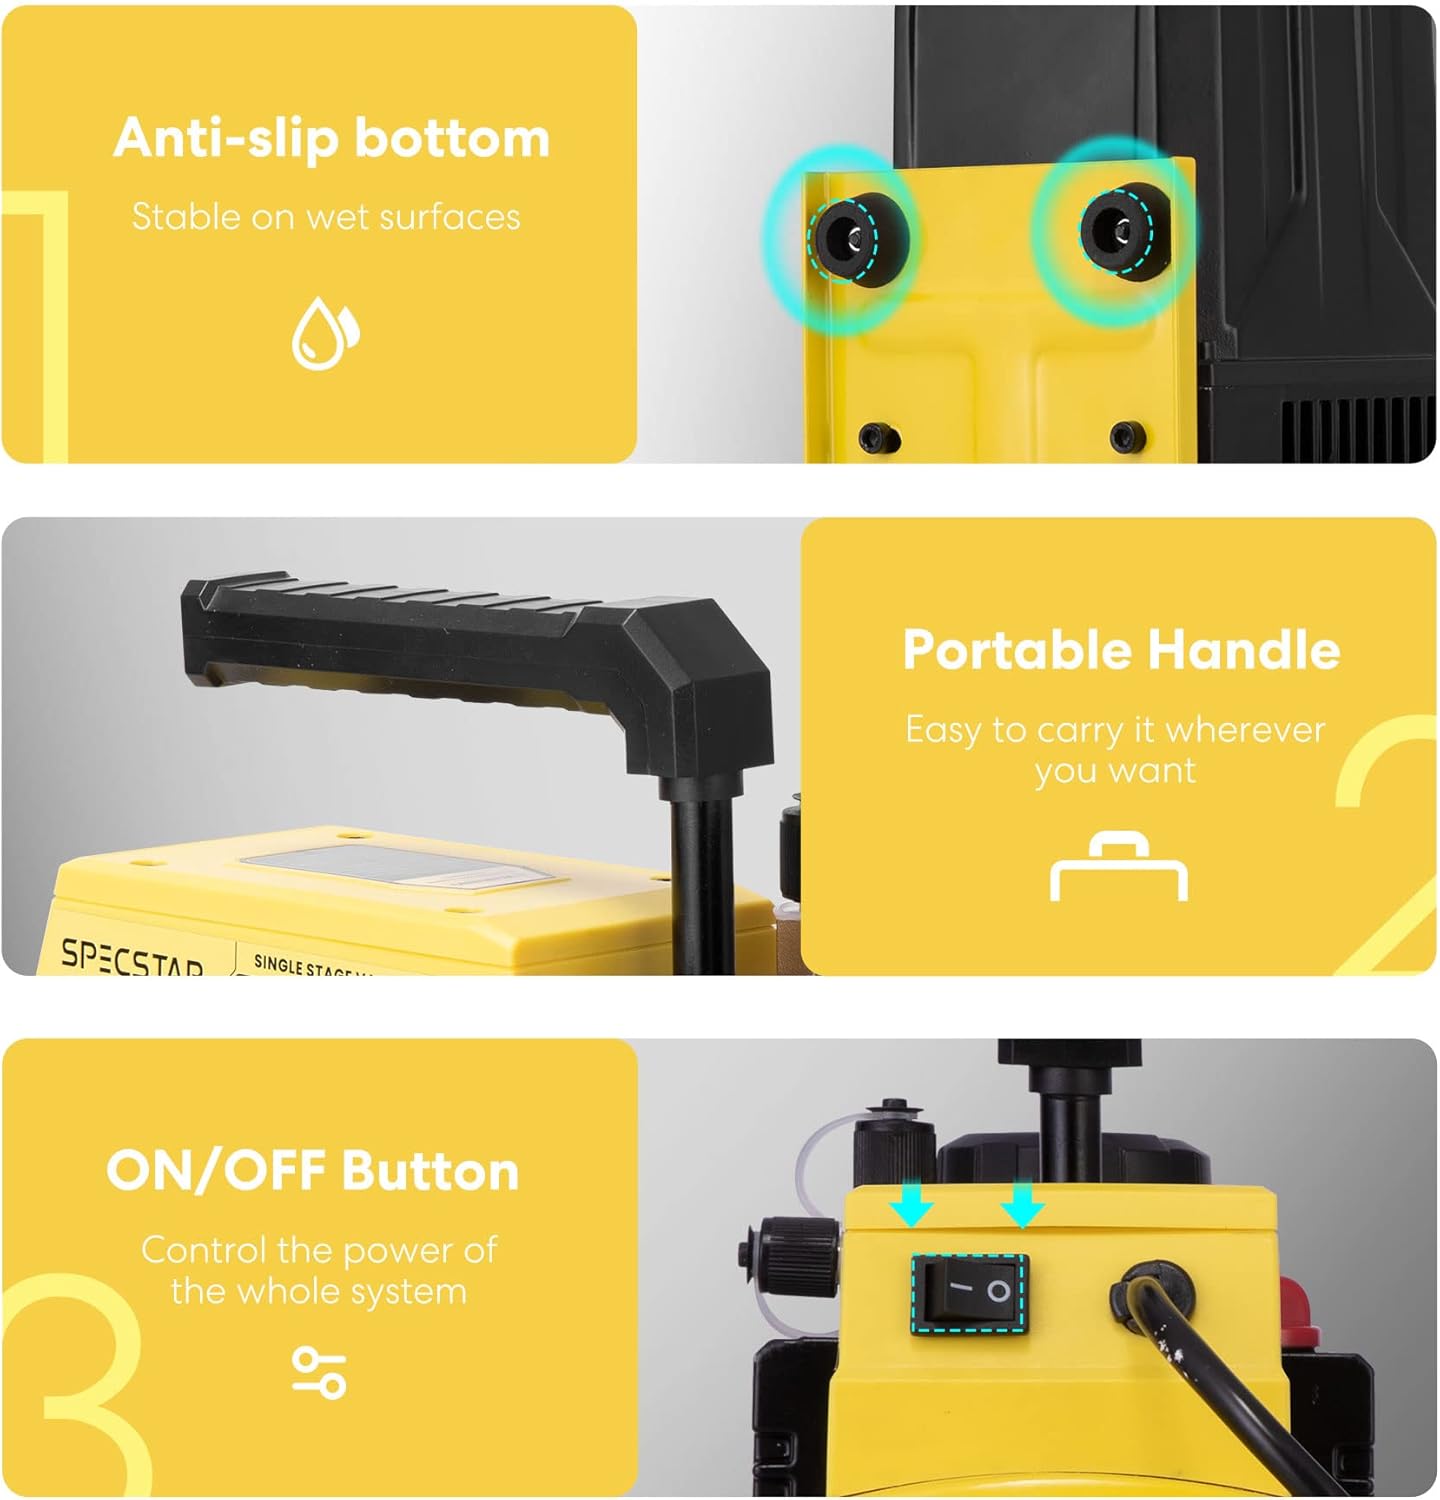
Figure 3.3: Vacuum Pump Design Features. This image showcases three key design elements: the anti-slip rubber feet for stability, the integrated portable handle for easy transport, and the clearly marked ON/OFF power button for simple control.

Figure 3.4: Multipurpose Applications of the Vacuum Pump. This image illustrates various uses for the vacuum pump, including vacuum packing, solvent degassing, material defoaming, and HVAC servicing, demonstrating its versatility.
3.2 SPECSTAR 220LB Digital Refrigerant Charging Scale
The digital refrigerant scale provides high-precision measurements for charging and recovery of refrigerants, ensuring accurate system performance. It comes with a protective case for portability.

Figure 3.5: SPECSTAR 220LB Digital Refrigerant Charging Scale. This image displays the digital refrigerant scale neatly stored within its protective black carrying case, showing the scale platform and the wired control unit.
Key Features:
- High Precision: Accuracy to +0.05% rdg +10g, with a weight limit of 220 lbs (100 kg).
- Overload Detection: Displays "FULL" and sounds an alarm if load exceeds 220 lbs.
- Auto-Shutdown: Automatically shuts off after 10 minutes of non-use (backlight after 3 minutes). User-configurable.
- Automatic Setting: Customize charging/recovery values for automated processes with alarms.
- Memory Function: Remembers last working settings.
- Multiple Units: Supports Oz, Lb, Kg, Lb+oz.
- LCD Screen: Clear display for readings and operations.
- Back Extensible Bracket: Provides an adjustable viewing angle for the control unit.

Figure 3.6: Sensitive Platform of the Refrigerant Scale. This image highlights the precision weighing platform of the digital scale, emphasizing its accuracy and 220 lbs weight capacity.

Figure 3.7: Refrigerant Scale Electronic Control Panel. This image shows a close-up of the scale's control unit with its LCD screen displaying "0.000" and various buttons for functions like ZERO, UNIT, CHARGE, RECOVERY, and HOLD, along with unit options (Oz, Lb, Kg, Lb+oz).
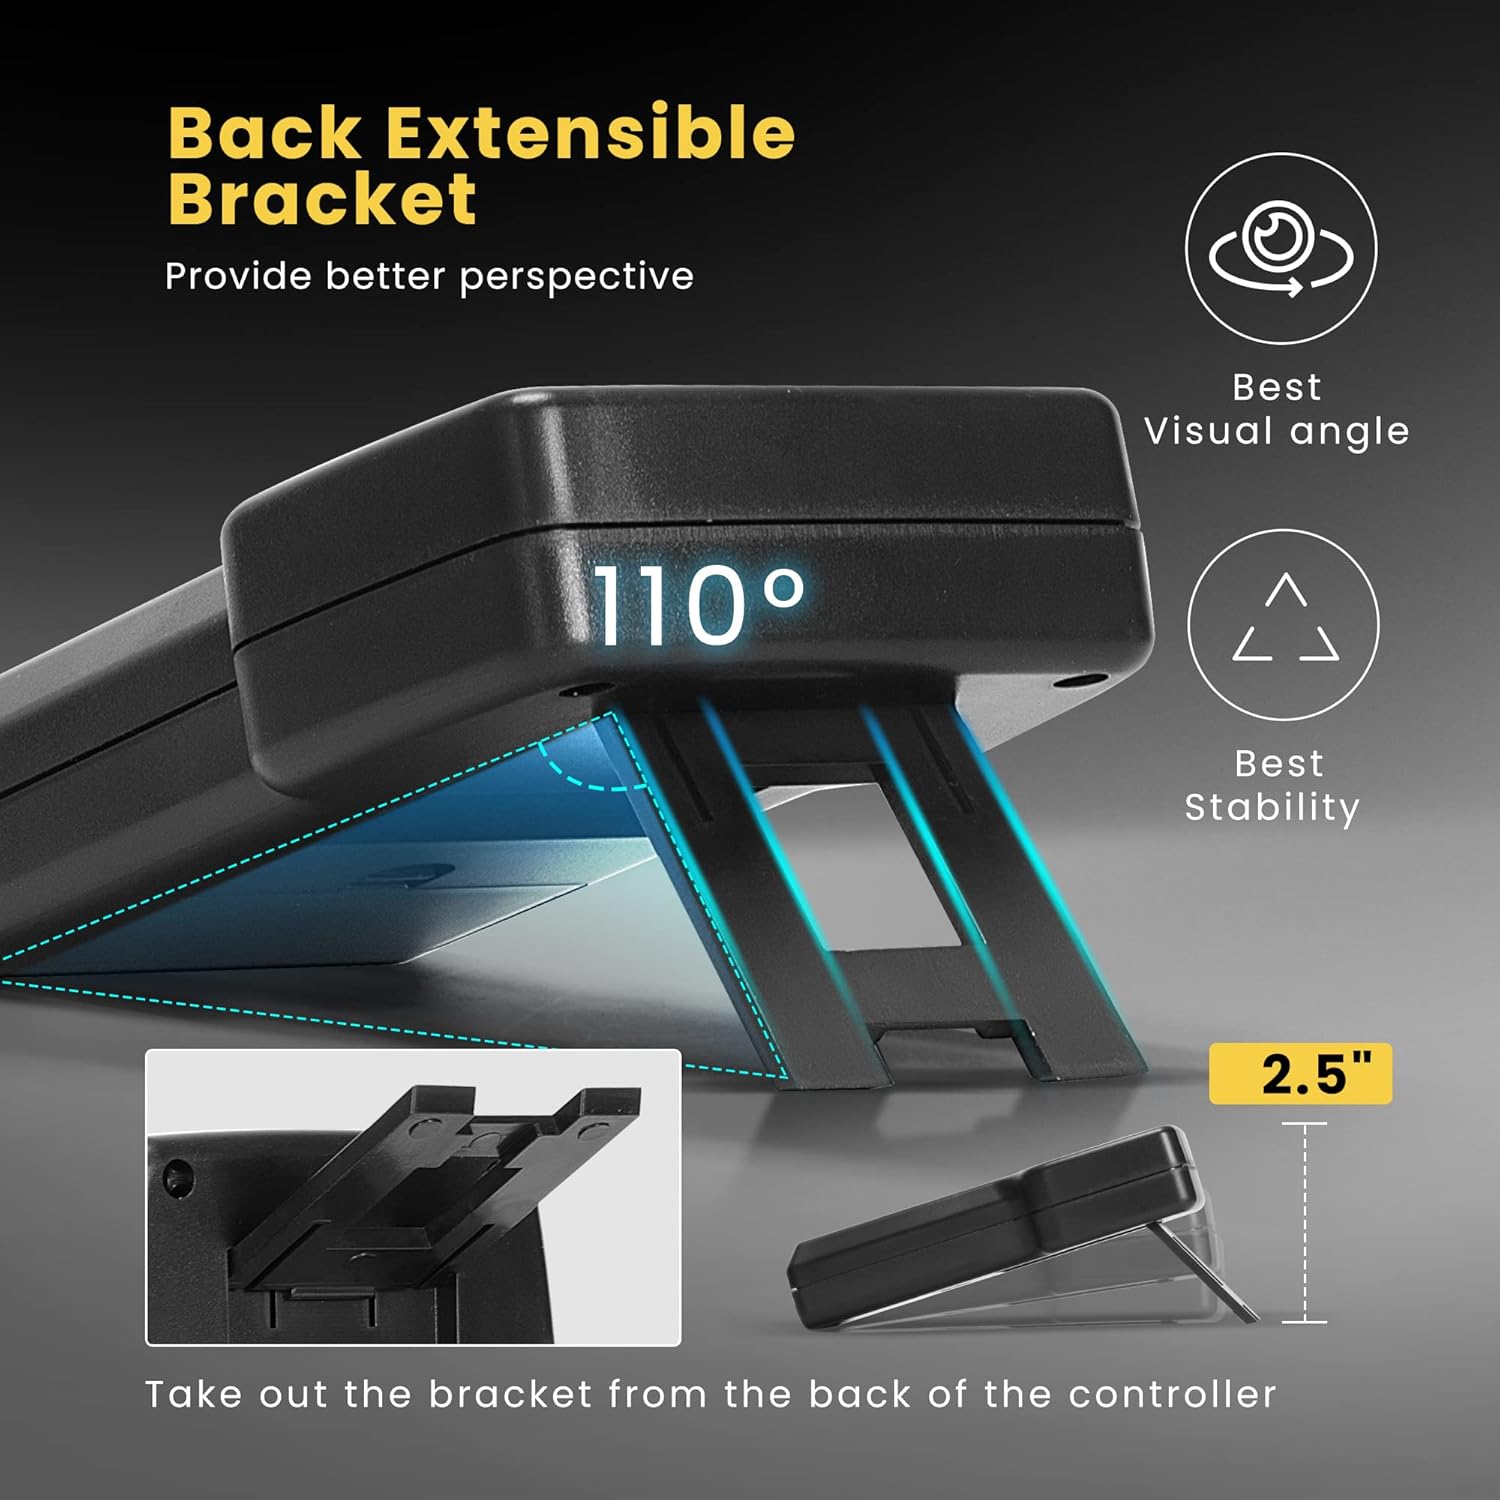
Figure 3.8: Refrigerant Scale Control Unit with Extensible Bracket. This image illustrates the adjustable back bracket on the scale's control unit, allowing for an optimal viewing angle of approximately 110 degrees and enhanced stability.
4. Setup
4.1 Vacuum Pump Setup
- Unpack: Carefully remove the vacuum pump from its packaging.
- Oil Filling: Remove the oil filler cap and fill the pump with the provided vacuum pump oil (0.29 qt./330ml). Ensure the oil level is between the MIN and MAX marks on the sight glass. Do not overfill.
- Placement: Place the pump on a stable, level surface in a well-ventilated area.
- Power Connection: Connect the power cord to a grounded 110V AC outlet.
- Intake Connection: Connect the appropriate hose to the vacuum pump's intake port. For R410a systems, a 5/16-inch adapter may be required (not included).
4.2 Refrigerant Scale Setup
- Unpack: Remove the scale platform and control unit from the carrying case.
- Battery Installation: Open the battery compartment on the control unit and insert the required batteries (typically 9V, not specified in product data, assume standard).
- Connect Control Unit: Plug the coiled cable from the scale platform into the control unit.
- Placement: Place the scale platform on a firm, level surface. Avoid placing it near sources of vibration or drafts.
- Adjust Bracket: Extend the back bracket on the control unit for optimal viewing angle, if desired.
5. Operation
5.1 Vacuum Pump Operation (System Evacuation)
- Connect Hoses: Connect the vacuum pump to the HVAC/refrigeration system using appropriate manifold gauges and hoses. Ensure all connections are tight.
- Open Valves: Open the manifold gauge valves to the system.
- Start Pump: Turn on the vacuum pump using the ON/OFF switch.
- Monitor Vacuum: Allow the pump to run until the desired vacuum level (e.g., 150 Microns or 2 Pa) is achieved and held for a specified period, indicating proper evacuation.
- Close Valves: Once evacuation is complete, close the manifold gauge valves to isolate the system from the pump.
- Turn Off Pump: Switch off the vacuum pump.
- Disconnect: Carefully disconnect the hoses from the pump and system.
Note: Always refer to the specific HVAC system manufacturer's guidelines for recommended vacuum levels and evacuation times.
5.2 Refrigerant Scale Operation (Charging/Recovery)
- Power On: Press the POWER button on the control unit to turn on the scale. The LCD will display "0.000".
- Select Unit: Press the UNIT button to cycle through available units: Oz, Lb, Kg, Lb+oz. Select the desired unit.
- Zero Scale: Place the refrigerant tank onto the scale platform. Press the ZERO button to tare the scale, setting the current weight to zero. This is crucial for accurate charging/recovery.
- Set Charging/Recovery Value (Automatic Setting):
- Press CHARGE or RECOVERY.
- Use the numeric keypad to enter the desired refrigerant weight.
- Press RUN/STOP to start the process. The scale will automatically monitor the weight and sound an alarm when the set value is reached.
- Press RUN/STOP again to stop the process manually.
- Manual Charging/Recovery: If not using the automatic setting, simply monitor the weight displayed on the LCD as you charge or recover refrigerant.
- Hold Function: Press the HOLD button to freeze the current weight display. Press again to release.
- Overload Detection: If the weight exceeds 220 lbs (100 kg), the display will show "FULL" and an audible alarm will sound. Remove excess weight immediately to prevent damage.
- Auto-Shutdown: The scale will automatically shut off after 10 minutes of inactivity. The backlight will turn off after 3 minutes. This feature can be manually enabled or disabled (refer to specific instructions on the device if available, not detailed in product data).
- Power Off: Press and hold the POWER button to turn off the scale.
6. Maintenance
6.1 Vacuum Pump Maintenance
- Oil Change: Vacuum pump oil should be changed regularly, especially after each use or if it appears cloudy or discolored.
- Ensure the pump is off and cool.
- Place a suitable container under the oil drain plug.
- Remove the oil drain plug and the oil filler cap to allow the oil to drain completely.
- Replace the drain plug.
- Refill with new vacuum pump oil to the correct level (between MIN and MAX marks).
- Dispose of used oil responsibly according to local regulations.
- Cleaning: Wipe the exterior of the pump with a damp cloth. Do not use harsh chemicals or solvents.
- Storage: Store the pump in a clean, dry environment. Ensure the intake port is capped to prevent contaminants from entering.
6.2 Refrigerant Scale Maintenance
- Cleaning: Wipe the scale platform and control unit with a soft, damp cloth. Do not use abrasive cleaners or immerse in water.
- Battery Replacement: Replace batteries in the control unit when the low battery indicator appears or if the scale does not power on.
- Storage: Store the scale in its protective carrying case in a cool, dry place when not in use. Avoid placing heavy objects on the scale platform during storage.
7. Troubleshooting
7.1 Vacuum Pump Troubleshooting
| Problem | Possible Cause | Solution |
|---|---|---|
| Pump does not start | No power; Faulty power cord; Motor issue | Check power connection; Inspect power cord; Contact customer support |
| Poor vacuum performance | Low or contaminated oil; Leaks in system/hoses; Clogged intake filter | Change oil; Check all connections for leaks; Clean/replace intake filter |
| Excessive noise/vibration | Low oil level; Loose components; Pump on uneven surface | Check/add oil; Tighten components; Place on level surface |
7.2 Refrigerant Scale Troubleshooting
| Problem | Possible Cause | Solution |
|---|---|---|
| Scale does not power on | Dead batteries; Loose battery connection | Replace batteries; Ensure batteries are correctly inserted |
| Inaccurate readings | Scale not zeroed; Uneven surface; External vibrations; Overload | Press ZERO button; Place on stable, level surface; Avoid vibrations; Check for "FULL" error and remove weight |
| "FULL" error displayed | Weight exceeds 220 lbs (100 kg) | Remove excess weight immediately |
8. Specifications
8.1 SPECSTAR 4.5 CFM Vacuum Pump
- Voltage: 110V
- Motor: 1/4 HP
- Flow Rate: 4.5 CFM (Cubic Feet per Minute)
- Ultimate Vacuum: 2 Pa (150 Microns)
- Oil Capacity: 0.29 qt. (330 ml)
- Compatibility: R134a, R12, R22, R502 (R410a with 5/16-inch adapter)
- Housing Material: Die-cast aluminum
8.2 SPECSTAR 220LB Digital Refrigerant Charging Scale
- Weight Capacity: 220 lbs (100 kg)
- Accuracy: +0.05% rdg +10g
- Units: Oz, Lb, Kg, Lb+oz
- Display: LCD
- Power Source: Batteries (type not specified, typically 9V)
- Auto-Shutdown: 10 minutes (unit), 3 minutes (backlight)
9. Warranty and Support
For warranty information, technical support, or service inquiries, please contact SPECSTAR customer service. Keep your purchase receipt as proof of purchase.
Customer Service Contact: Refer to the product packaging or the official SPECSTAR website for the most current contact information.