1. Introduction
This manual provides essential instructions for the safe and effective use of your VIDXCVIT 1.6 cubic foot fireproof and waterproof safe. Please read this manual thoroughly before installation and operation to ensure proper functionality and security.
The VIDXCVIT safe is designed to protect your valuables from fire and water damage, featuring a robust steel construction, an electronic keypad lock, and an anti-theft alarm system. It includes a removable shelf for organized storage and can be securely mounted to a wall or floor.
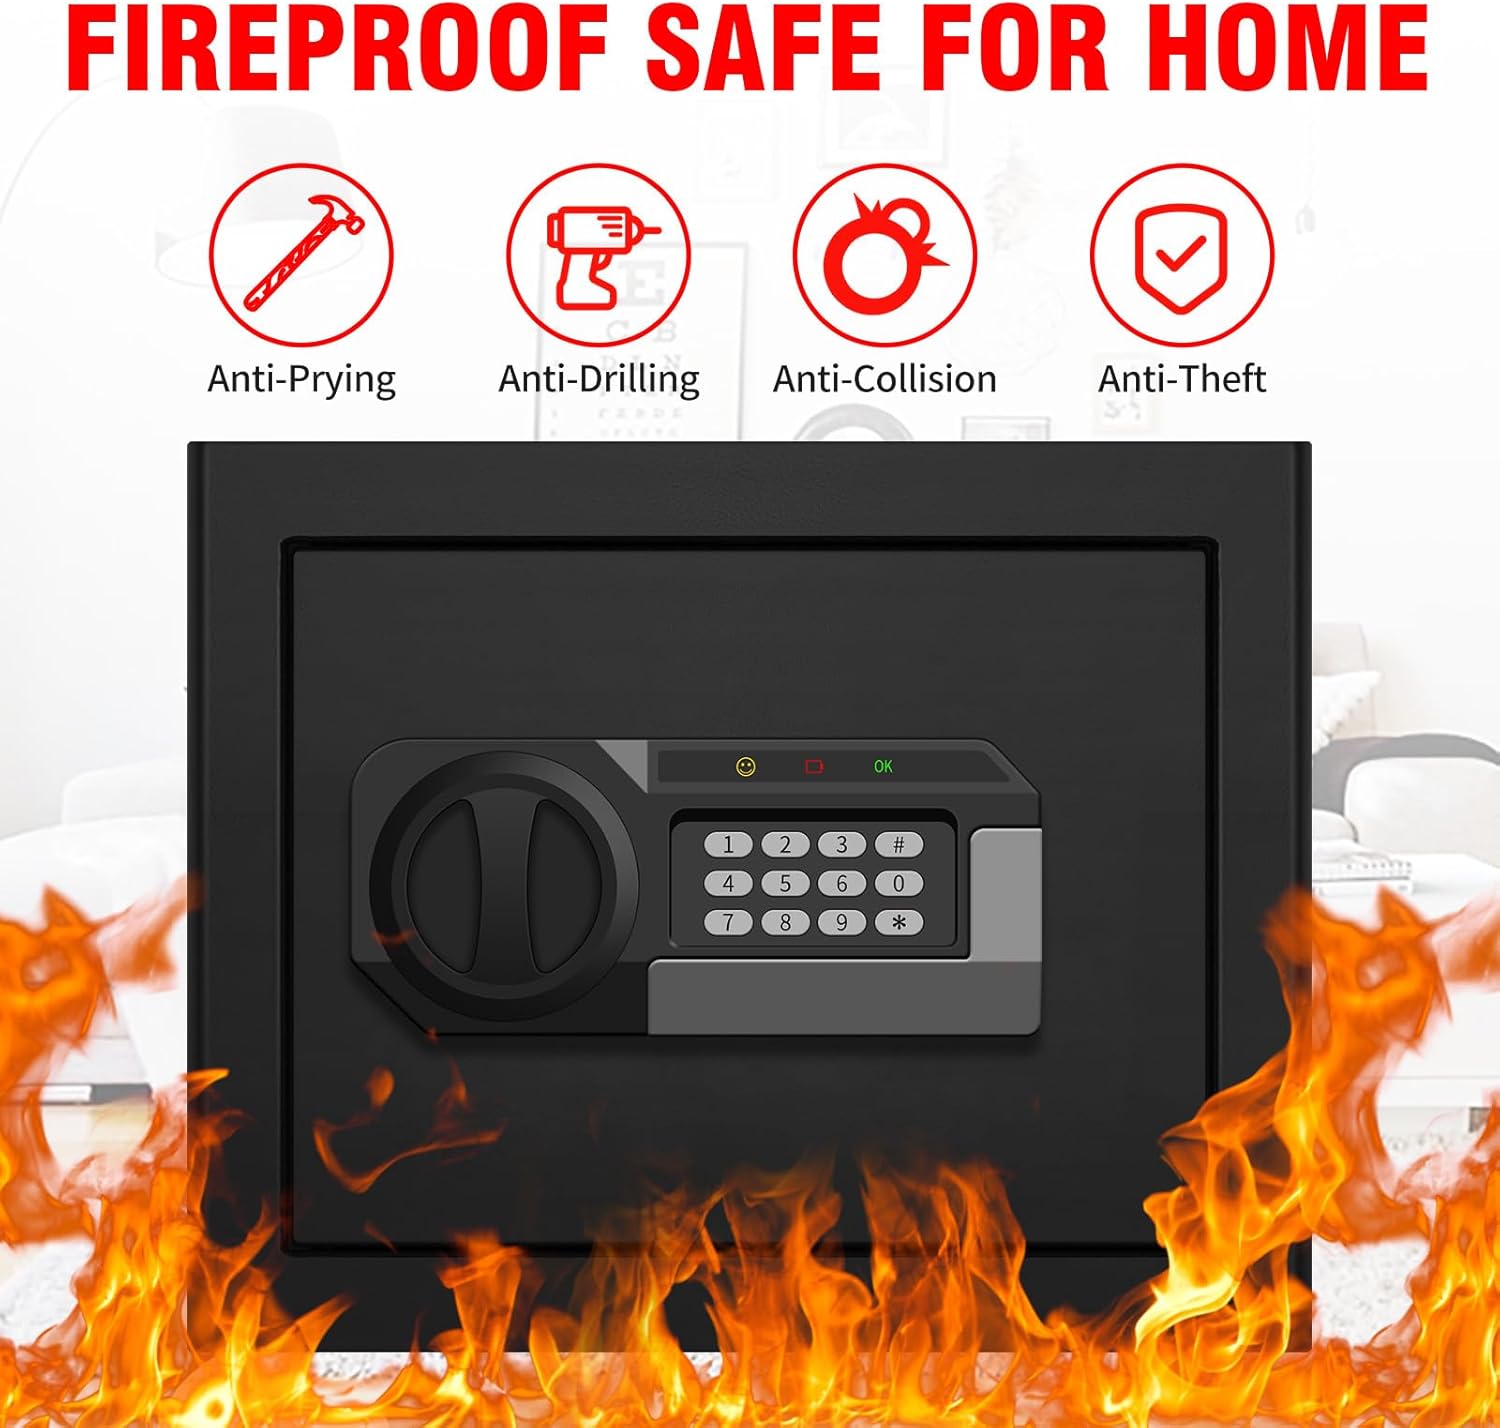
Image: Overview of the VIDXCVIT safe highlighting its anti-prying, anti-drilling, anti-collision, and anti-theft capabilities, surrounded by flames to denote fire resistance.
2. Setup
2.1 Initial Opening and Battery Installation
Upon receiving your safe, it will be locked. Use the provided emergency keys to open it for the first time and install the batteries.
- Locate the emergency keyhole, usually concealed behind the keypad cover or a small plate.
- Insert one of the emergency keys and turn it to unlock the safe.
- Open the safe door.
- Inside the door, locate the battery compartment. This safe requires 4 AA batteries (not included).
- Insert the batteries, ensuring correct polarity.
- Close the battery compartment.
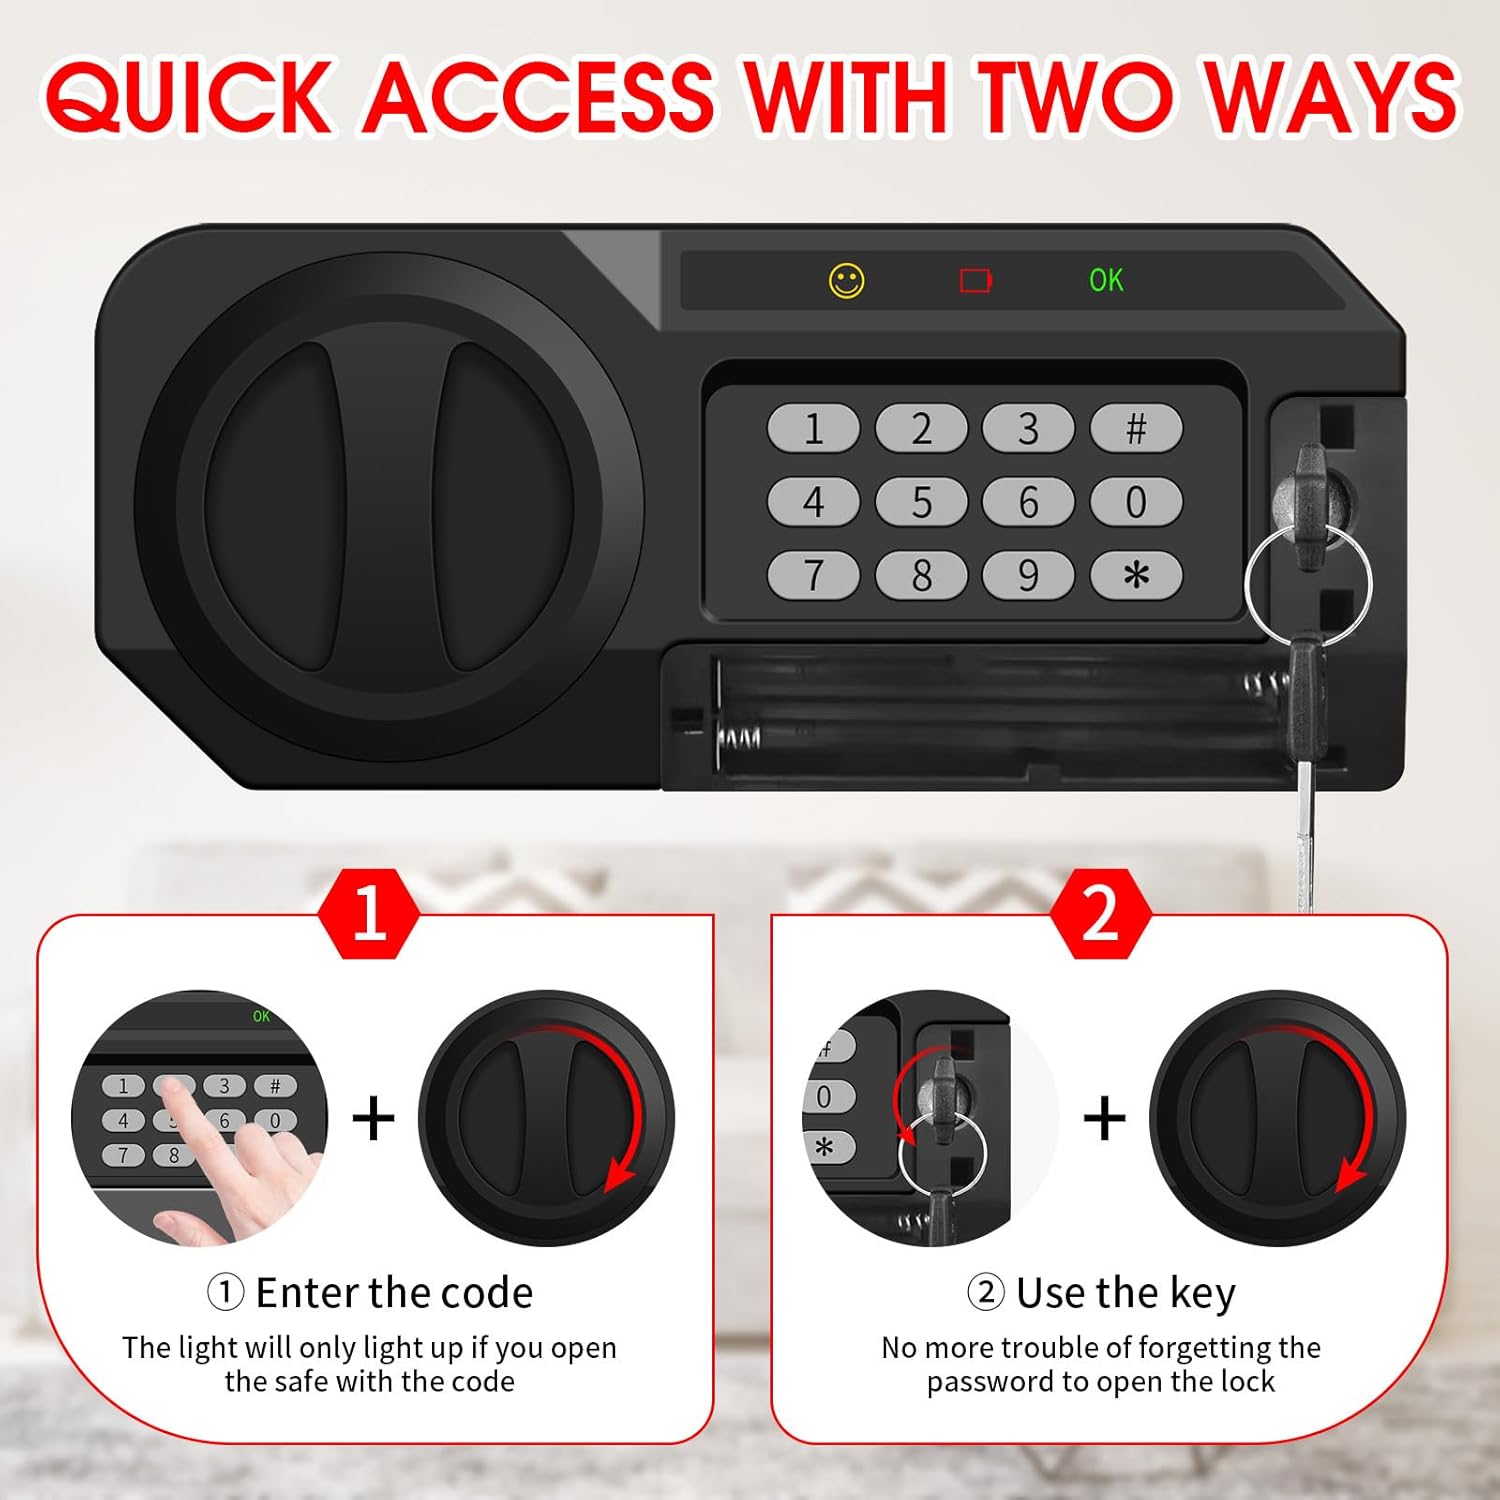
Image: The safe's keypad and emergency key slot, illustrating the two methods of quick access. A note advises against storing the emergency key inside the safe.
2.2 Setting Your Personal Code
After installing batteries, you can set your personal access code. The initial password is typically "159".
- With the safe door open, locate the red setting button on the inside of the door, near the hinge.
- Press the red setting button. You will hear a beep, and the indicator light on the keypad will illuminate.
- On the keypad, enter your desired 3 to 8 digit personal code.
- Press the '#' key to confirm. You will hear a confirmation beep.
- To set a master code, enter "00" then press the setting button inside the door. Enter your desired 3-8 digit master code and press '#'.
- Test your new code with the door open to ensure it works correctly before closing the safe.

Image: Detailed steps for setting both personal and master codes using the internal setting button and the external keypad.
2.3 Mounting the Safe
The safe can be mounted to a wall or floor for added security. Mounting hardware (screws) is included.
- Choose a suitable location for mounting.
- Mark the drilling points through the pre-drilled holes on the back or bottom of the safe.
- Drill pilot holes in the wall or floor at the marked positions.
- Align the safe with the drilled holes and secure it using the provided mounting screws.
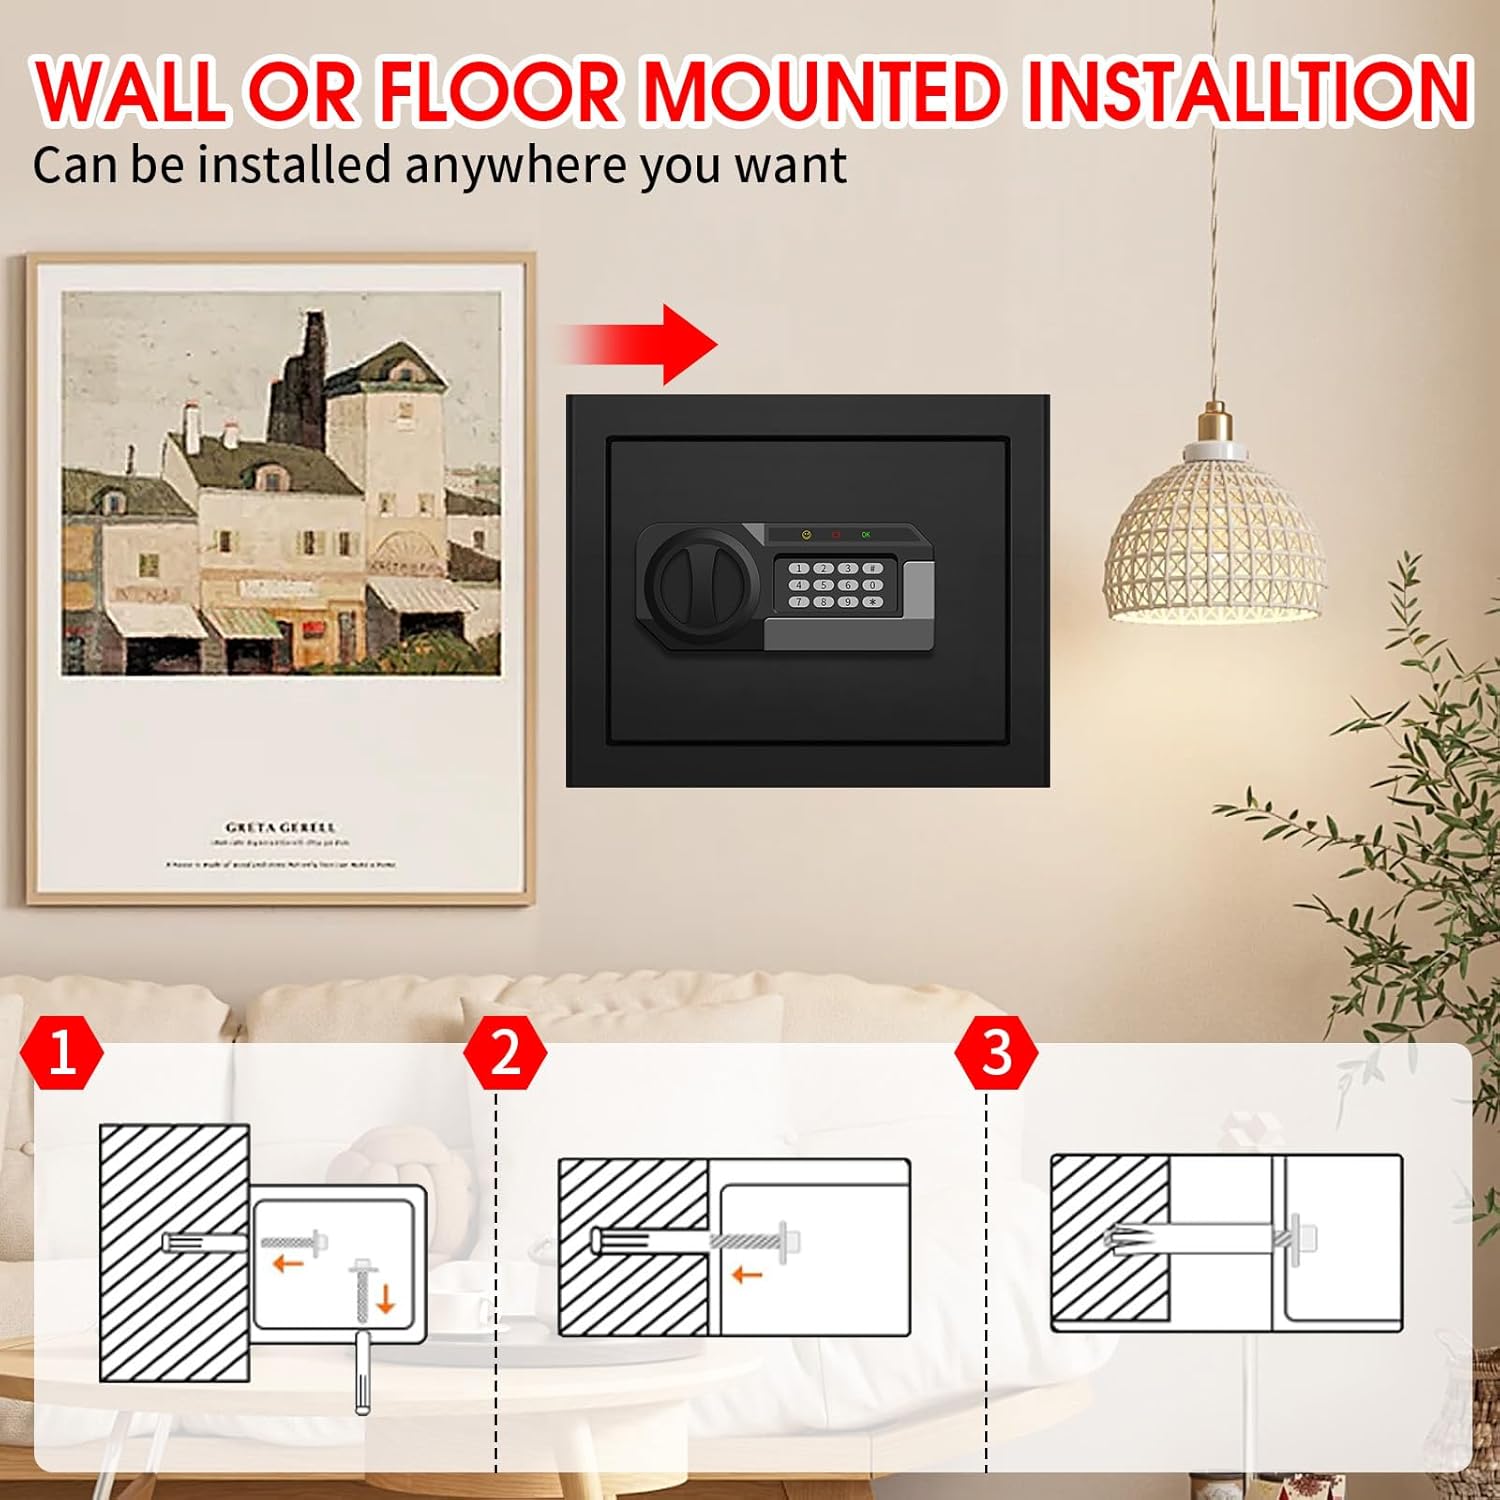
Image: A three-step diagram illustrating how to mount the safe to a wall using screws.
3. Operating Instructions
3.1 Opening the Safe
- Using the Digital Keypad: Enter your personal 3-8 digit code, then press '#'. The safe will unlock, and the door can be opened. The internal sensor light will activate for 30 seconds.
- Using the Emergency Key: If batteries are depleted or the code is forgotten, use one of the emergency keys to manually open the safe.
3.2 Closing the Safe
Close the safe door firmly. The locking bolts will automatically engage, securing the safe.
3.3 Anti-Theft Alarm System
The safe is equipped with an anti-theft alarm system:
- If an incorrect password is entered 3 times consecutively, the system will lock for 20 seconds.
- If an incorrect password is entered 6 times consecutively, the system will lock for 5 minutes and sound an alarm to alert you of unauthorized access.

Image: The safe with an alarm light flashing, illustrating the activation of the alarm system after multiple incorrect code entries.
3.4 Sensor Light
The intelligent sensor light inside the safe automatically turns on when the safe is opened via the keypad, providing visibility for retrieving items. It will turn off after 30 seconds.
4. Maintenance
- Battery Replacement: Replace the AA batteries when the low battery indicator light illuminates or if the keypad becomes unresponsive. Always replace all batteries at once with new ones.
- Cleaning: Clean the exterior of the safe with a soft, damp cloth. Avoid abrasive cleaners or solvents that could damage the finish.
- Key Storage: Store emergency keys in a secure location outside the safe.
5. Troubleshooting
| Problem | Possible Cause | Solution |
|---|---|---|
| Safe does not open with code. | Incorrect code entered; low batteries; keypad malfunction. | Re-enter code carefully. Replace batteries. Use emergency key to open. |
| Keypad is unresponsive. | Depleted batteries. | Replace all 4 AA batteries. |
| Alarm sounds unexpectedly. | Multiple incorrect code entries. | Wait for the lockout period to end. Enter the correct code. |
| Door does not close or lock properly. | Obstruction in the door frame; locking bolts not aligned. | Check for obstructions. Ensure the door is fully pushed shut. |
6. Specifications
- Brand: VIDXCVIT
- Model Number: 30 HC
- Capacity: 1.6 Cubic Feet
- Product Dimensions: 12.99"D x 14.57"W x 11.81"H
- Item Weight: 23.2 pounds
- Material: Low Carbon Steel
- Lock Type: Electronic Combination Lock
- Color: Black
- Special Features: Alarm System, Anti-Theft, Combination Lock, Removable Shelf, Sensor Light
- Mounting Type: Floor & Wall Mount
- Water Resistance Level: Water Resistant
- Included Components: 1 Safe box, 2 Emergency keys, 4 Mounting Screws, Mat, User Manual
- Batteries Required: Yes (4 AA batteries)
- Batteries Included: No
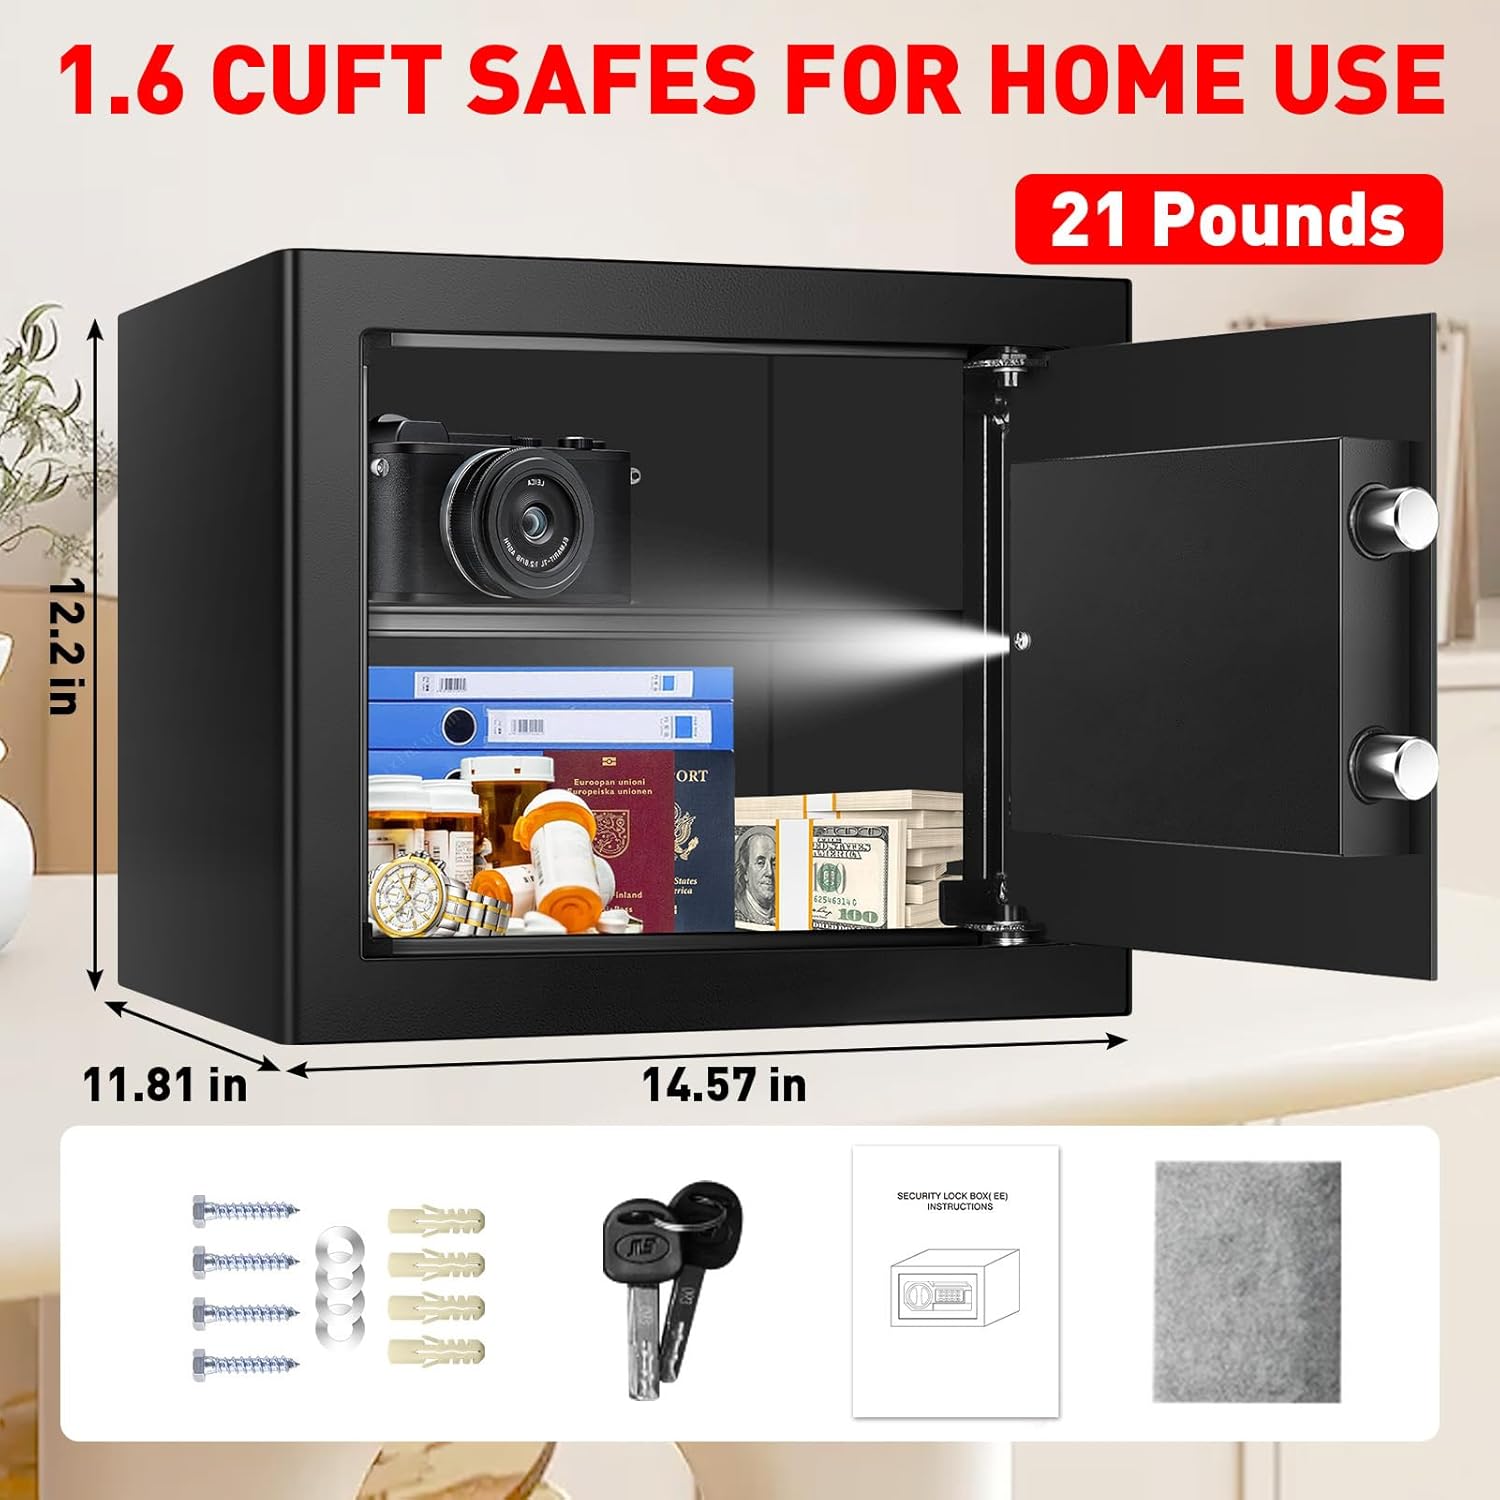
Image: The VIDXCVIT 1.6 CUFT safe with its external dimensions (14.57 in W x 11.81 in D x 12.2 in H) and a display of included accessories: mounting screws, emergency keys, user manual, and a protective mat.

Image: Two views of the safe's interior, demonstrating the versatility of the removable steel shelf for organizing items like cash, trophies, documents, gold, and medicine.
7. Warranty and Support
VIDXCVIT provides a lifetime warranty for this product, ensuring long-term peace of mind. Additionally, a 6-year return or exchange service is offered, along with lifetime technical support and free replacement parts service.
For technical assistance, warranty claims, or replacement parts, please contact VIDXCVIT customer support through the retailer's platform or the official brand website.