Betopper LPC007-R-2
BETOPPER LED Stage Lights User Manual
Model: LPC007-R-2
Brand: Betopper
1. Introduction
Thank you for purchasing the BETOPPER LED Stage Lights. This manual provides essential information for the safe and efficient operation of your new lighting system. Please read it thoroughly before use and retain it for future reference.
Safety Information
- Ensure proper ventilation to prevent overheating.
- Do not expose the lights to rain or moisture.
- Disconnect power before cleaning or servicing.
- Avoid direct eye exposure to the light source.
- Operate within specified voltage ranges (AC100-240V).
- Keep out of reach of children.
2. What's in the Box
Upon opening the package, please verify that all components are present and undamaged:
- 2x BETOPPER 54x3W RGB Par Light
- 2x sets Stage Lights installation Brackets and Screws
- User Manual (this document)
3. Specifications
| Feature | Detail |
|---|---|
| Model Number | LPC007-R-2 |
| Light Source Type | LED (54x3W RGB 3-in-1) |
| Brightness | 16200 lumen |
| Wattage | 162 Watts (Max Compatible: 180 Watts) |
| Beam Angle | 26 Degrees |
| Material | Aluminum, Stainless Steel |
| Finish Type | Powder Coated |
| Product Dimensions | 9.25"L x 9.25"W x 11.6"H |
| Item Weight | 10.33 pounds |
| Power Source | Corded Electric |
| Special Features | All 54 LED are RGB, Remote Control Support |
| Mounting Type | Ceiling Mount, Floor Mount |
4. Setup
4.1 Unpacking and Inspection
Carefully remove the lighting units and accessories from the packaging. Inspect each item for any signs of damage during transit. If any damage is found, contact your retailer immediately.
4.2 Mounting the Lights
The BETOPPER LED Stage Lights can be mounted in various configurations using the included brackets and screws. Ensure the mounting surface or truss is stable and capable of supporting the weight of the fixtures.
- Floor Mount: Use the adjustable brackets to position the lights on a flat, stable surface.
- Ceiling/Truss Mount: Securely attach the brackets to a compatible truss or ceiling structure using appropriate clamps (not included) and the provided screws. Ensure safety cables are used for overhead installations.

Figure 4.2.1: Two BETOPPER LED Stage Lights with remote controls.

Figure 4.2.2: Various views of the BETOPPER LED Stage Light, highlighting its design and connectivity options.

Figure 4.2.3: Detailed view of the light's rear panel with controls and ports.
4.3 Power Connection
Connect the provided power cable to the AC input on the rear of the fixture and then to a suitable power outlet. Ensure the power source matches the specified voltage (AC100-240V).
4.4 DMX Connection (Optional)
For DMX control, connect a DMX cable from your DMX controller to the DMX IN port of the first fixture. For multiple fixtures, daisy-chain them by connecting the DMX OUT of the first fixture to the DMX IN of the next, and so on. Ensure the last fixture in the chain has a DMX terminator connected to its DMX OUT port.
5. Operating Modes
The BETOPPER LED Stage Lights offer multiple operating modes, which can be selected via the digital display on the rear panel or the included remote control.
5.1 Remote Control Operation
The included remote control provides convenient access to various functions. Point the remote directly at the light's sensor for optimal response.

Figure 5.1.1: Comparison of lamp beads and remote control functionality.
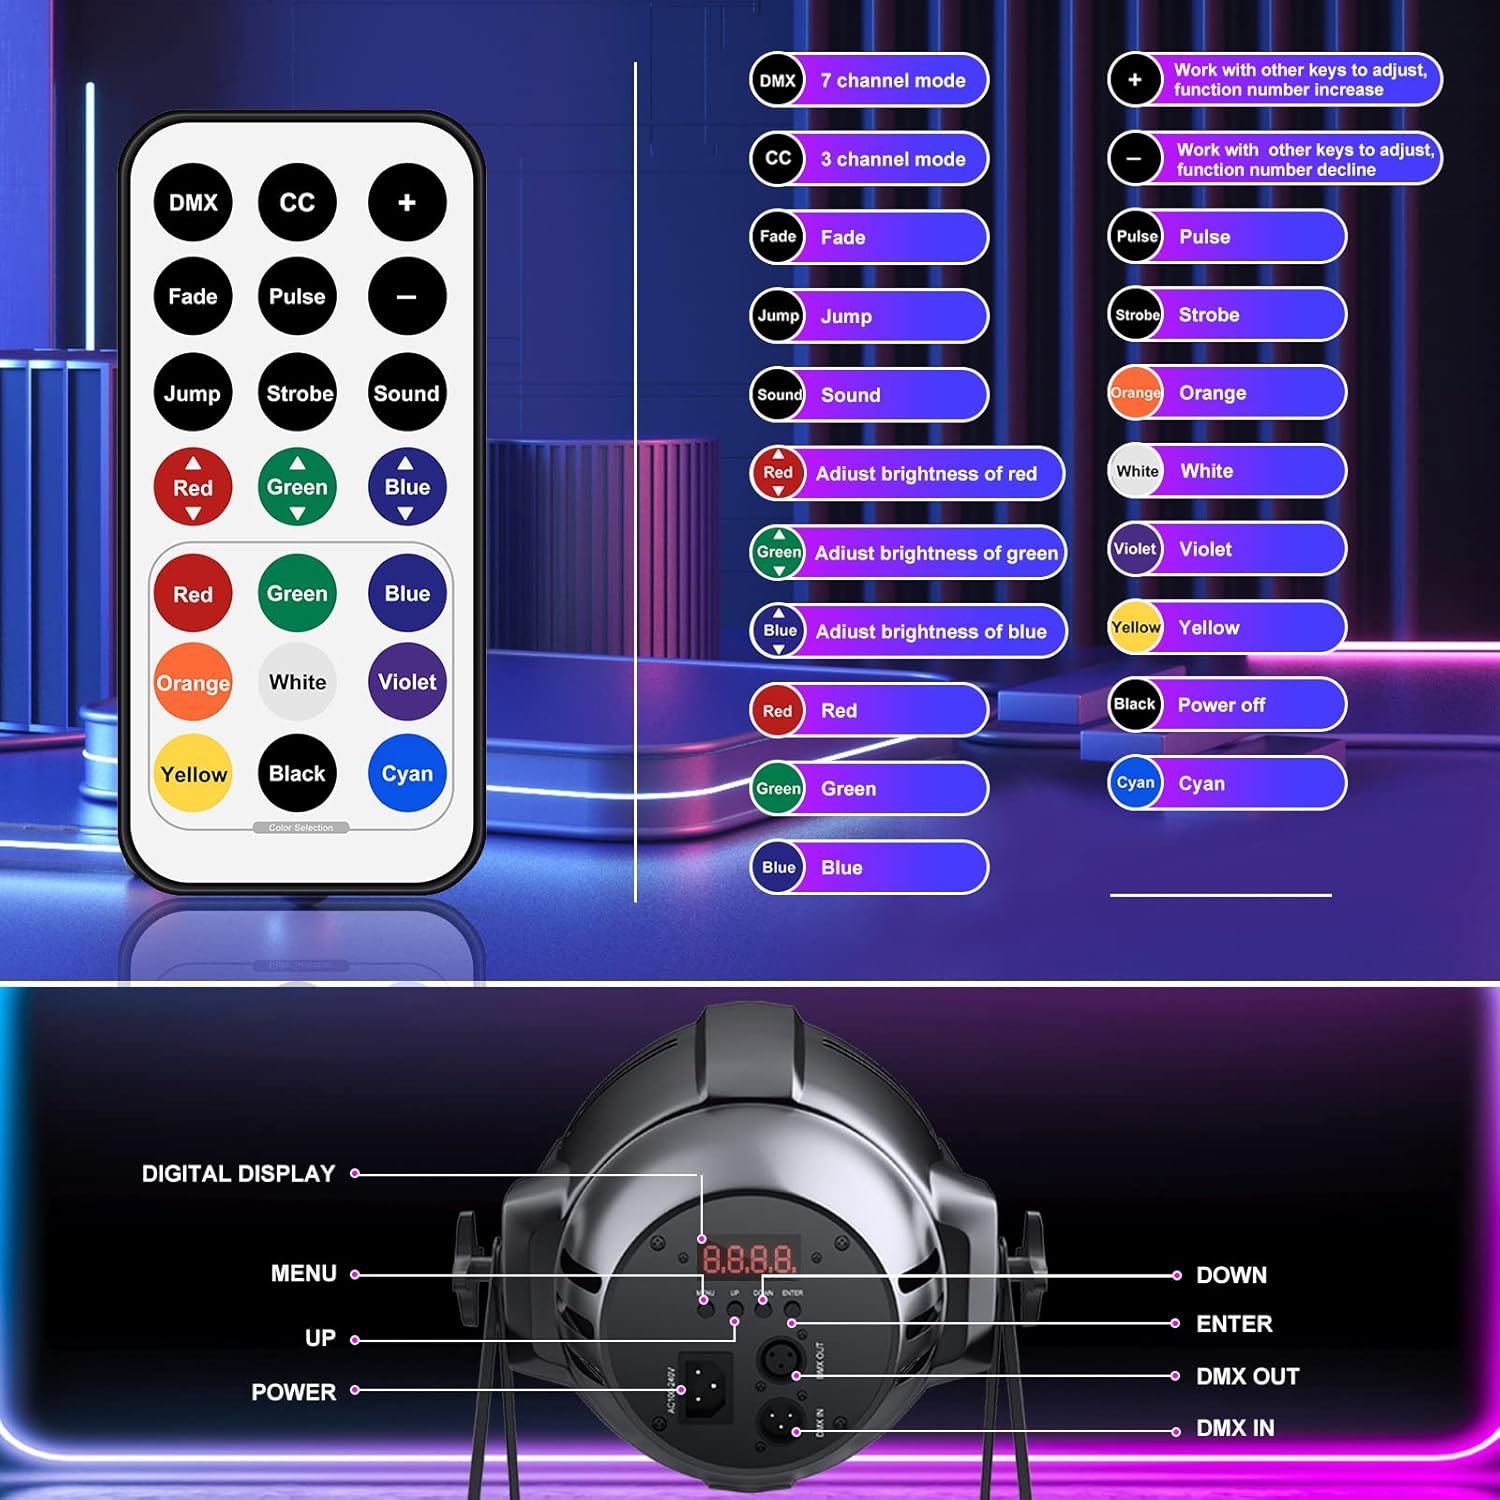
Figure 5.1.2: Remote control button functions.
Video 5.1.1: Demonstration of remote control functions including color changes, fade, jump, pulse, and strobe effects. This video also shows DMX control.
5.2 DMX 512 Control
The lights support DMX 512 protocol for professional control. Refer to the DMX channel chart (usually found in a separate DMX manual or appendix) for detailed channel assignments and functions. The lights feature 7-channel and 3-channel DMX modes.
5.3 Sound-Activated Mode
In sound-activated mode, the lights respond to ambient sound, changing colors and patterns according to the music beat. This mode is ideal for parties and events without a dedicated lighting controller.
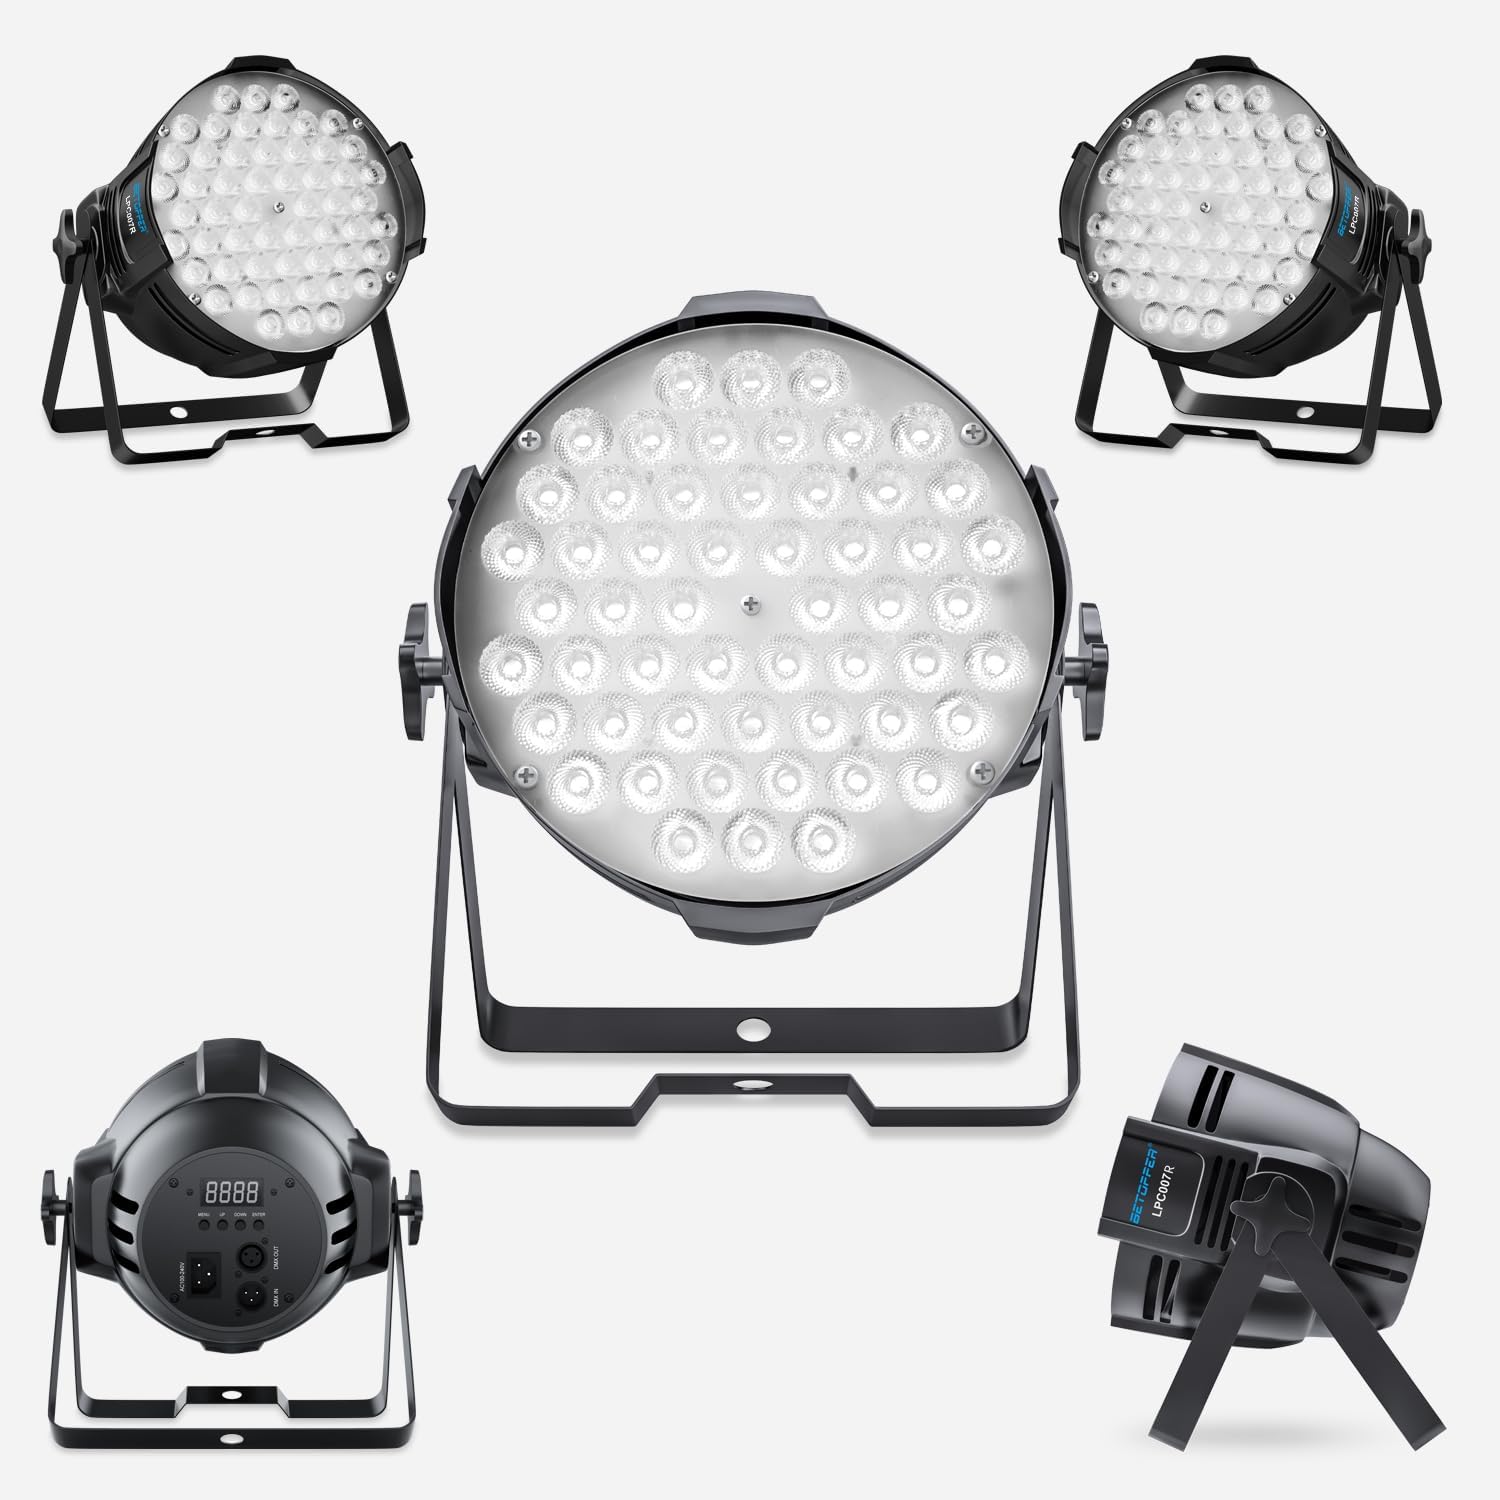
Figure 5.3.1: Illustration of the sound-activated control feature.
Video 5.3.1: Demonstration of the sound-activated mode, showing lights changing colors and patterns to music.
5.4 Auto Mode
The auto mode cycles through pre-programmed light shows and color sequences automatically, providing dynamic lighting effects without external input.
5.5 Master-Slave Mode
In Master-Slave mode, one light acts as the master unit, controlling all other connected slave units. This allows for synchronized lighting effects across multiple fixtures without a DMX controller.
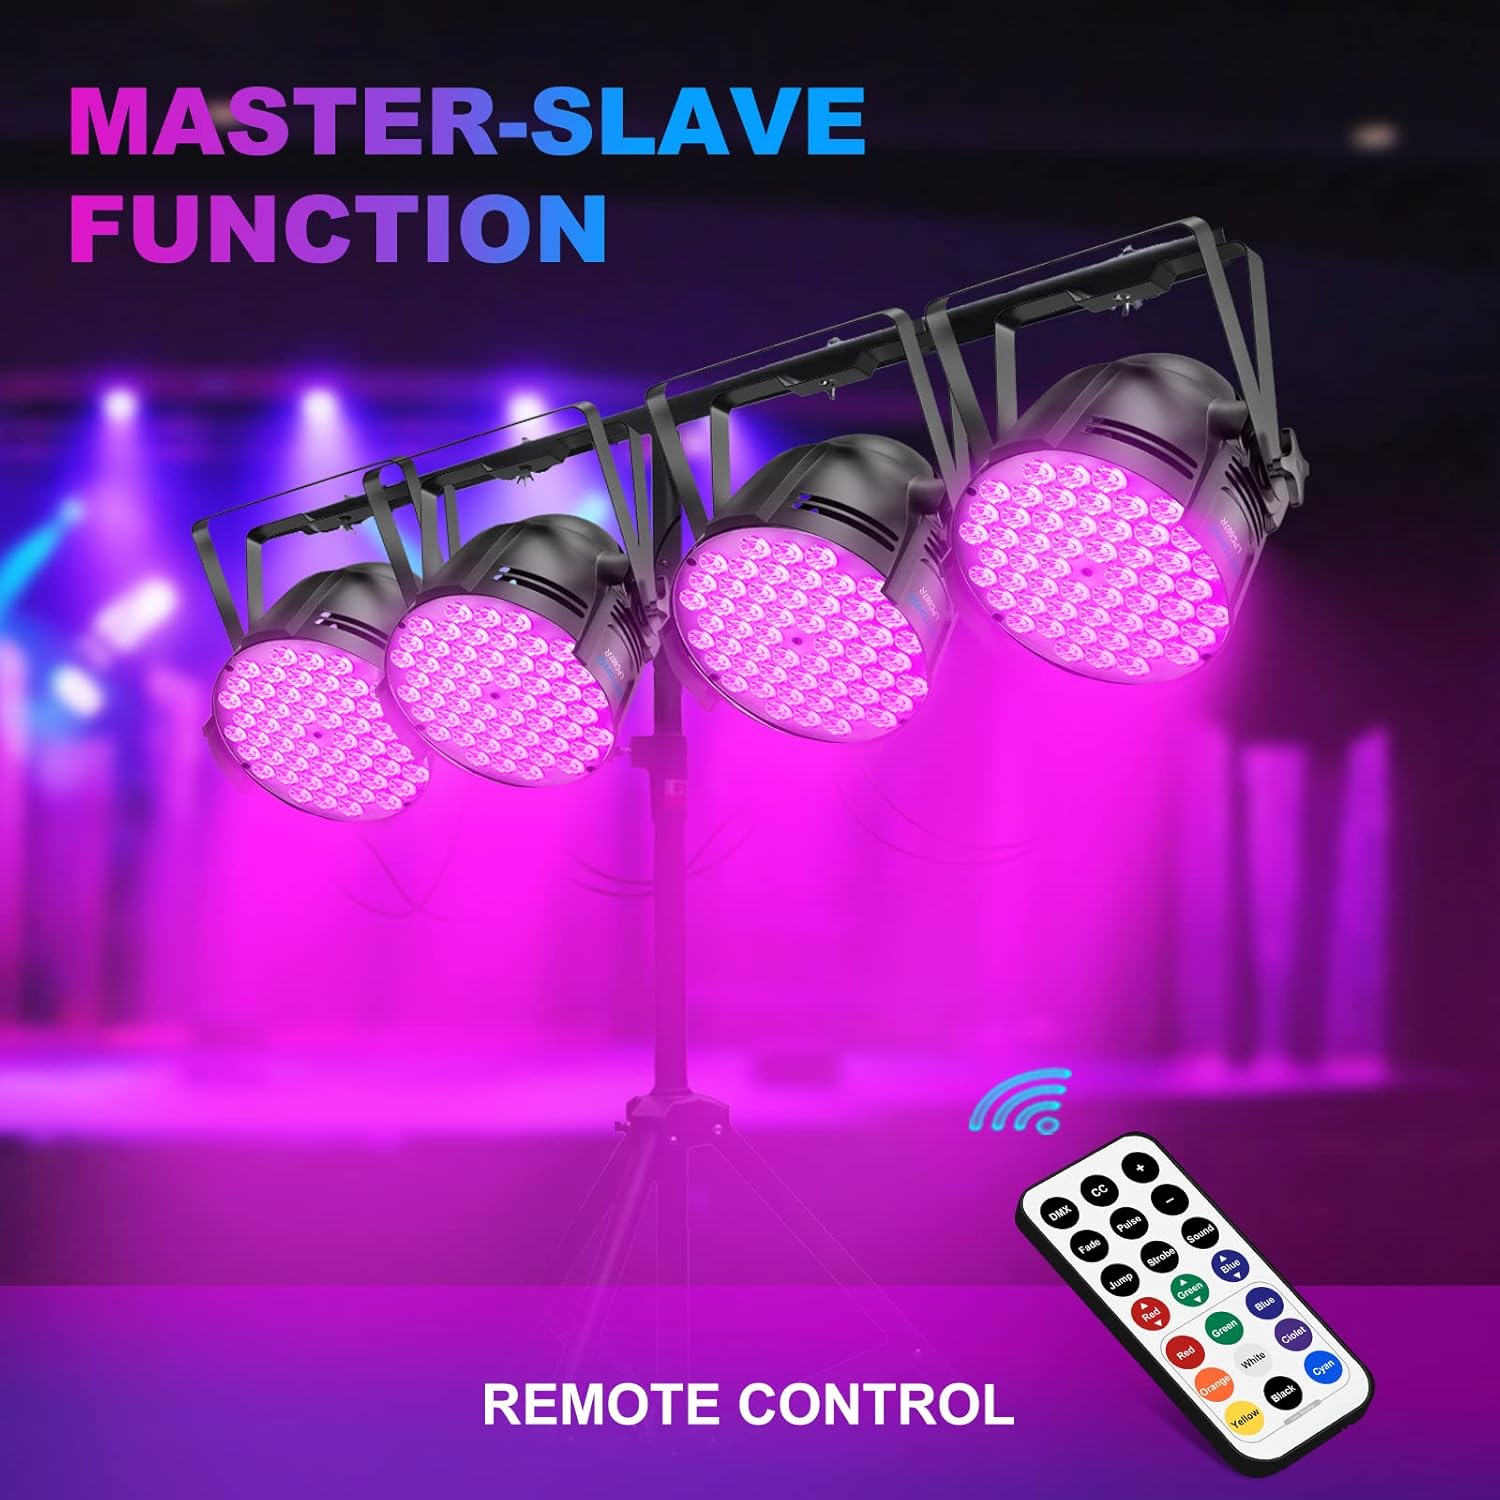
Figure 5.5.1: Setup demonstrating the Master-Slave function with multiple lights.
6. Maintenance
Regular maintenance ensures the longevity and optimal performance of your BETOPPER LED Stage Lights.
- Cleaning: Periodically clean the lens and housing with a soft, dry cloth. Do not use abrasive cleaners or solvents.
- Ventilation: Ensure the ventilation openings are clear of dust and debris to prevent overheating.
- Cable Inspection: Regularly check power and DMX cables for any signs of wear or damage. Replace damaged cables immediately.
- Storage: When not in use, store the lights in a cool, dry place, away from direct sunlight and extreme temperatures.
7. Troubleshooting
| Problem | Possible Cause | Solution |
|---|---|---|
| Light does not turn on. | No power, faulty cable, internal issue. | Check power connection and outlet. Test with a different cable. If problem persists, contact support. |
| Remote control not responding. | Remote battery low, remote not pointed correctly, sensor obstructed. | Replace remote battery. Ensure direct line of sight to the light's sensor. Clear any obstructions. |
| Lights not synchronizing in Master-Slave mode. | Incorrect mode setting, faulty DMX cable, incorrect DMX addressing. | Ensure master is set to Master mode and slaves to Slave mode. Check DMX cable connections. Verify DMX addressing if applicable. |
| Fan noise is loud. | Normal operation, dust accumulation. | Some fan noise is normal for cooling. Clean fan vents if excessive dust is present. |
8. Warranty and Support
For warranty information and technical support, please refer to the official Betopper website or contact your retailer. You can also visit the Betopper Store on Amazon for additional resources and product information.
A digital version of the user guide is available at: User Guide (PDF)
Ask a question about this manual
Ask about setup, troubleshooting, compatibility, parts, safety, or missing instructions. Manuals+ will review the question and use this page’s manual context to help answer it.