Introduction
Thank you for choosing the Nicama Baofeng BF-888S Walkie Talkie. This 16-channel handheld two-way radio is designed for reliable and clear communication over distances of 1-3 km, depending on terrain. It features a durable design, a 1500mAh Li-ion battery, and essential functions like VOX, scanning, and an emergency alarm. This manual will guide you through the setup, operation, and maintenance of your new device.
What's in the Box
Each Nicama Baofeng BF-888S package includes the following components:
- 10 x Walkie Talkies
- 10 x Li-ion battery pack
- 10 x Charger
- 10 x Belt clip
- 10 x User's manual
- 10 x Headphone

Image: A comprehensive view of the 10-pack contents, showcasing multiple walkie-talkies, individual charging docks, rechargeable batteries, belt clips, earpieces, and user manuals, all neatly arranged.
Product Features
- FCC Authorized: The BF-888S two-way radio is authorized by FCC with FCC ID: 2AJGM-BF888S.
- Extended Range: Achieves a communication range of 1-3 km, depending on environmental conditions and terrain.
- 16 Memory Channels: Provides 16 channels for versatile communication.
- 50 CTCSS / 105 CDCSS: Enhances privacy and reduces interference.
- VOX Function: Voice-operated transmission for hands-free operation (requires compatible VOX earpieces, not included).
- Scanning & Monitor Functions: Allows scanning for active channels and monitoring specific frequencies.
- English Voice Prompt: Provides audible feedback for channel changes and other functions.
- 1500mAh Li-ion Battery: Long-lasting rechargeable battery for extended use.
- Battery Saving Features: Optimizes power consumption to extend battery life.
- Low Voltage Alert: Notifies users when the battery is running low.
- Emergency Alarm: Activates an audible alarm for emergency situations (can be turned on using Channel 11).
- High Illumination Flashlight: Integrated flashlight for convenience in low-light conditions.
- Intelligent Charging: Smart charging system for efficient and safe battery replenishment.
Setup Guide
1. Install the Battery
- Align the battery pack with the back of the radio.
- Slide the battery upwards until it clicks securely into place.
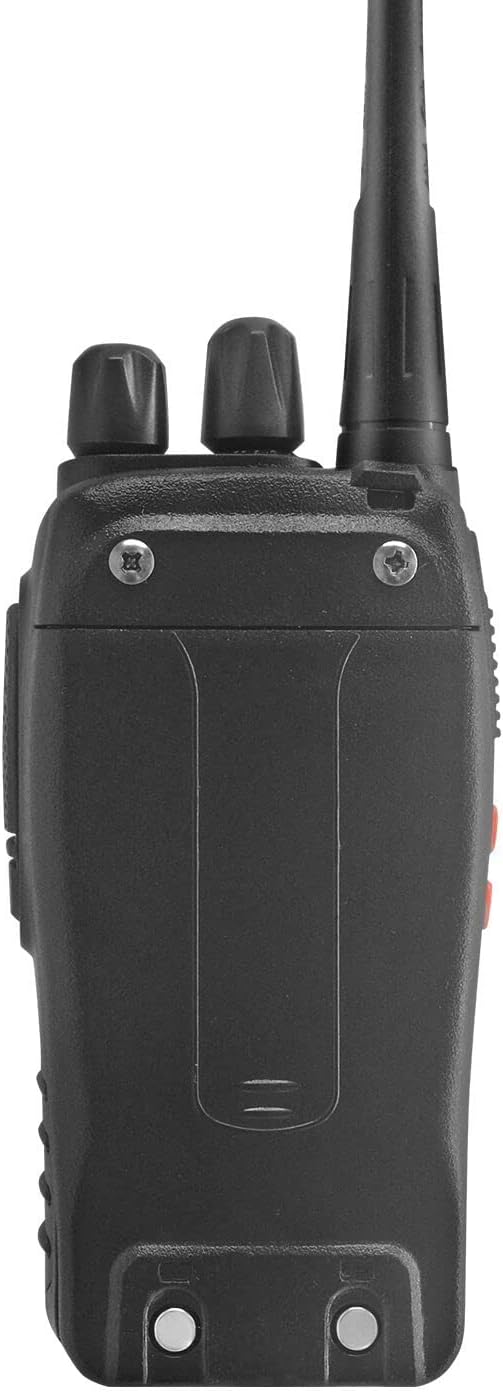
Image: A close-up of the rear of the walkie-talkie, showing the battery attachment points and the overall sturdy construction.
2. Attach the Antenna
- Screw the antenna clockwise into the connector on the top of the radio until it is firm. Do not overtighten.
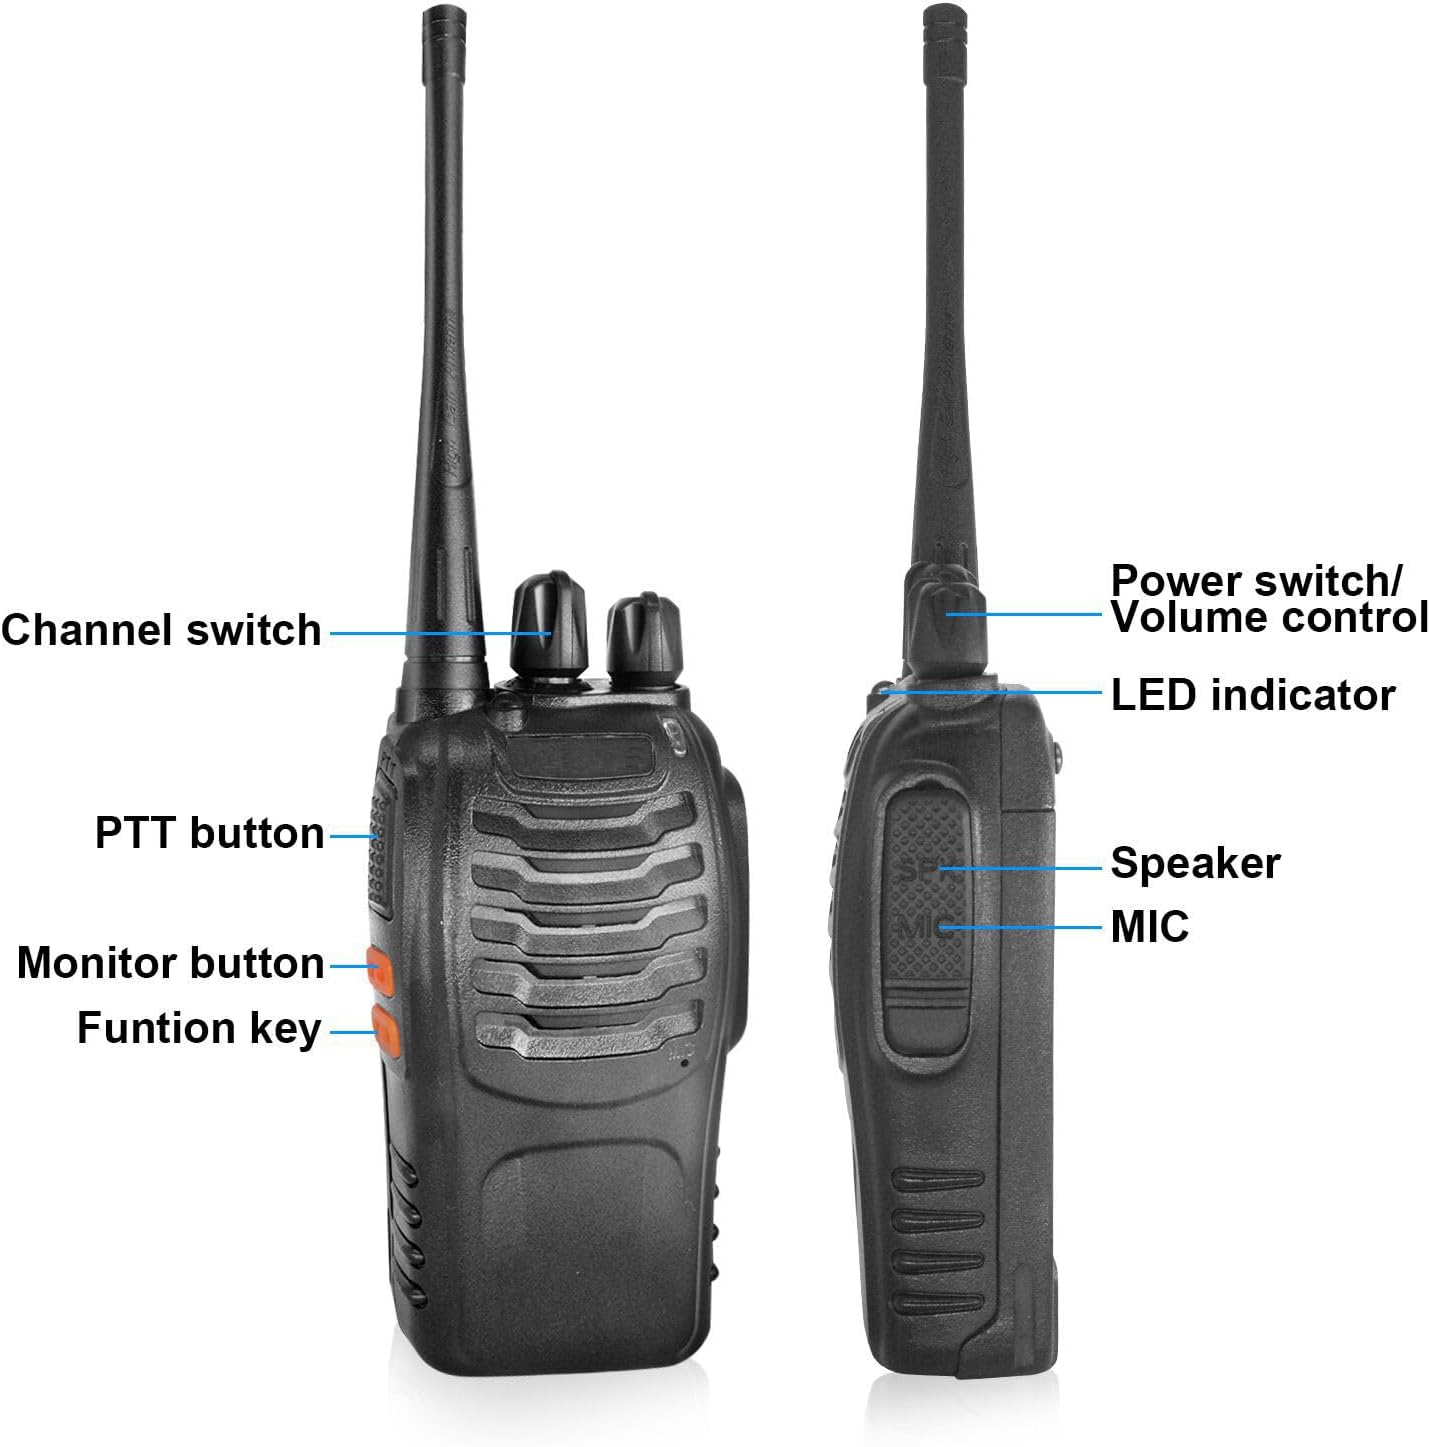
Image: A detailed view of the top section of the walkie-talkie, highlighting the antenna connection point, channel switch, and power/volume control, with labels for each component.
3. Attach the Belt Clip
- Use the provided screws to attach the belt clip to the designated area on the back of the radio.

Image: A close-up of the detachable belt clip, showing its robust construction and the screw holes for attachment to the radio.
4. Charge the Battery
- Place the radio (with battery installed) into the charging cradle.
- Plug the charger into a power outlet. The indicator light on the charger will show charging status (typically red for charging, green for fully charged).

Image: A single walkie-talkie standing upright in its charging dock, with the power cable connected, illustrating the charging process.
Operating Instructions
1. Power On/Off and Volume Control
- To power on the radio, rotate the top-most knob clockwise. You will hear a voice prompt indicating the current channel.
- Continue rotating the same knob clockwise to increase the volume, and counter-clockwise to decrease it.
- To power off, rotate the knob counter-clockwise until it clicks.
2. Channel Selection
- Rotate the middle knob (Channel Switch) to select one of the 16 available channels. A voice prompt will announce the selected channel number.
- Ensure all radios intended for communication are set to the same channel.
3. Push-to-Talk (PTT)
- To transmit, press and hold the large PTT button on the side of the radio. Speak clearly into the microphone. The LED indicator will turn red while transmitting.
- Release the PTT button to stop transmitting and listen for a response. The LED indicator will turn green when receiving a signal.
4. Flashlight Function
- Press the 'Funtion key' (usually the bottom orange button on the side) to activate the built-in flashlight.
- Press it again to switch to strobe mode (flashing light).
- Press a third time to turn the flashlight off.
5. Earpiece Usage
- Plug the earpiece into the dual-pin jack on the side of the radio.
- Position the earpiece comfortably in your ear and clip the microphone/PTT button to your collar for easy access.
- Use the PTT button on the earpiece to transmit messages.

Image: A close-up of the included earpiece, featuring an ear hook, an in-line microphone, and a push-to-talk (PTT) button, designed for discreet and hands-free communication.
6. VOX Function (Voice Operated Exchange)
The VOX function allows for hands-free transmission. When activated, the radio will automatically transmit when it detects your voice, eliminating the need to press the PTT button. This feature requires compatible VOX earpieces, which are not included in this package.
Specifications
| Feature | Specification |
|---|---|
| RF Rated Power | ≤ 5W |
| Channel Capacity | 16 |
| Operated Voltage | 3.7 V |
| Battery | 1500MAh Li-ion |
| Frequency Stability | ±2.5ppm |
| Operated Temperature | -30°c - +60°c |
| Antenna Impedance | 50Ω |
| Dimensions (L×W×H) (with battery, without antenna) | 60x33x115mm |
| Communication Range | 1-3 km |
| Transmitter RF Power Output | 3W |
| Transmitter Modulation | F3E |
| Transmitter Spurious Emission | ≤65dB |
| Transmitter Audio Distortion | ≤5% |
| Transmitting Current | ≤1.3A |
| Receiver Sensitivity (12dB SINAD) | ≤0.20 uV |
| Receiver Selectivity | 55dB/50dB |
| Receiver Intermediation | ≥65dB |
| Receiver Adjacent Channel Selectivity | ≥60dB |
| Receiver Spurious Response | ≥60dB |
| Receiver Audio Power Output | 1000mW |
Maintenance
- Cleaning: Wipe the radio's surface with a soft, damp cloth. Do not use harsh chemicals or abrasive cleaners.
- Battery Care: To prolong battery life, avoid overcharging and fully discharging the battery frequently. Store the radio and battery in a cool, dry place when not in use for extended periods.
- Antenna: Ensure the antenna is securely attached. Do not operate the radio without an antenna, as this can damage the device.
Troubleshooting
- No Power: Ensure the battery is fully charged and correctly installed. Rotate the power/volume knob clockwise to turn on the device.
- Cannot Transmit or Receive: Verify that all radios are on the same channel. Check the antenna connection. Ensure the battery has sufficient charge.
- Poor Audio Quality: Adjust the volume. Ensure the antenna is properly connected. Move to an area with fewer obstructions.
- Limited Range: Ensure the power setting is on HIGH (this may require programming with a cable, computer, and software). Obstructions like buildings and dense foliage can significantly reduce range.
- Emergency Alarm Activation: If the emergency alarm is accidentally activated, it can typically be turned off using Channel 11.
Warranty and Support
For warranty information, technical support, or service inquiries, please refer to the contact details provided with your purchase documentation or visit the official Nicama website. Keep your proof of purchase for warranty claims.