MOCW 40100
MOCW 40100 Wheel Hub Remover Tool
Model: 40100 | Brand: MOCW
Introduction
This manual provides detailed instructions for the safe and effective use of the MOCW 40100 Wheel Hub Remover Tool. This tool is designed to facilitate the removal of frozen or stubborn wheel hub assemblies without causing damage to other suspension components. It is compatible with most 5, 6, and 8 lug hub assemblies found on various cars and trucks.
Please read this manual thoroughly before operating the tool to ensure proper usage and safety.
Product Overview and Package Contents
The MOCW 40100 Wheel Hub Remover Tool kit includes the following components:
- Hub Removal Plate (Part No. 40110)
- Threaded Insert (Part No. 40090)
- Screw Assembly (Part No. 43670)
- Washers (Part No. 40080) - 2 pieces

Image: Components of the MOCW 40100 Wheel Hub Remover Tool kit, including the hub removal plate, threaded insert, screw assembly, and washers.
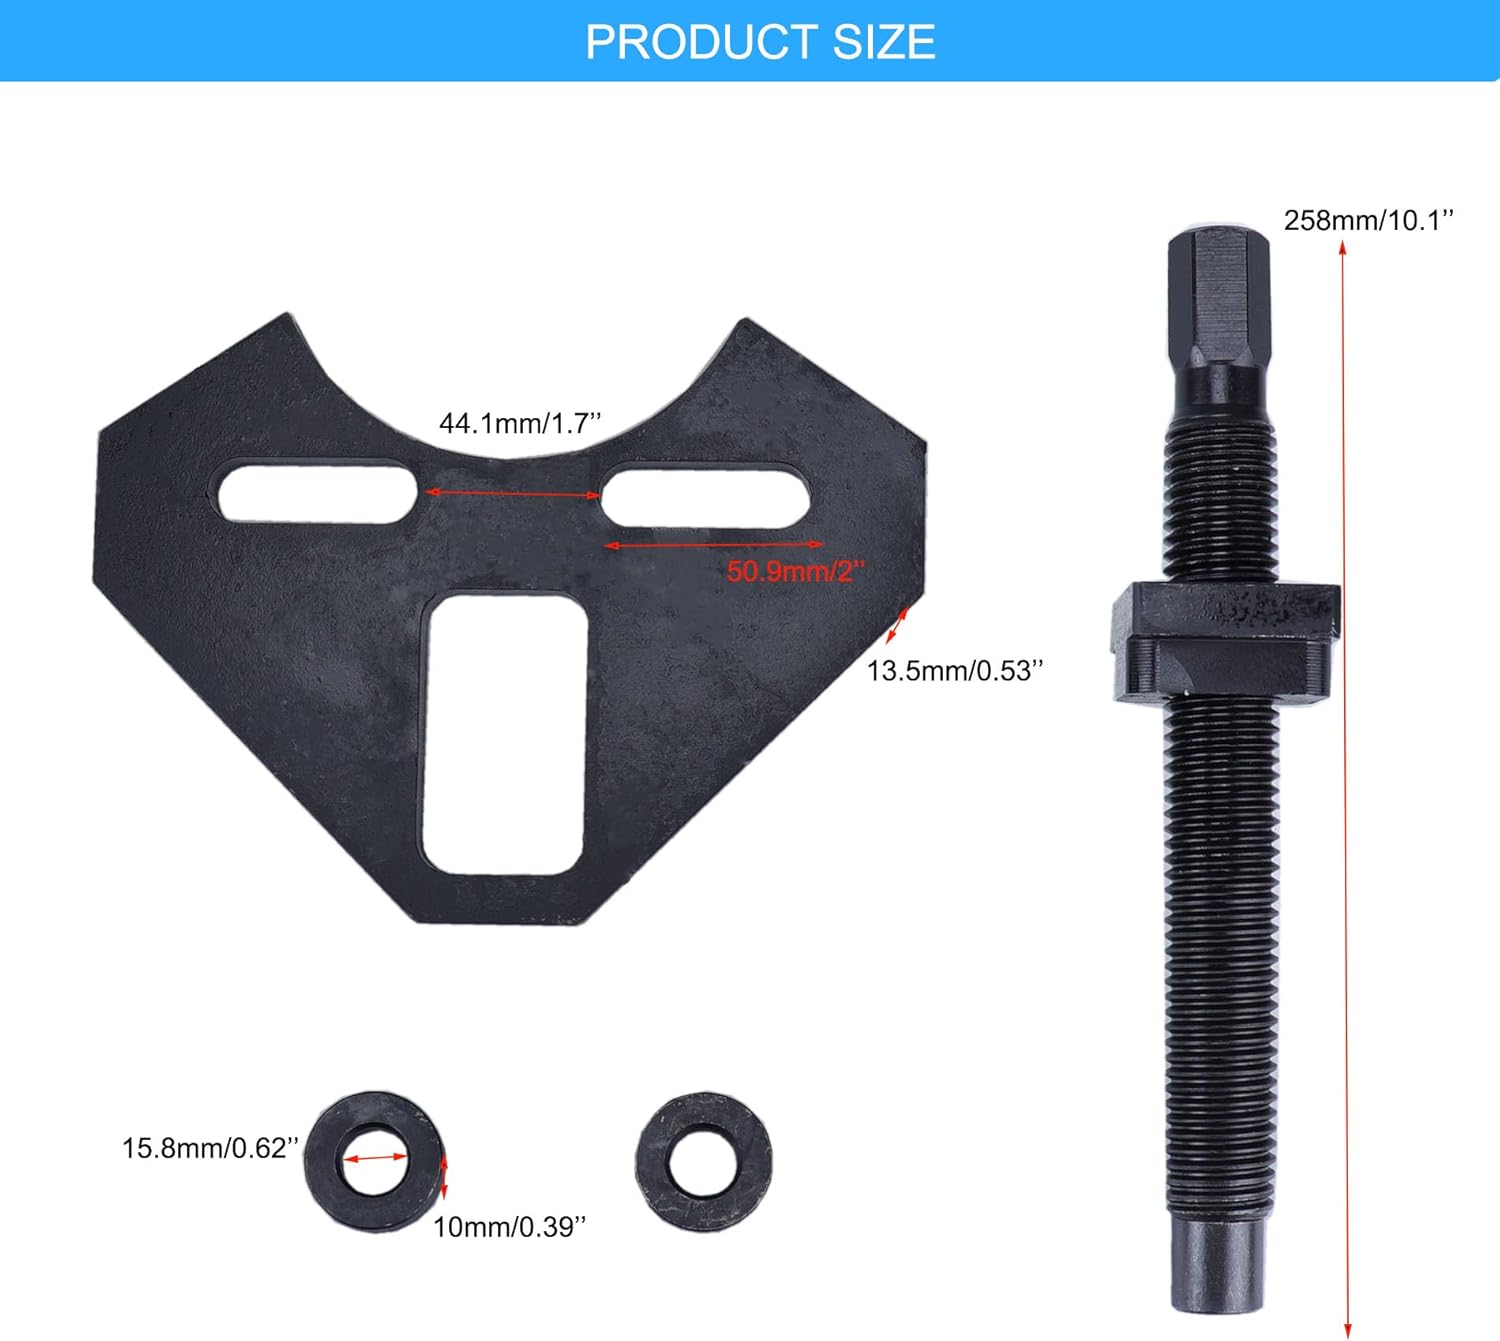
Image: Detailed dimensions of the MOCW 40100 Wheel Hub Remover Tool components, showing measurements for the plate, screw assembly, and washers.
Specifications
- Material: High-quality steel for strength and durability.
- Compatibility: Designed for most 5, 6, and 8 lug hub assemblies.
- Drive Plate Thickness: 1/2 inch.
- Function: Safely removes frozen hub assemblies without damaging suspension components.
- Manufacturer Part Number: US-MOCW1132
- Dimensions: Approximately 29.39 x 23.6 x 7.11 cm (shipping dimensions).
- Weight: Approximately 3.19 Kilograms.
Setup and Preparation
Before beginning the hub removal process, ensure you have the following:
- Appropriate safety gear (gloves, eye protection).
- A wrench or impact wrench for tightening lug nuts.
- A drill or hammer (optional, for assistance with stubborn hubs).
- Your vehicle securely lifted and supported.
Verify that the tool is compatible with your vehicle's hub assembly (5, 6, or 8 lug). The tool is designed to fit securely onto the existing lug studs.

Image: The hub remover tool positioned on a vehicle's hub assembly, demonstrating its intended application for 5, 6, and 8 lug patterns.
Operating Instructions
Follow these steps carefully to remove a wheel hub assembly:
- Attach the Drive Plate: Secure the Hub Removal Plate (40110) to the wheel hub using the provided hardened washers (40080) and the vehicle's existing lug nuts. Tighten the lug nuts firmly with a wrench to ensure the plate is stable.
- Insert Threaded Component: Place the Threaded Insert (40090) into the central opening of the Hub Removal Plate.
- Engage Forcing Screw: Insert the Screw Assembly (43670) through the threaded insert. Turn the forcing screw until it makes contact with a solid surface on the vehicle's suspension or chassis.
- Apply Force: Gradually apply force to the forcing screw. You can use a wrench, impact wrench, or a drill/hammer to assist in turning the screw. The screw will push against the solid surface, thereby pressing the hub assembly out.
- Even Removal: To completely and safely remove the hub, ensure that the forcing screw pushes from at least two different solid points. Avoid applying pressure from only one point, as this can damage the tool or the hub assembly. If the hub is particularly stubborn, alternate pressure points.

Image: A four-panel illustration demonstrating the operational steps: 1. Bolting the drive plate, 2. Placing the threaded insert, 3. Inserting the forcing screw, and 4. Applying force from multiple points for complete removal.
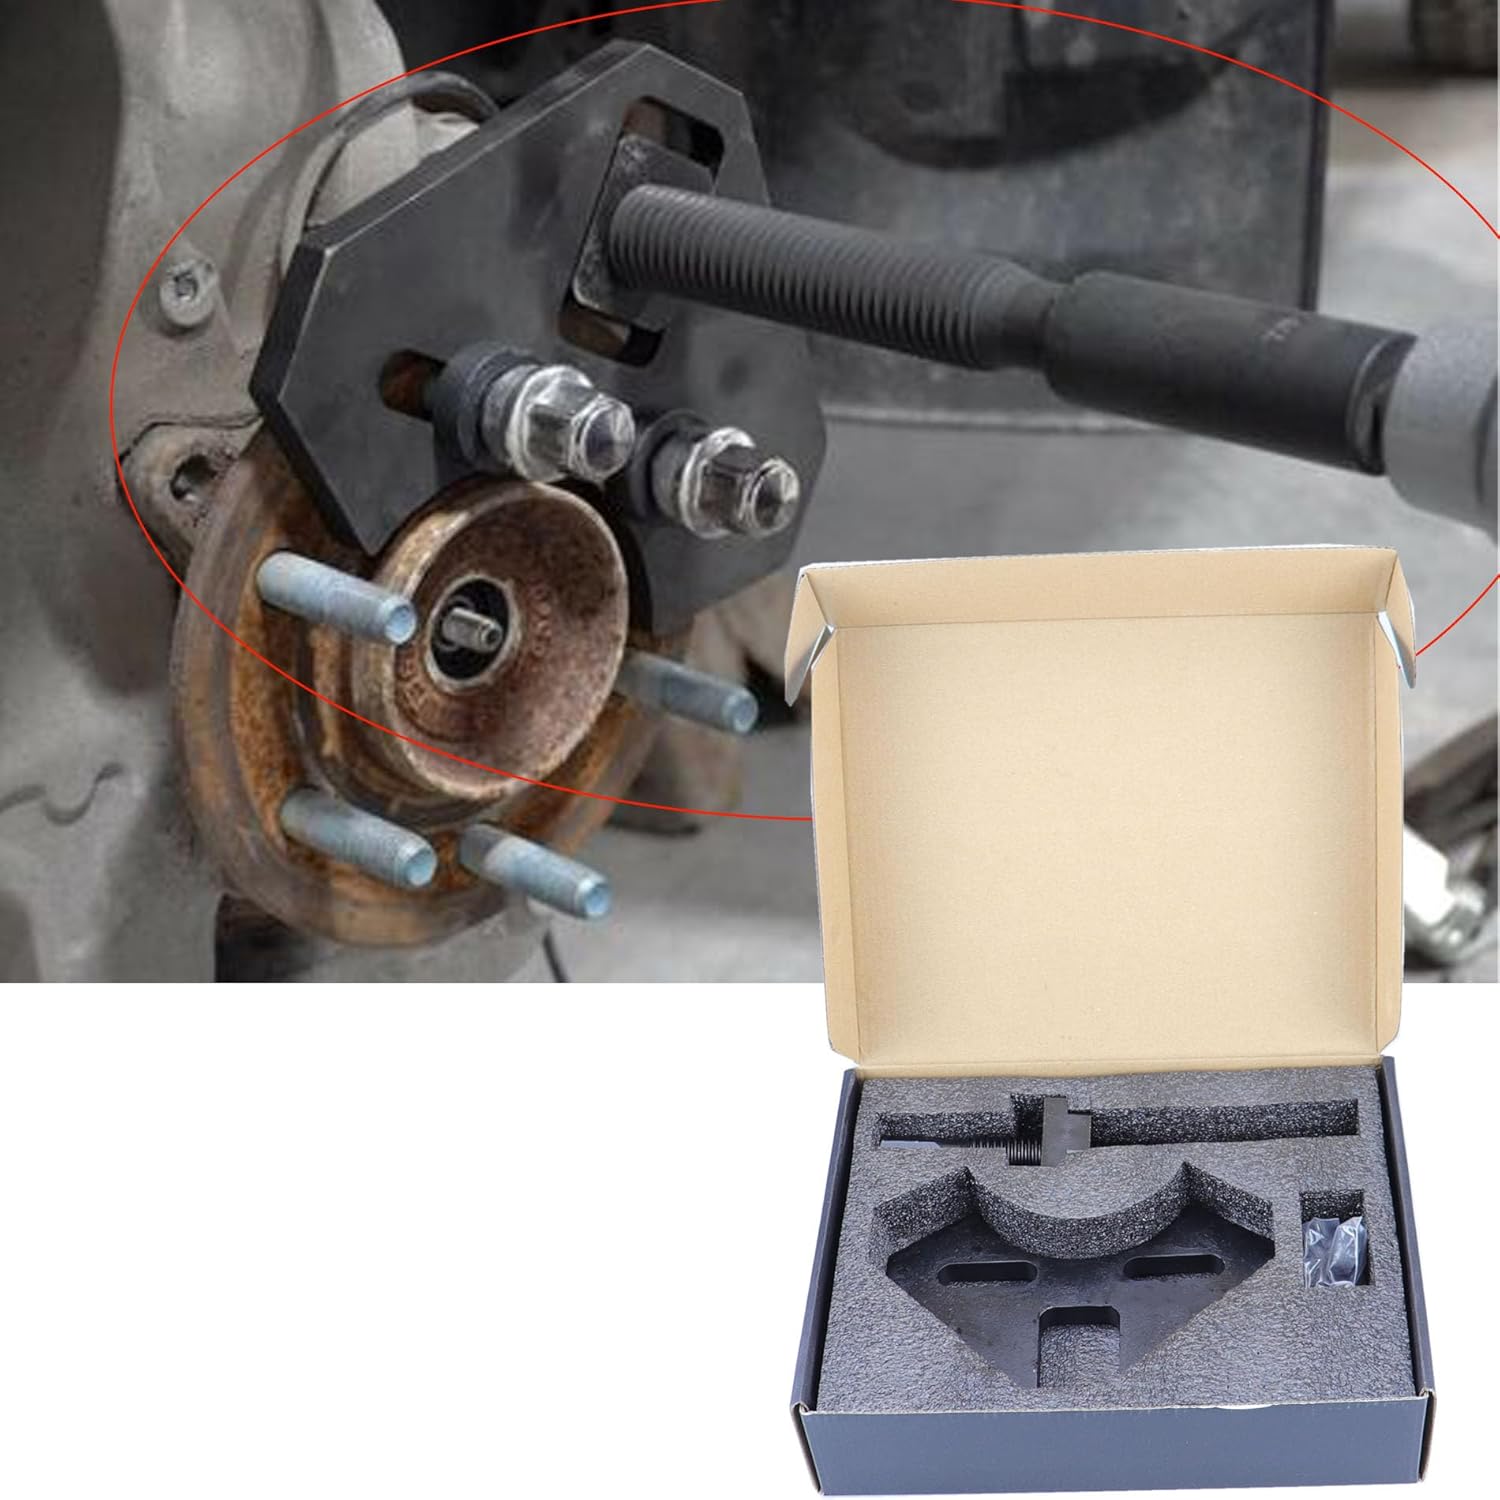
Image: The MOCW 40100 tool actively removing a hub assembly, with the tool's packaging visible in the foreground.
Maintenance
To ensure the longevity and optimal performance of your MOCW 40100 Wheel Hub Remover Tool:
- Clean all components thoroughly after each use to remove dirt, grease, and debris.
- Inspect the threads of the Screw Assembly (43670) and Threaded Insert (40090) for any signs of wear or damage. Lubricate threads lightly with appropriate grease before storage.
- Store the tool in its original packaging or a suitable toolbox in a dry environment to prevent rust.
- Replace any worn or damaged components immediately to prevent tool failure or injury.
Troubleshooting
If you encounter issues while using the MOCW 40100 Wheel Hub Remover Tool, consider the following:
- Difficulty in Hub Removal: Ensure the lug nuts securing the drive plate are sufficiently tightened. If the hub is extremely frozen, apply penetrating oil and allow it to soak before attempting removal again. Ensure you are pushing from at least two different solid points to distribute force effectively.
- Tool Thread Damage: Excessive force or improper alignment can damage the threads. Always ensure the forcing screw is aligned correctly with the threaded insert and the contact surface. Avoid using excessive impact force if the screw is not turning smoothly. If threads are damaged, the tool may need replacement.
- Lug Nuts Not Securing Plate: If the provided washers or existing lug nuts do not provide enough thread engagement, ensure you are using the correct size lug nuts for your vehicle. In some cases, alternative washers might be needed, but always prioritize secure attachment.
Warranty and Support
For warranty information or technical support regarding your MOCW 40100 Wheel Hub Remover Tool, please refer to the product packaging or contact MOCW customer service directly. Keep your purchase receipt as proof of purchase.
Contact Information: Please visit the official MOCW website or your retailer's support page for the most current contact details.
Ask a question about this manual
Ask about setup, troubleshooting, compatibility, parts, safety, or missing instructions. Manuals+ will review the question and use this page’s manual context to help answer it.