1. Introduction
Thank you for choosing the iClever MD179 Wireless Bluetooth Mouse. This manual provides detailed instructions for setting up, operating, and maintaining your mouse to ensure optimal performance. Please read this manual thoroughly before use.

Image: The iClever MD179 Wireless Bluetooth Mouse, showcasing its ergonomic design and compact form factor.
1.1 Package Contents
- iClever MD179 Wireless Mouse
- USB Receiver (2.4GHz)
- USB-C Charging Cable
- User Manual
1.2 Key Features
- Dual Mode Connectivity: Supports both Bluetooth 5.0 and 2.4GHz USB receiver connections.
- Multi-Device Pairing: Connects to up to 3 devices and allows easy switching.
- Rechargeable Battery: Built-in 300mAh battery with USB-C charging, offering up to 60 days of use.
- Silent Clicks: Designed for quiet operation, reducing noise in shared environments.
- Adjustable DPI: Four DPI levels (800/1200/1600/2400) for precise cursor control.
- Ergonomic Design: Comfortable grip suitable for small to medium-sized hands.
2. Product Overview
Familiarize yourself with the components of your iClever MD179 mouse.

Image: A diagram illustrating the various parts of the iClever MD179 mouse, including buttons, scroll wheel, and indicators.
- Right click button
- Left click button
- Scroll wheel / Middle button
- Forward button (Windows only)
- Back button (Windows only)
- DPI switch button
- ON/OFF switch
- 2.4G/Bluetooth 1/Bluetooth 2 channel indicator
3. Setup
3.1 Charging the Mouse
Before first use, or when the battery is low, charge the mouse using the provided USB-C cable. Connect the USB-C end to the mouse and the USB-A end to a power source (e.g., computer USB port, USB wall adapter). A full charge typically takes 2 hours.
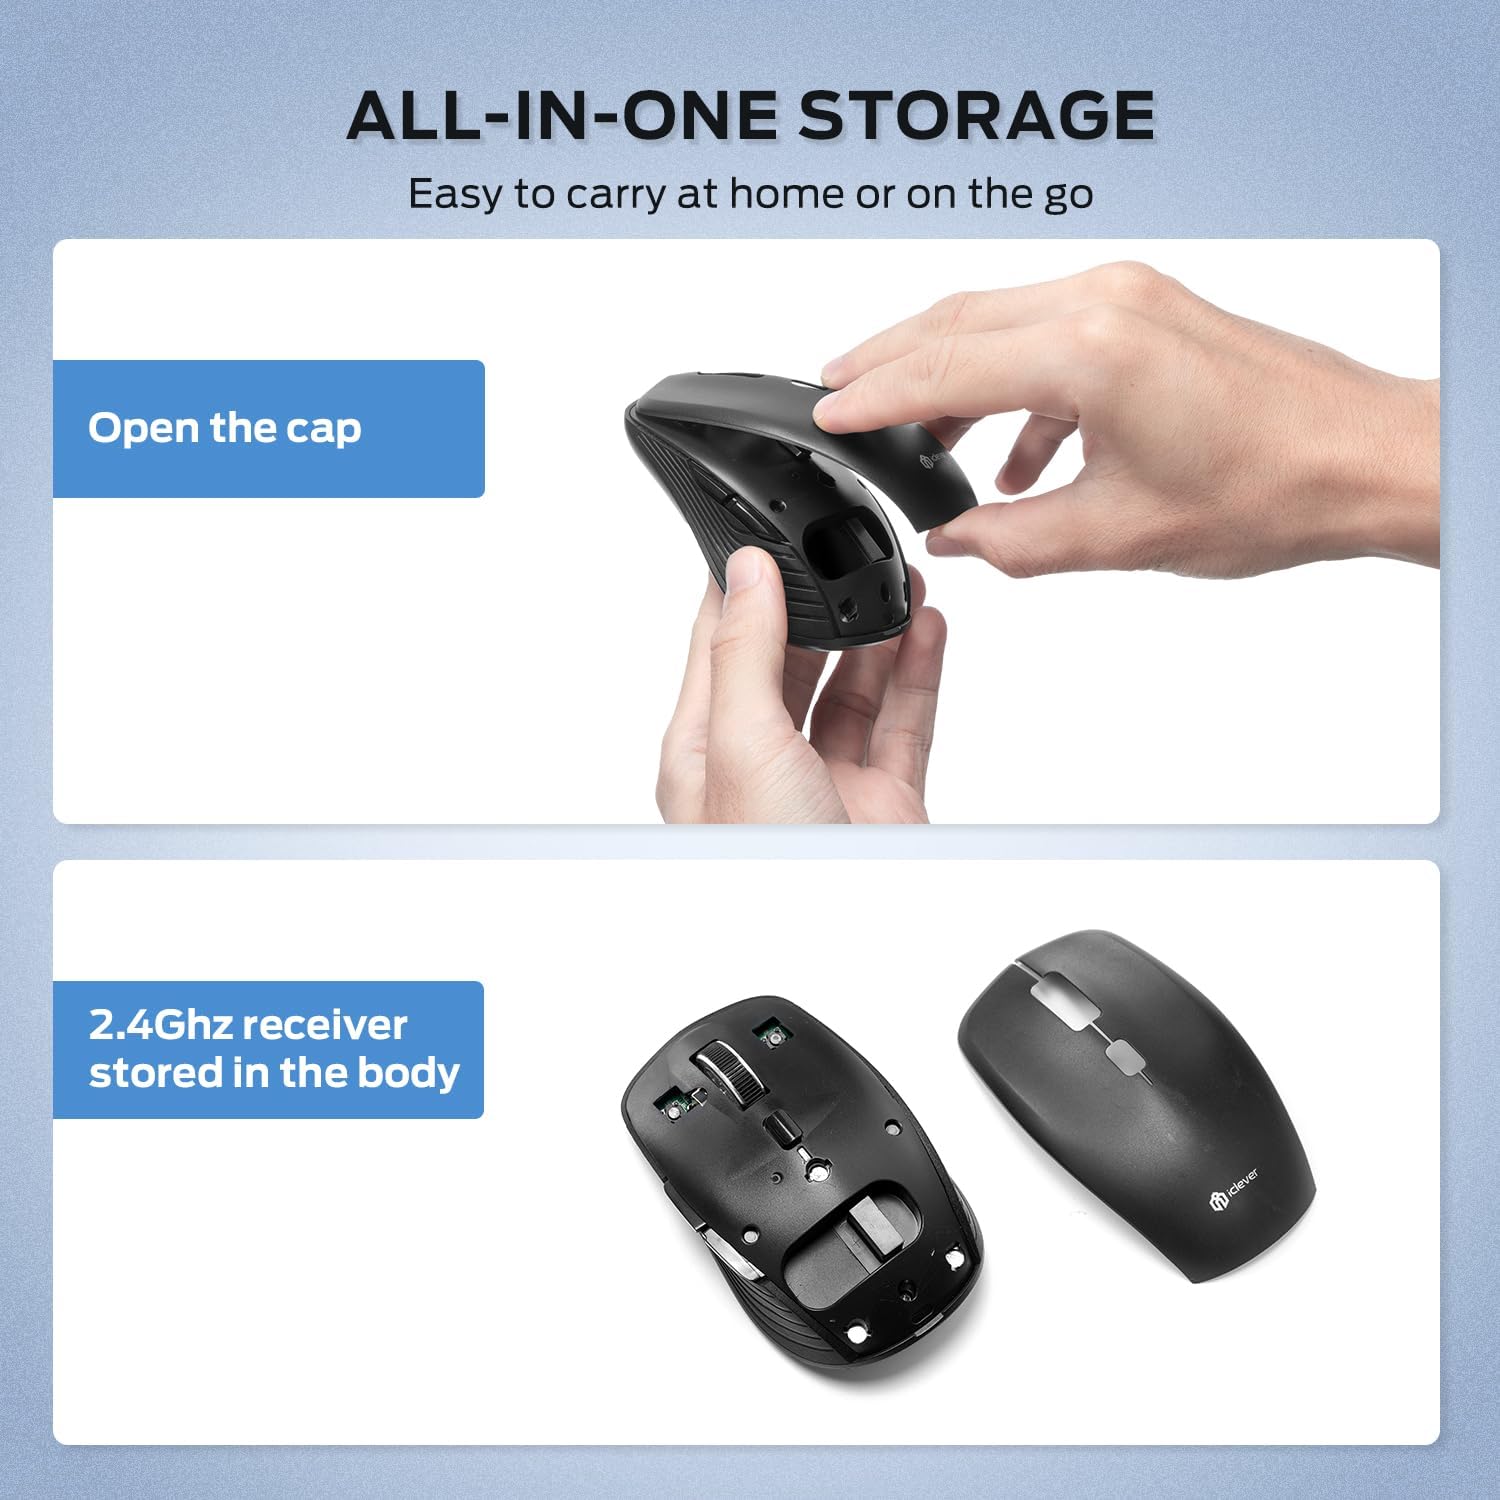
Image: The iClever MD179 mouse being charged via its USB-C port, highlighting the rechargeable feature.
3.2 2.4GHz USB Connection
- Locate the 2.4GHz USB receiver. It is stored inside the mouse. To access it, gently lift the top cover of the mouse.
- Insert the USB receiver into an available USB port on your computer.
- Turn on the mouse using the ON/OFF switch located on the bottom.
- The mouse will automatically connect to your computer. The channel indicator light will show '1' for 2.4GHz mode.

Image: Instructions on how to open the mouse cover to access the internal storage compartment for the 2.4GHz USB receiver.
3.3 Bluetooth Connection
The iClever MD179 mouse supports two Bluetooth connections (BT1 and BT2).

Image: The iClever MD179 mouse demonstrating its ability to connect to multiple devices via 2.4GHz USB and two Bluetooth channels.
- Turn on the mouse using the ON/OFF switch.
- Press the channel switch button (located on the bottom of the mouse) to select either Bluetooth 1 (BT1) or Bluetooth 2 (BT2). The corresponding indicator light (2 or 3) will blink slowly.
- Press and hold the channel switch button for 3-5 seconds until the indicator light for BT1 or BT2 starts blinking rapidly. This indicates the mouse is in pairing mode.
- On your device (laptop, tablet, smartphone), go to Bluetooth settings and search for new devices.
- Select "iClever MD179" from the list of available devices.
- Once paired, the indicator light will stop blinking and remain solid for a few seconds before turning off. The mouse is now connected.
4. Operating Instructions
4.1 Switching Between Devices
To switch between connected devices (2.4GHz, BT1, BT2), simply press the channel switch button on the bottom of the mouse. The indicator light will show which channel is active.
4.2 Adjusting DPI (Cursor Speed)
The iClever MD179 mouse has 4 adjustable DPI levels: 800, 1200, 1600, and 2400. To change the DPI, press the DPI switch button located on the top of the mouse, behind the scroll wheel.
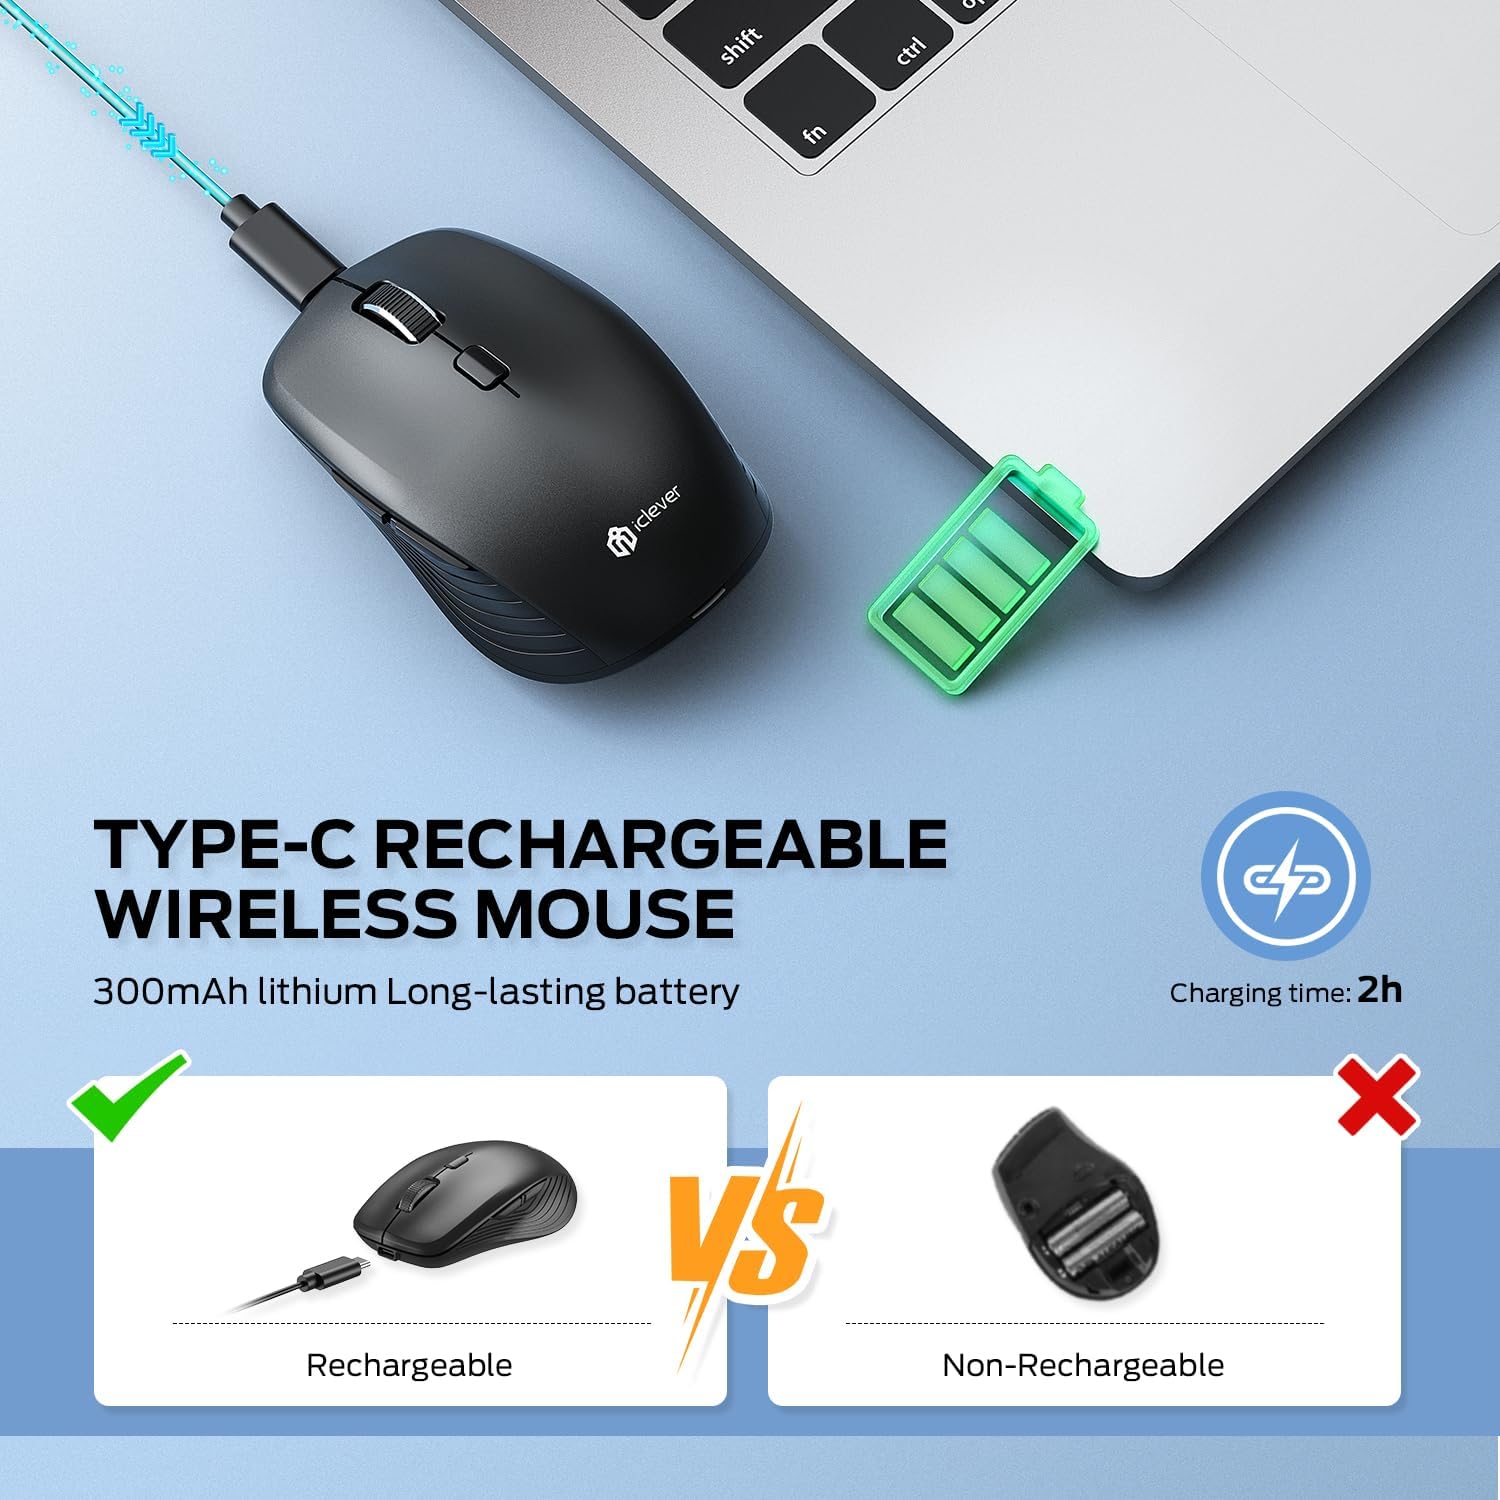
Image: A visual representation of the four DPI settings (800, 1200, 1600, 2400) and how to adjust them using the DPI button.
The right indicator light on the mouse will blink to confirm the current DPI setting:
- One blink: 800 DPI
- Two blinks: 1200 DPI
- Three blinks: 1600 DPI
- Four blinks: 2400 DPI
5. Maintenance
To ensure the longevity and optimal performance of your iClever MD179 mouse, follow these maintenance guidelines:
- Cleaning: Use a soft, dry cloth to clean the mouse. For stubborn dirt, slightly dampen the cloth with water or a mild cleaning solution. Avoid harsh chemicals or abrasive materials.
- Storage: When not in use for extended periods, turn off the mouse to conserve battery life. Store it in a cool, dry place away from direct sunlight and extreme temperatures.
- USB Receiver: When traveling or not using the 2.4GHz connection, store the USB receiver inside the mouse to prevent loss.
6. Troubleshooting
If you encounter issues with your iClever MD179 mouse, please refer to the following solutions:
6.1 Mouse Slows Down or is Unresponsive
- Charge the mouse for at least 2 hours.
- Ensure you are using the mouse on a suitable surface, such as a mouse pad or a hard, non-reflective surface.
- Reboot your device (computer, tablet) and attempt to re-pair the mouse.
6.2 Mouse Does Not Hold a Charge
- Try using a different USB-C charging cable.
- Connect the charging cable to a different power source (e.g., a different USB port on your computer or a different wall adapter).
- Ensure the voltage of your charger does not exceed 5V. Higher voltages can potentially damage the mouse battery.
6.3 Mouse Compatibility
- The mouse supports connection with PC, laptop, tablet, smartphone, MacBook, Mac, iPhone, and iPad.
- It is compatible with Windows 7/8/10/11, Mac, iOS, and Android operating systems.
- Note: The "Forward" and "Back" side buttons are not available on Mac/iPad/iPhone devices.
7. Specifications
| Feature | Specification |
|---|---|
| Model Number | MD179 |
| Product Dimensions | 4 x 2.42 x 0.1 inches |
| Item Weight | 4.6 ounces |
| Connectivity Technology | Bluetooth 5.0, 2.4GHz USB |
| DPI Levels | 800 / 1200 / 1600 / 2400 |
| Battery Capacity | 300mAh Rechargeable |
| Movement Detection | Optical Sensor |
| Special Features | Dual Mode, Multi-Device Pairing (up to 3), USB-C Rechargeable, Silent Click Buttons, Ergonomic Compact Design, Auto-Sleep & Wake Mode |
8. Warranty and Support
iClever products are designed for reliability and performance. For warranty information or technical support, please refer to the official iClever website or contact their customer service directly. Keep your purchase receipt as proof of purchase for warranty claims.
For further assistance, you may visit the iClever Store on Amazon.