1. Introduction
Thank you for choosing the Jectse Digital Voice Recorder Watch. This portable wristband device is designed for convenient audio recording in various settings, including lectures, meetings, and personal notes. It features advanced noise reduction, voice-activated recording, and a timestamp function for precise record-keeping. Its sleek design and long battery life make it an ideal companion for students, professionals, and anyone needing reliable audio capture.

The Jectse Digital Voice Recorder Watch is discreet and portable, suitable for various recording needs.
2. Package Contents
Please check the package for the following items:
- Digital Voice Recorder Watch
- USB Charging Cable
- Earbuds (3.5mm jack)
- User Manual

The package includes the Digital Voice Recorder Watch, USB charging cables, and earbuds for playback.
3. Product Overview
Familiarize yourself with the components of your Jectse Digital Voice Recorder Watch:
- Recording Button: Initiates and stops recording.
- Power Switch: Turns the device on or off.
- USB Port: For charging and data transfer.
- Microphone: Built-in for audio capture.
- Headphone Jack: For connecting earbuds for private playback.
- Indicator Light: Displays device status (recording, charging, low battery).
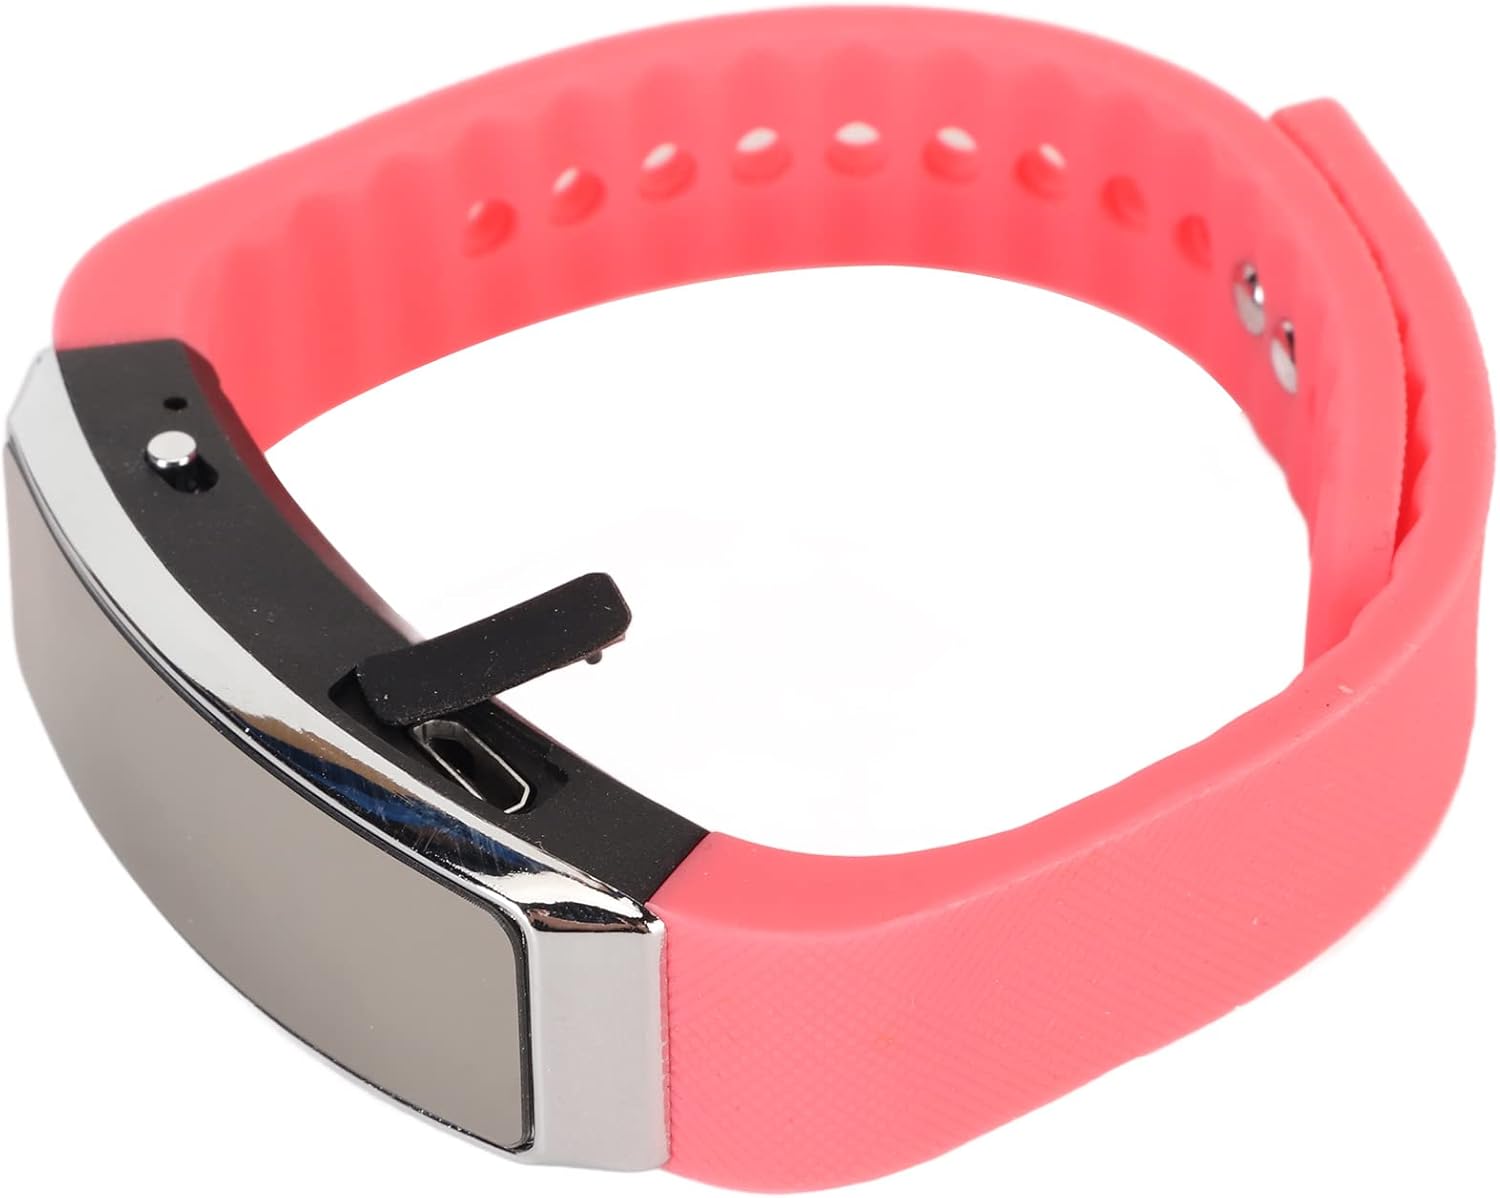
Side view of the recorder watch, highlighting its compact design and accessible controls.

Top view of the recorder watch, showcasing its modern aesthetic.
4. Setup
4.1. Charging the Device
- Connect the small end of the USB charging cable to the USB port on the recorder watch.
- Connect the larger end of the USB cable to a USB power adapter (not included), computer USB port, or other compatible charging device.
- The indicator light will show the charging status. A full charge typically takes a few hours.

The USB port for charging and data transfer is located on the side of the device, protected by a small flap.
4.2. Setting Time and Date (Timestamp)
To ensure accurate timestamps on your recordings, connect the device to a computer. The device will automatically synchronize its time and date with your computer's system time. No manual adjustment is typically required.
5. Operating Instructions
5.1. Power On/Off
- To power on: Slide the power switch to the 'ON' position. The indicator light will briefly illuminate.
- To power off: Slide the power switch to the 'OFF' position. The device will save any active recording before shutting down.
5.2. Voice Activated Recording
The device supports voice-activated recording, which means it will automatically start recording when sound is detected and pause when there is silence, conserving battery and memory.
- Ensure the device is powered on.
- The recorder will automatically enter voice-activated recording mode. The indicator light may flash or change color to indicate active recording.
- To stop recording, slide the power switch to the 'OFF' position. The recording will be saved automatically.

The voice recorder watch is ideal for capturing important discussions in meetings.
5.3. Playback
To listen to your recordings:
- Ensure the device is powered off.
- Plug the included earbuds into the headphone jack on the recorder watch.
- Slide the power switch to the 'ON' position. The device will automatically enter playback mode.
- Use the control buttons (if available on the earbuds or device, refer to specific model instructions) to navigate through recordings, adjust volume, or pause/play.
5.4. Connecting to PC/Transferring Files
- Ensure the device is powered off.
- Connect the recorder watch to your computer using the USB charging cable.
- The computer should recognize the device as a removable disk.
- Open the device folder to access your recorded audio files (typically in WAV format).
- You can copy, move, or delete files as needed.
6. Maintenance
- Cleaning: Use a soft, dry cloth to clean the device. Avoid using harsh chemicals or abrasive materials.
- Storage: Store the device in a cool, dry place away from direct sunlight and extreme temperatures.
- Battery Care: To prolong battery life, avoid fully discharging the battery frequently. Charge the device regularly, even if not in use for extended periods.
7. Troubleshooting
- Device not turning on: Ensure the battery is charged. Connect to a power source and try again.
- Cannot record: Check if the device has sufficient memory. Transfer files to a computer to free up space.
- Poor audio quality: Ensure the microphone is not obstructed. Record in a quieter environment or closer to the sound source. The built-in noise reduction feature helps, but extreme noise can still affect quality.
- Cannot connect to computer: Try a different USB port or cable. Ensure the device is powered off before connecting.
8. Specifications
| Feature | Detail |
|---|---|
| Brand | Jectse |
| Model Number | Jectsetqeg4s2wir-11 |
| Memory Storage Capacity | 8 GB |
| Battery Life (Continuous Recording) | 20 Hours |
| Standby Time | Up to 30 Days |
| Microphone Form Factor | Built-In |
| Audio Format | WAV |
| Hardware Interface | USB |
| Headphones Jack | 3.5 millimeters |
| Compatible Devices | Personal Computer |
| Special Features | Voice Activated, Noise Reduction, Timestamp |
9. Warranty and Support
The Jectse Digital Voice Recorder Watch comes with a standard manufacturer's warranty. For specific warranty details, returns, or technical support, please refer to the product packaging or contact your retailer. Keep your purchase receipt as proof of purchase.
10. Important Safety Information
- Do not expose the device to extreme temperatures, direct sunlight, or high humidity.
- Avoid dropping or subjecting the device to strong impacts.
- Keep out of reach of children.
- Do not attempt to disassemble or repair the device yourself. This will void the warranty.
- Dispose of the device and its battery responsibly according to local regulations.