Tecmac S3900-48T6S-R
Tecmac S3900-48T6S-R Network Switch User Manual
Advanced Layer 2 Plus Stackable Gigabit Switch
1. Introduction
This manual provides comprehensive instructions for the installation, operation, maintenance, and troubleshooting of the Tecmac S3900-48T6S-R Network Switch. The S3900-48T6S-R is an advanced Layer 2 Plus (Layer 3 Lite) stackable Gigabit switch designed for robust and reliable network performance.
It features 48 x 10/100/1000BASE-T ports and 6 x 10 Gigabit SFP+ uplinks, making it suitable for various network environments. The dual redundant power supplies and dual fan design ensure high availability and continuous operation, even in the event of a component failure. The S3900 series supports 1G and 10G stacking, offering scalable bandwidth and advanced Quality of Service (QoS) features while maintaining simplified management.
This switch is an ideal solution for small to medium-sized enterprise networks, mid-market businesses, and branch offices seeking a cost-effective and high-performance networking solution.
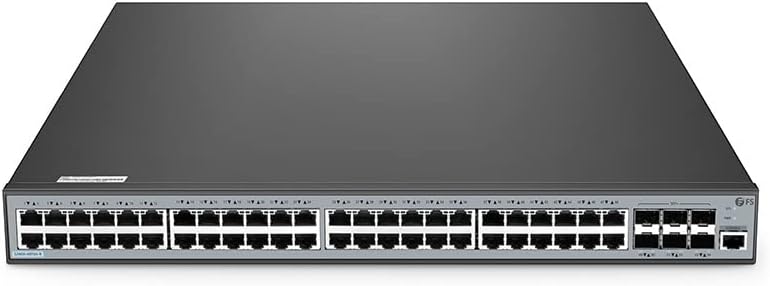
Figure 1: Front view of the Tecmac S3900-48T6S-R Network Switch, showing 48 RJ45 ports and 6 SFP+ uplink ports.
2. Setup and Installation
2.1 Unpacking and Inspection
Carefully unpack the switch and its accessories. Verify that all items listed in the packing list are present and undamaged. If any items are missing or damaged, contact your vendor immediately.
2.2 Mounting Options
The S3900-48T6S-R switch can be installed in a standard 19-inch equipment rack or placed on a desktop.
2.2.1 Rack Mounting
- Attach the provided rack-mount brackets to the sides of the switch using the included screws.
- Align the brackets with the mounting holes on the rack and secure the switch using appropriate rack screws.
2.2.2 Desktop Placement
- Ensure the desktop is flat, stable, and has adequate ventilation.
- Attach the rubber feet (if provided) to the bottom of the switch to prevent slipping and provide airflow.
2.3 Power Connection
The switch supports dual redundant power supplies for enhanced reliability.
- Connect the power cords to the power inlets on the rear of the switch.
- Plug the other end of the power cords into a grounded AC power outlet.
- Ensure the power LED on the front panel illuminates, indicating successful power-on.
2.4 Network Connections
2.4.1 RJ45 Ports (10/100/1000BASE-T)
- Connect standard Ethernet cables (Cat5e or higher) from your network devices (computers, servers, other switches) to the RJ45 ports on the front panel.
- Observe the link/activity LEDs for each port; a solid green light indicates a valid link, and a blinking light indicates data activity.
2.4.2 SFP+ Uplink Ports (10 Gigabit)
- Insert compatible 10 Gigabit SFP+ transceivers into the SFP+ slots.
- Connect fiber optic cables or direct attach copper (DAC) cables to the transceivers for high-speed uplinks to core switches or other network segments.
2.5 Initial Configuration Access
The switch can be configured via Command Line Interface (CLI), Web-based Graphical User Interface (GUI), SNMP, or SSH.
- CLI: Connect a console cable from your computer's serial port to the console port on the switch. Use a terminal emulation program (e.g., PuTTY, Tera Term) with settings: 9600 baud, 8 data bits, no parity, 1 stop bit, no flow control.
- Web GUI: Connect your computer to any RJ45 port on the switch. Configure your computer's IP address to be in the same subnet as the switch's default IP address (refer to the product's quick start guide for default IP). Open a web browser and enter the switch's IP address.
- SSH: For secure remote access, enable SSH on the switch and use an SSH client to connect to the switch's IP address.
3. Operating Instructions
3.1 LED Indicators
Monitor the front panel LEDs to understand the switch's status:
- Power LED: Solid green indicates power is on.
- System LED: Indicates system status (e.g., solid green for normal operation, blinking for errors or boot-up).
- Link/Activity LEDs (per port): Solid green indicates a valid network link; blinking green indicates data transmission.
3.2 Basic Connectivity
Once connected and powered on, the switch will automatically establish basic network connectivity between devices connected to its ports. For advanced network configurations, refer to the switch's software configuration guide.
3.3 Stacking Functionality
The S3900 series supports stacking, allowing multiple switches to operate as a single logical unit. This simplifies management and increases network capacity.
- Up to 6 units can be stacked.
- Stacking can utilize 1G or 10G SFP+ ports.
- The total stacking bandwidth can reach up to 360 Gbps.
- Refer to the advanced configuration guide for detailed stacking setup procedures.
3.4 Quality of Service (QoS)
The switch supports advanced QoS features to prioritize network traffic, ensuring critical applications (e.g., VoIP, video conferencing) receive sufficient bandwidth and low latency. QoS can be configured via the CLI or Web GUI.
4. Maintenance
4.1 Cleaning
- Regularly clean the exterior of the switch with a soft, dry cloth.
- Ensure ventilation openings are free from dust and obstructions to maintain proper airflow.
- Do not use liquid or aerosol cleaners directly on the switch.
4.2 Firmware Updates
Periodically check the manufacturer's website for firmware updates. Firmware updates can provide new features, performance improvements, and security patches. Follow the instructions provided with the firmware update package carefully.
4.3 Environmental Considerations
- Operate the switch within the specified temperature and humidity ranges.
- Ensure adequate ventilation around the switch to prevent overheating.
- Avoid placing the switch in direct sunlight or near heat sources.
5. Troubleshooting
This section provides solutions to common issues you might encounter with your Tecmac S3900-48T6S-R switch.
| Problem | Possible Cause | Solution |
|---|---|---|
| Switch does not power on (Power LED off) | No power supply; faulty power cord; power outlet issue. | Check power cord connections; verify power outlet is active; try a different power cord. |
| No link/connectivity on a port (Link LED off) | Incorrect cable; faulty cable; device not powered on; port disabled. | Ensure correct cable type (Ethernet for RJ45, fiber for SFP+); replace cable; power on connected device; check port status in switch configuration. |
| Slow network performance | Network congestion; duplex mismatch; faulty cable; outdated firmware. | Check network traffic; ensure duplex settings match on both ends; replace cable; update firmware. |
| Cannot access Web GUI or CLI | Incorrect IP address; network configuration issue; firewall blocking access. | Verify switch IP address and computer's IP settings; check network cable; temporarily disable firewall. |
6. Specifications
Key technical specifications for the Tecmac S3900-48T6S-R Network Switch:
- Model: S3900-48T6S-R
- Port Configuration: 48 x 10/100/1000BASE-T RJ45 ports, 6 x 10 Gigabit SFP+ uplink ports
- Switching Capacity: Supports high-speed data forwarding
- Stacking: Up to 6 units, with up to 360 Gbps stacking bandwidth
- Power Supply: Dual redundant power supplies (1+1)
- Cooling: Dual fan design
- Management: CLI (Command Line Interface), Web GUI, SNMP, SSH
- Voltage: 240 Volts
- Compatible Devices: Desktop (also rack-mountable)
- Manufacturer: Tecmac
- Manufacturer Reference: FS134657XX
- First Available Date: May 5, 2023
7. Warranty and Support
For any order-related queries, pre-sales inquiries, product availability, warranty support, or technical assistance, please contact our support team:
- Email: care@shoptheworld.in
- Phone/WhatsApp: +91 9820168421
- Website: https://shoptheworld.in/

Figure 2: Contact information for support and queries.