Introduction
This manual provides detailed instructions for the operation and maintenance of your Hernido Portable CD Player. Please read this manual thoroughly before using the device to ensure proper function and longevity.
Package Contents
Verify that all items are present in the package:
- CD Player
- Headphone
- USB Cable
- AUX Cable
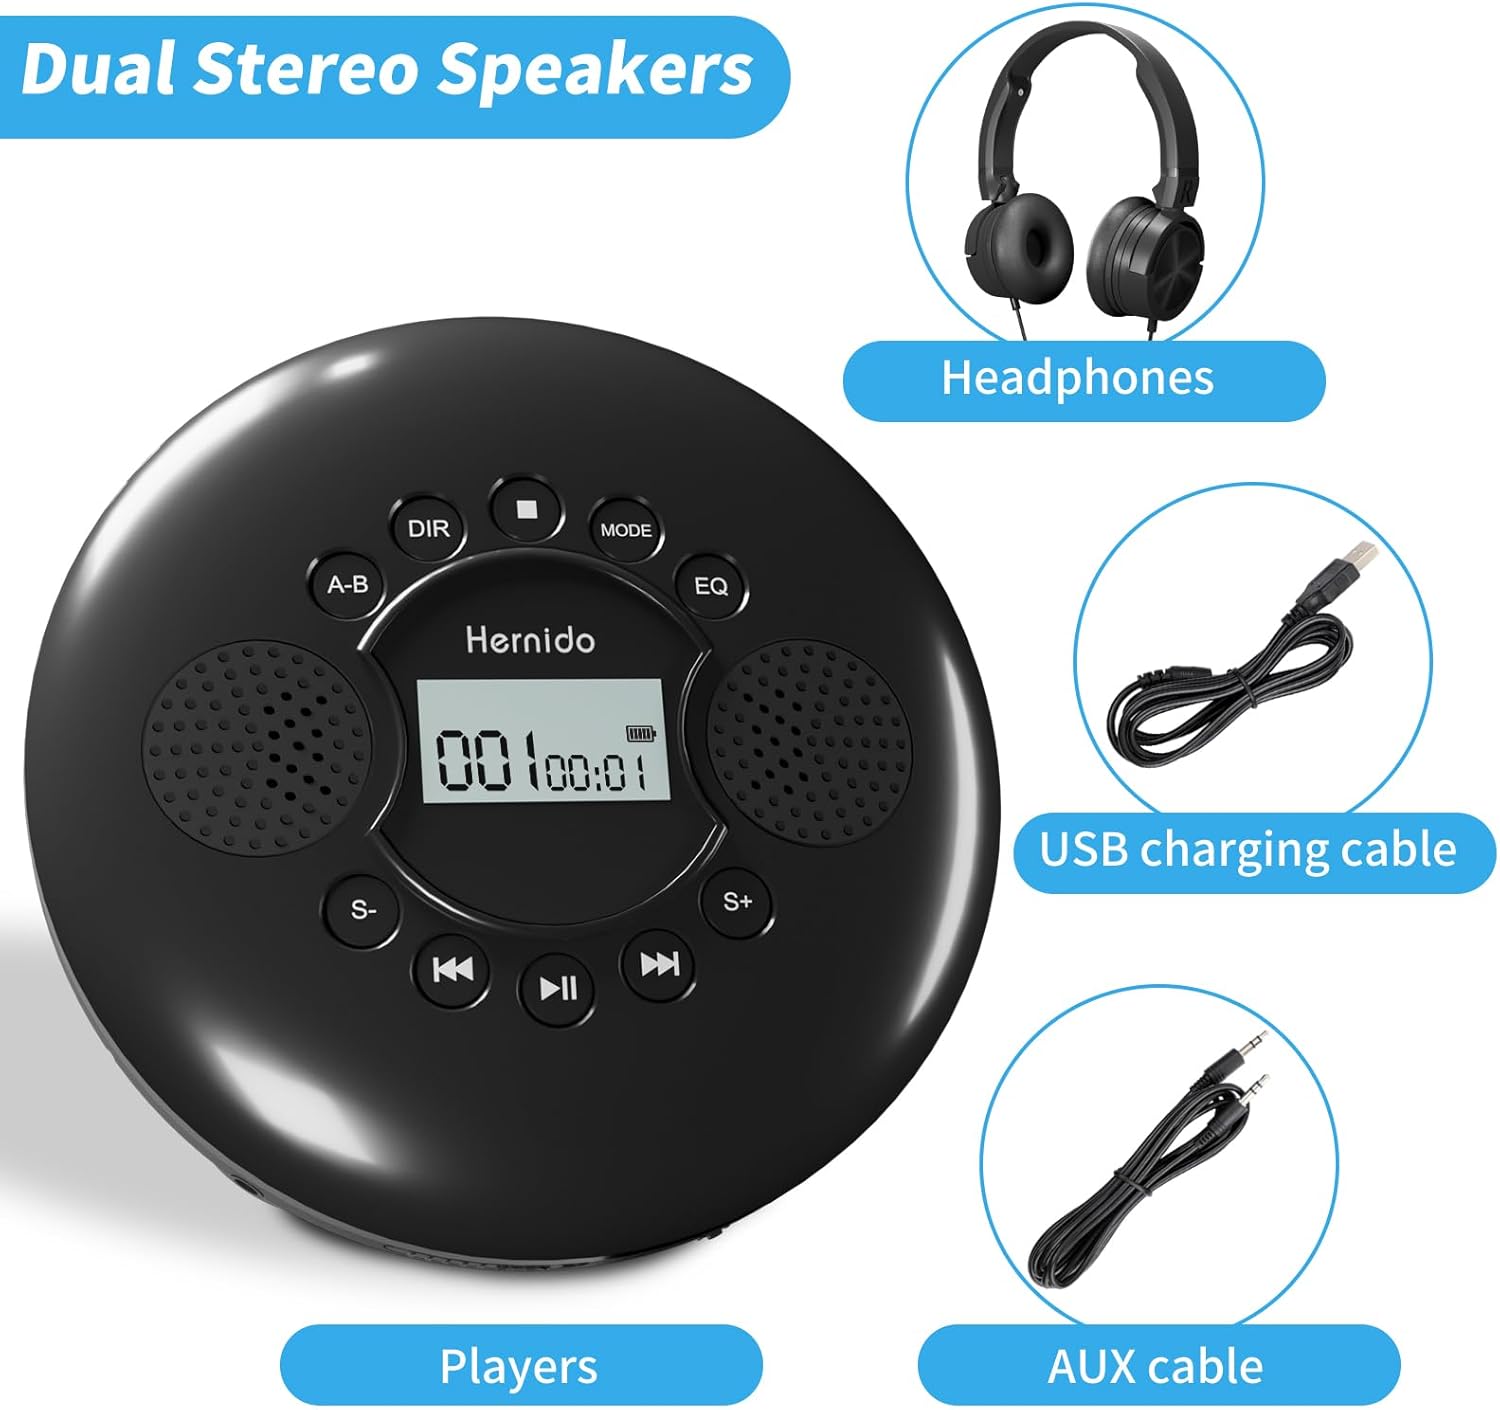
Image: Hernido Portable CD Player with its accessories, including headphones, USB charging cable, and AUX cable.
Product Overview (Controls and Ports)
Familiarize yourself with the various controls and ports on your Hernido Portable CD Player:

Image: Detailed diagram of the Hernido Portable CD Player, highlighting its buttons and connection ports for easy identification.
- Power ON/OFF Switch/Hold
- DC In 5V (Charging Port)
- A-B Repeat Button
- DIR (Directory) Button
- STOP Button
- MODE Button
- EQ (Equalizer) Button
- Speed- (Decrease Playback Speed)
- Previous Track Button
- Play/Pause Button
- Next Track Button
- Speed+ (Increase Playback Speed)
- Volume Knob (VOL+/VOL-)
- OPEN (CD Compartment Latch)
- Earphone Jack (3.5mm AUX)
- Charging LED Indicator
Setup
1. Charging the Battery
The Hernido Portable CD Player features a built-in 1200mAh rechargeable battery. Before first use, fully charge the device.
- Connect the provided USB cable to the DC In 5V port (2) on the player and to a USB power adapter (not included) or a computer's USB port.
- The Charging LED Indicator (16) will illuminate during charging. It will change color or turn off when fully charged.
- A full charge typically takes 3-4 hours and provides 7-8 hours of playback time.

Image: The CD player connected to a USB charger, illustrating the charging process and expected battery life.
2. Inserting a CD
- Slide the Power ON/OFF Switch/Hold (1) to the "OFF" position.
- Press the OPEN latch (14) to open the CD compartment cover.
- Carefully place a CD (CD/CD-R/MP3 CD/HDCD compatible) onto the spindle with the label side facing up.
- Gently press the center of the CD until it clicks into place.
- Close the CD compartment cover firmly until it latches.
3. Connecting Headphones or External Speakers
- For private listening, plug the included headphones into the Earphone Jack (15).
- To connect to external speakers or a car stereo, use the provided 3.5mm AUX cable. Plug one end into the Earphone Jack (15) and the other end into the AUX input of your external audio system.

Image: A user enjoying music with the Hernido Portable CD Player and connected headphones.

Image: The CD player connected to a car's AUX input, demonstrating its use in a vehicle.
Operating Instructions
1. Power On/Off and Hold Function
- To turn on the player, slide the Power ON/OFF Switch/Hold (1) to the "ON" position.
- To turn off the player, slide the Power ON/OFF Switch/Hold (1) to the "OFF" position.
- To lock the buttons and prevent accidental presses during playback, slide the Power ON/OFF Switch/Hold (1) to the "HOLD" position. Slide it back to "ON" to unlock.
2. Basic Playback
- Play/Pause: Press the Play/Pause Button (10) to start or pause playback.
- Next Track: Press the Next Track Button (11) to skip to the next track.
- Previous Track: Press the Previous Track Button (9) to go back to the beginning of the current track. Press it again to go to the previous track.
- Stop: Press the STOP Button (5) to stop playback.
3. Volume Control
Adjust the volume by rotating the Volume Knob (13) located on the side of the player. Rotate towards VOL+ to increase volume, and towards VOL- to decrease volume.
4. EQ (Equalizer) Modes
Press the EQ Button (7) repeatedly to cycle through the available equalizer presets: BBS, POP, JAZZ, ROCK, CLASSIC. This allows you to customize the audio output to your preference.

Image: The CD player displaying its various playback modes and equalizer settings, including BBS, POP, JAZZ, ROCK, and CLASSIC.
5. Playback Modes
Press the MODE Button (6) repeatedly to select different playback modes:
- Repeat 1: Repeats the current track.
- Repeat All: Repeats all tracks on the CD.
- SHUF (Shuffle): Plays tracks in a random order.
- INTRO: Plays the first 10 seconds of each track.
- DIR (Directory): For MP3 CDs, navigates through folders/directories.
6. A-B Repeat Function
The A-B Repeat function allows you to repeat a specific segment of a track. This is particularly useful for language learning or transcribing audio.
- During playback, press the A-B Button (3) once to set the starting point (A).
- Press the A-B Button (3) a second time to set the ending point (B). The segment between A and B will now repeat continuously.
- Press the A-B Button (3) a third time to cancel the A-B repeat and resume normal playback.

Image: A family utilizing the CD player for educational purposes, demonstrating the A-B repeat and speed adjustment features.
7. Playback Speed Adjustment
Adjust the playback speed using the Speed- (8) and Speed+ (12) buttons. This feature is beneficial for language learners or for listening to audiobooks at a preferred pace.
8. Programming Play
The player allows you to program up to 20 tracks to play in a specific order.
- In STOP mode, press the MODE button (6) until "PROG" appears on the display.
- Use the Next Track (11) or Previous Track (9) buttons to select the desired track.
- Press the MODE button (6) again to add the selected track to the program list.
- Repeat steps 2 and 3 to add more tracks.
- After programming all desired tracks, press the Play/Pause Button (10) to start programmed playback.
Connecting to Car Audio
The Hernido Portable CD Player can be connected to your car's audio system via the 3.5mm AUX port. This allows you to play CDs through your car's speakers.
- Ensure your car stereo has a 3.5mm AUX input.
- Connect one end of the provided 3.5mm AUX cable to the Earphone Jack (15) on the CD player.
- Connect the other end of the AUX cable to your car stereo's AUX input.
- Select the AUX input on your car stereo to hear the CD player's audio.
- Note: The USB port on the CD player is for charging only and does not support audio output to car stereos.
Video: Demonstration of the Hernido Portable CD Player's built-in dual stereo speakers and its use in various settings, including a car.
Maintenance
- Cleaning: Use a soft, dry cloth to clean the exterior of the player. For the lens, use a specialized CD lens cleaner. Do not use abrasive cleaners or solvents.
- Battery Care: To prolong battery life, avoid fully discharging the battery frequently. Charge the device regularly, even if not in use for extended periods.
- Storage: Store the CD player in a cool, dry place away from direct sunlight and extreme temperatures.
Troubleshooting
| Problem | Solution |
|---|---|
| Player does not turn on. | Ensure the battery is charged. Connect the USB charging cable and allow it to charge for a few minutes before attempting to power on. Check if the "HOLD" switch is in the OFF position. |
| CD does not play or skips. | Check if the CD is inserted correctly with the label side up. Ensure the CD is clean and free of scratches or smudges. The player has anti-skip/shockproof protection, but severe shocks may still cause skipping. |
| No sound from headphones/speakers. | Verify that headphones or AUX cable are securely plugged into the Earphone Jack (15). Adjust the Volume Knob (13). If using external speakers, ensure they are powered on and the correct input is selected. |
| Buttons are unresponsive. | Check if the Power ON/OFF Switch/Hold (1) is in the "HOLD" position. Slide it to "ON" to unlock the buttons. |
Specifications
| Feature | Detail |
|---|---|
| Model Number | 1 |
| Brand | Hernido |
| Power Source | 1 Lithium Ion battery (included), USB charging |
| Battery Capacity | 1200mAh |
| Playback Time | Approx. 7-8 hours (after 3-4 hours charging) |
| Connectivity | 3.5mm AUX |
| Special Features | Portable, Dual Stereo Speakers, Anti-Skip/Shockproof, EQ Modes, A-B Repeat, Speed Adjustment |
| Compatible Discs | Standard CD/CD-R, MP3 CD, HDCD |
| Item Weight | 1.21 pounds |
| Dimensions | 8.27 x 6.81 x 3.39 inches |
Warranty and Support
Hernido products come with an 18-month warranty. For any questions or support needs regarding your CD player, please contact Hernido customer service. They offer 24-hour one-to-one service to assist you.
For further assistance, please visit the Hernido Store on Amazon.