1. Introduction
Thank you for choosing the Sunfuny 3D Printing Pen SF-H800. This device allows you to create three-dimensional objects by extruding heated plastic filament. It features stepless speed control, an LED screen for real-time temperature display, and supports both PLA and ABS filaments. Please read this manual carefully before use to ensure proper operation and safety.
2. Safety Information
- Hot Nozzle: The pen's nozzle reaches high temperatures (160-235°C). DO NOT TOUCH THE NOZZLE during operation or immediately after use to avoid burns.
- Adult Supervision: This product is recommended for users aged 8 and above. Adult supervision is required for children.
- Ventilation: Use the pen in a well-ventilated area.
- Power Supply: Use only the provided power adapter.
- Filament: Use only 1.75mm PLA or ABS filament.
- Storage: Store the pen and filament in a dry, cool place away from direct sunlight.
- Auto Sleep Function: The pen features a 2-minute auto-sleep function for safety if not in use.
3. Package Contents
The Sunfuny 3D Printing Pen kit includes the following items:
- Sunfuny 3D Printing Pen (SF-H800)
- 150ft PLA Filament Refills (15 colors, 1.75mm)
- Shovel tool
- Portable Bag
- 3D Writing Board
- 3D Stencil
- Power Adapter
- User Manual (this document)

4. Product Overview
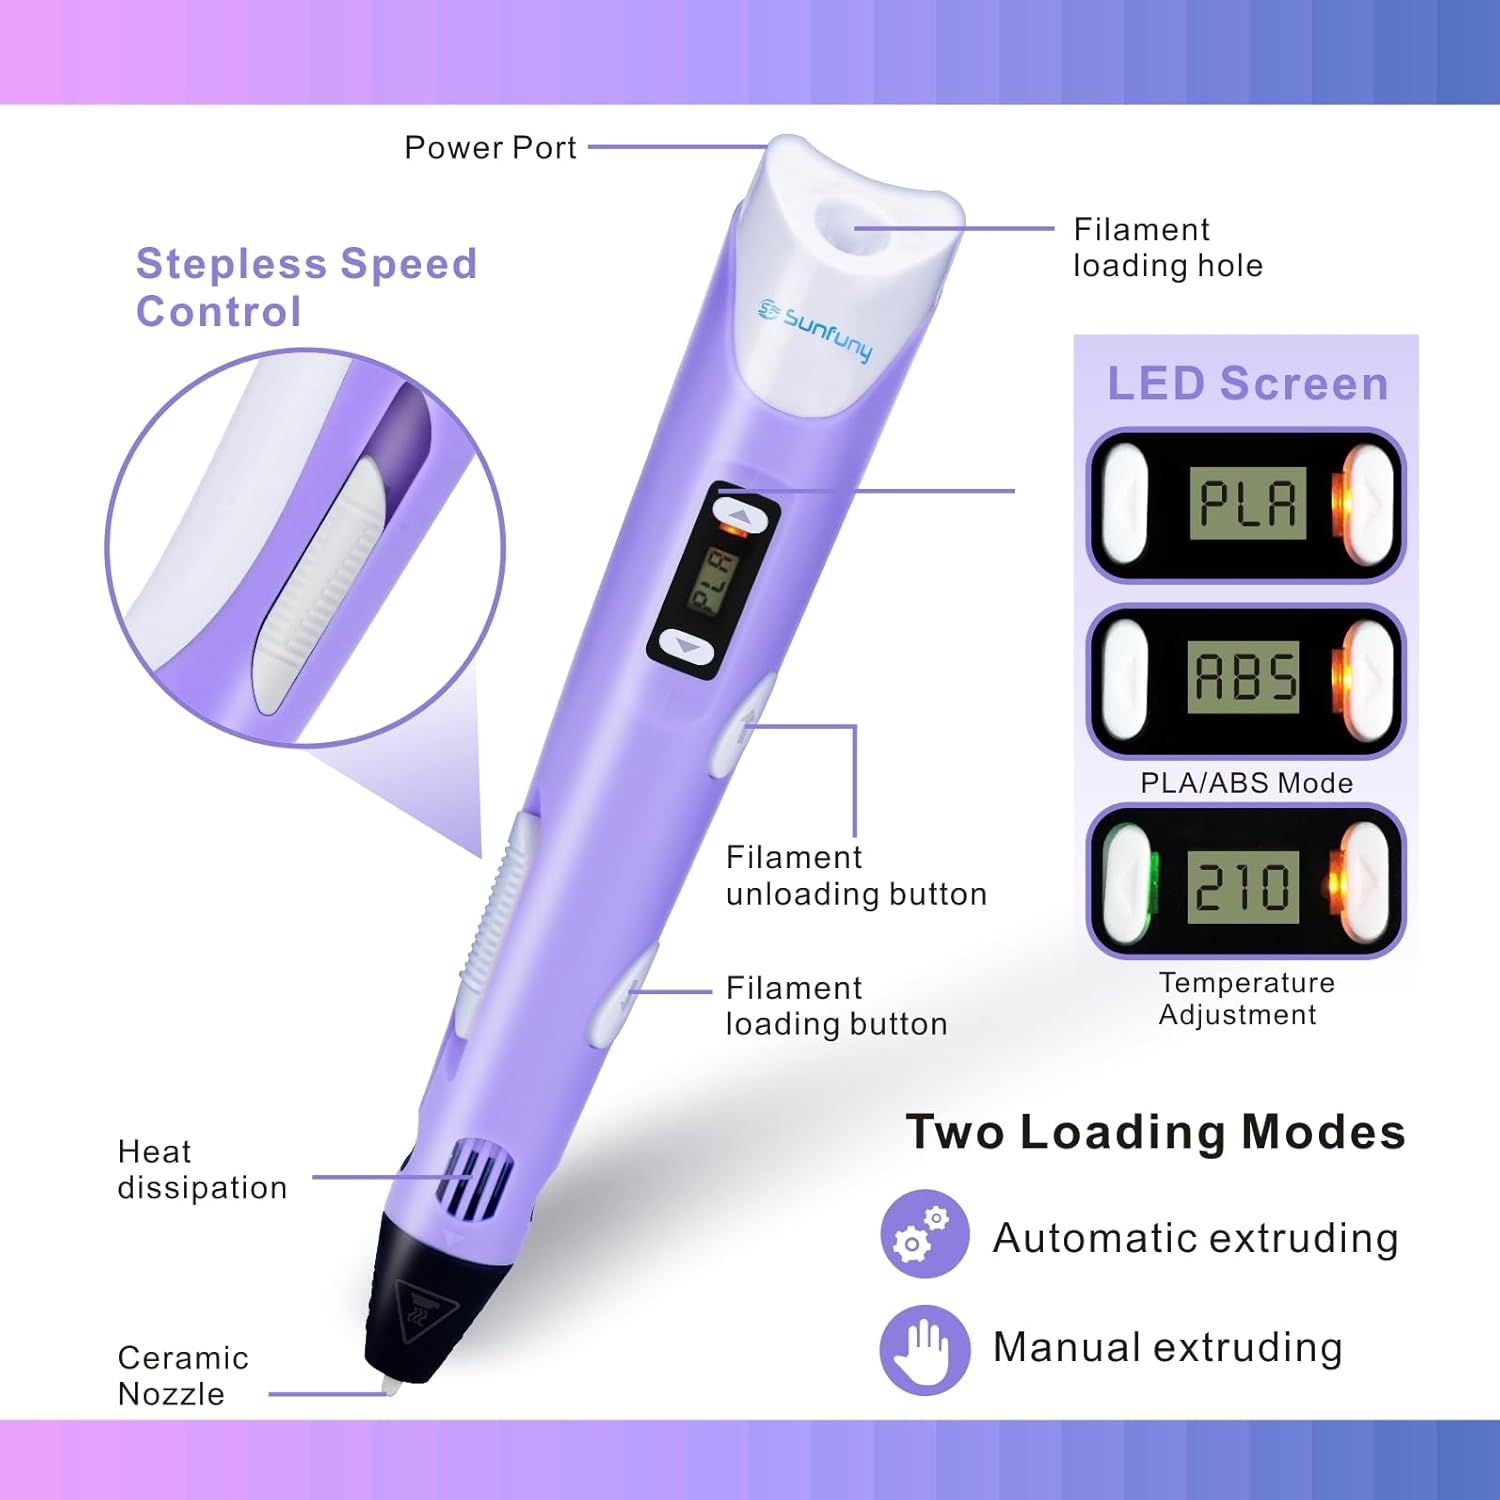
Familiarize yourself with the key components and controls of your Sunfuny 3D Printing Pen:
- Power Port: Connects the pen to the power adapter.
- Filament Loading Hole: Where the filament is inserted.
- LED Screen: Displays current temperature, filament type (PLA/ABS), and status.
- Temperature Adjustment Buttons (+/-): Used to increase or decrease the temperature, and to switch between PLA and ABS modes.
- Filament Unloading Button: Ejects the filament from the pen.
- Filament Loading Button: Feeds the filament into the pen and starts extrusion.
- Stepless Speed Control: A slider to precisely adjust the extrusion speed of the filament.
- Heat Dissipation Vents: Ensures proper cooling of the pen.
- Ceramic Nozzle: The hot tip where the melted filament exits.
5. Setup
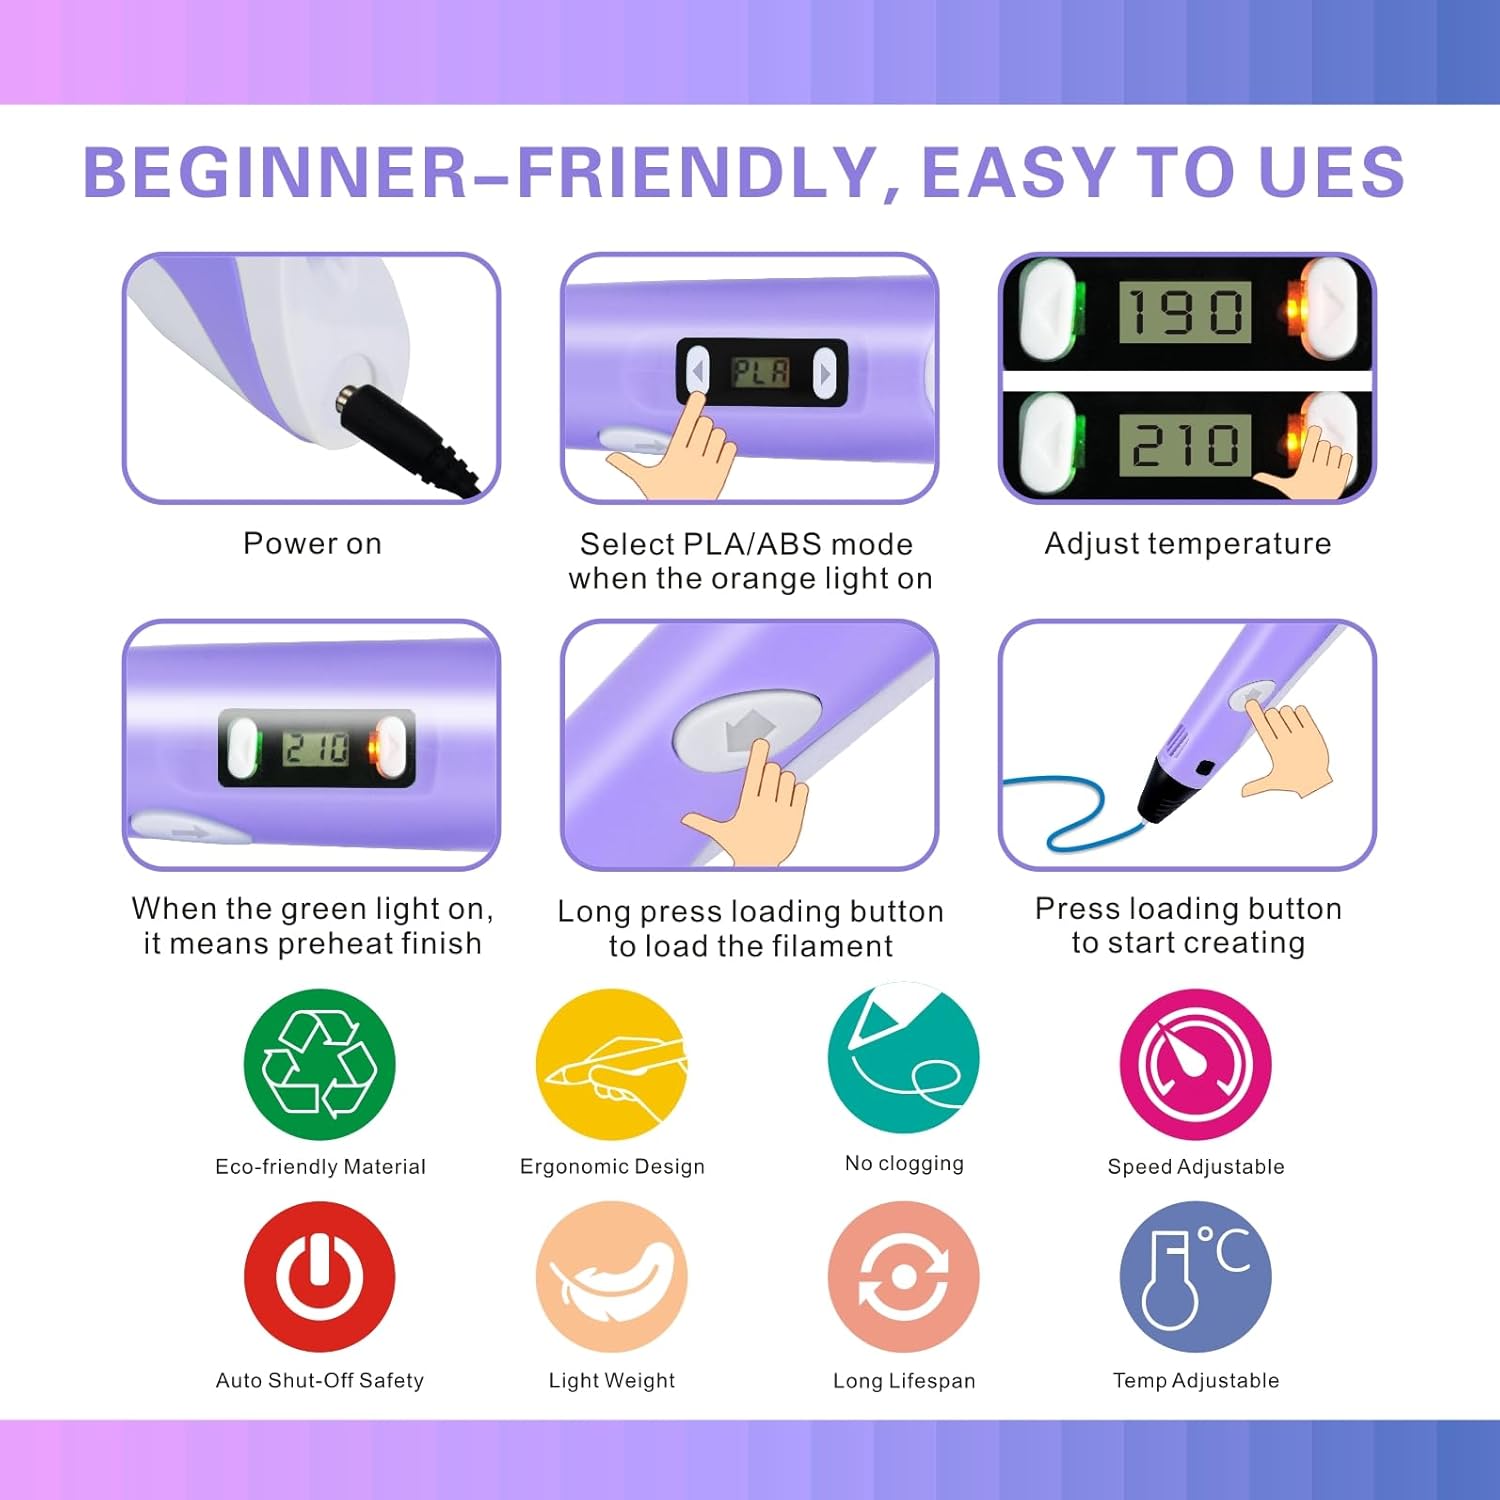
- Connect Power: Plug the power adapter into a wall outlet and connect the other end to the power port on the back of the 3D pen. The LED screen will light up.
- Select Filament Type: Use the temperature adjustment buttons (+/-) to select either PLA or ABS mode. The recommended temperature ranges are: PLA Mode: 160-210℃ and ABS Mode: 210-235℃.
- Preheat: Press the filament loading button once. The pen will begin to heat up to the selected temperature. The LED screen will display the current temperature. Wait until the indicator light turns green, signifying that preheating is complete.
- Load Filament: Once preheated, insert the 1.75mm filament into the filament loading hole at the back of the pen. Press and hold the filament loading button until the filament starts extruding from the nozzle.
Setup and Operation Video
Video 1: This video demonstrates the setup process of the 3D pen, including connecting the power, loading the filament, and adjusting settings. It also shows the pen in action, creating a 3D butterfly.
6. Operating Instructions
- Start Drawing: Once the filament is loaded and extruding, you can begin drawing. Press the filament loading button to start the extrusion.
- Adjust Speed: Use the stepless speed control slider on the side of the pen to adjust the filament extrusion rate. A slower speed allows for more detailed work, while a faster speed is suitable for filling larger areas.
- Adjust Temperature: If needed, fine-tune the temperature using the +/- buttons. The optimal temperature can vary slightly depending on the filament brand and desired effect.
- Creating 2D and 3D Designs: You can draw directly on a flat surface (like the provided 3D writing board or stencil) to create 2D shapes, then connect these shapes to form 3D structures.
- Unloading Filament: To change colors or finish using the pen, press and hold the filament unloading button until the filament is fully retracted from the pen.
Usage Demonstration Video
Video 2: This video provides a quick demonstration of the 3D pen's ease of use, showing how to connect power, load filament, and create simple 3D shapes. It highlights the pen's functionality for creative projects.
7. Maintenance
- Nozzle Cleaning: After each use, ensure no residual filament is left in the nozzle. If the nozzle becomes clogged, gently clear it using the provided shovel tool or a thin wire (only when the pen is heated and unplugged, with extreme caution).
- Filament Storage: Store unused filament in a sealed bag to prevent moisture absorption, which can affect printing quality.
- General Cleaning: Wipe the exterior of the pen with a soft, dry cloth. Do not use liquids or abrasive cleaners.
8. Troubleshooting
| Problem | Possible Cause | Solution |
|---|---|---|
| Filament not extruding | Nozzle clogged, incorrect temperature, filament not loaded correctly. | Clear nozzle, ensure correct temperature for filament type, re-insert filament. |
| Pen not heating up | Power connection issue, pen in auto-sleep mode. | Check power adapter and connection, press loading button to wake from sleep. |
| Filament flow is inconsistent | Filament quality, incorrect speed setting, partial clog. | Try different filament, adjust speed, check for partial nozzle clog. |
| Pen shuts off unexpectedly | Auto-sleep function activated, power interruption. | Press any button to reactivate, check power connection. |
9. Specifications
- Product Dimensions: 2.5 x 4 x 18.3 cm
- Weight: 510 g
- Item Model Number: SF-H800
- Filament Diameter: 1.75mm
- Supported Filament Types: PLA, ABS
- PLA Mode Temperature: 160-210℃
- ABS Mode Temperature: 210-235℃
- Nozzle Type: Ceramic
- Special Features: Stepless speed control, LED screen, 2-minute auto-sleep function, ergonomic design.
10. Warranty and Support
The Sunfuny 3D Printing Pen SF-H800 comes with a 1-year warranty from the date of purchase. If you encounter any issues with your 3D pen or have questions, please contact our customer support team. We are committed to providing the best possible experience for our users.
For warranty claims or technical assistance, please email us at the contact information provided on our official website or product packaging.