1. Introduction
This instruction manual provides essential information for the proper installation, operation, and maintenance of your ReadyWired Turntable Needle Stylus. This stylus is designed for specific Thomas Pacconi turntable models, ensuring optimal audio reproduction. Please read this manual thoroughly before installation and use.
Compatible Models: Thomas Pacconi TCP-MSE825, TPC-MSE800, TPC-7470-O, TPC-767.
2. Setup and Installation
Proper installation of the turntable needle is crucial for sound quality and to prevent damage to your records. Follow these steps carefully:
- Power Off: Ensure your turntable is powered off and unplugged from the electrical outlet before beginning installation.
- Remove Old Stylus: Gently grasp the old stylus assembly and pull it forward and down to detach it from the cartridge. Avoid touching the cantilever or needle tip.
- Inspect New Stylus: Carefully remove the new ReadyWired stylus from its packaging. Examine it for any visible damage.
- Install New Stylus: Hold the new stylus by its plastic housing. Align the stylus with the cartridge body. Push the stylus firmly upwards and backwards into the cartridge until it clicks securely into place. Do not force it.
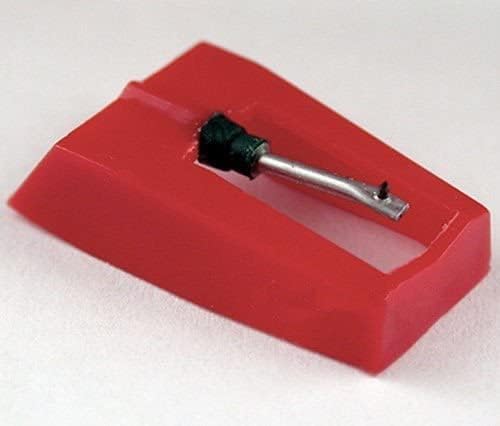
Figure 1: Top-down view of the ReadyWired Turntable Needle Stylus. This image shows the red plastic housing and the metal cantilever with the diamond tip.

Figure 2: Side view of the ReadyWired Turntable Needle Stylus, illustrating its profile and the cantilever extension.
After installation, ensure the stylus is seated correctly and securely. Gently lower the tonearm to check for proper clearance and alignment.
3. Operating Your Turntable with the New Stylus
Once the new stylus is installed, you can resume playing your vinyl records. Observe the following guidelines for optimal performance:
- Record Speed: This stylus supports 16, 33, and 45 RPM records. Ensure your turntable is set to the correct speed for the record you are playing. Note: This stylus is NOT for 78 RPM records.
- Tracking Force: The recommended tracking pressure for this stylus is 1.0 – 3.0 grams. Refer to your turntable's manual for instructions on adjusting the tracking force, if applicable. Incorrect tracking force can lead to poor sound quality or record wear.
- Handling Records: Always handle records by their edges to avoid transferring oils and dirt to the playing surface.
- Lowering the Tonearm: Use the tonearm lift lever to gently lower the stylus onto the record's lead-in groove. Avoid dropping the tonearm manually, as this can damage the stylus or record.
4. Maintenance and Care
Regular maintenance will extend the life of your stylus and preserve the quality of your records:
- Stylus Cleaning: Periodically clean the stylus tip using a soft brush designed for stylus cleaning. Brush gently from back to front (the direction the record spins) to remove dust and debris. Do not use harsh chemicals.
- Record Cleaning: Keep your records clean. Dust and dirt on records can accumulate on the stylus, affecting sound quality and potentially damaging the stylus tip.
- Stylus Replacement: A turntable stylus has a finite lifespan. Over time, the diamond tip will wear down, leading to degraded sound quality and increased record wear. Replace your stylus every 500-1000 hours of playback, or sooner if you notice a significant drop in sound quality or increased skipping.
- Storage: When not in use, ensure the tonearm is secured in its rest and the stylus guard (if available) is in place to protect the needle.
5. Troubleshooting
If you encounter issues with your turntable after installing the new stylus, consider the following:
- Poor Sound Quality (Muffled, Distorted):
- Ensure the stylus is fully seated in the cartridge.
- Check if the stylus tip is clean.
- Verify the tracking force is within the recommended range (1.0 – 3.0 grams).
- Inspect the record for dirt or damage.
- Skipping or Jumping:
- Confirm the tracking force is correctly set. Too light or too heavy can cause skipping.
- Check if the record is clean and free of scratches.
- Ensure the turntable is on a stable, level surface.
- Verify the anti-skate setting (if your turntable has one) is appropriate.
- No Sound or Low Volume:
- Check all audio connections from the turntable to your amplifier/receiver.
- Ensure the amplifier/receiver is set to the correct input (e.g., "Phono").
- Verify the stylus is correctly installed and making contact with the record groove.
If problems persist, consult your turntable's original instruction manual or contact customer support.
6. Specifications
| Stylus Type | 0.7 mil Diamond Conical Tip |
| Compatible Speeds | 16 RPM, 33 RPM, 45 RPM (Not for 78 RPM) |
| Tracking Pressure | 1.0 – 3.0 grams |
| Brand | ReadyWired |
| Compatible Turntables | Thomas Pacconi TCP-MSE825, TPC-MSE800, TPC-7470-O, TPC-767 |
7. Warranty and Support
Information regarding specific warranty terms for this ReadyWired stylus may be included with your purchase documentation. Please refer to any enclosed warranty cards or contact the retailer for details.
For further assistance or technical support, please contact ReadyWired customer service through their official channels or the retailer from whom you purchased the product.