Introduction
This manual provides detailed instructions for the safe installation, operation, and maintenance of your Energetic 14-Inch LED Flush Mount Ceiling Light Fixture, Model MXL1186. Please read this manual thoroughly before installation and retain it for future reference.

Figure 1: Energetic 14-Inch LED Flush Mount Ceiling Light Fixture.
Safety Information
WARNING: Risk of electric shock. Disconnect power at the circuit breaker or fuse box before installation or servicing.
- Ensure all electrical connections comply with local codes and ordinances, as well as the National Electric Code (NEC).
- If you are unfamiliar with proper electrical wiring connections, consult a qualified electrician.
- Do not install this fixture with wet hands or while standing on a wet or damp surface.
- This fixture is suitable for damp locations.
- Do not attempt to modify the fixture. Any modifications may void the warranty and create safety hazards.
- Ensure the mounting surface can support the weight of the fixture.
Package Contents
Verify that all components are present before beginning installation:
- 1 x Energetic 14-Inch LED Flush Mount Ceiling Light Fixture
- 1 x Instruction Manual
- Mounting Hardware (screws, wire nuts) - Note: Some packages may not include all hardware; please ensure you have appropriate hardware for your installation.
Specifications
| Feature | Specification |
|---|---|
| Model Number | MXL1186 |
| Dimensions | 14 inches (Diameter) x 3.94 inches (Height) |
| Wattage | 24W |
| Lumen Output | 1560 LM |
| Color Temperature | 3000K (Warm White), 4000K (Cool White), 5000K (Daylight) - Selectable |
| Dimmability | 10% - 100% (Compatible with most dimmer switches, not included) |
| CRI (Color Rendering Index) | 90+ |
| Voltage | 120 Volts |
| Material | Plastic |
| Finish Type | Brushed |
| Certification | ETL Listed |
| Indoor/Outdoor Usage | Indoor (Suitable for damp locations) |

Figure 2: Product Dimensions. The fixture measures 14 inches in diameter and 3.94 inches in height.
Installation Instructions
Before You Begin: Ensure power is disconnected at the circuit breaker. Read all instructions carefully.
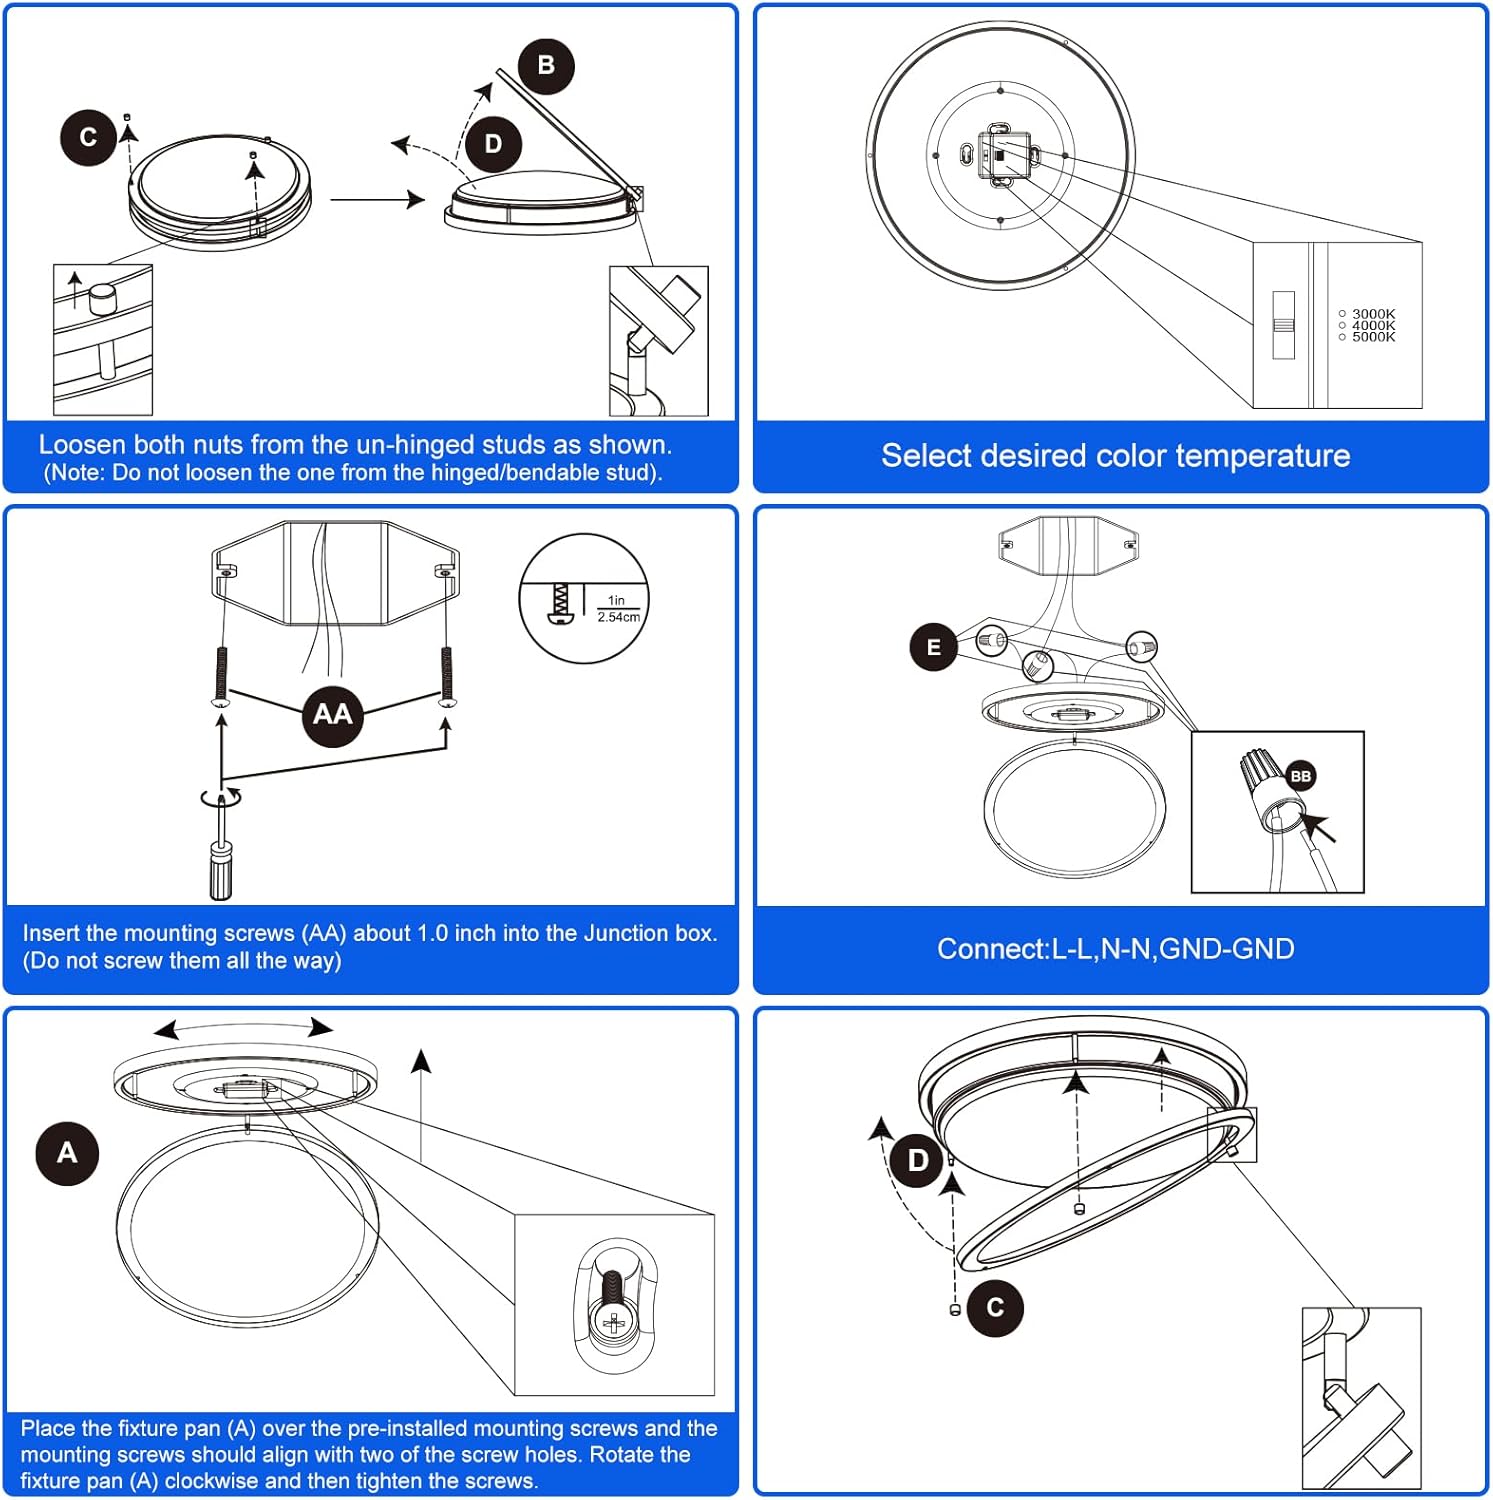
Figure 3: Installation Diagram. This diagram illustrates the complete installation process.
- Prepare the Fixture: Loosen both nuts from the un-hinged studs on the fixture. Do not loosen the nut from the hinged/bendable stud.
- Select Color Temperature: Before mounting, locate the small switch inside the fixture to select your desired color temperature (3000K, 4000K, or 5000K). This setting can be changed after installation if needed by carefully opening the diffuser.
- Install Mounting Screws: Insert the mounting screws (labeled AA in Figure 3) approximately 1.0 inch into the junction box. Do not screw them in completely at this stage.
- Connect Wiring: Connect the household wiring to the fixture's wiring using appropriate wire nuts. Connect the Live (L) wire to the fixture's Live wire, Neutral (N) to Neutral, and Ground (GND) to Ground. Ensure all connections are secure.
- Mount the Fixture: Place the fixture pan (labeled A in Figure 3) over the pre-installed mounting screws. The mounting screws should align with the two screw holes. Rotate the fixture pan to secure it, then tighten the screws to hold the fixture firmly against the ceiling.
- Secure Diffuser: Carefully close and secure the diffuser (labeled C and D in Figure 3) to the fixture body.
Operating Instructions
Color Temperature Adjustment
The fixture offers three selectable color temperatures: 3000K (Warm White), 4000K (Cool White), and 5000K (Daylight). This setting is adjusted via a small switch located inside the fixture. It is recommended to select your preferred color temperature before final installation. If you need to change it after installation, carefully open the diffuser to access the switch.

Figure 4: Color Temperature Options. Visual representation of 3000K, 4000K, and 5000K light settings.
Dimming Functionality
This LED ceiling light fixture is dimmable, allowing brightness adjustment from 10% to 100%. It is compatible with most standard dimmer switches available on the market. A dimmer switch is not included with the fixture and must be purchased separately.
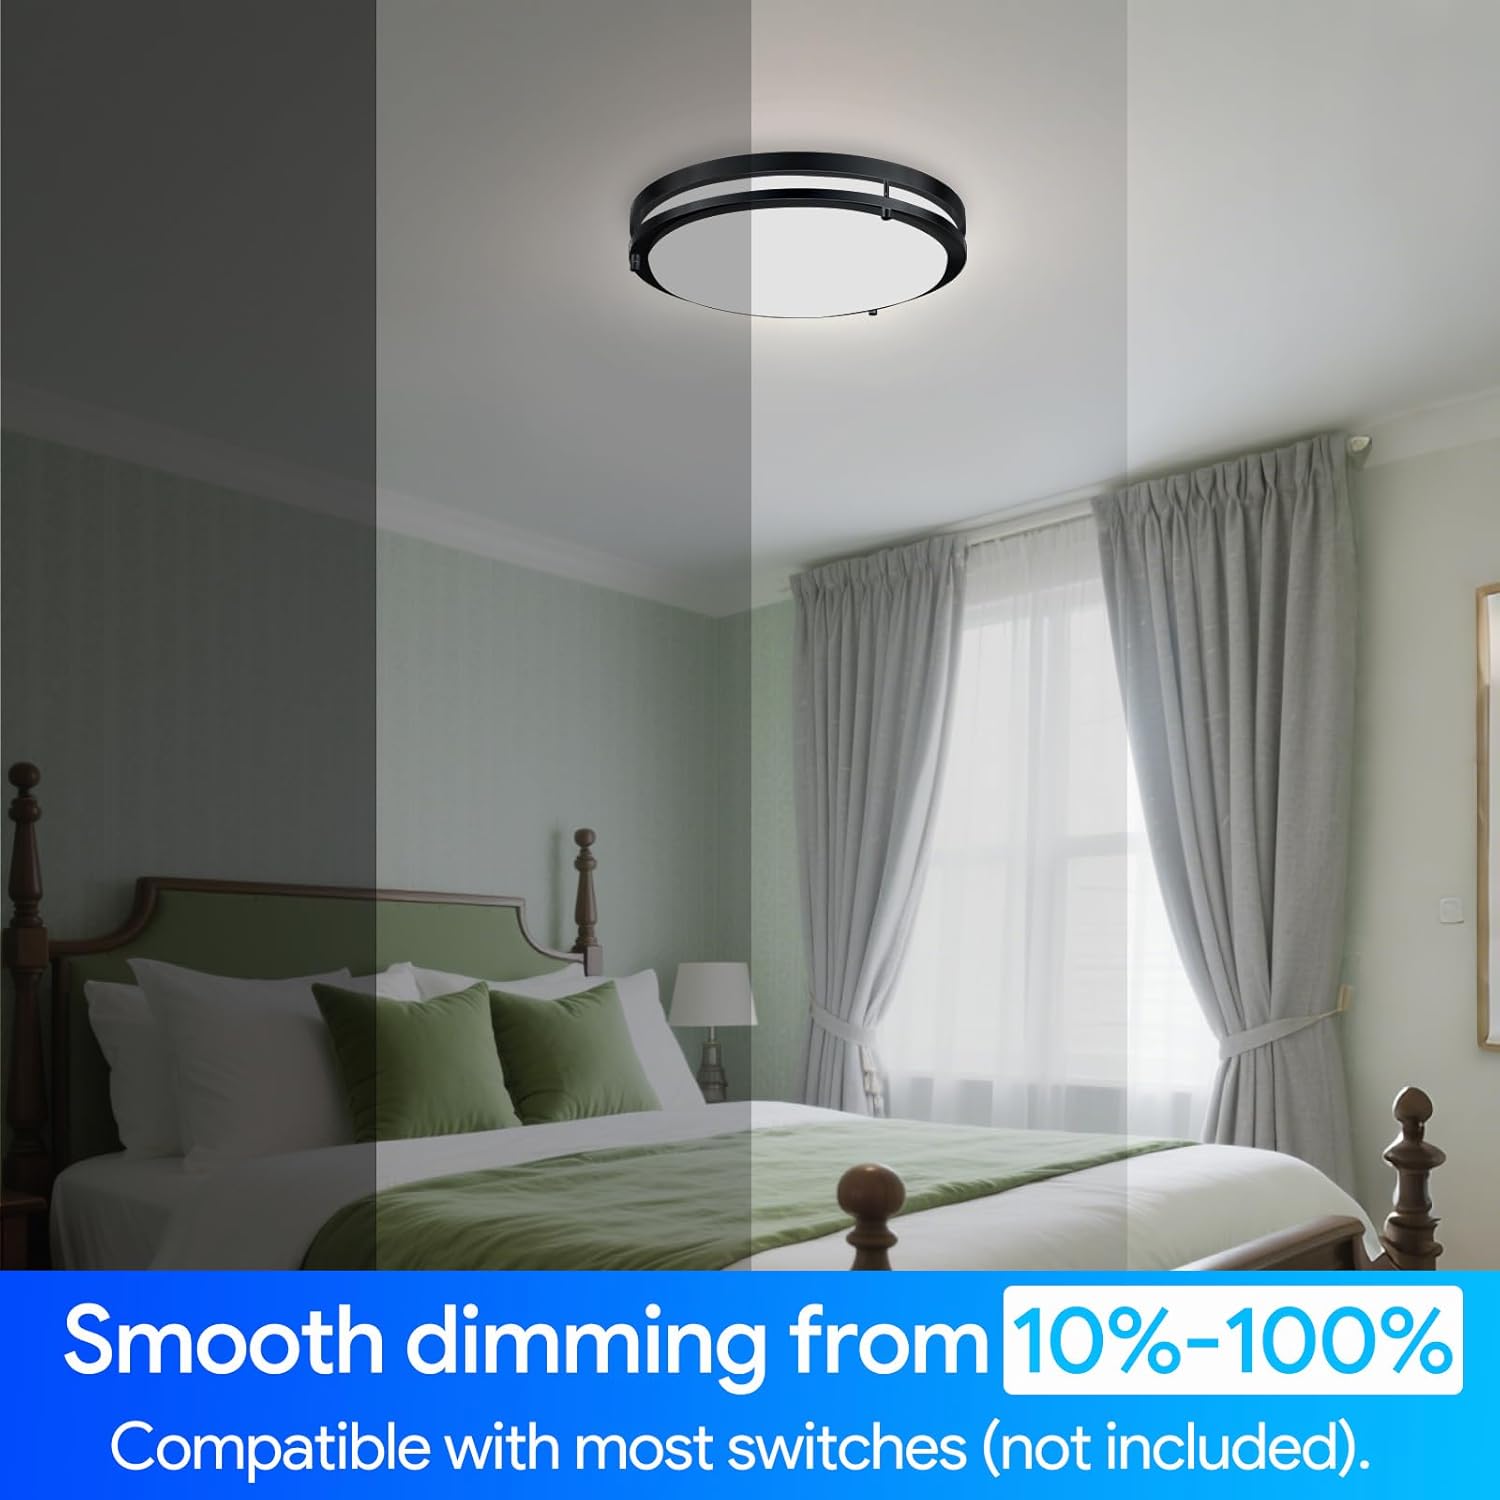
Figure 5: Dimmable Brightness. The light can be adjusted from 10% to 100% brightness.
Maintenance
- Cleaning: Ensure power is disconnected before cleaning. Wipe the fixture with a soft, dry, or slightly damp cloth. Do not use harsh chemicals, abrasive cleaners, or polishes as they may damage the finish or electrical components.
- Bulb Replacement: This fixture uses integrated LED components and does not require bulb replacement.
- Inspection: Periodically inspect the fixture for any signs of damage or loose connections. If any issues are found, disconnect power and consult a qualified electrician.
Troubleshooting
| Problem | Possible Cause | Solution |
|---|---|---|
| Light does not turn on. | No power to the fixture; Loose wiring connection; Faulty switch. | Check circuit breaker/fuse. Ensure all wire connections are secure. Test the switch. |
| Light flickers or dims improperly. | Incompatible dimmer switch; Loose wiring connection. | Ensure dimmer switch is LED compatible. Check wiring connections. |
| Incorrect color temperature. | Color temperature switch set incorrectly. | Carefully open the diffuser and adjust the internal switch to the desired setting. |
If troubleshooting steps do not resolve the issue, please contact customer support.
Warranty and Support
This Energetic LED Flush Mount Ceiling Light Fixture comes with a 5-year service warranty. For warranty claims, technical support, or any questions regarding your product, please contact E ENERGETIC LIGHTING customer service. Please have your model number (MXL1186) and proof of purchase available when contacting support.
Contact Information: Refer to the product packaging or the official E ENERGETIC LIGHTING website for the most current contact details.