
1. Introduction
This manual provides essential information regarding the Zahara DC Jack Charging Port replacement part, Model NE4004-W4. This component is designed for specific Razer Blade 15 laptop models and requires soldering for proper installation. It is intended for use by qualified technicians or individuals with advanced soldering skills and experience in laptop repair.
2. Product Overview
The Zahara DC Jack Charging Port is a critical component for restoring power input functionality to compatible Razer Blade 15 laptops. It features a robust design for reliable power connection.
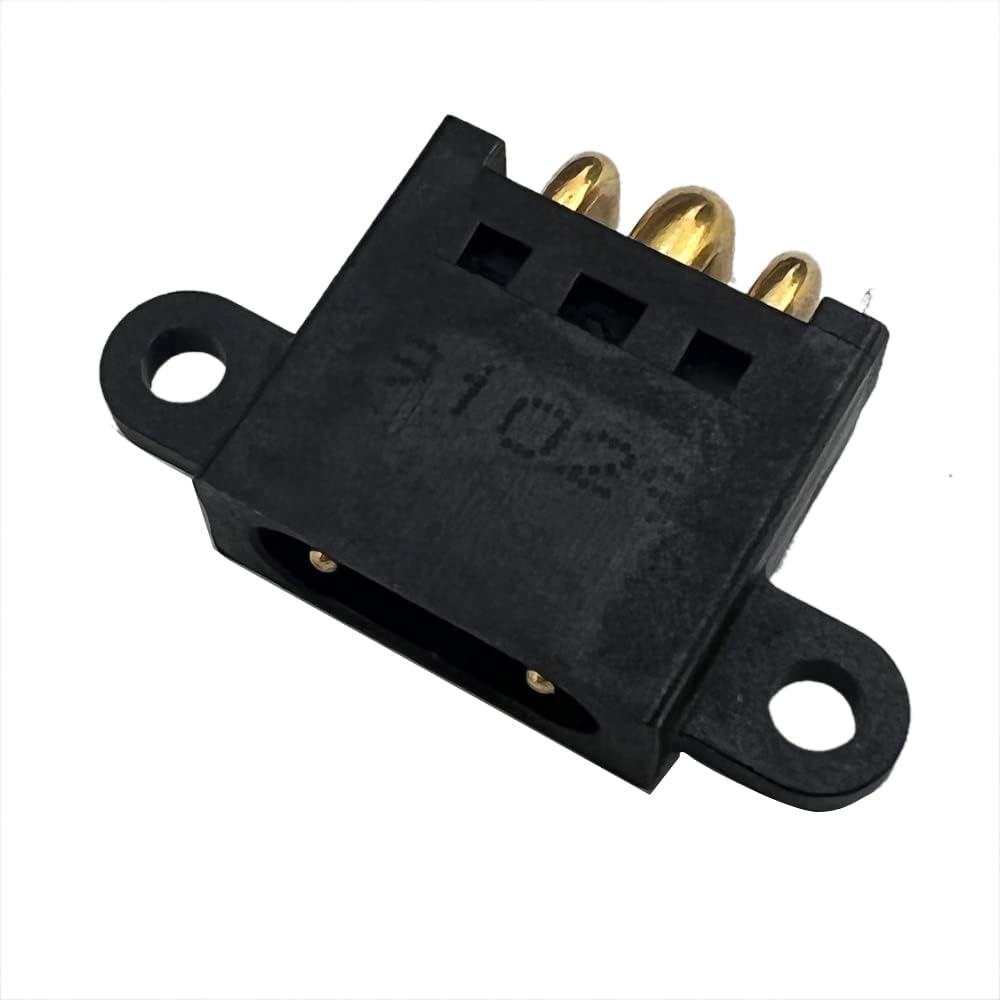
Figure 1: Front view of the Zahara DC Jack Charging Port, showing the power input receptacle.

Figure 2: Side view of the DC Jack, illustrating the three soldering pins for motherboard connection.
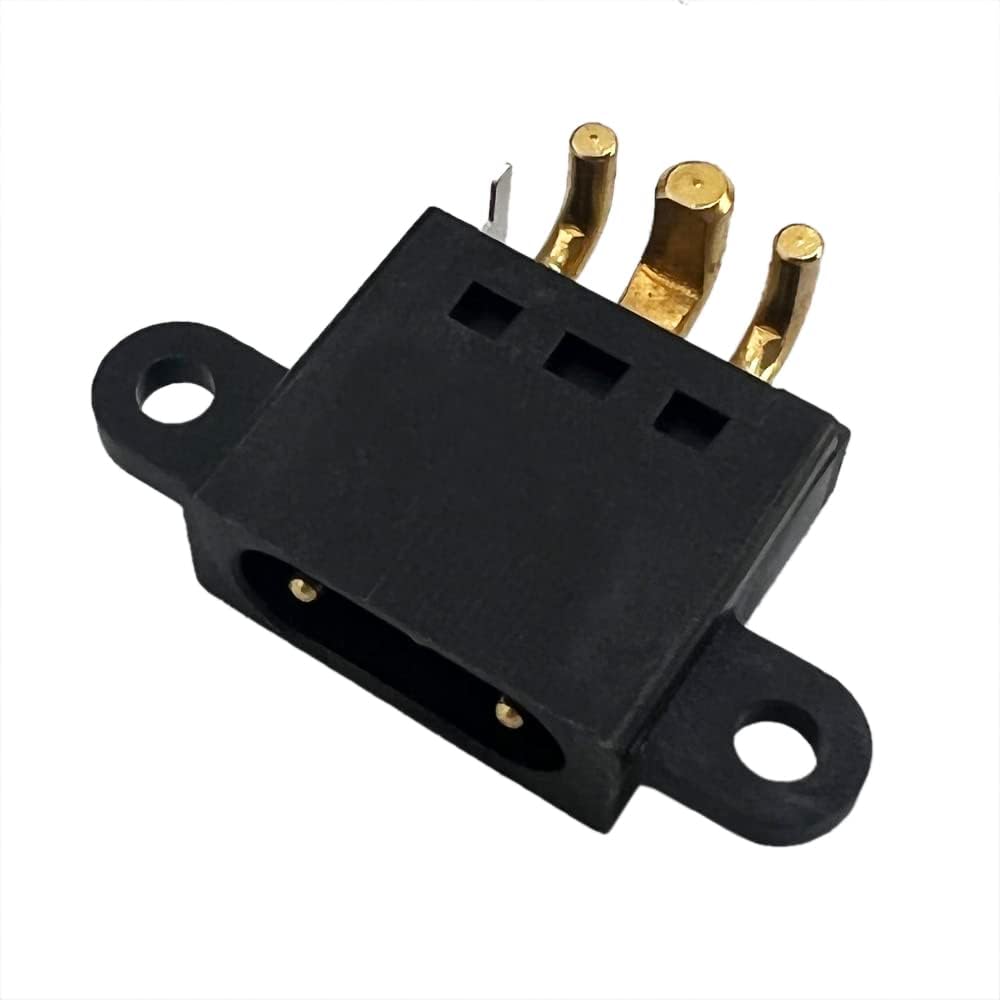
Figure 3: Angled view of the DC Jack, providing a comprehensive look at its structure and mounting points.
3. Compatibility
This DC Jack Charging Port is compatible with the following Razer Blade 15 laptop models:
- RZ09-0301
- RZ09-02878E92
- RZ09-02886E92
- RZ09-0238
- RZ09-0287
- RZ09-0288
- RZ09-0314
- RZ09-0330
- RZ09-0368
- RZ09-0370
- RZ09-0427
- RZ09-0484
- RZ09-0409
- RZ09-0409BEC3
- RZ09-0409AWD3
- RZ09-0409AND3
- RZ09-0409BED3
- RZ09-0409AJD3
- RZ09-0409AGD3
- RZ09-0409ATD3
- RZ09-0409CE53-R3U1
- RZ09-0409BEA3-R3U1
- RZ09-0409BEC3-R3U1
- RZ09-0409CG53-R3G1
Please verify your laptop's model number before attempting installation to ensure compatibility.
4. Safety Information
Installation of this component involves working with sensitive electronic parts and requires soldering. Improper installation can lead to damage to your laptop, personal injury, or fire hazards. It is strongly recommended that installation be performed by a certified professional technician.
- Disconnect Power: Always ensure the laptop is completely powered off and disconnected from the AC adapter and battery before beginning any repair.
- Static Discharge: Use an anti-static wrist strap and work on an anti-static mat to prevent electrostatic discharge (ESD) damage to sensitive components.
- Soldering Safety: Wear appropriate personal protective equipment, including safety glasses. Work in a well-ventilated area to avoid inhaling solder fumes. Use a soldering iron with proper temperature control.
- Component Handling: Handle the DC jack and motherboard components carefully to avoid physical damage.
5. Installation (Setup)
This section outlines the general steps for replacing a DC jack. Due to the complexity and precision required, professional installation is highly recommended.
5.1. Required Tools
- Precision screwdriver set (Phillips, Torx)
- Plastic spudger or opening tools
- Anti-static wrist strap and mat
- Soldering iron with fine tip
- Desoldering pump or desoldering braid
- Rosin core solder (lead-free recommended)
- Flux pen or paste
- Isopropyl alcohol (99%) and lint-free wipes
- Multimeter (for testing connections)
- Safety glasses
5.2. Installation Steps (General Guide)

Figure 4: A typical laptop repair workbench, illustrating the environment for such an installation.
- Disassembly: Carefully disassemble the laptop to access the motherboard and the existing DC jack. Refer to your specific Razer Blade 15 model's service manual for detailed disassembly instructions.
- Disconnect Battery: Always disconnect the laptop battery before proceeding with any component removal or installation on the motherboard.
- Desolder Old DC Jack: Using a soldering iron and desoldering tool, carefully remove the old DC jack from the motherboard. Ensure all solder pads are clean and free of old solder.
- Prepare New DC Jack: Apply a small amount of flux to the pins of the new Zahara DC Jack and the corresponding pads on the motherboard.
- Solder New DC Jack: Position the new DC jack onto the motherboard, ensuring proper alignment. Carefully solder each pin to its respective pad. Ensure strong, clean solder joints without bridges.
- Inspect and Clean: Visually inspect all solder joints for quality. Clean any flux residue from the motherboard using isopropyl alcohol and a lint-free wipe.
- Test (Optional but Recommended): Before full reassembly, connect the AC adapter and use a multimeter to verify that power is correctly supplied through the new DC jack to the motherboard.
- Reassembly: Carefully reassemble the laptop, ensuring all cables and components are correctly connected and secured.
If you are not confident in performing these steps, seek assistance from a professional laptop repair service.
6. Troubleshooting
If your laptop does not charge after replacing the DC jack, consider the following:
- Check Solder Joints: Re-inspect all solder joints on the DC jack for cold joints, shorts, or insufficient solder. Reflow if necessary.
- Cable Connections: Ensure all internal cables, especially the battery connector, are securely reconnected.
- AC Adapter: Verify that your AC adapter is functional and compatible with your Razer Blade 15 model.
- Motherboard Damage: In rare cases, the motherboard itself might have sustained damage beyond the DC jack. If issues persist, professional diagnosis is recommended.
7. Specifications
| Feature | Detail |
|---|---|
| Model Number | NE4004-W4 |
| Item Weight | 0.529 ounces |
| Package Dimensions | 2.95 x 1.97 x 0.79 inches |
| Manufacturer | Zahara |
| Compatibility | Razer Blade 15 series (various models listed in Section 3) |
8. Warranty and Support
For any issues with our products or your order, please contact us. Our customer support team aims to reply within 12 hours and will assist you in resolving any problems. If you require bulk orders, please reach out for preferential pricing.
Please note that improper installation or damage caused during the installation process may void any applicable warranty.