1. Introduction
Thank you for purchasing the Qiilu Mini Projector. This portable device is designed to provide a versatile entertainment experience, supporting 1080P HD display and offering multiple connectivity options for home theater, outdoor viewing, and gaming. Please read this manual carefully to ensure proper setup, operation, and maintenance of your projector.

Image 1.1: The Qiilu Mini Projector set up for a private home theater experience. This compact projector is designed for portability and supports 1080P HD content with 1500 lumens brightness.
2. Package Contents
Please check the package for the following items:
- 1 x Qiilu Mini Projector
- 1 x Remote Control (batteries not included)
- 1 x Power Adapter (US/EU/UK/EU plug, depending on region)
- 1 x AV Cable
- 1 x User Manual

Image 2.1: Contents of the Qiilu Mini Projector package, including the projector unit, remote control, power adapter, and AV cable.
3. Product Overview
The Qiilu Mini Projector features a compact design with various input interfaces to connect to a wide range of devices.
3.1. Input Interfaces
The projector is equipped with multiple ports for connectivity:
- HDMI: For connecting laptops, TV boxes, game consoles, etc.
- USB: For connecting USB flash drives or external hard drives.
- AV: For connecting older devices like DVD players or VCRs.
- VGA: For connecting desktop PCs or older laptops.
- Small Memory Card Slot: For direct media playback from memory cards.
- 3.5mm Earphone Port: For connecting external audio devices or headphones.

Image 3.1: A diagram illustrating the various input interfaces available on the Qiilu Mini Projector, including HDMI, USB, AV, VGA, and a small memory card slot, allowing connection to devices such as laptops, desktop PCs, TV boxes, DVD/VCD players, and game consoles.
4. Setup
4.1. Power Connection
- Connect the power adapter to the DC IN port on the projector.
- Plug the power adapter into a wall outlet.
4.2. Connecting Input Devices
Choose the appropriate cable (HDMI, AV, VGA, USB) to connect your desired media source (e.g., laptop, TV box, USB drive) to the corresponding port on the projector.
4.3. Adjusting Focus
After powering on the projector, rotate the focus ring on the front of the projector until the projected image appears clear and sharp on the screen.
4.4. Placement and Screen Size
For optimal viewing, place the projector at a distance of 1.5 to 2.0 meters from the projection surface. This distance typically yields a screen size between 24 to 60 inches. A screen size of approximately 40 inches is recommended for the best effect, especially in a dark environment.
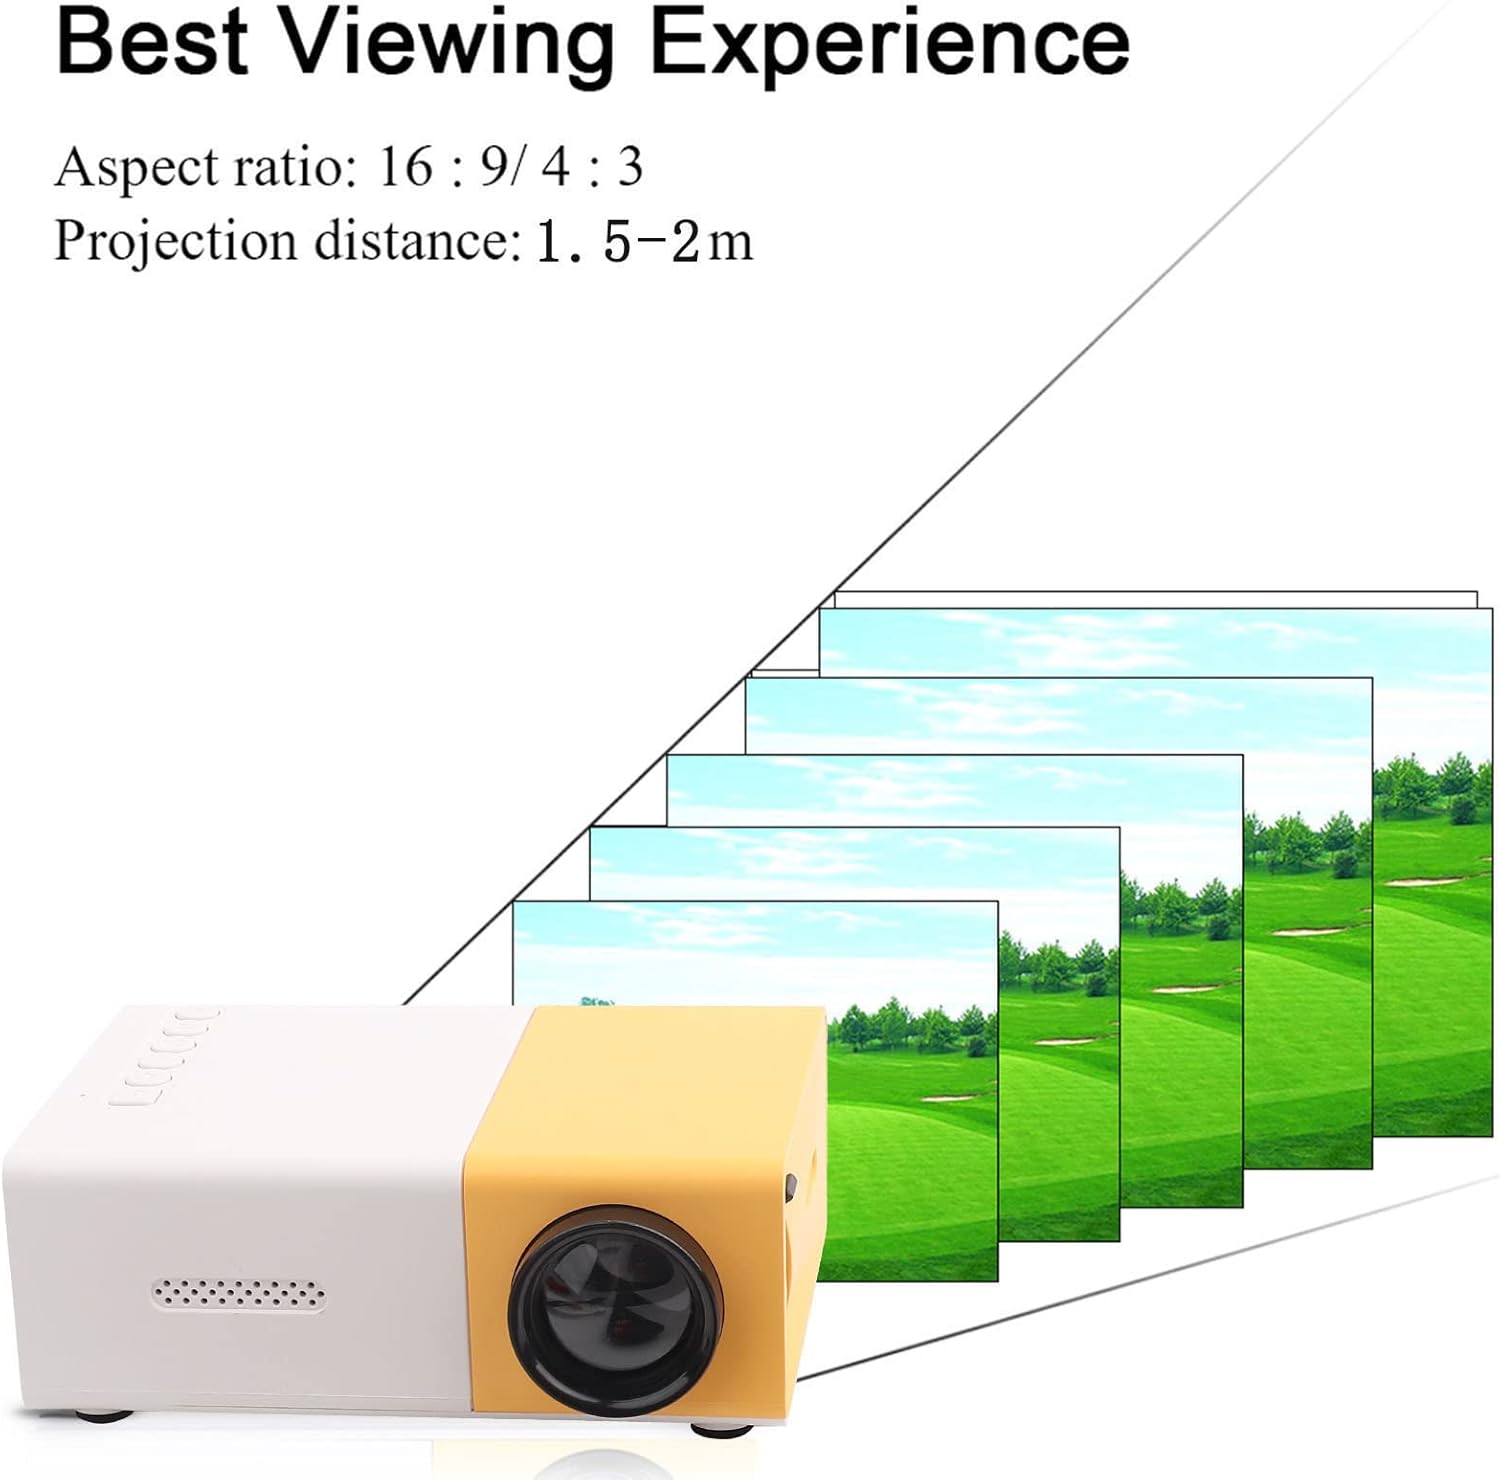
Image 4.1: Illustration of the recommended projection distance (1.5-2m) and aspect ratio (16:9/4:3) for achieving the best viewing experience with the mini projector.
5. Operating Instructions
5.1. Powering On/Off
Press the power button on the projector or the remote control to turn the unit on or off.
5.2. Selecting Input Source
Use the 'Source' button on the remote control or the projector's control panel to cycle through available input sources (HDMI, USB, AV, VGA, Memory Card) until your desired source is displayed.
5.3. Media Playback
The projector supports a variety of media formats:
- Audio Files: MP3, WMA, OGG, FLAC, APE, WAV
- Image Files: JPEG, BMP, PNG
- Video Files: Supports full format files (up to 1080P playback)
- Text Files: TXT
Navigate through your media files using the remote control's directional buttons and 'OK' button.

Image 5.1: The mini projector displaying a high-definition image of various fruits, demonstrating its support for 720P and 1080P display for clear and natural visuals.
5.4. Bluetooth Connectivity
The projector supports Bluetooth connectivity. Refer to the on-screen menu for pairing instructions with compatible Bluetooth audio devices.
6. Maintenance
6.1. Cleaning
- Use a soft, dry cloth to clean the projector's exterior.
- For the lens, use a lens cleaning cloth and specialized lens cleaning solution. Avoid harsh chemicals.
- Ensure ventilation vents are clear of dust and debris to prevent overheating.
6.2. Storage
When not in use, store the projector in a cool, dry place, away from direct sunlight and extreme temperatures. Use the original packaging or a protective case to prevent damage.
7. Troubleshooting
7.1. No Image Displayed
- Ensure the power adapter is securely connected and the projector is powered on.
- Verify that the correct input source is selected.
- Check the connection cable between the projector and the source device. Try a different cable if necessary.
7.2. Blurry Image
- Adjust the focus ring on the projector until the image is clear.
- Ensure the projection distance is within the recommended range (1.5-2.0m).
- Clean the projector lens if it appears dirty.
7.3. No Sound
- Check the volume settings on both the projector and the source device.
- If using external speakers or headphones, ensure they are properly connected to the 3.5mm earphone port or paired via Bluetooth.
- Verify that the audio format of the media file is supported.
8. Specifications
| Feature | Specification |
|---|---|
| Light Source | LED, 30,000 hours lifespan |
| Native Resolution | 320 x 240 pixels |
| Support Resolution | 720P, 1080P |
| Brightness | 1500lm |
| Contrast Ratio | 800:1 |
| Focusing Mode | Manual focusing |
| Displayable Colors | 1.67M |
| Aspect Ratio | 16:9 / 4:3 |
| Projection Distance | 1.5-2.0m |
| Projection Screen Size | 24-60 inches |
| Input | DC12V-2A |
| Dimensions | Approx. 127 x 81.5 x 48.5mm (5 x 3.21 x 1.91 inches) |
| Item Weight | Approx. 1.04 pounds |
| Connectivity Technology | Bluetooth, HDMI, USB |

Image 8.1: A visual comparison demonstrating the enhanced brightness of 1500 lumens, delivering stunning true color presentations and abundant detail compared to common lumen projectors.

Image 8.2: A close-up view of the projector's lens, emphasizing the 30,000-hour lifespan of its RGB LED lamps, which are designed to be harmless, radiation-free, environmentally friendly, and durable.
9. Warranty and Support
9.1. Product Warranty
This product is typically covered by a standard return policy, allowing for refunds or replacements within 30 days of purchase. For extended protection, 2-year and 3-year protection plans may be available for purchase separately.
9.2. Customer Support
For any questions, technical assistance, or warranty claims, please contact your retailer or the manufacturer's customer support. Refer to your purchase documentation for specific contact information.