GROHE 29432GN0
GROHE Eurocube Pressure Balance Rainshower Set
Model: 29432GN0
Brand: GROHE
1. Introduction
This instruction manual provides detailed guidance for the installation, operation, and maintenance of your GROHE Eurocube Pressure Balance Rainshower Set. Please read this manual thoroughly before beginning installation or use to ensure proper function and longevity of your product. Retain this manual for future reference.
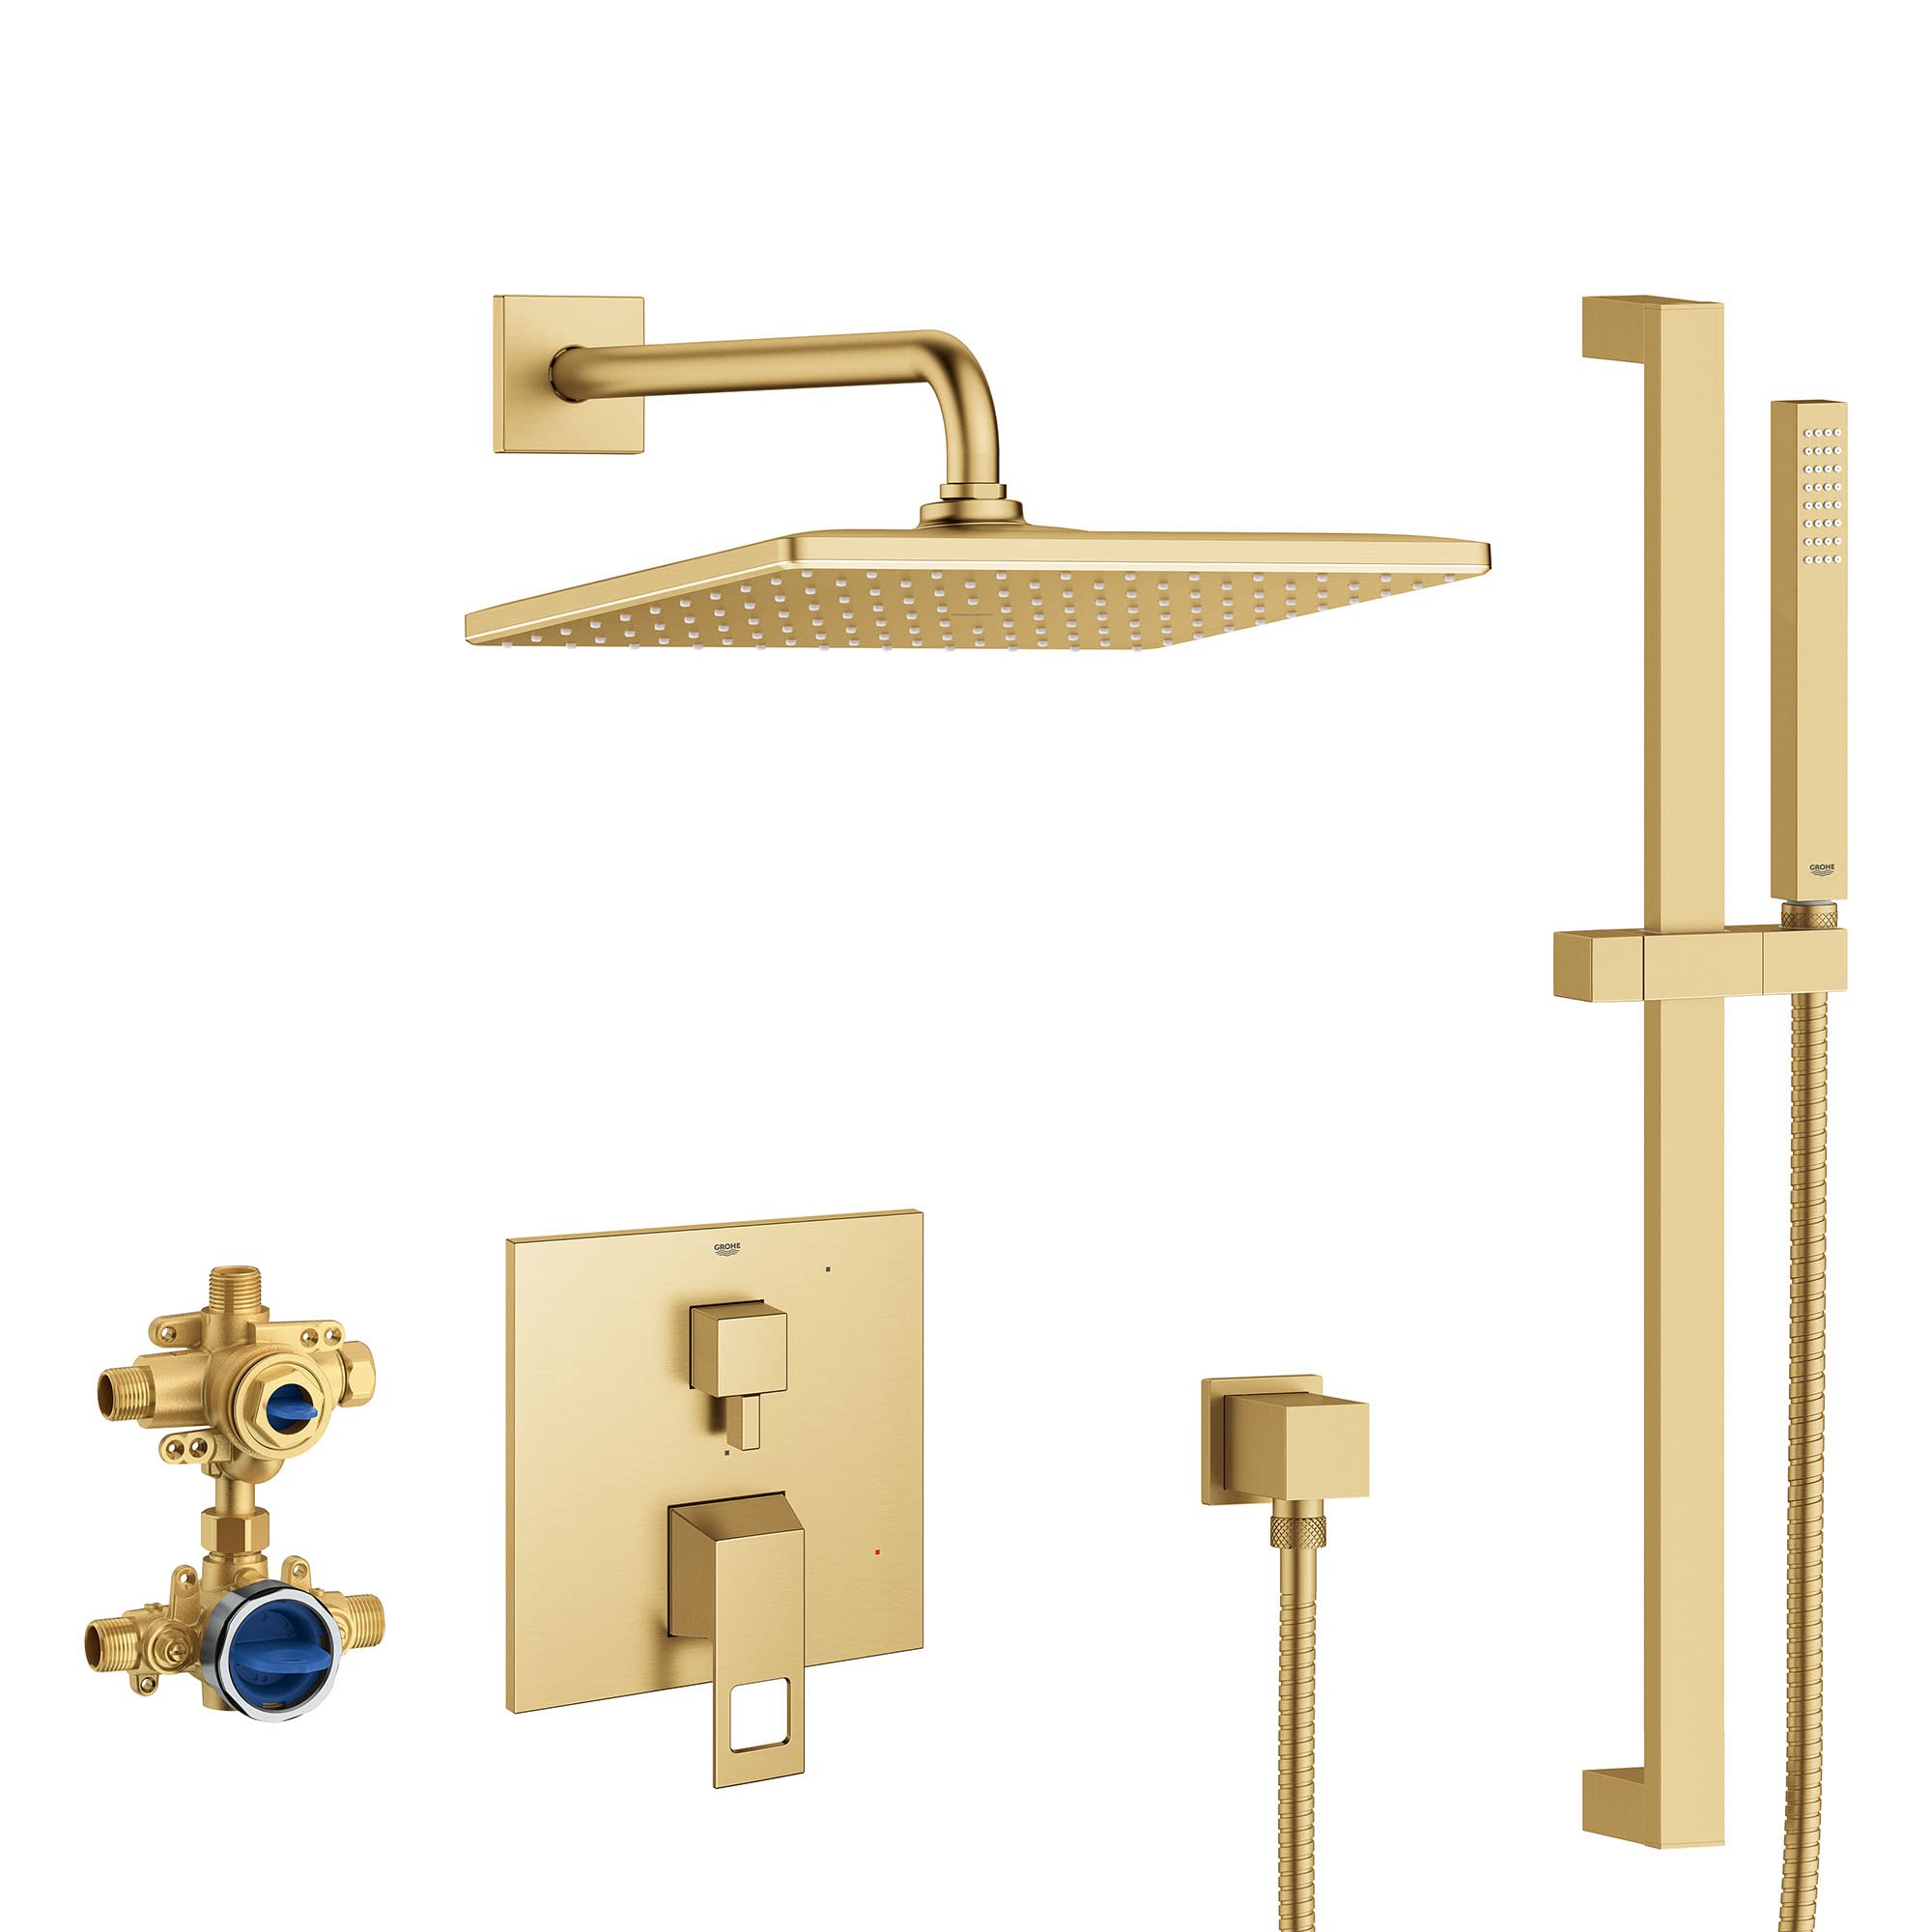
Image 1.1: The GROHE Eurocube Pressure Balance Rainshower Set, featuring the large rainshower head and the slim hand shower, in a Brushed Cool Sunrise finish.
2. Safety Information
- Professional Installation Recommended: Installation of this product requires plumbing knowledge and should ideally be performed by a qualified professional to ensure compliance with local codes and proper function.
- Water Supply: Ensure the main water supply is turned off before beginning any installation or maintenance to prevent water damage.
- Temperature Settings: The pressure balance valve is designed to maintain a consistent water temperature. However, always test water temperature before use to prevent scalding, especially for children or individuals with sensitive skin.
- Component Handling: Handle all components with care to avoid damage to the finish or internal mechanisms.
- Cleaning: Use only mild soap and water for cleaning. Abrasive cleaners or harsh chemicals can damage the finish and void the warranty.
3. Package Contents
Verify that all components listed below are present and undamaged before proceeding with installation. If any parts are missing or damaged, contact GROHE customer support.
- Eurocube Pressure Balance Valve Trim with 2-way diverter (29 423)
- GrohSafe 3.0 Pressure Balance Rough Valve with integrated diverter (35 117)
- Rainshower 310 Mono Shower Head, 1.75 gpm (26 570)
- Rainshower 15” Shower Arm (26 632)
- Hand Shower (slim, single-spray SPA stick)
- Shower Hose
- Wall Union
- Check Valves
- Installation Guide
4. Setup and Installation
Installation of the GROHE Eurocube Rainshower Set involves several plumbing steps. It is highly recommended that a licensed plumber performs the installation to ensure proper function and adherence to local building codes.
- Prepare the Installation Area: Ensure the wall cavity is clear and accessible. Turn off the main water supply to the bathroom.
- Install the GrohSafe 3.0 Rough Valve (35 117): Mount the rough valve securely within the wall cavity according to the detailed instructions provided with the valve. Connect the hot and cold water lines to the designated inlets. Ensure the valve is level and at the correct depth relative to the finished wall surface.
- Connect Outlets: Connect the appropriate plumbing lines from the rough valve to the shower arm location and the hand shower wall union location. The integrated diverter allows for two water outlets.
- Install Shower Arm (26 632): Secure the 15-inch shower arm into the wall outlet, ensuring a watertight seal.
- Attach Rainshower Head (26 570): Thread the Rainshower 310 Mono Shower Head onto the shower arm. Hand-tighten, then use a wrench for a final quarter turn, being careful not to overtighten.
- Install Hand Shower Wall Union and Hose: Mount the wall union for the hand shower at the desired height. Connect the shower hose to the wall union and then to the slim SPA stick hand shower.
- Install Eurocube Valve Trim (29 423): Once the wall is finished, install the Eurocube pressure balance valve trim over the rough valve. Follow the specific instructions for securing the trim plate, handle, and diverter knob. Ensure the ceramic discs are properly seated for smooth operation.
- Test for Leaks: Slowly turn the main water supply back on and check all connections for leaks. Operate the shower system to ensure proper water flow and temperature control.
5. Operating Instructions
Your GROHE Eurocube Rainshower Set is designed for intuitive use and a luxurious showering experience.
- Temperature Control: The main handle on the Eurocube valve trim controls the water temperature. Rotate the handle to adjust from cold to hot. The pressure balance feature automatically maintains a consistent temperature even if water pressure fluctuates elsewhere in your home.
- Flow Control: The same main handle also controls the water flow. Push or pull the handle to turn the water on or off and adjust the flow intensity.
- Diverter Function: The smaller knob or lever on the Eurocube valve trim acts as a 2-way diverter. Rotate or move this control to switch water flow between the Rainshower 310 Mono Shower Head and the SPA stick hand shower.
- Rainshower 310 Mono Shower Head: This shower head delivers the GROHE PureRain spray, designed to replicate a soft, spring rain for full body coverage.
- SPA Stick Hand Shower: The slim hand shower provides a single, focused spray for targeted rinsing or cleaning.
6. Maintenance and Care
Proper care will preserve the finish and functionality of your GROHE Eurocube Rainshower Set.
- Cleaning the Finish: For the Brushed Cool Sunrise finish, use only a soft cloth and mild soap and water. Rinse thoroughly with clean water and dry immediately to prevent water spots. Avoid abrasive cleaners, scouring pads, ammonia-based cleaners, or any harsh chemicals, as these can damage the finish.
- Cleaning the Shower Head Nozzles: The Rainshower 310 Mono Shower Head features flexible silicone nozzles. To remove limescale buildup, simply wipe the nozzles with your finger or a soft cloth. For stubborn deposits, a solution of white vinegar and water can be used, applied with a soft cloth, then rinsed thoroughly.
- General Inspection: Periodically check all connections for tightness and signs of wear. Address any leaks promptly to prevent further damage.
7. Troubleshooting
Refer to the table below for common issues and their potential solutions.
| Problem | Possible Cause | Solution |
|---|---|---|
| Low Water Pressure | Clogged shower head nozzles; partially closed shut-off valves; general household water pressure issue. | Clean shower head nozzles (see Maintenance); ensure shut-off valves are fully open; consult a plumber if household pressure is consistently low. |
| Water Temperature Fluctuations | Pressure balance valve malfunction; issues with hot/cold water supply. | Ensure hot and cold water supplies are stable; if problem persists, contact a qualified plumber or GROHE support. |
| Leaking from Connections | Loose connections; damaged O-rings or seals; improper installation. | Turn off water supply, gently tighten connections; inspect and replace O-rings/seals if damaged; if installation error, consult a plumber. |
| Diverter Not Switching Properly | Debris in diverter mechanism; worn cartridge. | Flush the system; if problem persists, the diverter cartridge may need replacement by a qualified professional. |
8. Specifications
- Model Number: 29432GN0
- Brand: GROHE
- Color: Brushed Cool Sunrise
- Material: Metal, Plastic, Zinc
- Finish Type: BRUSHED COOL SUNRISE
- Number of Handles: 2 (one for temperature/flow, one for diverter)
- Mounting Type: Wall Mount
- Shower Head Flow Rate: 1.75 gpm (gallons per minute)
- Included Components: Valve Trim, Rough Valve, Hose, Wall Union, Check Valves, Showerhead, Shower Arm, Hand Shower, Installation Guide
9. Warranty and Support
GROHE products are manufactured to the highest quality standards and are backed by a limited warranty. For specific warranty details, please refer to the warranty card included with your product or visit the official GROHE website. For technical support, replacement parts, or any inquiries, please contact GROHE customer service through their official channels.
Official GROHE Website: www.grohe.us
Ask a question about this manual
Ask about setup, troubleshooting, compatibility, parts, safety, or missing instructions. Manuals+ will review the question and use this page’s manual context to help answer it.