1. Introduction
Thank you for choosing the COSTWAY 2000W Steam Cleaner. This manual provides essential information for the safe and efficient operation, maintenance, and troubleshooting of your steam cleaner. Please read it thoroughly before first use and keep it for future reference.
This steam cleaner is designed for effective cleaning using high-temperature, high-pressure steam, eliminating the need for harsh chemicals. It is suitable for various surfaces including floors, windows, upholstery, and kitchen appliances.
2. Safety Information
WARNING: Always follow basic safety precautions when using electrical appliances to reduce the risk of fire, electric shock, or injury.
- Ensure the power supply matches the voltage specified on the appliance.
- Do not leave the steam cleaner unattended while it is powered on.
- Keep children and pets away from the appliance during operation.
- The steam is extremely hot (up to 160°C) and under high pressure (up to 5 bar). Avoid direct contact with skin or eyes.
- Always use the trigger lock on the handle to prevent accidental steam release.
- The tank cover acts as a safety valve. Do not attempt to open it while the unit is pressurized. Only refill water when the pressure gauge indicates zero.
- Do not immerse the appliance in water or other liquids.
- Unplug the appliance from the power outlet before cleaning, maintenance, or when not in use.
- Do not use the appliance if the power cord or plug is damaged.
3. Package Contents
Verify that all components are present in the package:

An overhead view of the yellow COSTWAY steam cleaner unit, featuring its main body with wheels, handle, and control knobs. Surrounding it are the various attachments: two extension tubes, a floor brush, a window squeegee, several small brushes, an angled nozzle, a measuring cup, and a funnel.

An image showcasing the 13 premium accessories that come with the steam cleaner. Each accessory is clearly laid out and labeled, including the measuring cup, funnel, rotating brush, cleaning cloth, window squeegee, floor scrubber, extension tubes, angled jet nozzle, small nozzle adapter, scrubbing adapter, rectangular brush, medium brush, and small brush.
- Steam Cleaner Main Unit
- 2 x Extension Tubes
- Floor Brush
- Floor Cleaning Cloth
- Scrubbing Adapter
- Small Nozzle Adapter
- Rectangular Brush
- Medium Brush
- Small Brush
- Angled Jet Nozzle
- Rotating Brush
- Window Squeegee
- Funnel
- Measuring Cup
- User Manual
4. Setup
- Unpacking: Carefully remove all components from the packaging. Retain packaging for storage or future transport.
- Assembly: Attach the desired accessory (e.g., extension tubes and floor brush) to the steam gun. Ensure connections are secure.
- Filling the Water Tank:
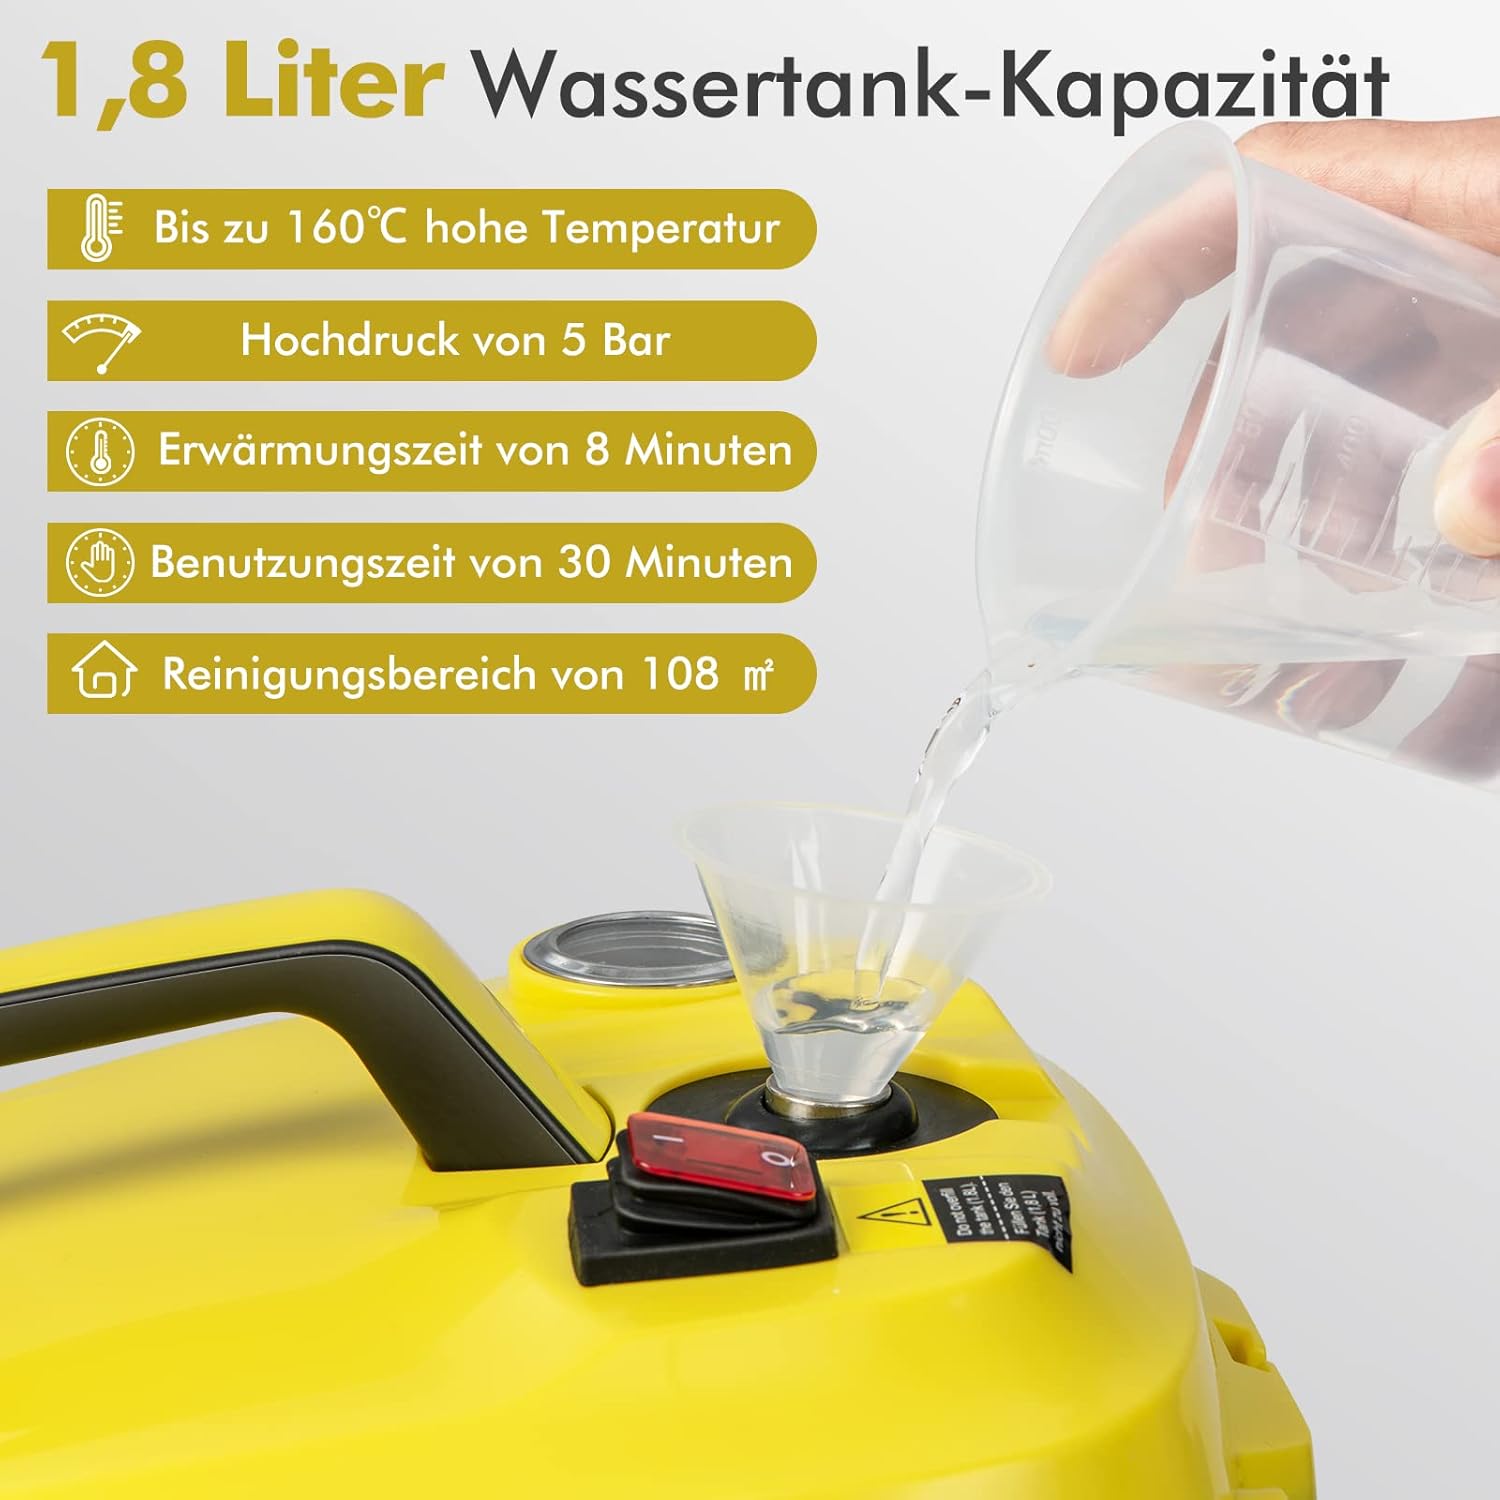
A close-up image showing water being poured into the steam cleaner's 1.8-liter water tank using a funnel. Text overlays highlight key performance metrics: up to 160°C high temperature, 5 bar high pressure, 8-minute heating time, 30-minute usage time, and a cleaning area of 108 m².
- Ensure the unit is unplugged and cool.
- Unscrew the safety cap of the water tank.
- Use the provided measuring cup and funnel to fill the tank with up to 1.8 liters of clean tap water. Do not overfill.
- Screw the safety cap back on tightly.
- Connecting Power: Plug the power cord into a grounded electrical outlet.
5. Operating Instructions
- Power On: Switch the power button to the 'ON' position. The indicator light will illuminate, signaling that the unit is heating up.
- Heating Time: The steam cleaner will heat up in approximately 8 minutes. The indicator light will turn off when the operating temperature (up to 160°C) and pressure (up to 5 bar) are reached.
- Steam Release: Unlock the trigger on the steam gun handle. Press the trigger to release steam. Direct the steam towards the surface to be cleaned.
- Using Accessories:

A collage of images demonstrating the steam cleaner's versatility. It shows the device being used to clean a sofa, kitchen stovetop, curtains, floor tiles, mirrors, carpets, tight corners, and bathroom fixtures, highlighting its multi-surface cleaning capabilities.
- Floor Brush: Ideal for large floor areas and carpets. Attach with extension tubes for comfortable use.
- Window Squeegee: For streak-free cleaning of windows, mirrors, and other smooth surfaces.
- Small/Medium/Rectangular Brushes: Use for scrubbing stubborn dirt on various surfaces like grout, tiles, and kitchen fixtures.
- Angled Jet Nozzle: Perfect for reaching tight corners, crevices, and difficult-to-access areas.
- Rotating Brush: Designed for deep cleaning of upholstery and removing tough stains.
- Monitoring Pressure: The integrated pressure gauge allows you to monitor the steam pressure. Ensure it is within the optimal operating range.

An image showing a user operating the steam cleaner with the floor brush attachment on a carpet. A magnified inset displays the precise pressure gauge on the main unit, indicating the steam pressure during operation.
- Refilling Water During Operation: If the steam output decreases or stops, the water tank may be empty. IMPORTANT: Turn off the unit and unplug it. Wait for the pressure gauge to drop to zero before carefully unscrewing the safety cap and refilling the tank.
- Finishing Cleaning: When done, switch the power button to 'OFF' and unplug the unit. Allow it to cool down completely before storing.
6. Maintenance
- Cleaning the Unit: Wipe the exterior of the steam cleaner with a damp cloth. Do not use abrasive cleaners or solvents.
- Draining Water: After each use, ensure the unit is cool and depressurized. Carefully drain any remaining water from the tank.
- Accessory Care: Clean all accessories after use. Cloths can be machine washed. Brushes and nozzles can be rinsed with water.
- Descaling: Over time, mineral deposits may build up in the water tank, especially in hard water areas. To descale, fill the tank with a solution of water and white vinegar (1:1 ratio) and let it sit for a few hours or overnight. Then, drain and rinse thoroughly. Do not operate the unit with the descaling solution.
- Storage: Store the steam cleaner and its accessories in a cool, dry place, away from direct sunlight and extreme temperatures. The unit features a storage holder for convenient stowing.
7. Troubleshooting
| Problem | Possible Cause | Solution |
|---|---|---|
| No steam or low steam output | Water tank empty Unit not heated sufficiently Mineral buildup | Refill water tank (ensure pressure is zero) Allow 8 minutes for heating Perform descaling procedure |
| Water leaking from nozzle | Condensation Accessory not properly attached | This is normal during initial use or after prolonged pauses Ensure all accessories are securely fastened |
| Unit not turning on | Not plugged in Power outlet issue Faulty power cord | Check power connection Test outlet with another appliance Contact customer support if cord is damaged |
| Safety cap cannot be opened | Unit is still pressurized | Turn off and unplug the unit. Wait for the pressure gauge to indicate zero before attempting to open. |
8. Specifications

An infographic detailing the steam cleaner's technical data, including its yellow color, PP material, dimensions, voltage, power, maximum operating temperature, heating time, maximum working pressure, and tank capacity. It also highlights design features such as its portable design, ergonomic handle, universal wheels, and storage holder.
| Brand | COSTWAY |
| Model | QE32653DE |
| Color | Yellow |
| Product Dimensions | 26 x 37 x 25 cm |
| Product Weight | 5 kg |
| Water Tank Capacity | 1.8 Liters |
| Power | 2000 W |
| Voltage | 220-240V AC 50Hz |
| Max. Steam Pressure | 5 Bar |
| Max. Steam Temperature | 160°C |
| Heating Time | Approx. 8 minutes |
| Continuous Usage Time | Up to 30 minutes |
| Max. Cleaning Area | 108 m² |
| Material | PP |
| Hose Length | 142 cm |
| Power Cable Length | 5 m |
9. Warranty and Support
For warranty information, technical support, or replacement parts, please refer to the contact details provided at the point of purchase or visit the official COSTWAY website. Keep your purchase receipt as proof of purchase.


