
Introduction
The ANDMON MINI400 Solar Electric Fence Charger is designed to provide reliable and energy-efficient electric fencing for various applications, including livestock containment and garden protection. This manual provides essential information for the safe and effective installation, operation, and maintenance of your device.
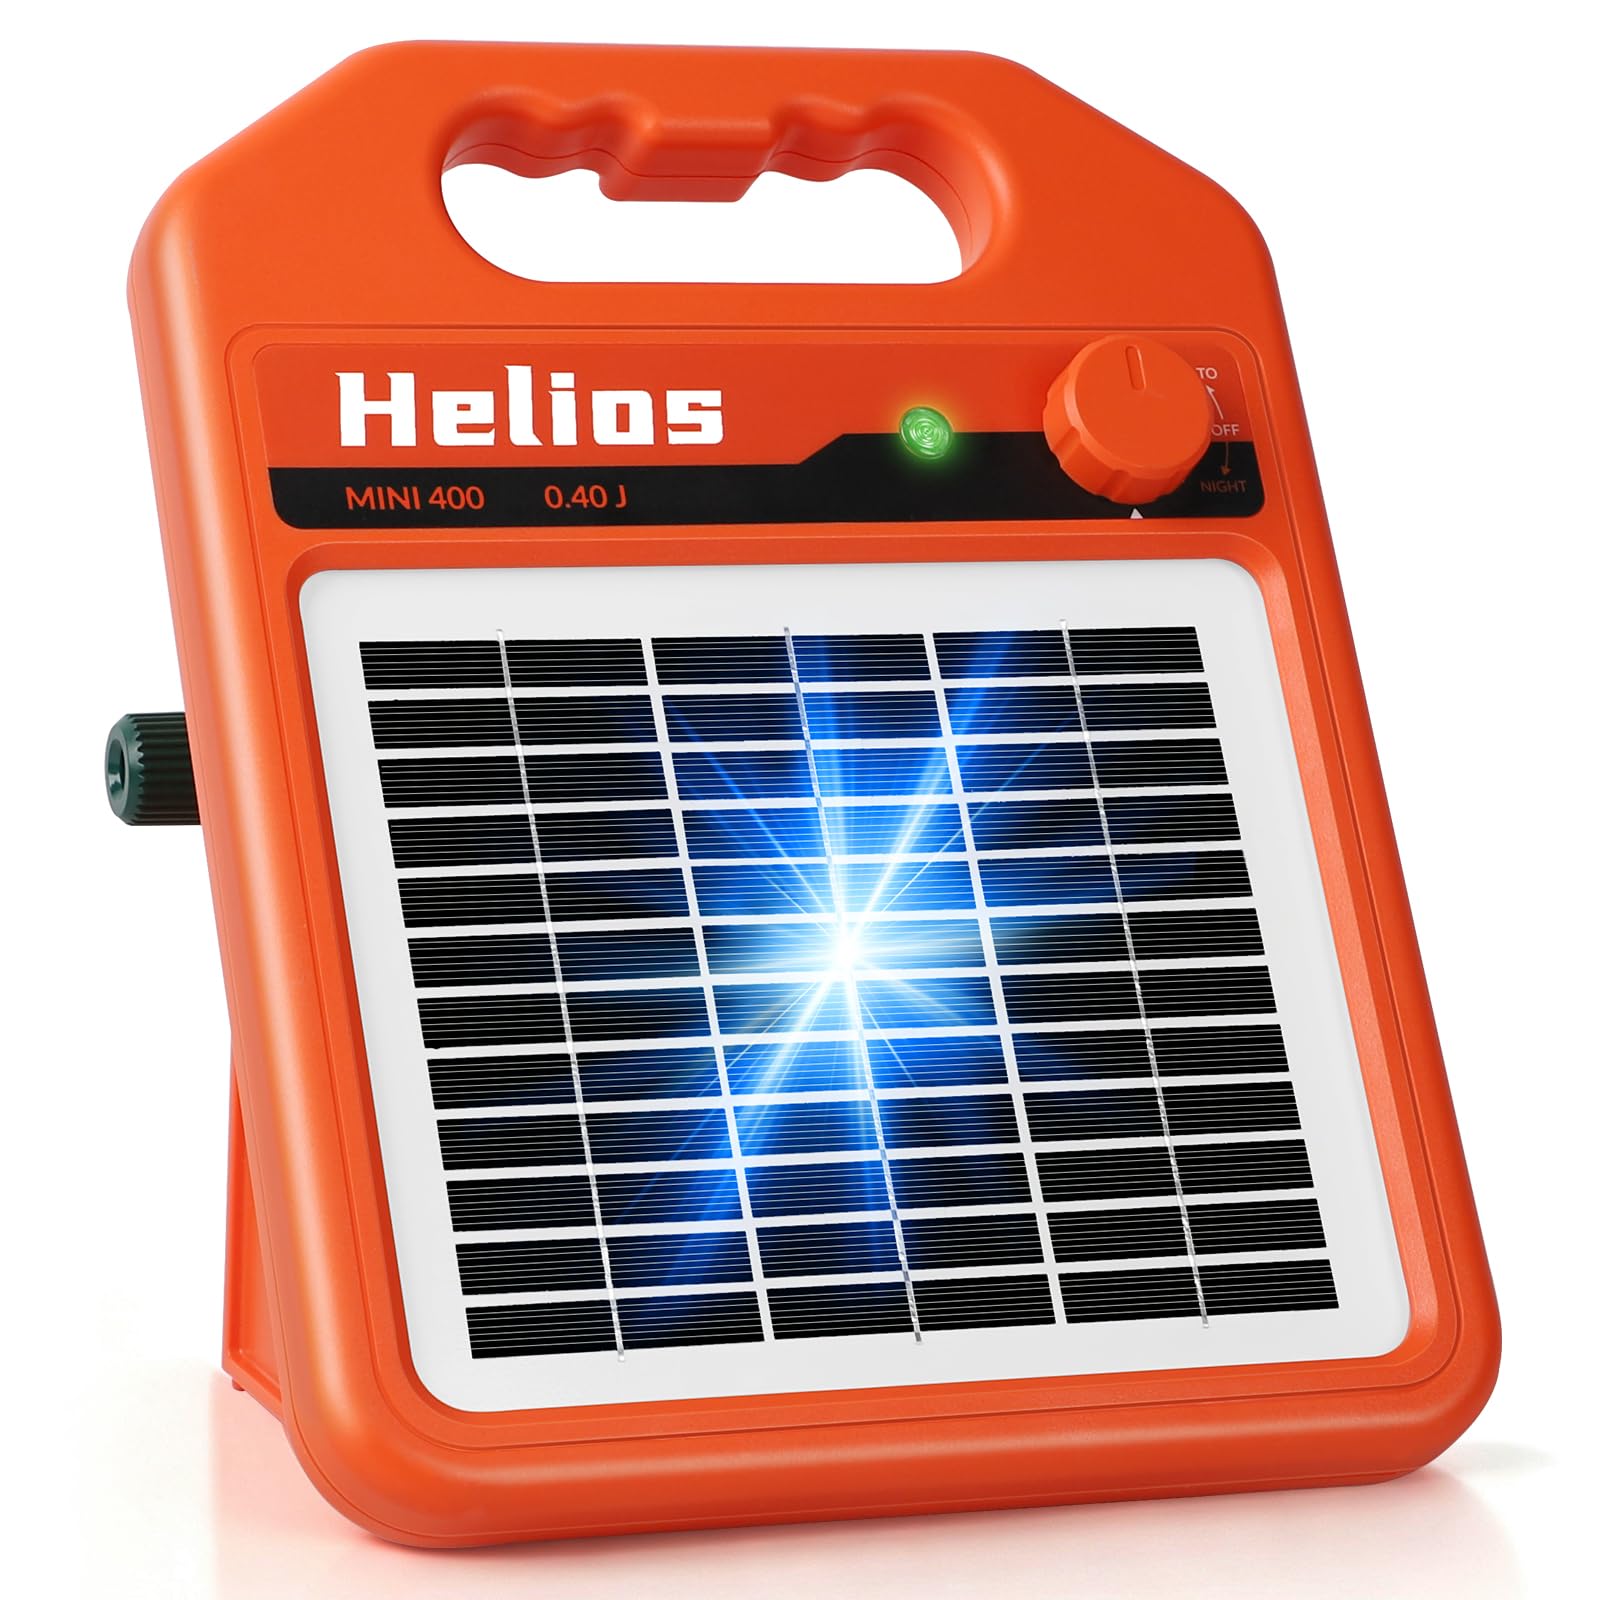
Image: The ANDMON MINI400 Solar Electric Fence Charger, an orange unit with a solar panel, shown mounted on a fence post in a grassy area.
Safety Information
WARNING: Electric fence chargers produce high voltage pulses. Read all instructions carefully before installation and operation to prevent injury to humans and animals.
- Do not connect the energizer to any other power source than specified.
- Keep children and untrained individuals away from the electric fence.
- Ensure proper grounding of the fence system.
- Do not touch the fence wires directly when the energizer is active.
- Disconnect the energizer from the fence and power source before performing any maintenance or repairs.
- Install warning signs on the electric fence at appropriate intervals.
Package Contents
Verify that all items are present in the package:
- ANDMON MINI400 Solar Electric Fence Energizer
- Battery connection clips (red and black)
- DC charging cable
- 12V/4.5AH Sealed Lead-Acid Battery
- User Manual
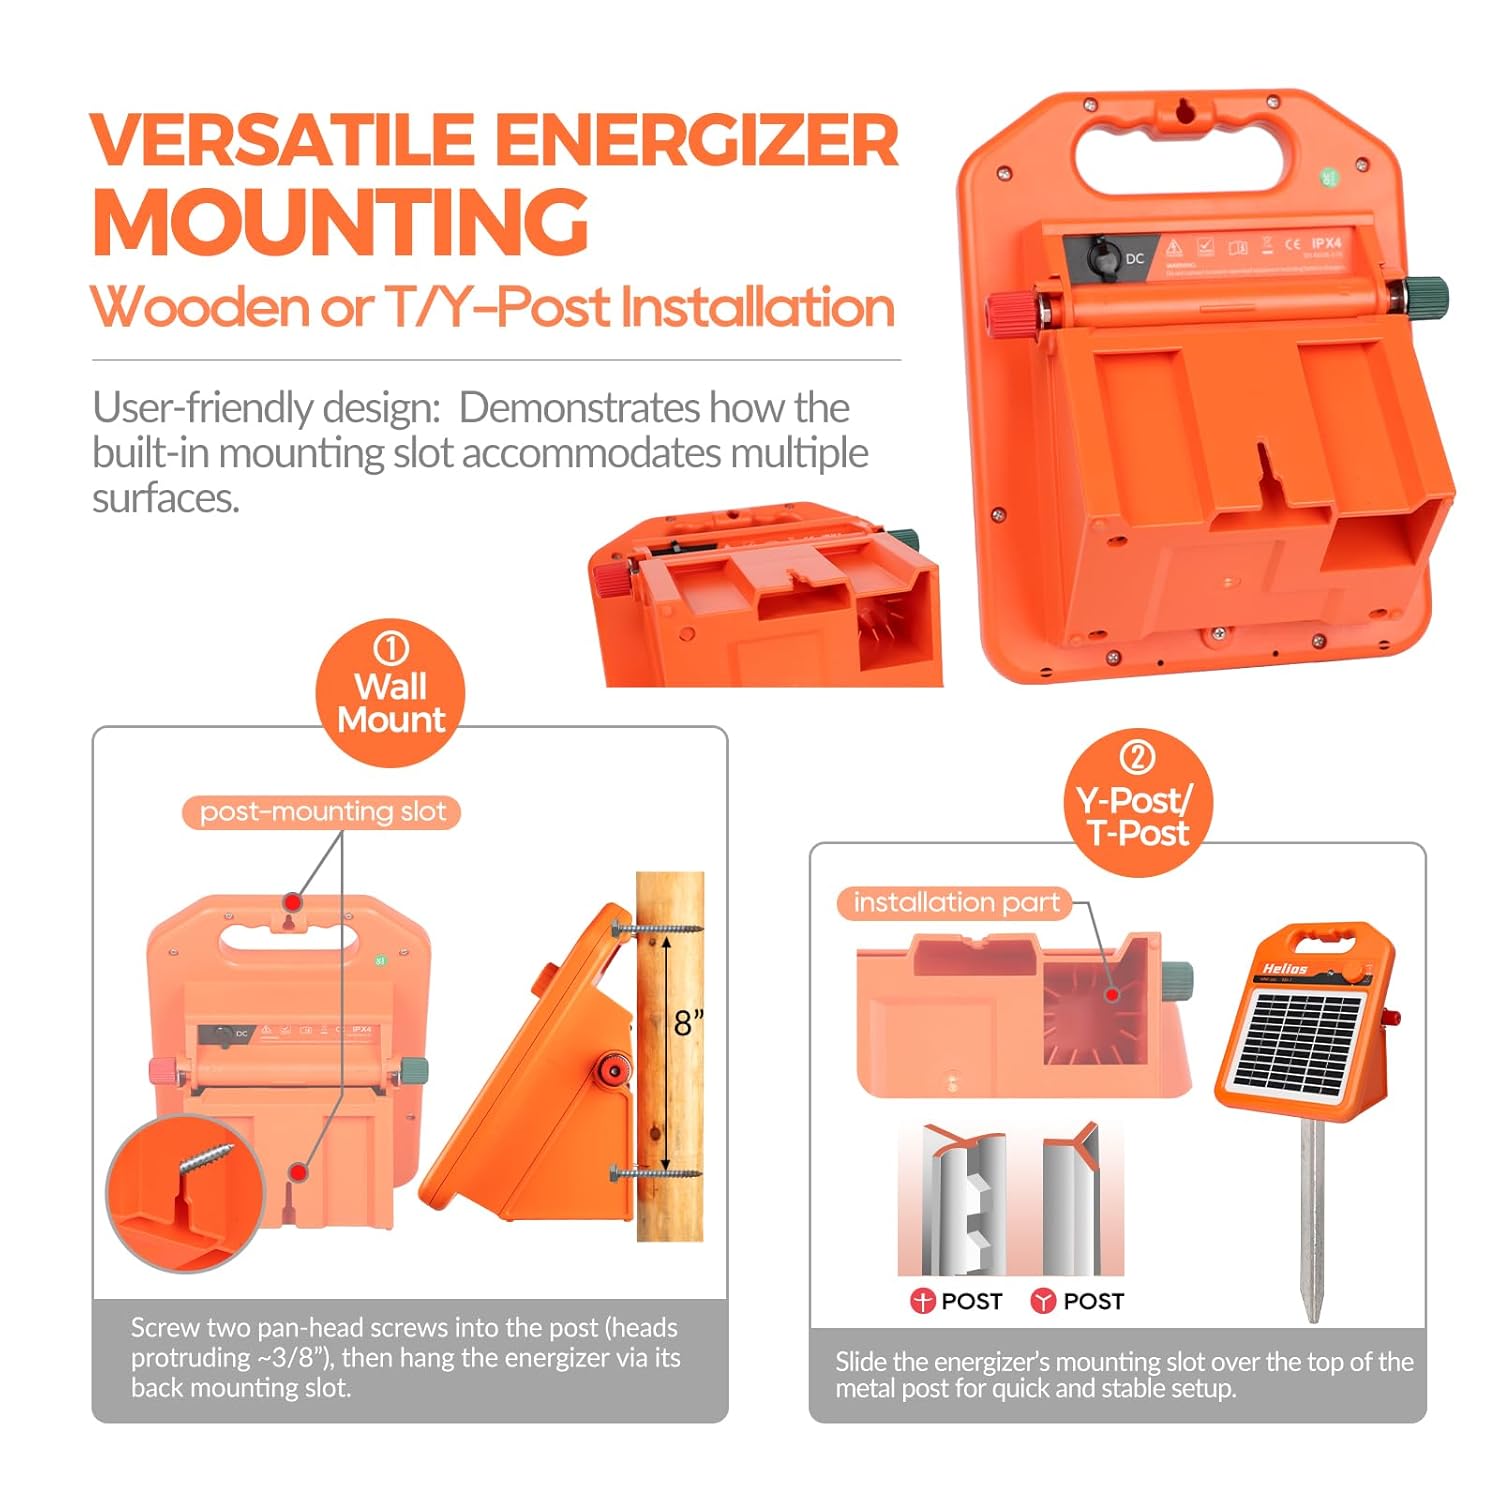
Image: The ANDMON MINI400 energizer with its included accessories: battery, charging cable, and connection clips.
Setup and Installation
1. Battery Connection
The internal battery is disconnected for safety during shipping. Before first use, you must connect the battery terminals.
- Open the battery cover on the back of the energizer.
- Connect the red cable to the red positive (+) battery terminal.
- Connect the black cable to the black negative (-) battery terminal.
- Carefully place the battery into its compartment and close the cover.
Video: Instructions on how to connect the battery inside the ANDMON MINI400 Solar Electric Fence Charger.
2. Mounting the Energizer
The MINI400 can be mounted on Y/T/Wooden posts or directly to a wall.
- For Y/T-Posts: Slide the energizer's mounting slot over the top of the metal post for a quick and stable setup.
- For Wooden Posts/Wall Mount: Screw two pan-head screws into the post or wall, leaving approximately 3/8" protruding. Hang the energizer via its back mounting slots.
Image: Diagrams illustrating wall mount and Y/T-post installation methods for the energizer.
3. Connecting to Fence and Ground
Proper connection to the fence and a good ground system are crucial for effective operation.
- Connect the red alligator clip (positive terminal) to the electric fence wire.
- Connect the black alligator clip (negative terminal) to a grounding rod driven into the earth.
Video: A step-by-step guide on how to install the ANDMON Solar Electric Fence Charger, including grounding and fence connections.

Image: Four panels showing the easy installation steps: mounting on a post, connecting leads, connecting black clip to grounding post, and red clip to the fence.
Operating Instructions
Mode Selection
The MINI400 features a rotary switch for selecting operating modes:
- AUTO Mode: Generates pulses approximately every 1.5 seconds during the day.
- NIGHT Mode: Generates pulses approximately every 2.9 seconds at night, conserving battery life.
- OFF: Turns the energizer off.

Image: Close-up of the energizer's control dial, showing options for AUTO, OFF, and NIGHT modes.
Power Options
The energizer can be powered by its integrated solar panel or via a DC charger.
- Solar Charging: Position the solar panel to receive maximum direct sunlight throughout the day for optimal charging.
- DC Charging: Use the provided DC charging cable to charge the internal battery from a suitable power adapter.

Image: Diagram showing optimal solar panel angles for northern and southern hemispheres to maximize sun exposure.
Maintenance
- Solar Panel: Regularly clean the solar panel surface with a soft, damp cloth to ensure maximum charging efficiency. Dust, dirt, or debris can reduce performance.
- Battery: The 12V/4.5AH sealed lead-acid battery is designed for long life. If the energizer is stored for extended periods, ensure the battery is fully charged before storage and recharged every 3-6 months to maintain its health.
- Connections: Periodically check all connections (fence, ground, battery) for corrosion or looseness. Clean and tighten as necessary to ensure good conductivity.
- Vegetation: Keep vegetation clear from the fence line to prevent short circuits and maintain effective shocking power.

Image: A close-up view of the solar panel on the energizer, highlighting the need for cleanliness.
Troubleshooting
| Problem | Possible Cause | Solution |
|---|---|---|
| No pulse/Weak shock | Low battery charge | Ensure solar panel receives direct sunlight or charge via DC adapter. |
| No pulse/Weak shock | Poor grounding | Check ground rod connection and ensure it is driven deep into moist soil. |
| No pulse/Weak shock | Fence short-circuited by vegetation or faulty insulators | Clear vegetation from fence line. Inspect and replace damaged insulators. |
| Energizer not turning on | Battery not connected or completely discharged | Verify battery connections. Charge battery fully. |
Specifications
| Feature | Detail |
|---|---|
| Model Number | AMMN400Front |
| Output Energy | 0.4 Joule Stored Energy |
| Fence Length Capacity | Up to 30 miles (depending on conditions) |
| Battery Type | 12V/4.5AH Sealed Lead-Acid |
| Power Source | Solar energy, DC charger |
| Day Mode Pulse Interval | 1.5 seconds |
| Night Mode Pulse Interval | 2.9 seconds |
| Item Weight | 7.94 pounds |
| Package Dimensions | 10.83 x 10.24 x 7.36 inches |
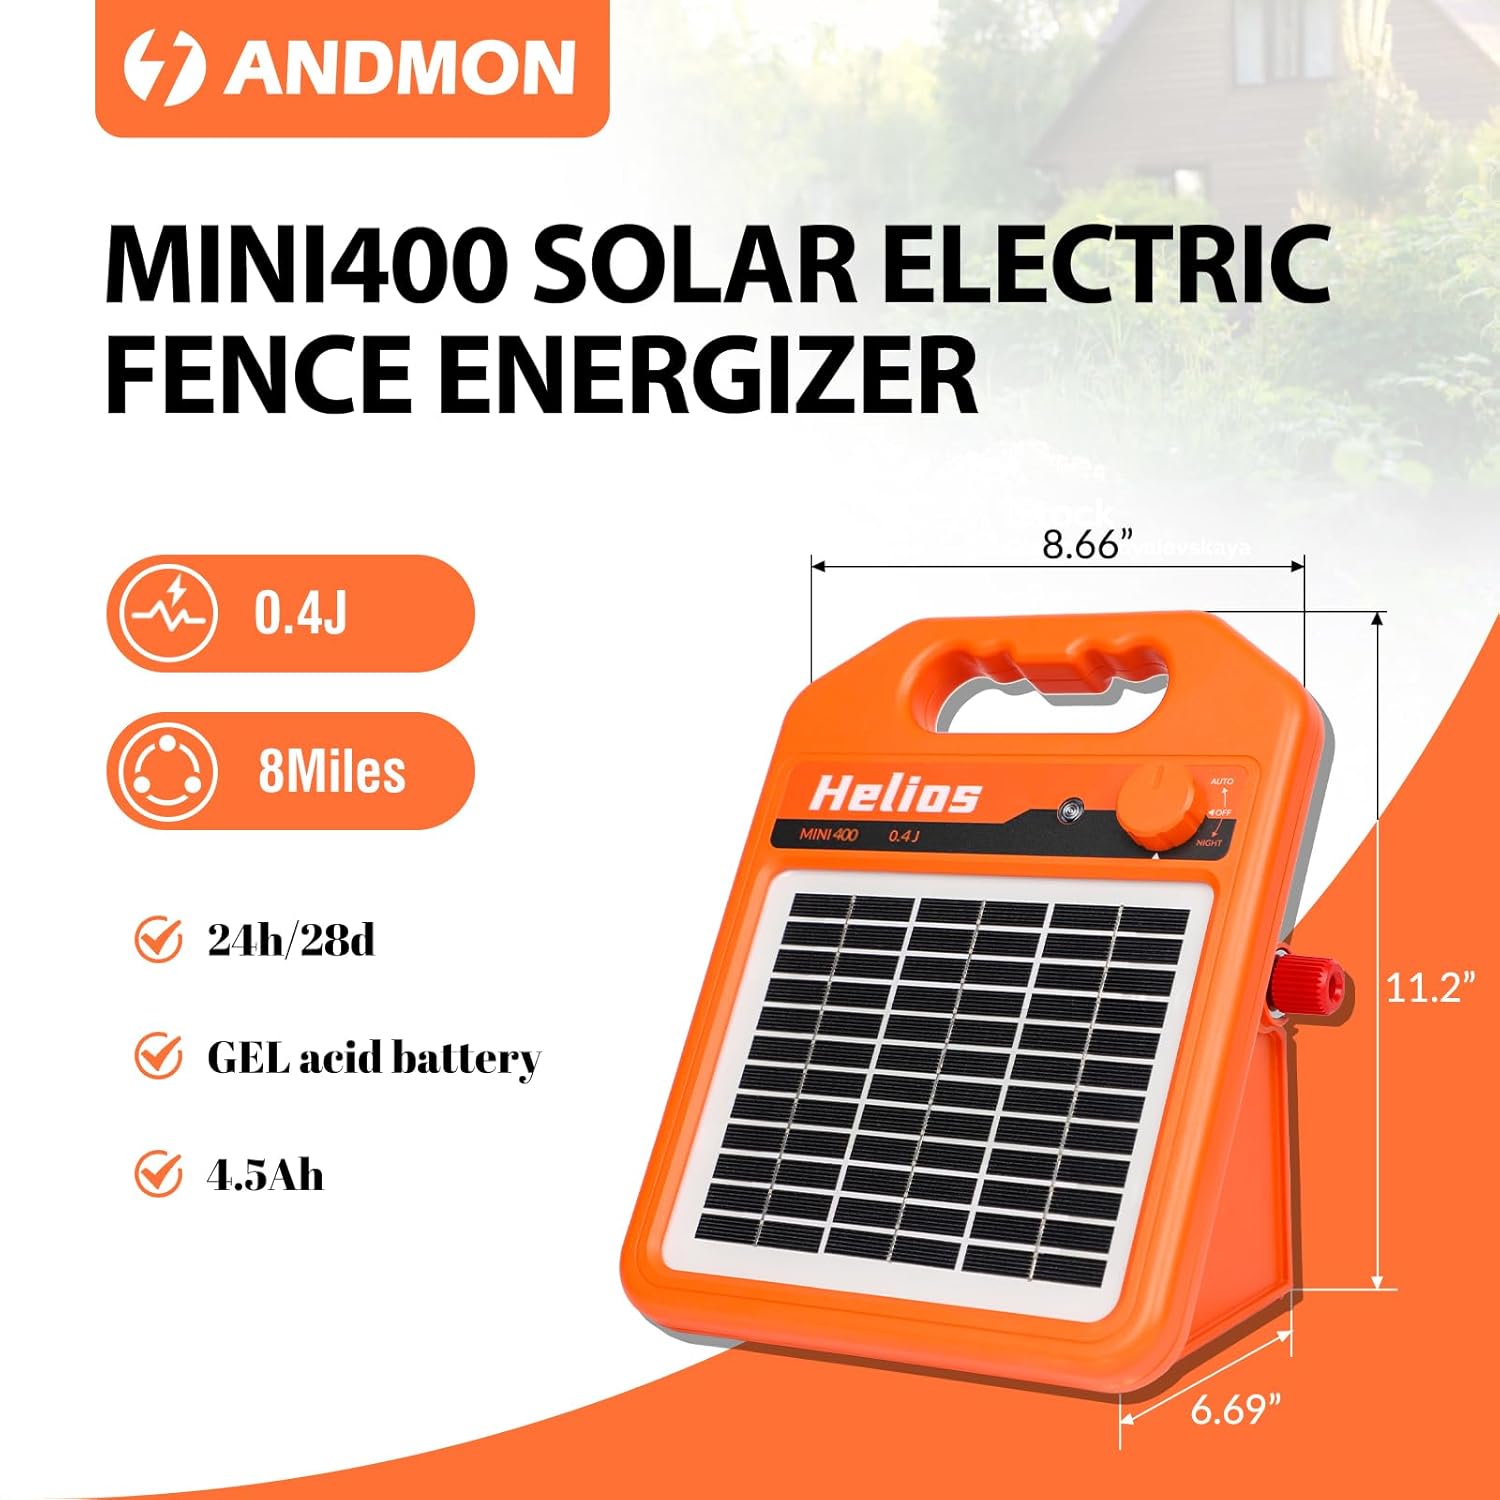
Image: Diagram showing the key dimensions of the ANDMON MINI400 Solar Electric Fence Charger.
Warranty and Support
For warranty information or technical support, please refer to the contact details provided with your purchase documentation or visit the official ANDMON website. Keep your proof of purchase for warranty claims.
For additional resources and product information, you may visit the ANDMON Store on Amazon.