Daxiongmao C30-SJT-16.5FT
Daxiongmao Endoscope Camera User Manual
Model: C30-SJT-16.5FT
Introduction
This manual provides comprehensive instructions for the safe and effective use of your Daxiongmao Endoscope Camera. This device is designed for various inspection tasks, featuring a dual-lens system, a 4.3-inch IPS color display, and IP67 waterproofing for versatile applications in plumbing, automotive, and general household inspections.

Figure 1: The Daxiongmao Endoscope Camera, showing the main display unit, the flexible camera probe, and included accessories like the hook and magnet attachments.
Setup
1. Package Contents
Before first use, please verify that all items are present in the package:
- LCD Digital Endoscope Unit (with built-in 32GB TF Card)
- USB to Micro USB Cable
- Accessory Set (Hook, Magnet)
- User Manual (this document)
2. Charging the Device
The endoscope camera is powered by a built-in Lithium Polymer battery. For optimal performance, fully charge the device before initial use.
- Connect the provided USB to Micro USB Cable to the charging port on the endoscope unit.
- Connect the other end of the cable to a standard USB power adapter (not included) or a computer's USB port.
- The charging indicator on the device will show charging status. Disconnect once fully charged.
3. Inserting/Checking TF Card
The device comes with a 32GB TF card pre-installed for storing photos and videos. Ensure it is properly seated before operation.

Figure 2: The endoscope unit with its TF card slot visible, demonstrating how files can be transferred to a computer.
- Locate the TF card slot on the side of the endoscope unit.
- Gently push the TF card until it clicks into place. To remove, push again to release.
4. Initial Power On
Press and hold the 'POWER' button located on the control panel to turn on the device. The 4.3-inch IPS screen will illuminate, displaying the live feed from the camera.
Operating Instructions
1. Understanding the Display
The 4.3-inch IPS color HD screen provides a clear view of the inspection area. It supports real-time viewing, photo capture, and video recording.

Figure 3: The 4.3-inch IPS display, offering a clear and detailed view during inspections.
2. Dual Lens Operation
Your endoscope features an upgraded dual-lens design, allowing you to switch between a front-view camera and a side-view camera without needing external mirrors. This provides a wider field of view (total 156 degrees).
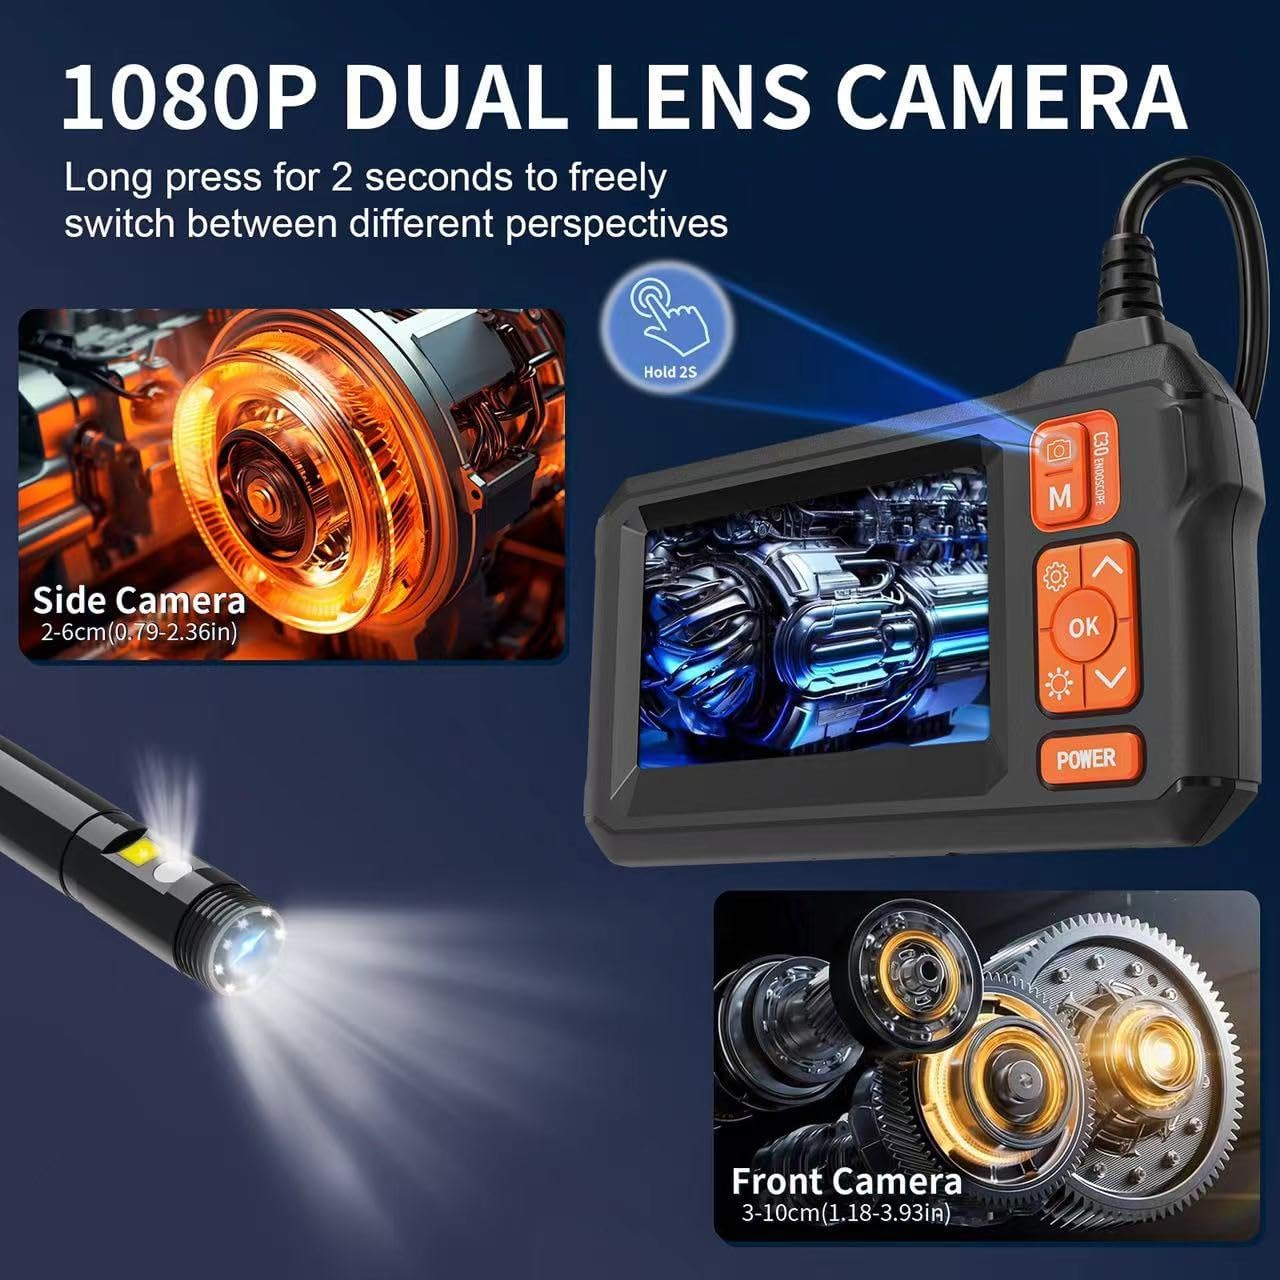
Figure 4: Illustration of the dual-lens system, enabling seamless switching between front and side perspectives for comprehensive inspection.
- Press the dedicated button (often labeled 'M' or with a camera icon) to toggle between the front and side camera views.
- The optimal observation distance for clear images is between 3cm and 10cm (1.18 to 3.93 inches).
3. Adjusting LED Lights
The camera probe is equipped with 8 adjustable LED lights to illuminate dark inspection areas. There are 3 adjustable brightness levels.
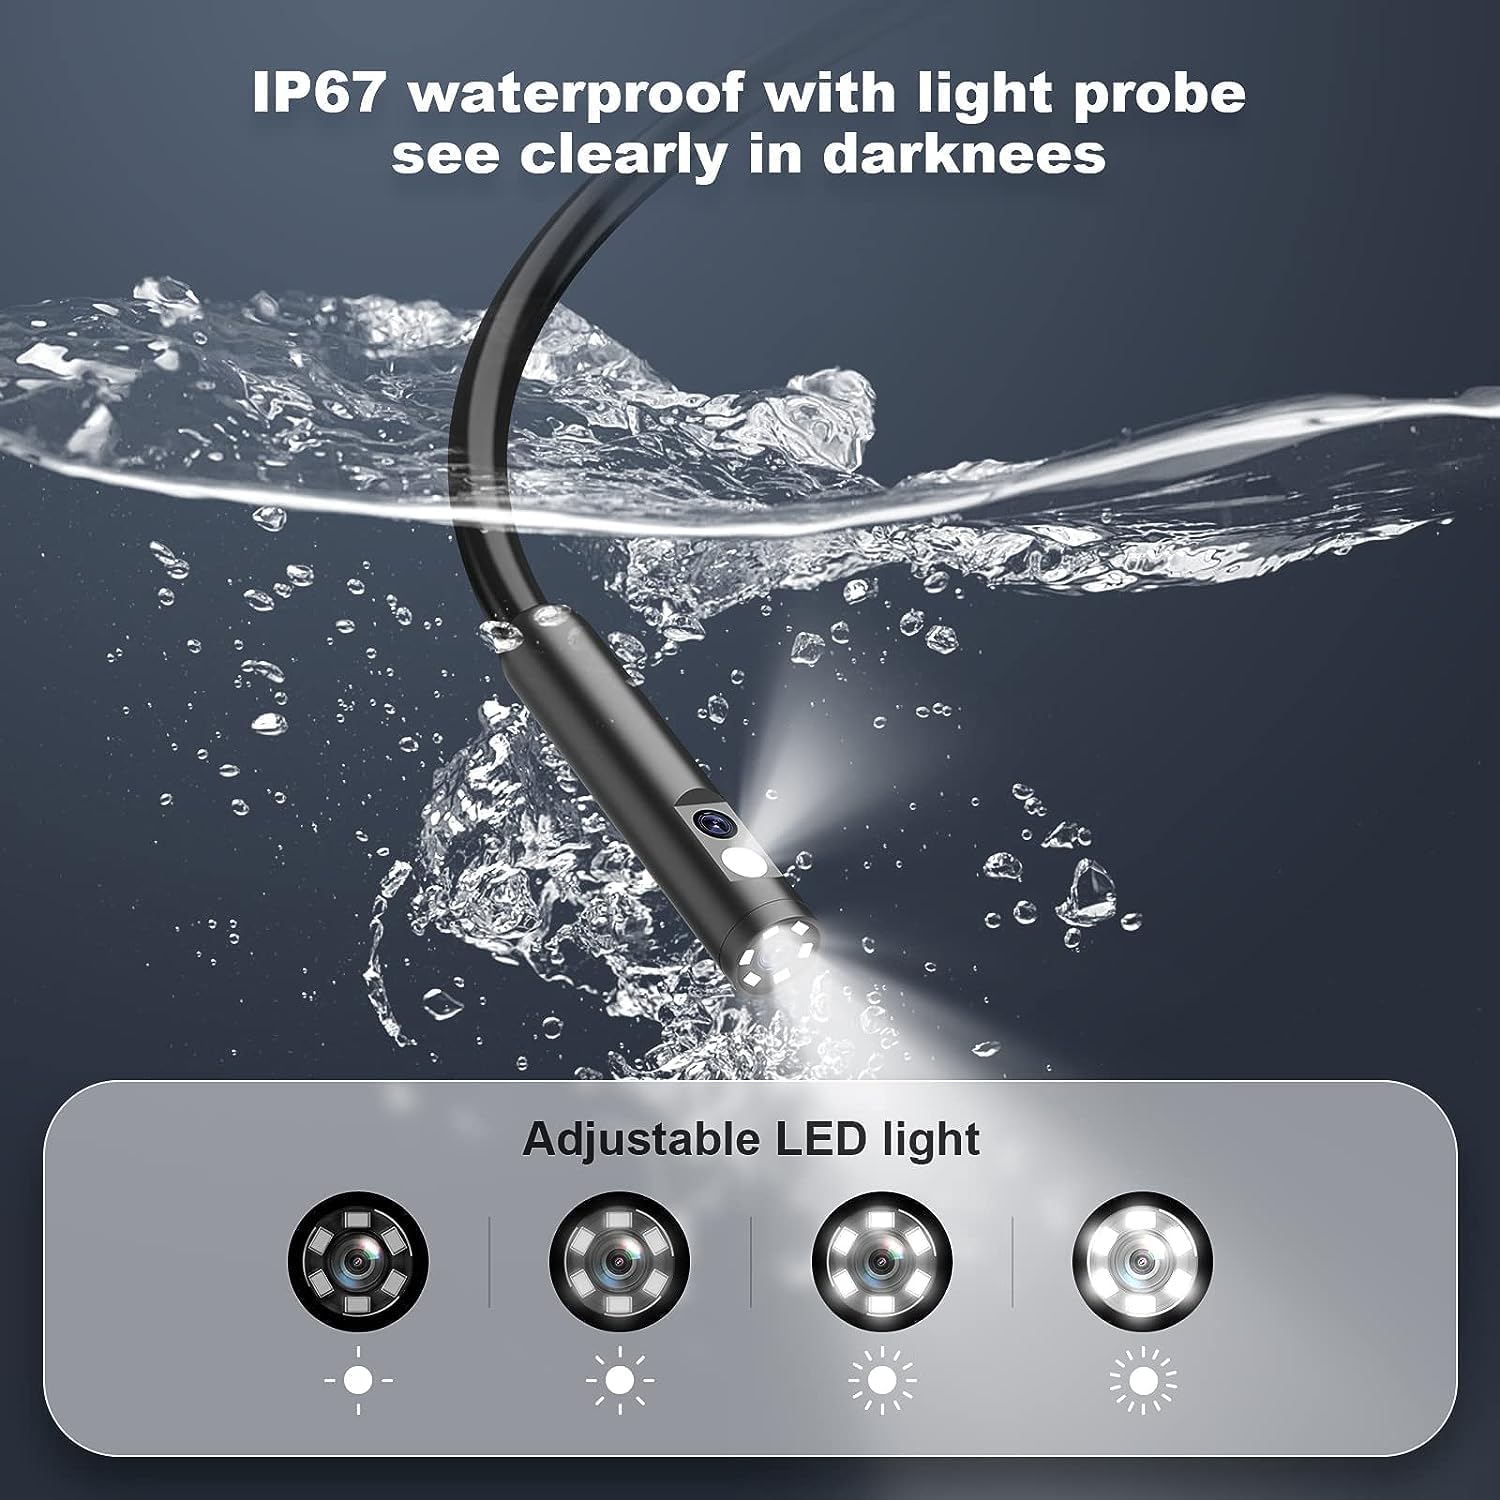
Figure 5: The IP67 waterproof camera probe with its adjustable LED lights, designed for clear visibility in dark or wet environments.
- Use the light adjustment button (often indicated by a light bulb icon) to cycle through the brightness levels.
4. Capturing Photos and Videos
The endoscope allows you to capture high-definition photos and videos directly to the built-in 32GB TF card.
- To take a photo: Press the 'OK' button once.
- To start/stop video recording: Press and hold the 'OK' button.
- Captured files will have time stamps for easy organization.
5. Maneuvering the Flexible Cable
The 16.5FT semi-rigid cable can be bent and will hold its shape, allowing you to navigate through various narrow and hard-to-reach areas.

Figure 6: Examples of the endoscope's application in diverse environments, demonstrating its flexibility and utility for detailed inspections.
6. Transferring Files to a Computer
You can easily transfer captured photos and videos to your computer using the provided USB data cable. No special apps or Wi-Fi connection are required.
- Connect the endoscope unit to your computer using the USB to Micro USB Cable.
- The device will appear as a removable storage device on your computer.
- You can then access and transfer files directly.
- Note: The endoscope cannot be operated normally while connected to a computer for file transfer.
Maintenance
1. Cleaning the Device
- The camera probe is IP67 waterproof and can be rinsed with water. Ensure the USB port cover is securely closed before exposing to water.
- Wipe the display unit and control panel with a soft, dry cloth. Avoid using abrasive cleaners or solvents.
- Ensure the camera lens is clean for optimal image clarity.
2. Storage
- Store the endoscope camera in a cool, dry place away from direct sunlight and extreme temperatures.
- Keep the flexible cable neatly coiled to prevent kinks or damage.
- Ensure the device is fully charged before long-term storage to preserve battery life.
Troubleshooting
| Problem | Possible Cause | Solution |
|---|---|---|
| Device does not power on. | Low battery. | Charge the device fully using the provided USB cable. |
| No image on screen / "No Camera" message. | Camera probe not properly connected or damaged. | Ensure the camera probe is securely connected to the main unit. If the issue persists, contact customer support. |
| Cannot capture photos/videos or "Memory Card Error". | TF card is full, corrupted, or not properly inserted. | Check if the TF card is correctly inserted. Transfer files to a computer to free up space. If corrupted, try formatting the card (this will erase all data) or replace it. |
| Image is blurry or unclear. | Camera lens is dirty or observation distance is incorrect. | Clean the camera lens. Adjust the distance to the object (optimal 3cm-10cm). Increase LED brightness if in a dark area. |
| Control panel buttons are unresponsive. | Temporary software glitch or low battery. | Try restarting the device. Ensure the battery is sufficiently charged. If unresponsive, allow the battery to drain completely and then recharge. |
Specifications
| Feature | Detail |
|---|---|
| Model Number | C30-SJT-16.5FT |
| Display Screen | 4.3-inch IPS Color HD Screen |
| Camera Type | Dual Lens (Front & Side) |
| Video Capture Resolution | 1080p |
| Cable Length | 16.5FT (Semi-rigid) |
| Water Resistance Level | IP67 Waterproof (Probe) |
| Lighting | Adjustable 8 LED Lights |
| Media Storage | Built-in 32GB TF Card (MicroSD Card) |
| Battery Type | 1 Lithium Polymer battery (required) |
| Item Weight | 1.17 pounds |
| Package Dimensions | 7.68 x 5.2 x 3.23 inches |
| Color | Orange |
| Exposure Control Type | Automatic |
| Manufacturer | leersi_jet |
| Date First Available | April 28, 2023 |
Warranty and Support
Daxiongmao offers a 24-month free warranty for your endoscope camera. For any questions, technical assistance, or warranty claims, please contact our customer support team.
We provide 24-hour professional and kind after-sales service to ensure your satisfaction.
Please refer to your purchase documentation or the product listing for specific contact information.
Ask a question about this manual
Ask about setup, troubleshooting, compatibility, parts, safety, or missing instructions. Manuals+ will review the question and use this page’s manual context to help answer it.