1. Introduction
This manual provides detailed instructions for the installation, operation, and maintenance of your CAMECHO 10.26 Inch Portable Car Stereo. Please read this manual thoroughly before using the product to ensure proper function and safety. This portable car stereo offers features such as Wireless Carplay, Android Auto, Bluetooth connectivity, FM transmission, AUX output, and includes a rear camera for enhanced driving convenience.

Image 1.1: CAMECHO 10.26 Inch Portable Car Stereo and accessories.
2. Package Contents
Verify that all items listed below are included in your package:
- 10.26 Inch Portable Car Stereo Unit
- Monitor Base
- User Manual
- 32GB TF Card
- Power Cord (Cigarette Lighter Charger)
- 3m AUX Cable
- Extension Cord
- AHD Rear Camera
- Bracket Fixing Stickers (Adhesive Pads)

Image 2.1: Contents of the product package.
3. Setup and Installation
3.1 Mounting the Unit
- Choose a suitable, stable location on your dashboard or windshield for the monitor base.
- Clean the mounting surface thoroughly to ensure optimal adhesion.
- Attach the monitor base using the provided bracket fixing stickers. Ensure it is securely fastened.
- Adjust the angle of the portable car stereo unit for optimal viewing.
3.2 Power Connection
The unit is powered via a cigarette lighter charger.
- Connect the Type-C power interface of the monitor to the power cord.
- Insert the cigarette lighter charger into your vehicle's 12V power outlet.
- Important: Use only the original power cord provided. If a replacement is needed, ensure it is a high-quality, compliant cigarette lighter charger to prevent damage due to insufficient voltage or heat.
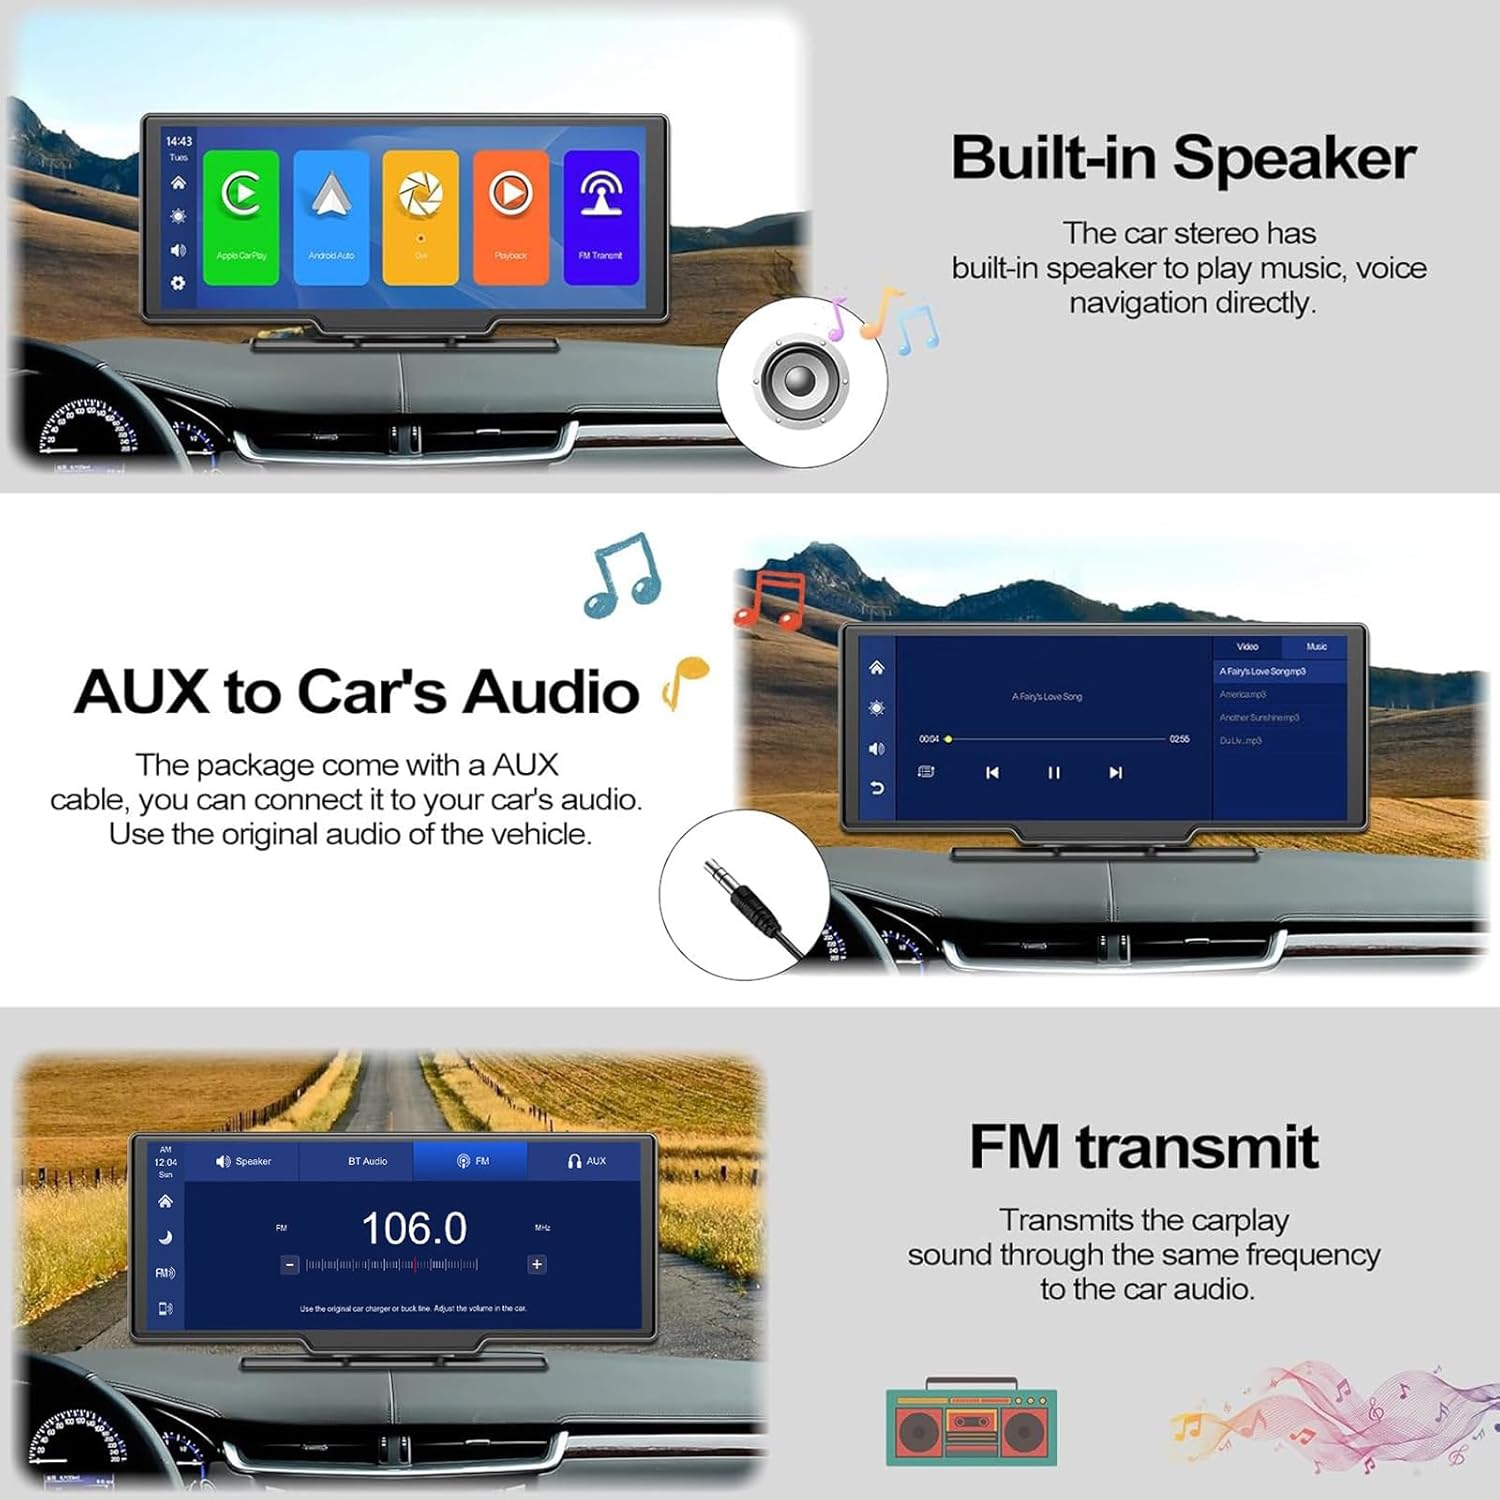
Image 3.1: Power connection and TF card insertion.
3.3 Rear Camera Installation
The included AHD rear camera provides a 160° wide view and IP69 waterproof rating for superior night vision.
- Locate an appropriate mounting position at the rear of your vehicle, typically near the license plate.
- Mark the screw holes and drill them if necessary.
- Securely attach the camera to the vehicle using screws.
- Connect the camera's video cable to the AV-IN port on the portable car stereo unit.
- The reverse trigger cable (red wire) must be connected to the positive terminal of your vehicle's reverse light. This enables automatic display of the rear camera feed when reversing.

Image 3.2: Rear camera wiring diagram.
4. Operating Instructions
4.1 Wireless Carplay & Android Auto
Connect your smartphone wirelessly to access navigation, calls, music, and more.
- Ensure your phone's Wi-Fi and Bluetooth are enabled.
- On the car stereo, select the 'Apple CarPlay' or 'Android Auto' option.
- Go to the 'BT Manage' interface on the car stereo.
- Pair your phone via Bluetooth with the car stereo.
- Once connected, the system will automatically launch Carplay or Android Auto.
- The unit will attempt to automatically connect to the last paired phone when powered on.

Image 4.1: Wireless Carplay and Android Auto interface.
4.2 Voice Control (Siri & Google Assistant)
Utilize voice commands for hands-free operation.
- Once connected to Carplay or Android Auto, activate your phone's voice assistant (Siri or Google Assistant).
- Use commands such as "Call [Contact Name]", "Play some music", "Get directions to [Destination]", or "Broadcast news".
- This feature allows you to control various functions while keeping your focus on the road.
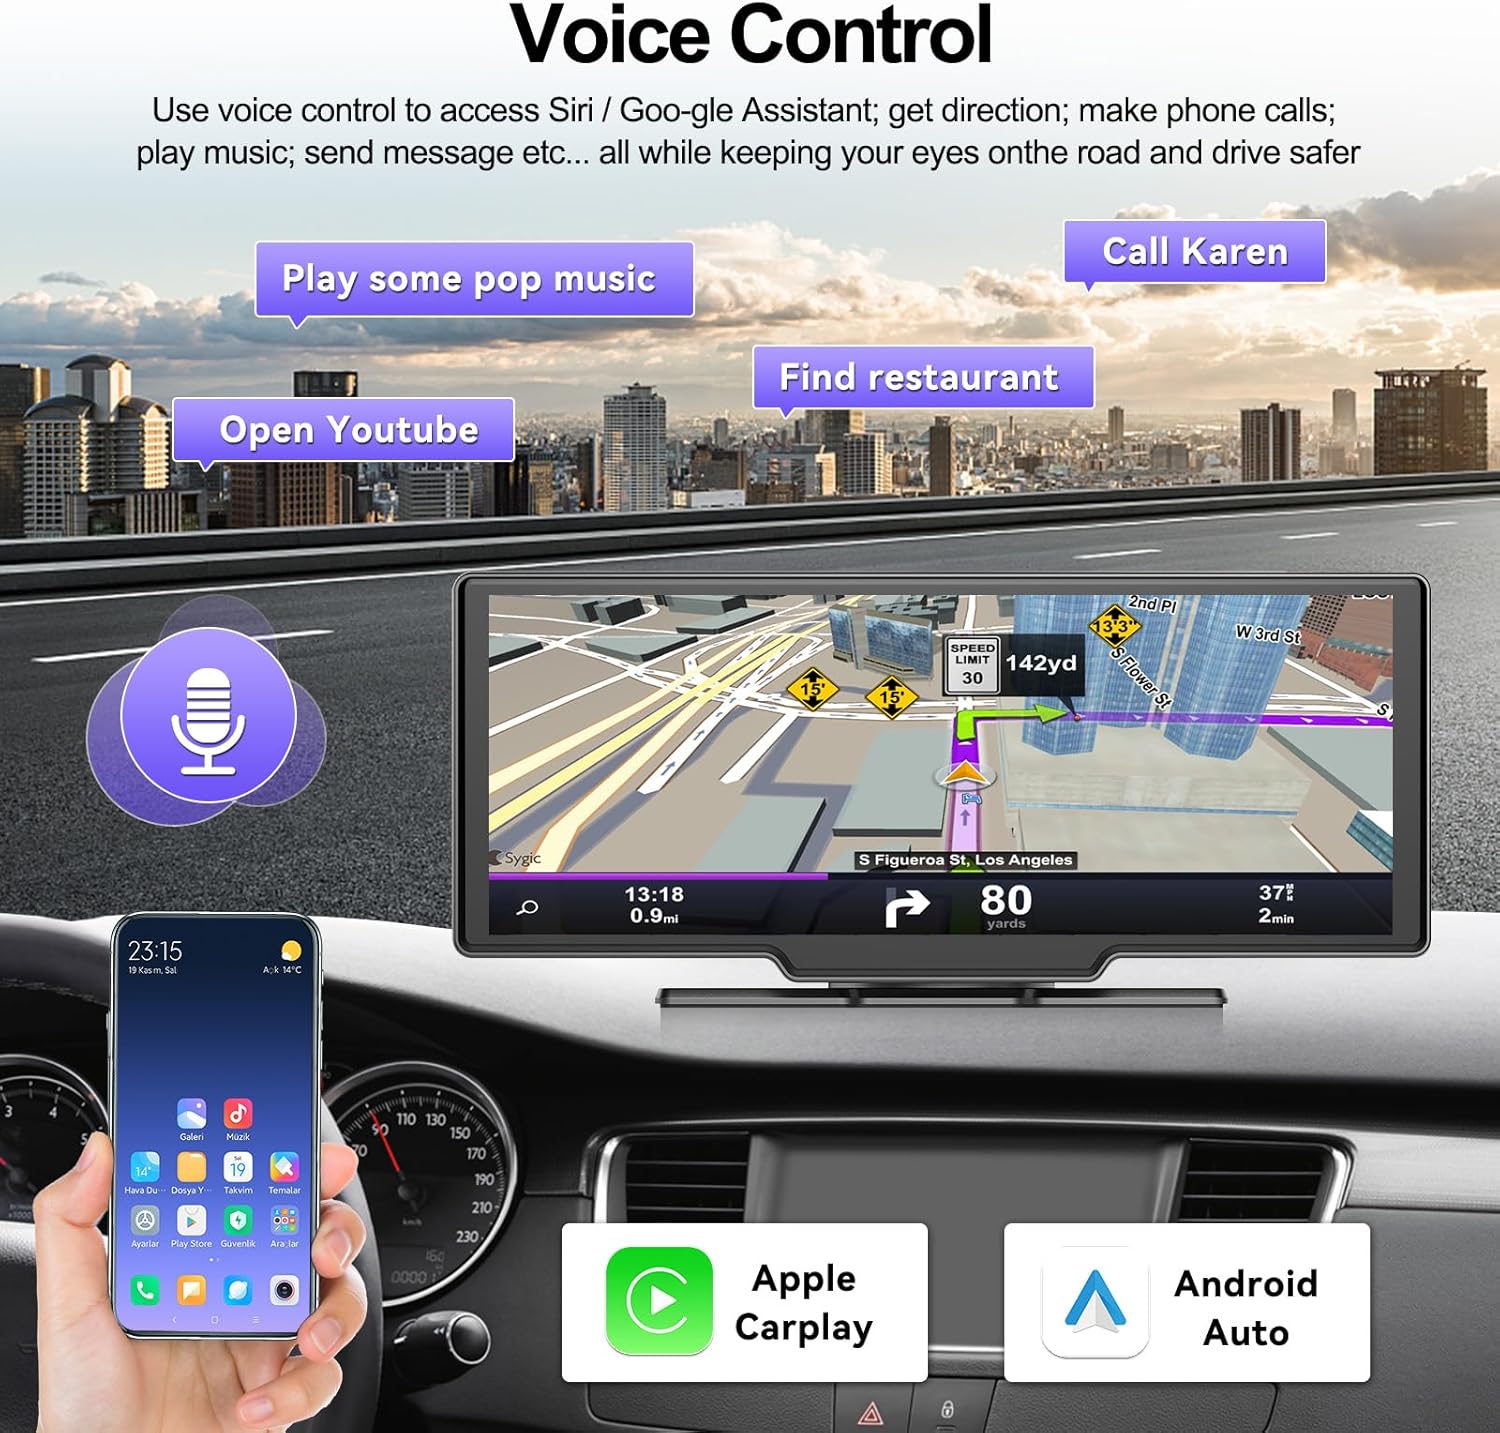
Image 4.2: Voice control functionality.
4.3 Bluetooth Connectivity
The built-in microphone and Bluetooth function enable clear hands-free calls and mobile music playback.
- Pair your phone via Bluetooth as described in the Carplay/Android Auto section.
- Make or receive calls directly through the car stereo.
- Stream music from your phone to the car stereo's built-in speaker or your car's audio system (via AUX/FM).
Image 4.3: Bluetooth music interface.
4.4 Audio Output Options (AUX & FM Transmitter)
You can output audio from the portable car stereo to your vehicle's sound system.
- AUX Connection: Use the provided 3m AUX cable to connect the car stereo's AUX output to your car's AUX input. This routes audio directly to your car's speakers.
- FM Transmitter: Tune the portable car stereo to an unused FM frequency. Then, tune your car's radio to the same FM frequency to receive audio wirelessly.
- The unit also has a built-in speaker for independent sound playback.
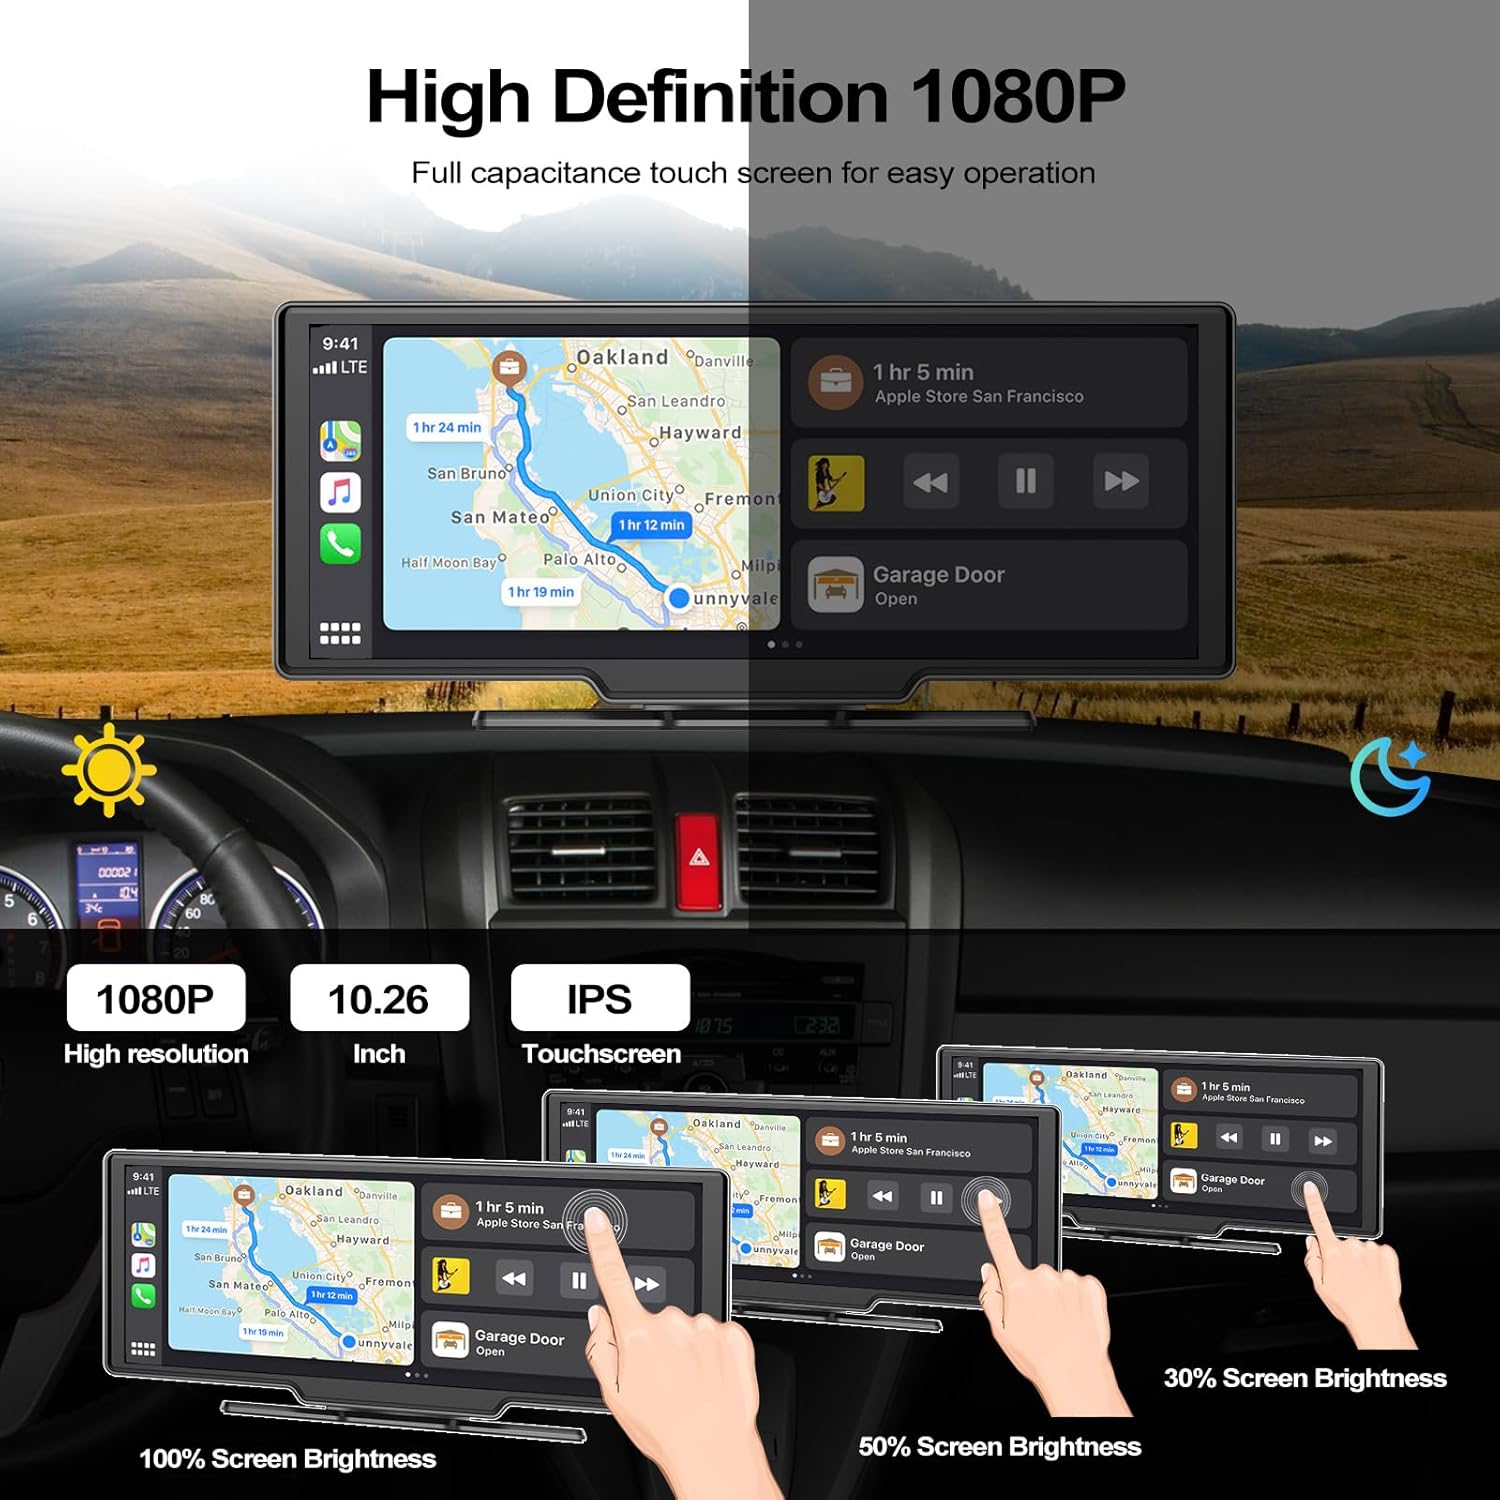
Image 4.4: Audio output options.
4.5 Rear Camera Operation
When the vehicle is in reverse, the rear camera feed will automatically display on the screen.
- The screen will show a wide-angle view of the area behind your vehicle.
- Adjustable reversing lines are displayed to assist with parking and maneuvering.

Image 4.5: Rear camera display with adjustable lines.
4.6 TF Card Functionality
The unit supports TF card input for recording video.
- Insert the included 32GB TF card into the designated slot on the side of the unit.
- Ensure the TF card has a speed certification of at least Level 10 for reliable video recording.
5. Display Features
The 10.26-inch display offers a high-definition viewing experience.
- Resolution: 1080P High Resolution for clear visuals.
- Screen Type: IPS Touchscreen for wide viewing angles and responsive control.
- Brightness Adjustment: The screen brightness can be adjusted (e.g., 100%, 50%, 30%) to suit different lighting conditions.

Image 5.1: Display features and brightness adjustment.
6. Maintenance
To ensure the longevity and optimal performance of your CAMECHO Portable Car Stereo, follow these maintenance guidelines:
- Cleaning: Use a soft, dry cloth to clean the screen and exterior. Avoid abrasive cleaners or solvents.
- Temperature: Avoid exposing the unit to extreme temperatures, direct sunlight for prolonged periods, or high humidity.
- Connections: Periodically check all cable connections to ensure they are secure.
- Software Updates: Check the manufacturer's website for any available software updates to improve performance and add features.
7. Troubleshooting
If you encounter issues with your device, refer to the following troubleshooting steps:
| Problem | Possible Cause | Solution |
|---|---|---|
| Unit does not power on. | No power, loose connection, faulty power adapter. | Check if the cigarette lighter charger is properly inserted and the vehicle's power outlet is functional. Ensure the power cable is securely connected to the unit. Try a different 12V outlet if available. |
| Wireless Carplay/Android Auto fails to connect. | Bluetooth/Wi-Fi off, incorrect pairing, phone compatibility. | Ensure your phone's Bluetooth and Wi-Fi are enabled. Forget the device on both the phone and car stereo, then re-pair. Restart both devices. Verify your phone model supports Wireless Carplay/Android Auto. |
| No sound from car speakers. | Incorrect AUX/FM settings, volume too low. | If using AUX, ensure the AUX cable is connected correctly and your car's audio input is set to AUX. If using FM, ensure the car stereo and your car radio are tuned to the exact same unused FM frequency. Check volume levels on both devices. |
| Rear camera image is not displayed. | Loose camera connection, incorrect wiring of reverse trigger. | Check the AV-IN connection from the camera to the unit. Ensure the reverse trigger wire is correctly connected to the positive terminal of the reverse light. |
| Unit frequently reboots or freezes. | Power instability, software issue, overheating. | Ensure a stable power supply. Disconnect and reconnect power. If the issue persists, contact customer support. |
| Mounting adhesive loses grip. | Improper surface preparation, extreme temperatures. | Ensure the mounting surface is clean and dry before application. Avoid extreme heat or cold. Use new, high-quality adhesive pads if necessary. |
8. Specifications
| Feature | Specification |
|---|---|
| Brand | CAMECHO |
| Model | A3247G32G3G4-AM39DE-C214 |
| Screen Size | 10.26 Inches |
| Product Dimensions | 18 x 10 x 9 cm |
| Item Weight | 1.16 Kilograms |
| Connectivity Technology | Bluetooth |
| Compatible Devices | Smartphone |
| Special Features | Rear Camera, Wireless Carplay, Wireless Android Auto, Voice Control, FM Transmitter, AUX Output, TF Card Slot |
| Audio Output Mode | [Basic] |
| Surround Sound Configuration | 4.0 |
| Output Power | 50 Watts |
| Installation Type | Windshield Mount |
| Video Encoding | H.264, MPEG-4, HEVC (H.265), VP9 |
9. Warranty and Support
CAMECHO is committed to providing high-quality products and customer satisfaction.
- Warranty: 24 Months Warranty from the date of purchase.
- Replacement: 30 Day Replacement policy for eligible issues.
- Technical Support: Lifetime Technical Support is available.
- Online Response: Expect an online response within 18 hours for inquiries.
For technical assistance or warranty claims, please contact us via email at: CAMECHOVIP@126.com

Image 9.1: CAMECHO customer support details.