1. Introduction
The Mokxihit Duplex MMDVM Hotspot Board is designed for digital voice modes such as DMR, YSF, and D-Star. It provides a reliable platform for amateur radio enthusiasts to connect to digital networks using a compatible Raspberry Pi. This manual provides detailed instructions for the assembly, setup, and operation of your hotspot board.
2. Package Contents
Please verify that all items listed below are included in your package. If any items are missing or damaged, please contact customer support.
- 1x Duplex MMDVM Hotspot Board with OLED Display
- 1x 8GB TF Card (pre-loaded with Pi-Star software)
- 2x UHF Antennas
- 1x USB Cable
- 2x 90-degree Connectors
- 1x Acrylic Shell Kit (multiple pieces)
- 1x Set of Screws and Standoffs
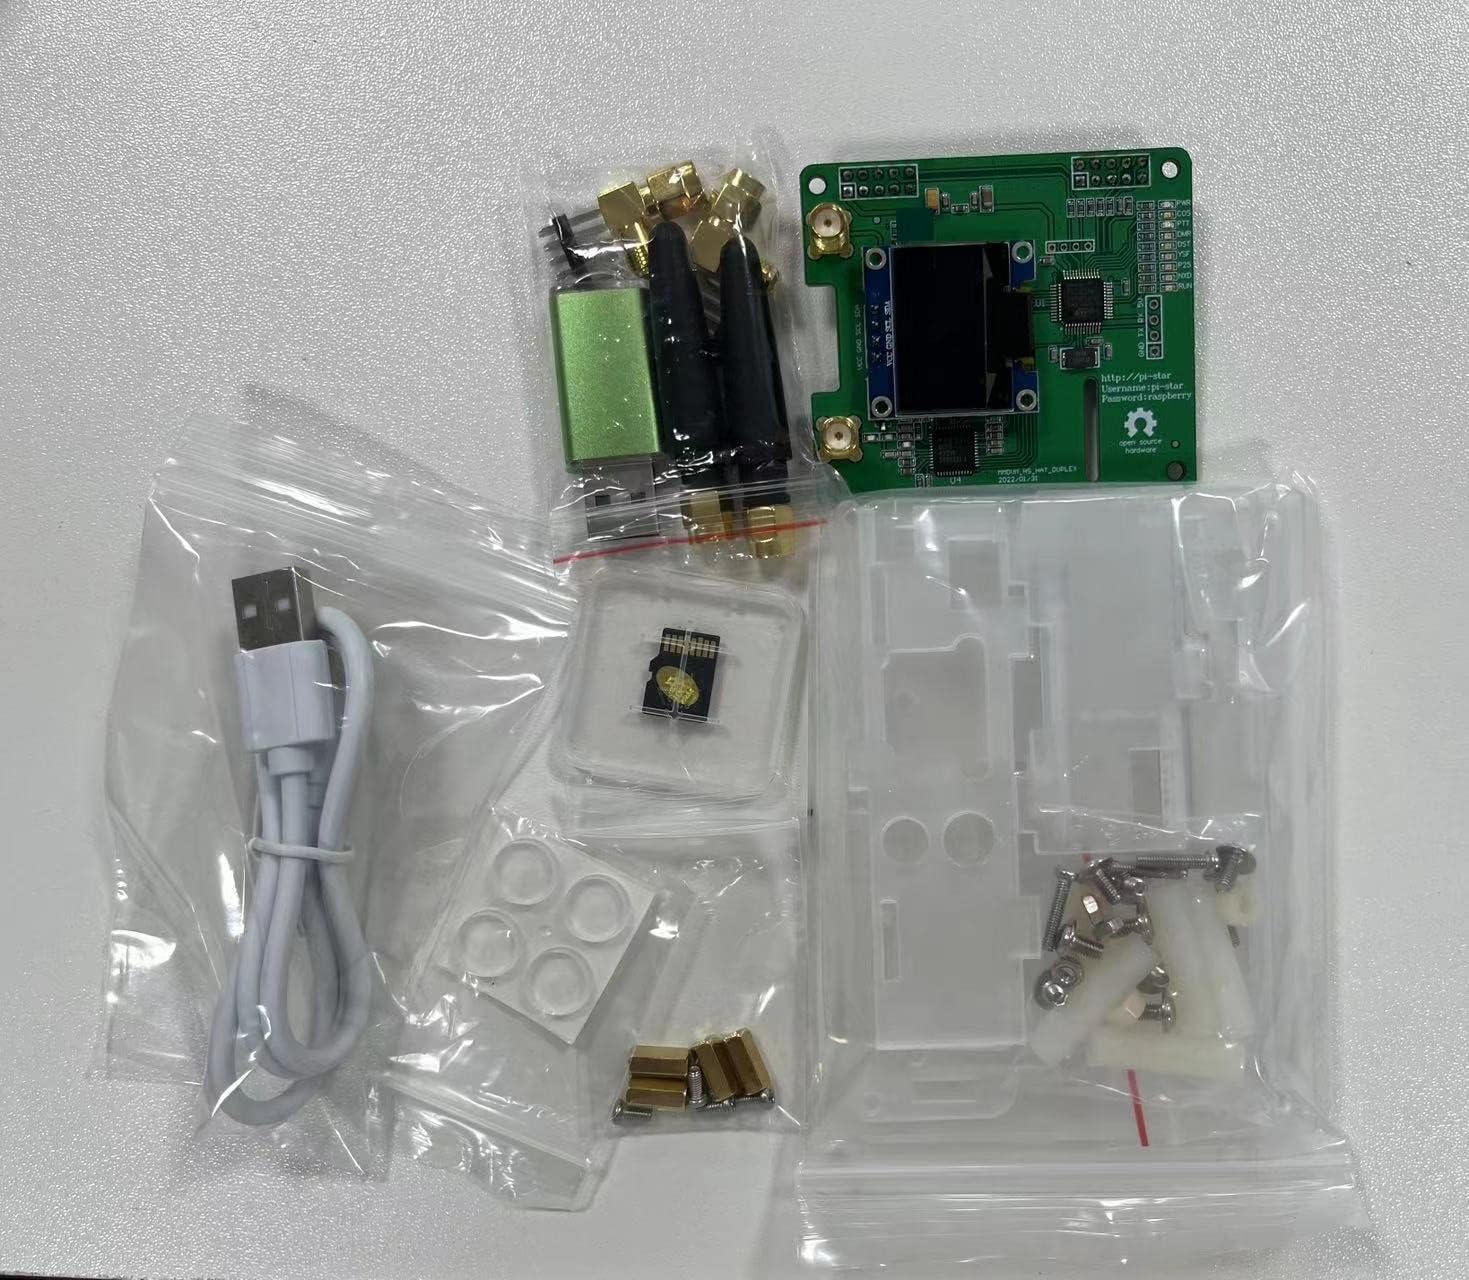
Image 2.1: All components included in the package.
3. Assembly Instructions
Follow these steps carefully to assemble your Duplex MMDVM Hotspot Board with a compatible Raspberry Pi (not included).
3.1 Identify Case Components and Hardware
The acrylic shell kit consists of several pieces (A1-A6) and various screws and standoffs (B1-B7). Refer to the image below to identify each part.

Image 3.1: Acrylic case components and hardware.
3.2 Mount Raspberry Pi to Base Plate
Place your Raspberry Pi board onto the bottom acrylic plate (A2). Secure it using the designated screws (B1) and standoffs (B5, B6, B7) as shown in the image. Ensure the Raspberry Pi is firmly attached and aligned with the mounting holes.

Image 3.2: Raspberry Pi mounted on the bottom acrylic plate.
3.3 Connect MMDVM Board
Carefully align the GPIO pins of the Duplex MMDVM Hotspot Board with the GPIO header on your Raspberry Pi. Gently press down to ensure a secure connection. The OLED display on the MMDVM board should face upwards.
3.4 Assemble the Acrylic Case
Once the MMDVM board is connected, assemble the remaining acrylic case pieces (A1, A3, A4, A5, A6) around the Raspberry Pi and MMDVM board. The case is designed to snap together or be secured with the remaining screws and standoffs (B1, B3, B4). Ensure all ports (USB, Ethernet, HDMI, power) are accessible through the case openings.

Image 3.3: Assembled hotspot board within the acrylic case, side view.
3.5 Attach Antennas
Screw the two UHF antennas onto the SMA connectors on the Duplex MMDVM Hotspot Board. Ensure they are finger-tight but do not overtighten.

Image 3.4: Fully assembled Duplex MMDVM Hotspot Board with antennas.
4. Initial Setup and Configuration
Your 8GB TF card comes pre-loaded with the Pi-Star software, with most parameters already set for ease of use.
4.1 Insert TF Card and Power On
Insert the pre-loaded 8GB TF card into the Raspberry Pi's SD card slot. Connect a suitable 5V power supply to your Raspberry Pi. The hotspot will begin to boot up.
4.2 Accessing Pi-Star
Once booted, the OLED display on the MMDVM board will show network information (e.g., IP address). You can access the Pi-Star web interface by navigating to the displayed IP address in a web browser on a device connected to the same network. The default username is pi-star and the default password is raspberry (or pi-star for newer versions).
4.3 Basic Configuration
From the Pi-Star dashboard, you can configure your callsign, DMR ID, frequency, and other network settings specific to your digital radio setup (DMR, YSF, D-Star). Refer to the comprehensive Pi-Star documentation available online for detailed configuration guides and advanced settings.
5. Operating Instructions
Once configured, your Duplex MMDVM Hotspot Board will allow your digital radio to connect to worldwide digital voice networks.
- Duplex Mode: The board supports duplex operation, allowing simultaneous transmit and receive on different frequencies, which is common for DMR and other modes.
- Simplex Mode: The board also supports simplex operation, where transmit and receive occur on the same frequency. This can be configured in the Pi-Star settings.
- OLED Display: The OLED screen provides real-time status information, including network connectivity, mode of operation, and call activity.
Ensure your radio is configured to the correct frequency and talkgroup/reflector settings as defined in your Pi-Star configuration.
6. Maintenance
To ensure optimal performance and longevity of your hotspot:
- Keep Clean: Periodically clean the acrylic case with a soft, dry cloth. Avoid harsh chemicals.
- Environment: Operate the hotspot in a well-ventilated area, away from direct sunlight, moisture, and extreme temperatures.
- Software Updates: Regularly check for and apply updates to the Pi-Star software via the web interface to benefit from new features and bug fixes.
- Antennas: Ensure antennas are securely connected. Avoid bending or stressing the antenna connectors.
7. Troubleshooting
If you encounter issues with your hotspot, consider the following common troubleshooting steps:
- No Power/Boot: Ensure the Raspberry Pi is receiving adequate power (5V, 2.5A or higher recommended for Pi 3B/4B). Check that the TF card is properly inserted.
- No Network Connectivity: Verify your Wi-Fi settings in Pi-Star are correct. Ensure the hotspot is within range of your Wi-Fi router. Try restarting your router and the hotspot.
- OLED Display Blank: Check the connection between the MMDVM board and the Raspberry Pi's GPIO pins. Ensure the Pi-Star software is running correctly.
- Radio Not Connecting: Double-check your radio's frequency, offset, and talkgroup/reflector settings against your Pi-Star configuration. Ensure the MMDVM mode in Pi-Star matches your radio's mode (e.g., DMR, YSF).
- Poor Audio/BER: Adjust the TX/RX offset in Pi-Star if necessary, though the high-quality TCXO should allow for zero offset in most cases. Ensure antennas are properly attached.
For more detailed troubleshooting, consult the extensive Pi-Star online documentation and community forums.
8. Specifications
| Feature | Specification |
|---|---|
| Supported Modes | DMR, YSF, D-Star (Duplex and Simplex) |
| Oscillator | High Quality TCXO (Temperature Compensated Crystal Oscillator) |
| BER Performance | Low Bit Error Rate |
| Antenna Type | UHF (2x included) |
| Display | OLED Screen |
| Pre-installed Software | Pi-Star (on 8GB TF card) |
| Compatible Raspberry Pi Models | 1B+, 2B, 3B, 3B+, 4B |
| Connectivity Technology | USB (for Raspberry Pi power/data) |
| Package Dimensions | 4.7 x 3.9 x 1.6 inches |
| Item Weight | 6.4 ounces |
9. Warranty and Support
Specific warranty information for this product is not provided in the product details. For warranty inquiries, technical support, or assistance with your Mokxihit Duplex MMDVM Hotspot Board, please contact the seller directly through the platform where you purchased the product. You may also visit the Mokxihit Store on Amazon for additional product information or to contact the brand.


