1. Important Safety Information
Please read all instructions carefully before operating the dehumidifier. Retain this manual for future reference.
- Ensure the unit is placed on a level, stable surface to prevent water spillage.
- Maintain adequate clearance (at least 20 cm) around the unit for proper airflow.
- Do not operate the unit with a damaged power cord. Contact customer support for replacement.
- Unplug the dehumidifier before cleaning or performing any maintenance.
- Do not insert objects into the air inlet or outlet.
- Keep the unit away from heat sources and direct sunlight.
- This appliance is not intended for use by persons (including children) with reduced physical, sensory or mental capabilities, or lack of experience and knowledge, unless they have been given supervision or instruction concerning use of the appliance by a person responsible for their safety.
2. Product Overview
The Waykar 80 Pints Dehumidifier is designed to efficiently remove excess moisture from your environment, improving air quality and comfort. It is suitable for spaces up to 5,000 square feet.

Figure 2.1: Front view of the Waykar 80 Pints Dehumidifier.

Figure 2.2: Dehumidifier operating in a room, illustrating its coverage capability and adjustable humidity range (30-80% RH).
Key features include:
- 80 Pint Capacity: Removes up to 80 pints of moisture per day.
- Energy Star Certified: Designed for high energy efficiency.
- Wide-Angle Swing: Automatic 30°-90° swing function for improved air circulation.
- Quiet Operation: Operates as low as 42 dB.
- Smart Touch Control: Intuitive panel for easy settings adjustment.
- 24-Hour Timer: Schedule operations for convenience.
- Auto Defrost & Memory Restart: Ensures stable performance and resumes settings after power interruption.
- Flexible Drainage: Options for manual tank emptying or continuous drainage.
- Washable Air Filter: Easy to clean and maintain.
- 360° Swivel Wheels & Integrated Handle: For easy mobility.
3. Setup and Installation
3.1 Unpacking
Carefully remove the dehumidifier from its packaging. Inspect the unit for any signs of damage. If any damage is found, do not operate the unit and contact customer support.
3.2 Placement
Place the dehumidifier on a firm, level surface in a location where the ambient temperature will not fall below 5°C (41°F). Ensure there is at least 20 cm (8 inches) of space around the unit for proper air circulation. Avoid placing the unit near heat-generating appliances or in direct sunlight.

Figure 3.1: The dehumidifier features 360° swivel wheels and an integrated handle for easy movement, along with tidy cable storage.
3.3 Power Connection
Plug the power cord into a grounded electrical outlet. Ensure the voltage and frequency of the power supply match the specifications on the unit's rating label.
4. Operating Instructions
The control panel allows you to manage all functions of the dehumidifier.
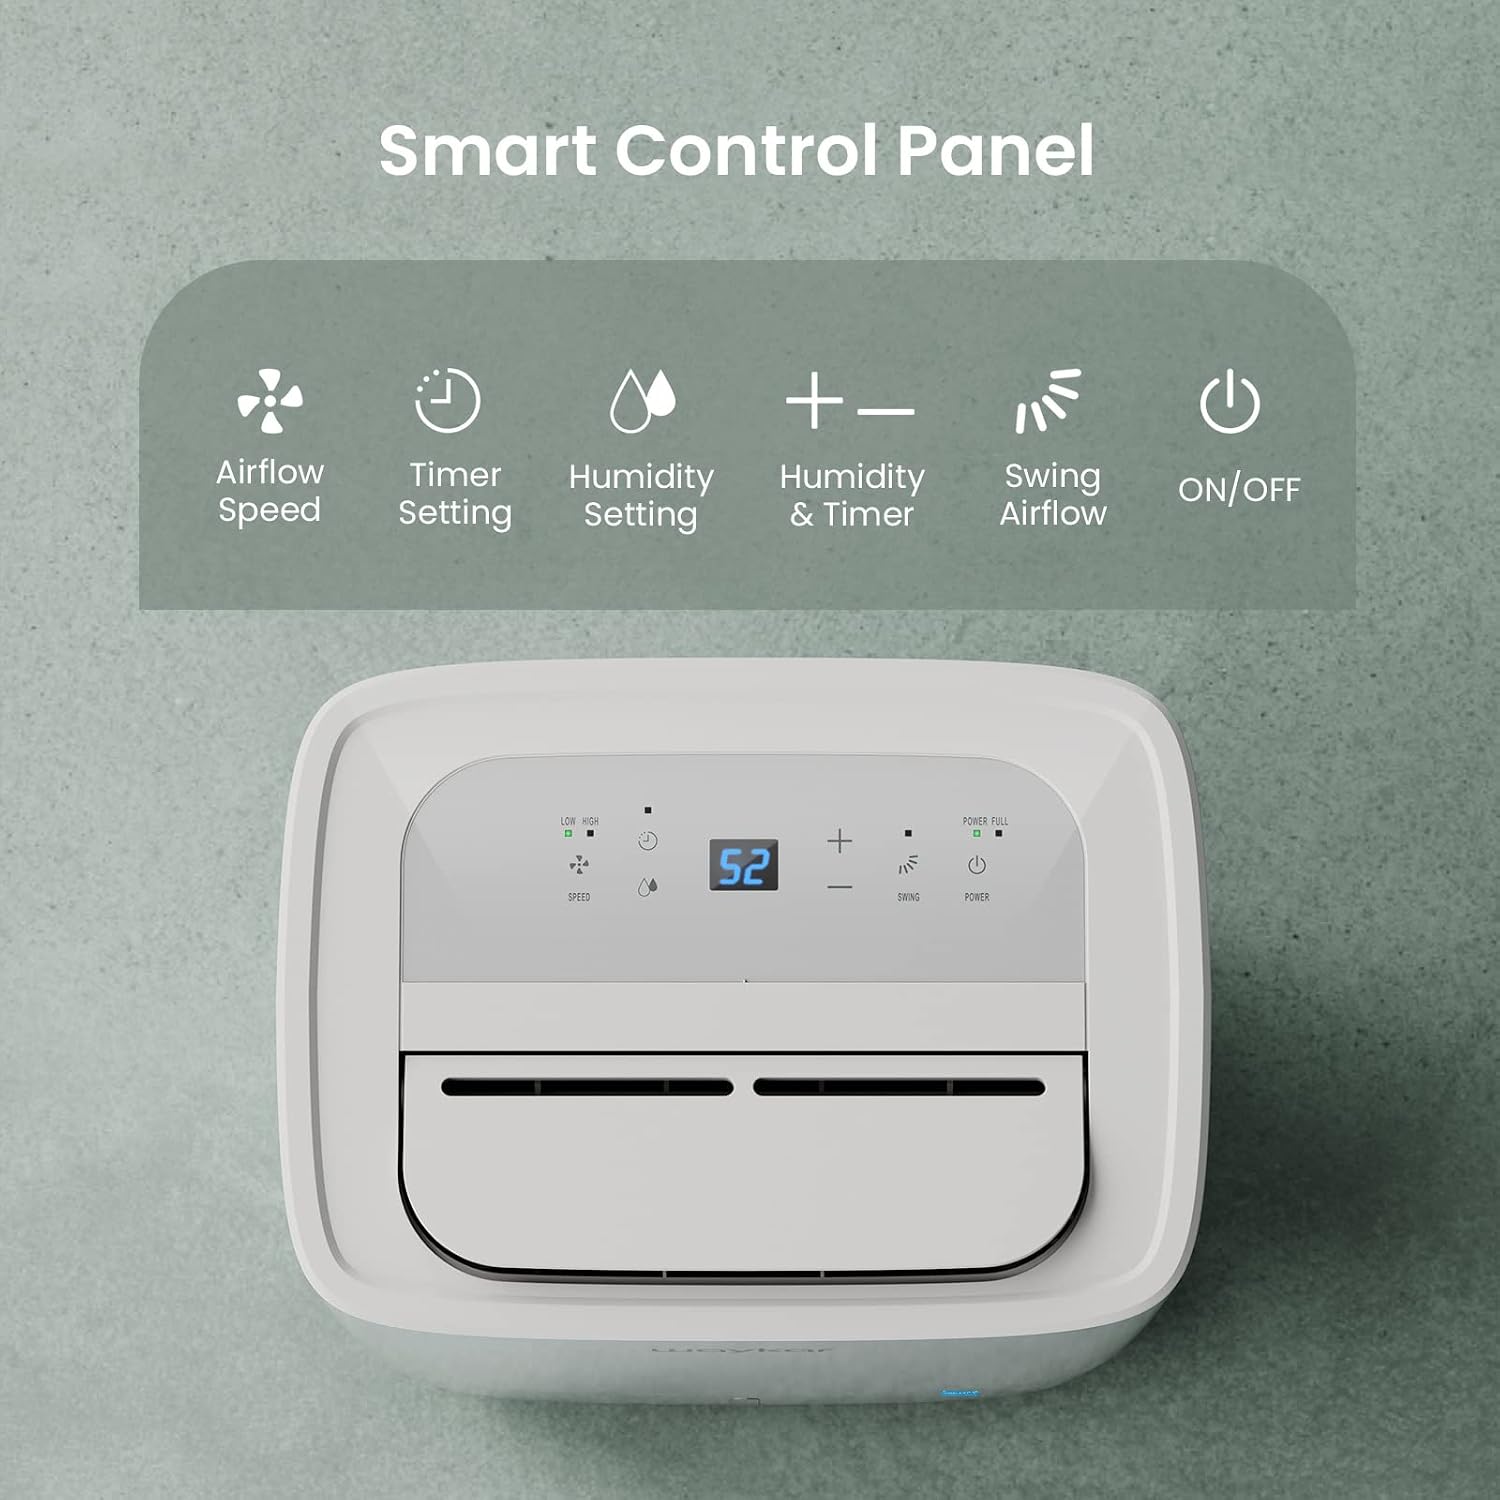
Figure 4.1: Smart Control Panel with buttons for Airflow Speed, Timer Setting, Humidity Setting, Swing Airflow, and ON/OFF.
4.1 Power ON/OFF
- Press the Power button to turn the unit ON or OFF.
4.2 Setting Humidity Level
- Press the + or - buttons to adjust the desired humidity level between 30% and 80% Relative Humidity (RH). The unit will operate until the set humidity level is reached, then cycle ON/OFF to maintain it.
4.3 Fan Speed
- Press the Speed button to toggle between Low and High fan speeds.
4.4 Timer Function
- Press the Timer button to set a delay for the unit to turn ON or OFF. The timer can be set from 0.5 to 24 hours.
4.5 Swing Airflow
- Press the Swing button to activate the automatic 30°-90° airflow oscillation. This helps distribute dehumidified air more evenly.
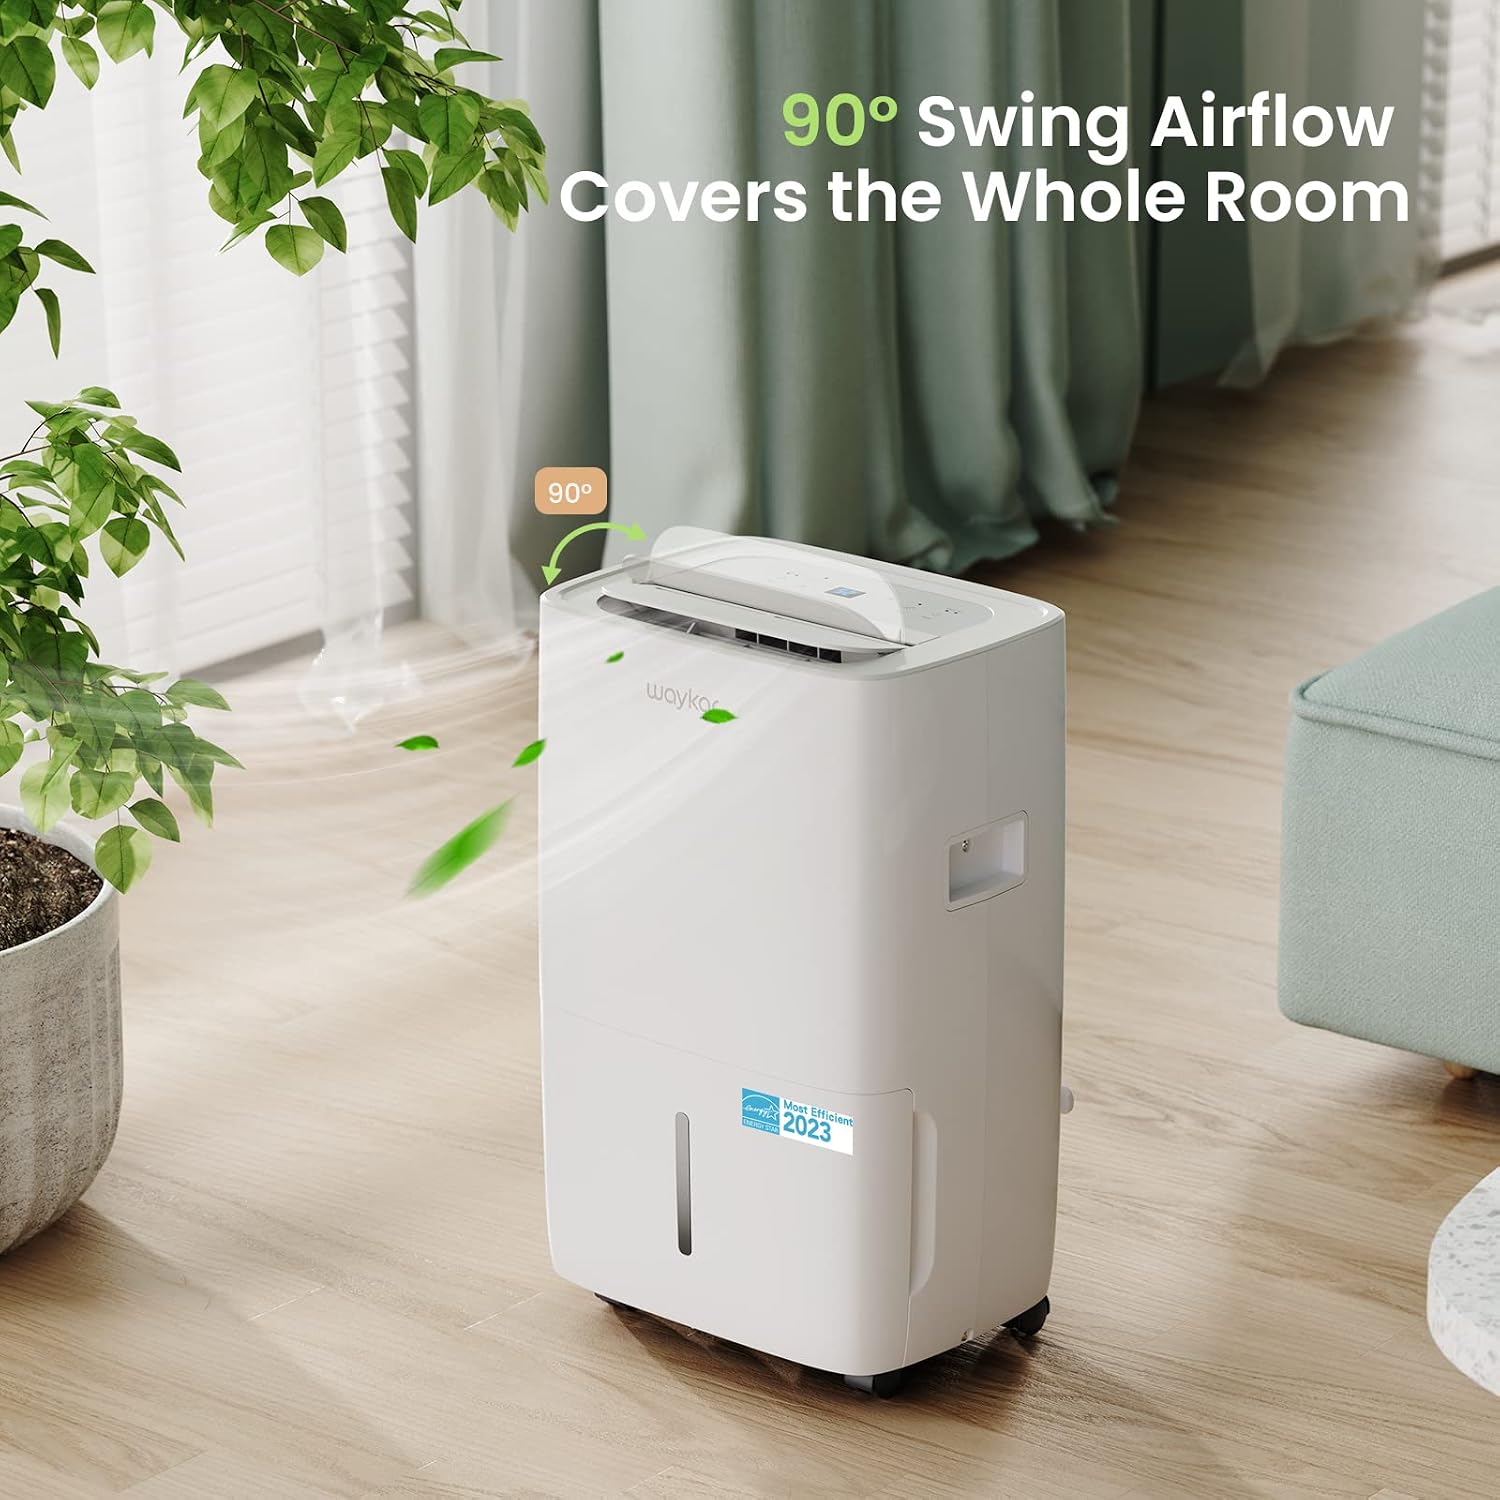
Figure 4.2: The 90° swing airflow feature helps cover the entire room for efficient dehumidification.
4.6 Child Lock
- To activate the Child Lock, press and hold the Timer button for 3 seconds. The control panel will be locked to prevent accidental changes. Repeat to unlock.
4.7 Auto Defrost and Memory Restart
- The unit features an automatic defrost function that activates when frost builds up on the evaporator coils, ensuring efficient operation in cooler environments.
- In case of a power outage, the Memory Restart function will automatically resume the previous settings once power is restored.
5. Drainage Options
The Waykar dehumidifier offers two convenient drainage methods:
5.1 Manual Drainage (Water Tank)
- When the 1.14-gallon (4.3L) water tank is full, the unit will automatically shut off and an indicator light will illuminate on the control panel.
- Carefully pull out the water tank from the front of the unit.
- Empty the collected water.
- Slide the empty tank back into the unit until it clicks into place. The unit will then resume operation.
5.2 Continuous Drainage (Drain Hose)
- For continuous operation without needing to empty the tank, attach the included 3.3 ft (1 m) drain hose to the drainage outlet at the back of the unit.
- Ensure the hose is securely tightened to prevent leaks.
- Direct the other end of the hose to a suitable drain (e.g., floor drain, sink). Ensure the hose is sloped downwards to allow gravity drainage.

Figure 5.1: Illustration of both manual drainage (left) and continuous drainage (right) options.
6. Maintenance
Regular maintenance ensures optimal performance and longevity of your dehumidifier.
6.1 Cleaning the Air Filter
The washable air filter should be cleaned regularly (approximately every 250 hours of operation or when the filter indicator light illuminates) to maintain efficiency.
- Turn off the unit and unplug it from the power outlet.
- Remove the air filter from the back of the unit.
- Wash the filter with warm, soapy water. Rinse thoroughly.
- Allow the filter to air dry completely before reinserting it into the unit.
- Once the filter is reinstalled, press and hold the Filter button for 3 seconds to reset the filter indicator.

Figure 6.1: The detachable and washable water tank, featuring a visible water level indicator.
6.2 Cleaning the Water Tank
Clean the water tank periodically to prevent mold and bacteria growth.
- Remove the water tank from the unit.
- Wash the tank with warm water and a mild detergent.
- Rinse thoroughly and dry before placing it back into the dehumidifier.
6.3 Exterior Cleaning
- Wipe the exterior of the unit with a soft, damp cloth. Do not use harsh chemicals or abrasive cleaners.
7. Troubleshooting Guide
Before contacting customer support, please refer to the following common issues and solutions:
| Problem | Possible Cause | Solution |
|---|---|---|
| Dehumidifier does not turn ON | No power supply; Power cord not plugged in; Water tank full or incorrectly installed. | Check power outlet; Plug in power cord securely; Empty and correctly reinstall water tank. |
| Unit is running but not dehumidifying | Air filter clogged; Room temperature too low; Humidity setting too high. | Clean air filter; Ensure room temperature is above 5°C (41°F); Lower desired humidity setting. |
| Unit is noisy | Unit not on a level surface; Air filter clogged. | Place unit on a flat, stable surface; Clean air filter. |
| Water leaks from the unit | Water tank incorrectly installed; Drain hose not securely attached (continuous drainage). | Reinstall water tank correctly; Securely tighten drain hose connection. |
Error Code
Ask a question about this manualAsk about setup, troubleshooting, compatibility, parts, safety, or missing instructions. Manuals+ will review the question and use this page’s manual context to help answer it. |