Introduction
Welcome to your new FITNMORE Parkside PIFDS 120 A1 Inverter Flux-Cored Welder. This manual provides essential information for safe and efficient operation, maintenance, and troubleshooting. Please read it thoroughly before using the device to ensure proper handling and to maximize its lifespan.
Safety Instructions
General Safety Warnings
- Electrical Shock: Welding equipment can cause electric shock. Ensure the machine is properly grounded and always wear dry welding gloves.
- Fumes and Gases: Welding produces fumes and gases that can be hazardous to your health. Work in a well-ventilated area or use a fume extractor.
- Arc Rays: Arc rays can injure eyes and burn skin. Always wear a welding helmet with appropriate filter shade and protective clothing.
- Fire and Explosion: Welding sparks and hot metal can cause fires or explosions. Keep flammable materials away from the welding area.
- Hot Parts: The welding torch and workpiece become hot. Allow them to cool before handling or wear heat-resistant gloves.
Personal Protective Equipment (PPE)
- Welding helmet with appropriate filter.
- Welding gloves.
- Flame-resistant clothing (long sleeves and pants).
- Safety shoes.
Product Overview
The FITNMORE Parkside PIFDS 120 A1 is a lightweight inverter welder designed for mobile use, offering optimal arc regulation and welding results. It operates without the need for protective gas, making it versatile for various applications.
Key Features
- Lightweight design due to inverter technology, ideal for mobile use.
- Improved arc regulation for optimal welding results, suitable even for inexperienced users.
- Operates without the need for protective gas.
- Synergistic rotary knob for easy adjustment of material thickness (0.8 - 3 mm).
- Automatic adjustment of welding current and wire feed.
- Fan cooling and overload protection via thermal protection with control light.
- Robust housing with shoulder strap.
Included Accessories
- 0.45 kg (0.9 mm) welding wire.
- 1 pre-installed burner nozzle.
- 4 welding nozzles (1 pre-installed).
- 1 welding protection screen.
- 1 slag hammer with wire brush.
- 1 shoulder strap.
This image displays the various accessories included with your welder, such as the welding wire, nozzles, welding protection screen, slag hammer with wire brush, and the shoulder strap for easy transport.

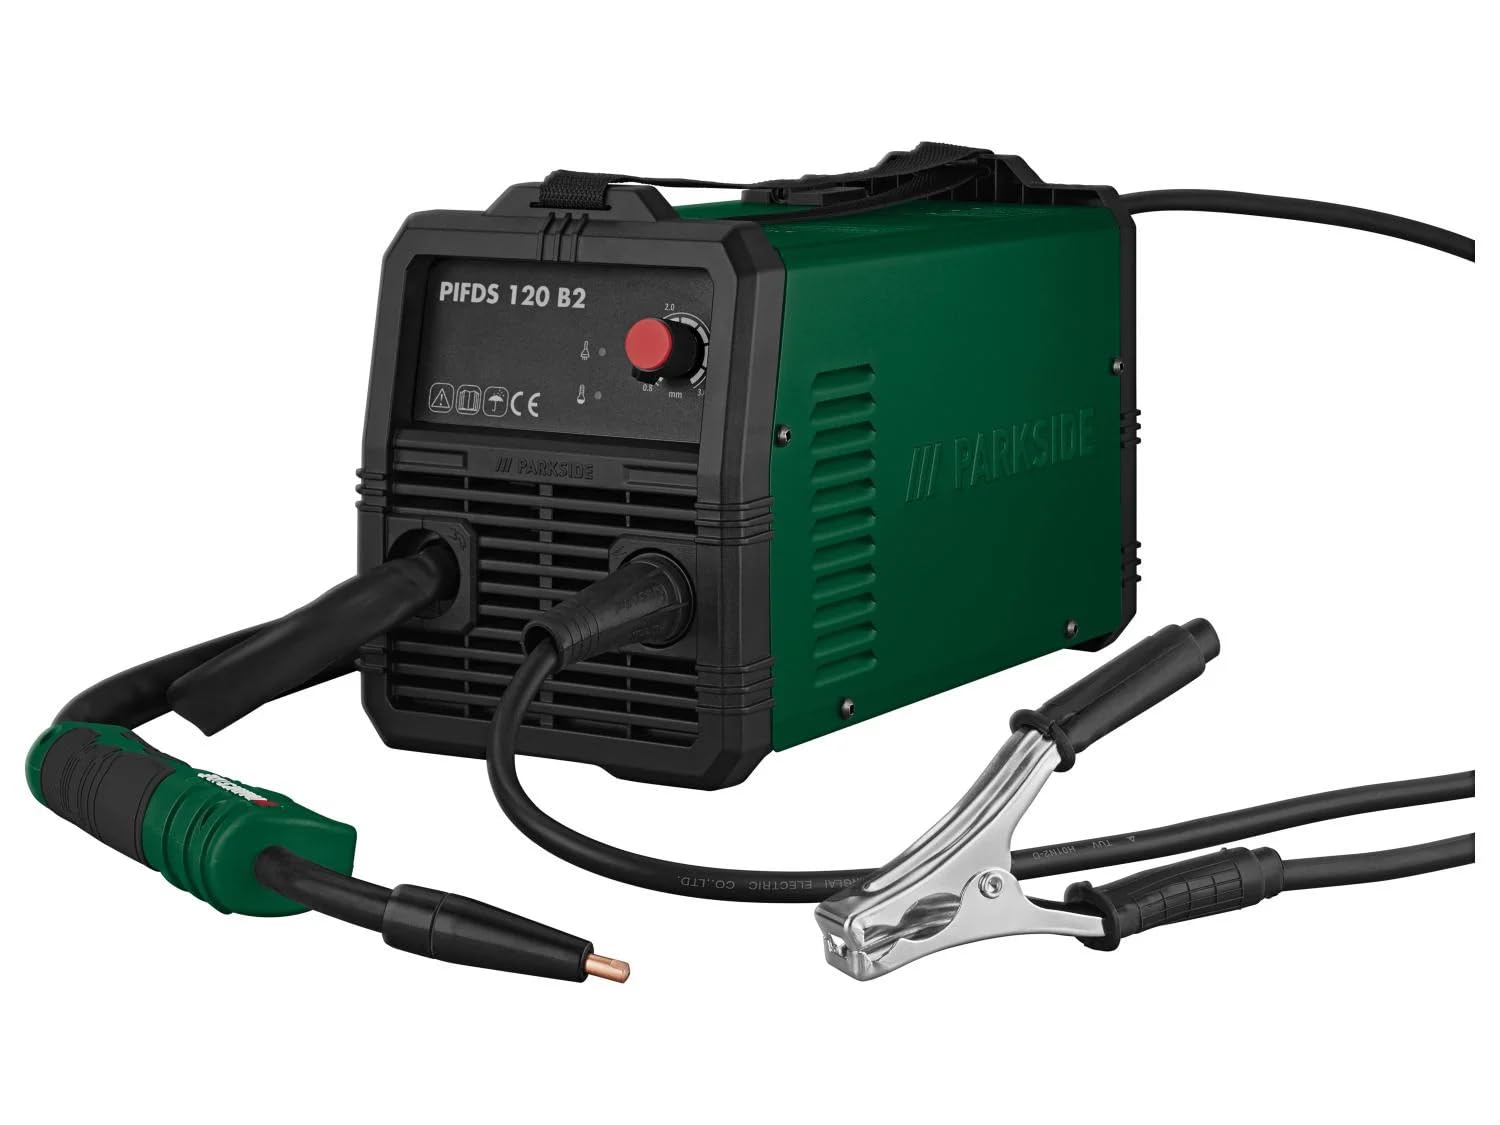
A side view of the FITNMORE Parkside PIFDS 120 A1 Inverter Welder, highlighting its compact and portable design.
Setup
Unpacking and Inspection
- Carefully remove the welder and all accessories from the packaging.
- Inspect the device for any signs of damage during transit. Do not operate if damaged.
- Ensure all listed accessories are present.
Power Connection
- Connect the power cable to a suitable 230 V electrical outlet.
- Ensure the power source meets the welder's requirements.
Connecting Welding Cables
- Connect the ground clamp cable to the appropriate terminal on the welder.
- Connect the welding torch cable to its designated terminal.

This image illustrates the rear of the welder, highlighting the connection points for the welding cables.
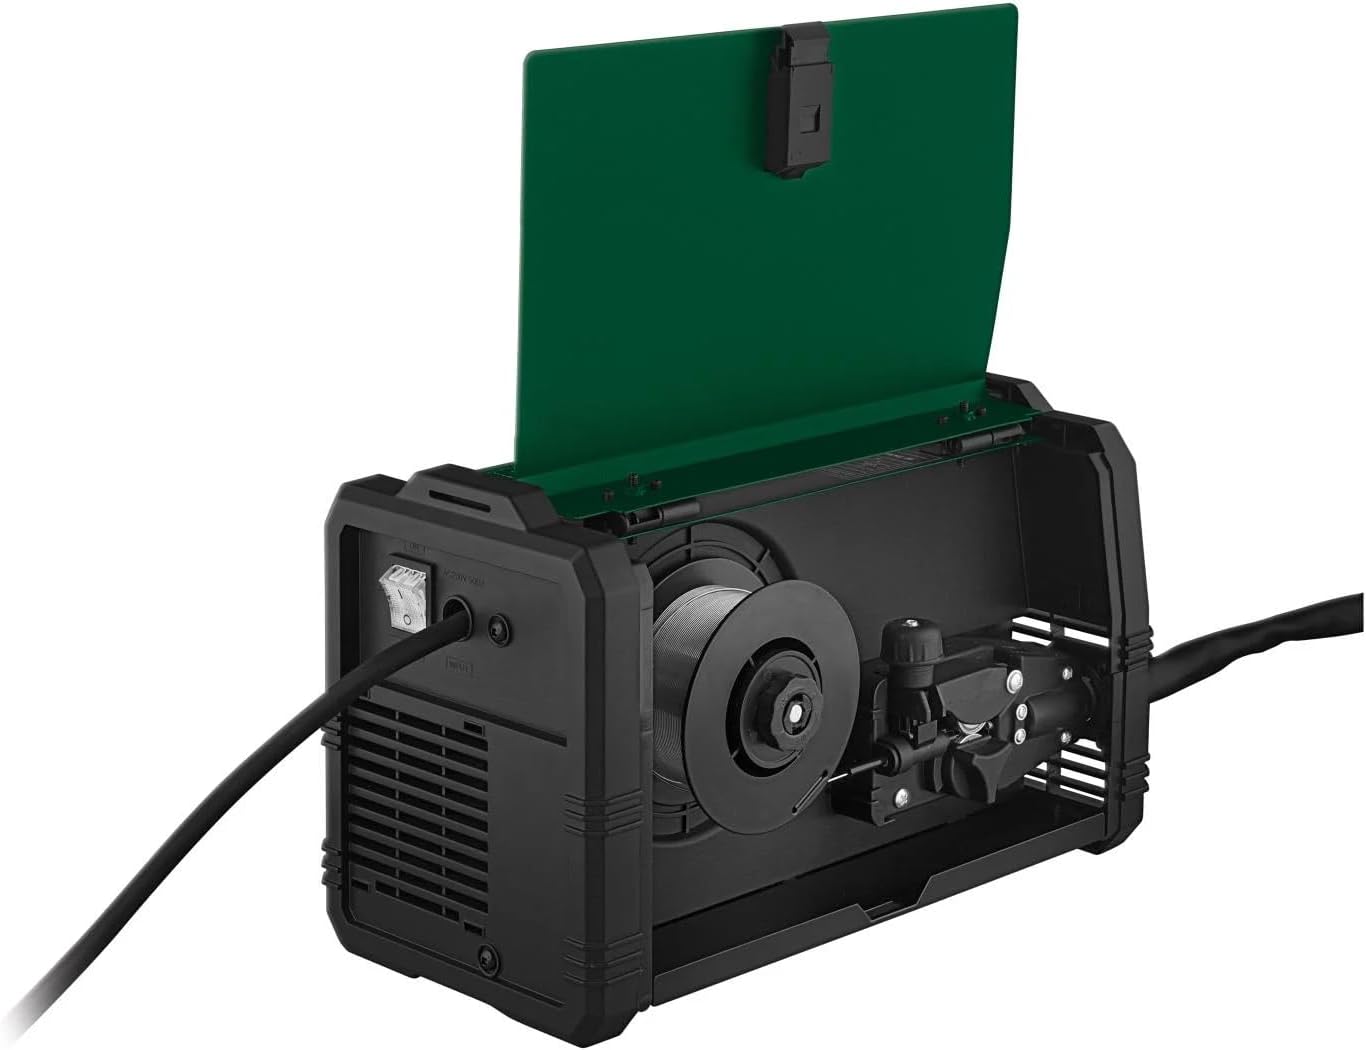
Installing Welding Wire (Flux-Cored)
- Open the wire feed compartment.
- Place the welding wire spool onto the spindle, ensuring it rotates freely.
- Feed the wire through the guide tube and into the drive rollers.
- Adjust the tension on the drive rollers to prevent slipping or crushing the wire.
- Close the compartment.

This image shows the internal compartment where the welding wire spool is installed and fed through the mechanism.
Attaching the Shoulder Strap
- Attach the provided shoulder strap to the designated loops on the welder for convenient portability.

The front view of the welder, demonstrating the attached shoulder strap for convenient portability.
Video: Accessories and Tubular Wire Installation
This video demonstrates the installation of tubular wire and other accessories for a welding machine, providing a visual guide for setup.
Operating the Welder
Powering On
- Ensure all connections are secure and turn on the main power switch.
Adjusting Settings
- Use the synergistic rotary knob to select the appropriate material thickness (0.8 - 3 mm).
- The welder will automatically adjust the welding current and wire feed speed based on your selection.
Welding Process
- Always wear full Personal Protective Equipment (PPE) before starting.
- Position the workpiece securely and ensure good ground connection.
- Bring the welding torch close to the workpiece and press the trigger to initiate the arc.
- Maintain a consistent travel speed and torch angle for optimal weld quality.
This image shows a user actively welding with the device, demonstrating proper safety gear and technique.
Video: Using Tubular Wires
This video provides a demonstration on the correct usage of tubular wires for welding, offering practical guidance for operation.
Maintenance
Regular maintenance ensures the longevity and optimal performance of your welder.
Cleaning
- Regularly clean the device, especially the cooling vents, to prevent dust and debris buildup. Use compressed air for best results.
- Clean the welding torch nozzle and contact tip regularly to remove spatter.
Inspection
- Periodically inspect all cables and connections for wear, cuts, or damage. Replace any damaged components immediately.
- Check the wire feed mechanism for smooth operation and proper tension.
Storage
- Store the welder in a dry, clean, and safe place, away from moisture and extreme temperatures.
- Protect the device from dust when not in use.
Video: Fans and Cooling
This video highlights the importance of the cooling fans and proper ventilation for the welding machine, crucial for its maintenance and longevity.
Troubleshooting
Here are some common issues and their potential solutions:
- No Power:
Check if the power cable is securely plugged in. Verify the circuit breaker or fuse. Ensure the main power switch on the welder is in the 'ON' position. - Poor Weld Quality (e.g., inconsistent arc, weak penetration):
Verify the material thickness setting on the synergistic knob is correct for your workpiece. Check the wire feed speed; it should be automatically adjusted but can be fine-tuned if necessary. Ensure the workpiece is clean and free of rust or paint. Check for proper ground connection. - Overload Protection Activated (control light on):
This indicates the unit has overheated. Turn off the welder and allow it to cool down. Ensure the cooling vents are clear and not obstructed. Reduce the duty cycle or welding current if continuously overheating. - Wire Not Feeding:
Check if the wire spool is correctly installed and not tangled. Ensure the drive roller tension is adequate. Inspect the welding torch liner for blockages or kinks.
If issues persist after attempting these solutions, please contact customer support.
Specifications
| Feature | Detail |
|---|---|
| Welding Current | 25-120 A |
| Protection Class | IP21S |
| Rated Voltage | 230 V |
| Power Cable Length | 4 m |
| Recommended Material Thickness | 0.8-3 mm |
| Material | Steel, Plastic |
| Dimensions | Approx. 33.1 x 16.1 x 19.9 cm |
| Weight | Approx. 4 kg |
Warranty and Support
For detailed warranty information, terms, and conditions, please refer to the specific warranty card or documentation included with your FITNMORE Parkside PIFDS 120 A1 Inverter Flux-Cored Welder at the time of purchase. For technical support, spare parts, or service inquiries, please visit the official FITNMORE website or contact their customer service department directly. Keep your proof of purchase handy when contacting support.