Introduction
This manual provides comprehensive instructions for the Dpofirs 1080P 30FPS Vlogging Camera Recorder. Please read this manual carefully before using the device to ensure proper operation and to maximize its performance. Keep this manual for future reference.
Product Overview
The Dpofirs Vlogging Camera Recorder is designed for capturing high-definition videos and photos. It features a 2.7-inch TFT rotatable screen, 16x digital zoom, and 16MP image resolution.
Key Features:
- HD Camera: 2.7-inch TFT rotatable screen, 1080P video resolution, 16x digital zoom, 16MP pixels.
- Selfie Support: Front fill light for photos, 2 or 10-second self-timer.
- Storage: Supports up to 32GB memory card (not included). A Class10 U3 chip memory card is recommended for optimal performance.
- USB Connectivity: Connects to a computer for file transfer and can function as a PC camera.
- Integrated Speaker: Built-in speaker for audio playback.
- Recording while Charging: Supports continuous recording while connected to a power source.
Camera Components:

Image 1: Close-up view of the camera's video lens, showing the focal length and aperture details.

Image 2: Rear view of the camcorder, highlighting the control buttons, menu button, mode button, and speaker grille.

Image 3: Detailed view of the camera's flip-out screen, showing resolution and megapixel information.

Image 4: The Dpofirs camcorder displayed with its standard accessories, including the battery, USB cable, and wrist strap.
Setup
- Charge the Battery: Insert the included lithium battery into the camera. Connect the camera to a power source using the USB cable to fully charge the battery before first use.
- Insert Memory Card: Open the memory card slot cover. Insert a compatible SDHC memory card (up to 32GB, Class10 U3 recommended) into the slot until it clicks into place. Ensure the card is inserted in the correct orientation.
- Power On: Press and hold the power button to turn on the camera.
Operating Instructions
Basic Operation:
- Power On/Off: Press and hold the power button to turn the camera on or off.
- Mode Selection: Press the MODE button to switch between Photo mode and Video recording mode.
- Recording Video:
- In Video mode, press the Record button (usually marked with a red dot or camera icon) to start recording.
- Press the Record button again to stop recording.
- Taking Photos:
- In Photo mode, press the Shutter button (usually a larger button on top) to capture a photo.
- Zoom Function: Use the zoom lever/buttons (often marked with 'W' for Wide and 'T' for Telephoto) to adjust the 16x digital zoom.
- Reviewing Content: Press the Playback button (often marked with a play icon) to view recorded videos and photos. Use navigation buttons to browse.
Advanced Functions:
- Self-Timer: Access the menu settings to select a 2-second or 10-second self-timer for photos.
- Fill Light: The camera features a front fill light. Activate it through the menu settings for improved lighting in low-light conditions, especially for selfies.

Image 5: The camcorder in use for a selfie, demonstrating the rotatable screen and front fill light feature.
- Connecting to PC: Use the provided USB cable to connect the camera to a computer. The camera can be used to transfer files or as a PC camera.
- HD Output: The camera supports HD output for viewing content on compatible displays.
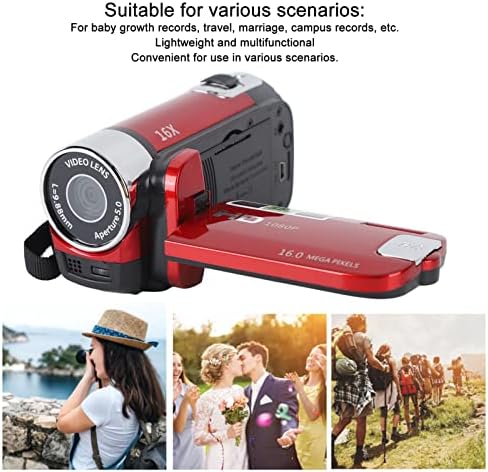
Image 6: Illustrates various applicable scenarios for the camcorder, such as travel, weddings, and personal recordings.
Maintenance
- Cleaning: Use a soft, dry cloth to clean the camera body. For the lens and screen, use a specialized lens cleaning cloth and solution. Avoid abrasive materials.
- Storage: Store the camera in a cool, dry place away from direct sunlight and extreme temperatures. Remove the battery if the camera will not be used for an extended period.
- Battery Care: Fully charge the battery before storage and recharge it every few months to maintain its lifespan.
- Memory Card: Regularly back up your data from the memory card to a computer or external storage device. Format the memory card periodically to maintain performance.
Troubleshooting
| Problem | Possible Cause | Solution |
|---|---|---|
| Camera does not power on. | Battery is depleted or not inserted correctly. | Ensure the battery is fully charged and correctly inserted. |
| Cannot record video or take photos. | Memory card is full, not inserted, or incompatible. | Check memory card status. Ensure it is inserted, has free space, and is a Class10 U3 card. |
| Poor image/video quality. | Insufficient lighting, dirty lens, or incorrect settings. | Ensure adequate lighting. Clean the lens. Check resolution settings in the menu. |
| Camera not recognized by computer. | Faulty USB cable or incorrect connection mode. | Try a different USB cable. Ensure the camera is in PC camera or mass storage mode if applicable. |
Specifications
| Feature | Detail |
|---|---|
| Model Number | Dpofirsgn9zt6aq2u-12 |
| Image Resolution | 16 Megapixels (effective), supports VGA, 1M, 5M, 12M, 16M |
| Image Format | JPG |
| Video Resolution | 1080 Pixels (effective), supports FHD (1920x1080), HD (1280x720), 640x480 |
| Video Format | AVI |
| Screen Size | 2.7 inches TFT |
| Digital Zoom | 16x |
| Optical Zoom | 16x |
| Shutter Type | Electronic |
| Self-Timer | 2 seconds, 10 seconds |
| TV Output | NTSC 30fps, PAL 25fps |
| Storage Media | SDHC memory card (up to 32GB, Class10 U3 recommended) |
| Battery | 1 x 10²⁰mAh Lithium Battery (built-in) |
| Connectivity | USB |
| Sensor Technology | CMOS |
| Weight | 216 grams |
| Package Dimensions | 14 x 11 x 7 cm |
| Image Aspect Ratio | 16:9 |
| White Balance Settings | Auto |
| Exposure Control Type | Automatic |
| Number of Speakers | 1 |
| Compatible Devices | Personal Computer |
| Camcorder Type | Video Camera |
| Recommended Uses | Personal recordings, baby growth records, travel, campus activities |
| Water Resistance Level | Not waterproof |
| Image Stabilization | Digital (Not Assured) |
| Form Factor | Handheld |
| Lens Type | Zoom |
| Focus Type | Auto Focus |
| Shooting Modes | Automatic |
Warranty and Support
For warranty information and technical support, please refer to the documentation included with your purchase or contact Dpofirs customer service.
Return Policy: This product has a 30-day return policy for refund or replacement.