OCZWV JKP45WP2WG, JKP45WP3WG, JKP45WT1WW, JKP45WT2WW, JKP45WV1WW, JKP45WW1WW, JKP45WW2WW, JKP54GP1BG, JKP54GP2BG, JKP54GP3BG,
Heating Element User Manual
For GE Oven Models: JKP45WP2WG, JKP45WP3WG, JKP45WT1WW, JKP45WT2WW, JKP45WV1WW, JKP45WW1WW, JKP45WW2WW, JKP54GP1BG, JKP54GP2BG, JKP54GP3BG, JKP54GP4BG
Brand: OCZWV
1. Introduction
This manual provides essential information regarding the installation, operation, and maintenance of the WB44K5009 Heating Element. This component is designed as a replacement part for specific General Electric manufactured range models, including those under the Hotpoint and RCA brands. Proper installation and adherence to safety guidelines are crucial for the safe and effective functioning of your appliance.
2. Compatibility
This heating element (part number WB44K5009) is compatible with the following GE oven models:
- JKP45WP2WG
- JKP45WP3WG
- JKP45WT1WW
- JKP45WT2WW
- JKP45WV1WW
- JKP45WW1WW
- JKP45WW2WW
- JKP54GP1BG
- JKP54GP2BG
- JKP54GP3BG
- JKP54GP4BG
It also replaces part numbers AP2030967 and PS249244.
3. Specifications
| Attribute | Detail |
|---|---|
| Part Number | WB44K5009 |
| Dimensions (Side to Side) | 13-1/4 inches (33.66 cm) |
| Dimensions (Mounting Bracket to Back) | 15-7/8 inches (40.32 cm) |
| Dimensions (Mounting Bracket to Terminal End) | 3 inches (7.62 cm) |
| Terminal Type | Male Spade 1/4 inch |
| Power Rating | 3400 Watts at 240 Volt |
| Replacement For | AP2030967, PS249244 |
| Manufacturer | SAN-SAN |
| Power Source | AC |
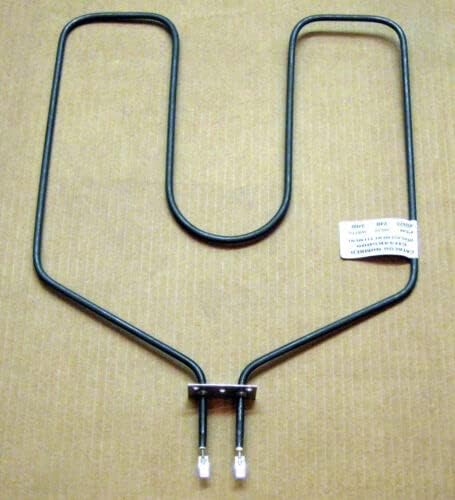
Figure 1: The WB44K5009 Heating Element. This image displays the U-shaped heating element with its two terminal prongs extending downwards from a central mounting bracket. A small white label is visible on the right side of the element.
4. Installation (Setup)
WARNING: Before attempting any installation or repair, ensure the appliance is completely disconnected from its power source. Failure to do so can result in electric shock, injury, or death. If you are unsure about any step, consult a qualified technician.
- Safety First: Disconnect the oven from the electrical supply by unplugging it or turning off the circuit breaker.
- Access the Element: Open the oven door and locate the existing heating element. Depending on your oven model, you may need to remove oven racks or other components to gain full access.
- Remove Fasteners: Identify and remove the screws or fasteners holding the old heating element in place. These are typically located at the back of the oven cavity.
- Disconnect Wiring: Carefully pull the old element forward a few inches to expose the electrical terminals. Note the position of each wire before disconnecting them. It is recommended to take a photo for reference. Disconnect the wires from the old element.
- Remove Old Element: Once wires are disconnected and fasteners removed, carefully slide the old heating element out of the oven cavity.
- Install New Element: Align the new WB44K5009 heating element with the mounting holes. Connect the electrical wires to the new element's terminals, ensuring a secure connection. Refer to your reference photo if needed.
- Secure New Element: Push the new element into place and secure it with the screws or fasteners removed earlier.
- Test: Restore power to the oven. Perform a test bake cycle to ensure the new heating element is functioning correctly and heating evenly.
For detailed, model-specific instructions, refer to your oven's original service manual or consult a professional appliance repair technician.
5. Operating Instructions
The heating element is an internal component of your oven responsible for generating heat. Once installed, its operation is controlled by the oven's thermostat and control panel. There are no direct user controls for the heating element itself. To operate your oven and utilize the heating element, follow the instructions provided in your oven's primary user manual for setting temperature, selecting cooking modes, and preheating.
6. Maintenance
The WB44K5009 heating element is designed to be a durable, low-maintenance component. Regular maintenance of the element itself is generally not required. However, to ensure its longevity and the overall performance of your oven:
- Keep Oven Clean: Regularly clean the interior of your oven to prevent grease and food residue buildup, which can affect heating efficiency and potentially damage components over time.
- Avoid Impact: Be careful when placing or removing items from the oven to avoid striking the heating element, which could cause damage.
- Professional Inspection: If you notice any unusual smells, uneven heating, or visible damage to the element, consult a qualified appliance technician for inspection and repair.
7. Troubleshooting
If your oven is not heating properly after replacing the element, consider the following common issues:
| Problem | Possible Cause | Solution |
|---|---|---|
| Oven not heating at all | No power to the oven; faulty wiring connection; faulty thermostat or control board. | Check circuit breaker. Ensure wires are securely connected to the element. If power is present and connections are good, a professional diagnosis of the thermostat or control board may be needed. |
| Oven heating unevenly | Element not fully functional; issues with oven calibration or other heating elements (if applicable). | Visually inspect the element for any breaks or hot spots. Ensure the element is correctly seated. Consult oven's main manual for calibration or seek professional help. |
| Element sparking or glowing inconsistently | Loose connection; damaged element. | Immediately disconnect power. Check all wiring connections for tightness. If the element appears damaged, it may need replacement. |
For issues not listed here or if troubleshooting steps do not resolve the problem, it is recommended to contact a certified appliance repair technician.
8. Warranty and Support
For information regarding the warranty of your OCZWV heating element, please refer to the documentation provided at the time of purchase or contact the seller directly. For technical support or assistance with installation beyond the scope of this manual, it is advisable to consult a qualified appliance repair professional or the manufacturer of your GE oven.
You can find more information about GE appliances and service at their official website: www.geappliances.com
Ask a question about this manual
Ask about setup, troubleshooting, compatibility, parts, safety, or missing instructions. Manuals+ will review the question and use this page’s manual context to help answer it.