1. Introduction
This manual provides detailed instructions for the assembly, installation, operation, and maintenance of your wonline 20-inch Black Bathroom Vanity with Resin Sink, Model USBR4006. Please read all instructions carefully before beginning installation and retain this manual for future reference.
The wonline bathroom vanity is designed with a modern aesthetic, featuring a durable MDF wood cabinet and a high-quality resin sink. Its compact design is ideal for various bathroom sizes, offering both functionality and style.
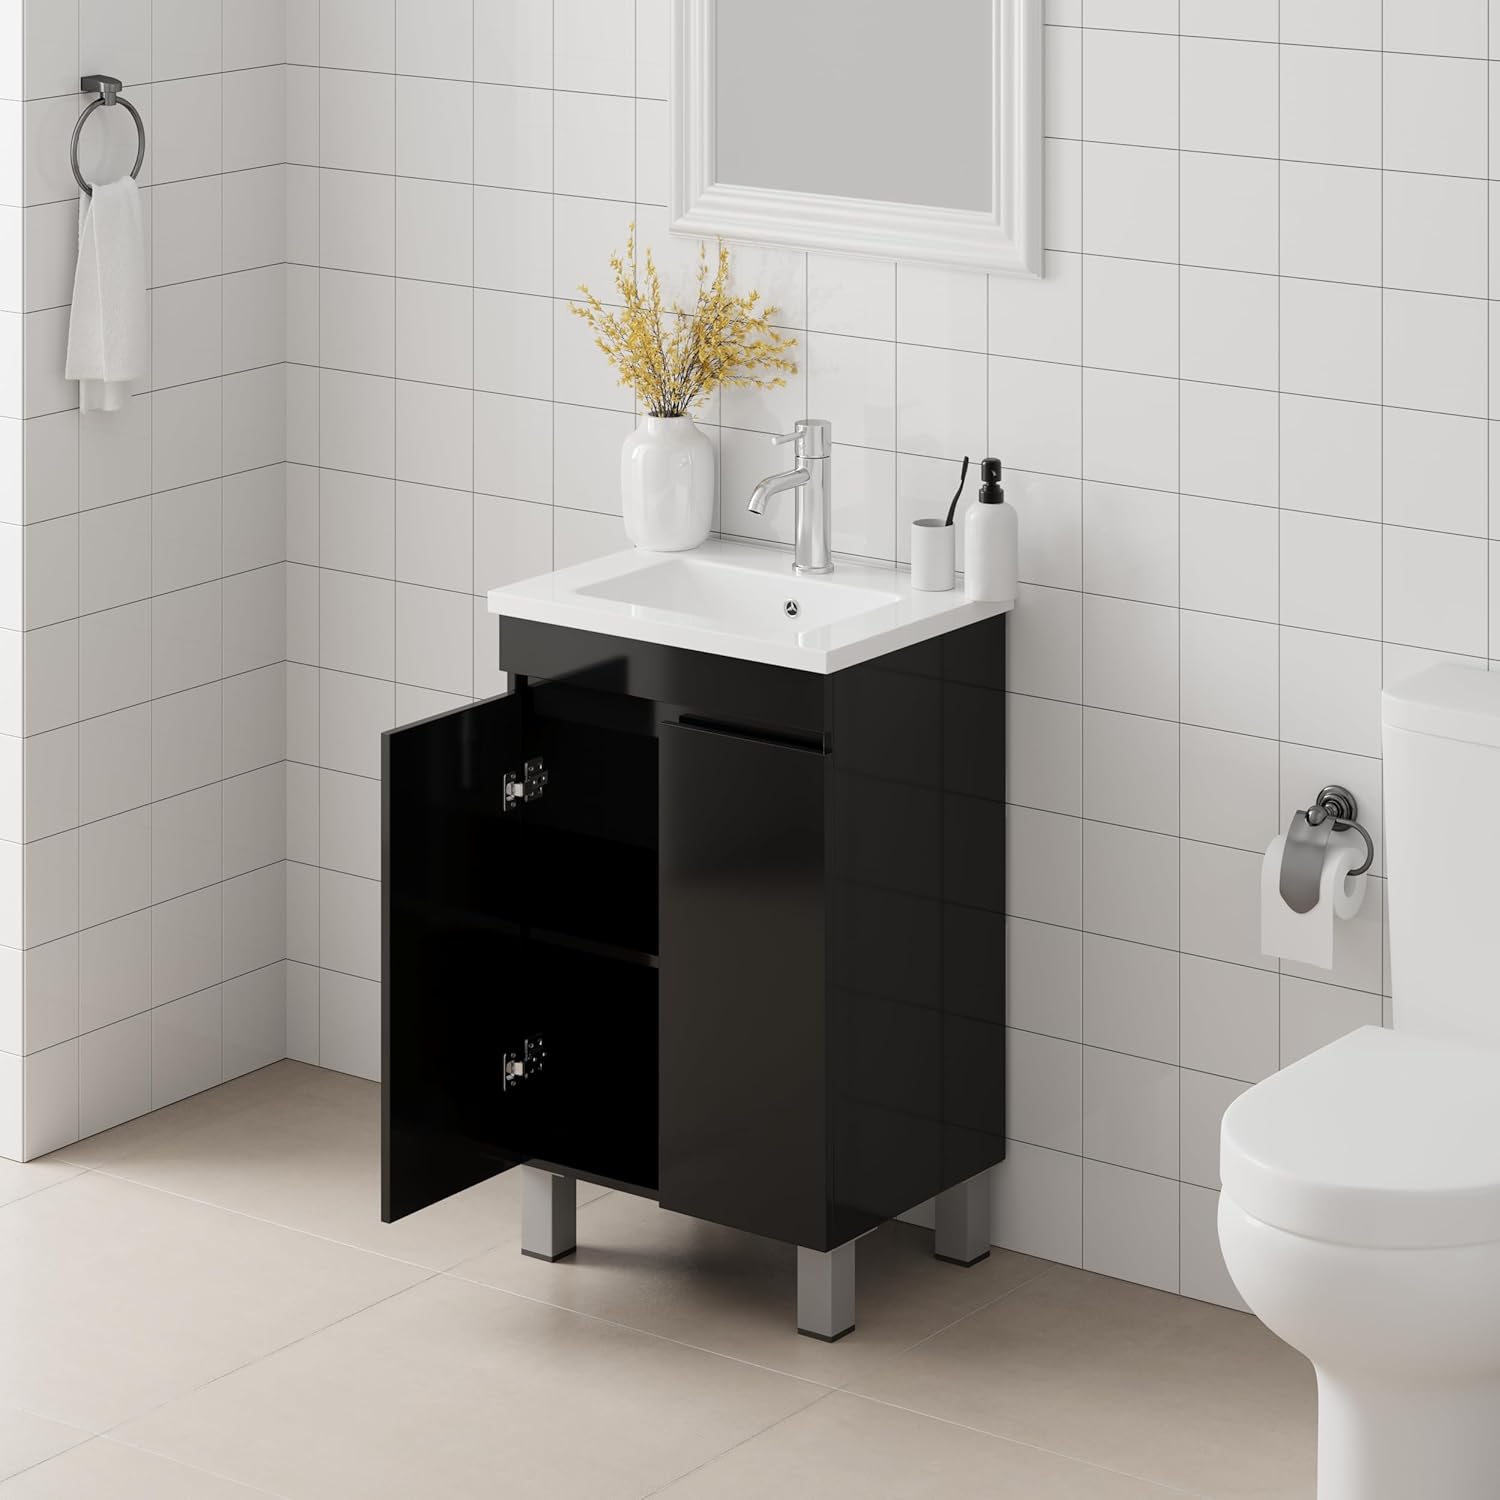
Image 1.1: Front view of the wonline 20-inch Black Bathroom Vanity with Resin Sink.
2. Safety Information
- Always ensure the installation area is clear and well-lit.
- Wear appropriate safety gear, including gloves and eye protection, during assembly and installation.
- Do not overtighten screws, as this may damage the MDF material.
- Ensure all water connections are properly sealed to prevent leaks.
- If you are unsure about any step, consult a qualified professional.
3. Package Contents
Before beginning assembly, verify that all components listed below are present and undamaged. If any parts are missing or damaged, please contact customer support.

Image 3.1: Visual representation of included components.
- 1 x Vanity Cabinet
- 1 x Resin Sink
- 1 x Faucet
- 1 x Pop Up Drain
- 1 x Installation Manual (this document)
- Other Accessories (hardware for assembly and installation)
4. Setup and Installation
The wonline bathroom vanity is designed for easy installation. Follow these steps carefully for proper setup.
4.1 Pre-Installation Planning
- Measure your bathroom space to ensure the vanity fits correctly. Refer to the dimensions provided in Section 7.
- Ensure water supply lines and drain pipes are accessible at the installation location.
- Gather all necessary tools (e.g., screwdriver, wrench, level, sealant).

Image 4.1: Detailed dimensions of the vanity and sink for planning.
4.2 Cabinet Assembly
- Unpack all components and lay them out on a clean, soft surface to prevent scratches.
- Assemble the cabinet frame according to the included hardware and pre-drilled holes. Ensure all connections are secure.
- Install the cabinet doors using the provided soft-close hinges. Adjust hinges as needed for proper alignment.
- Attach the vanity legs to the base of the cabinet.

Image 4.2: Detail of cabinet hinges and legs, illustrating assembly points.
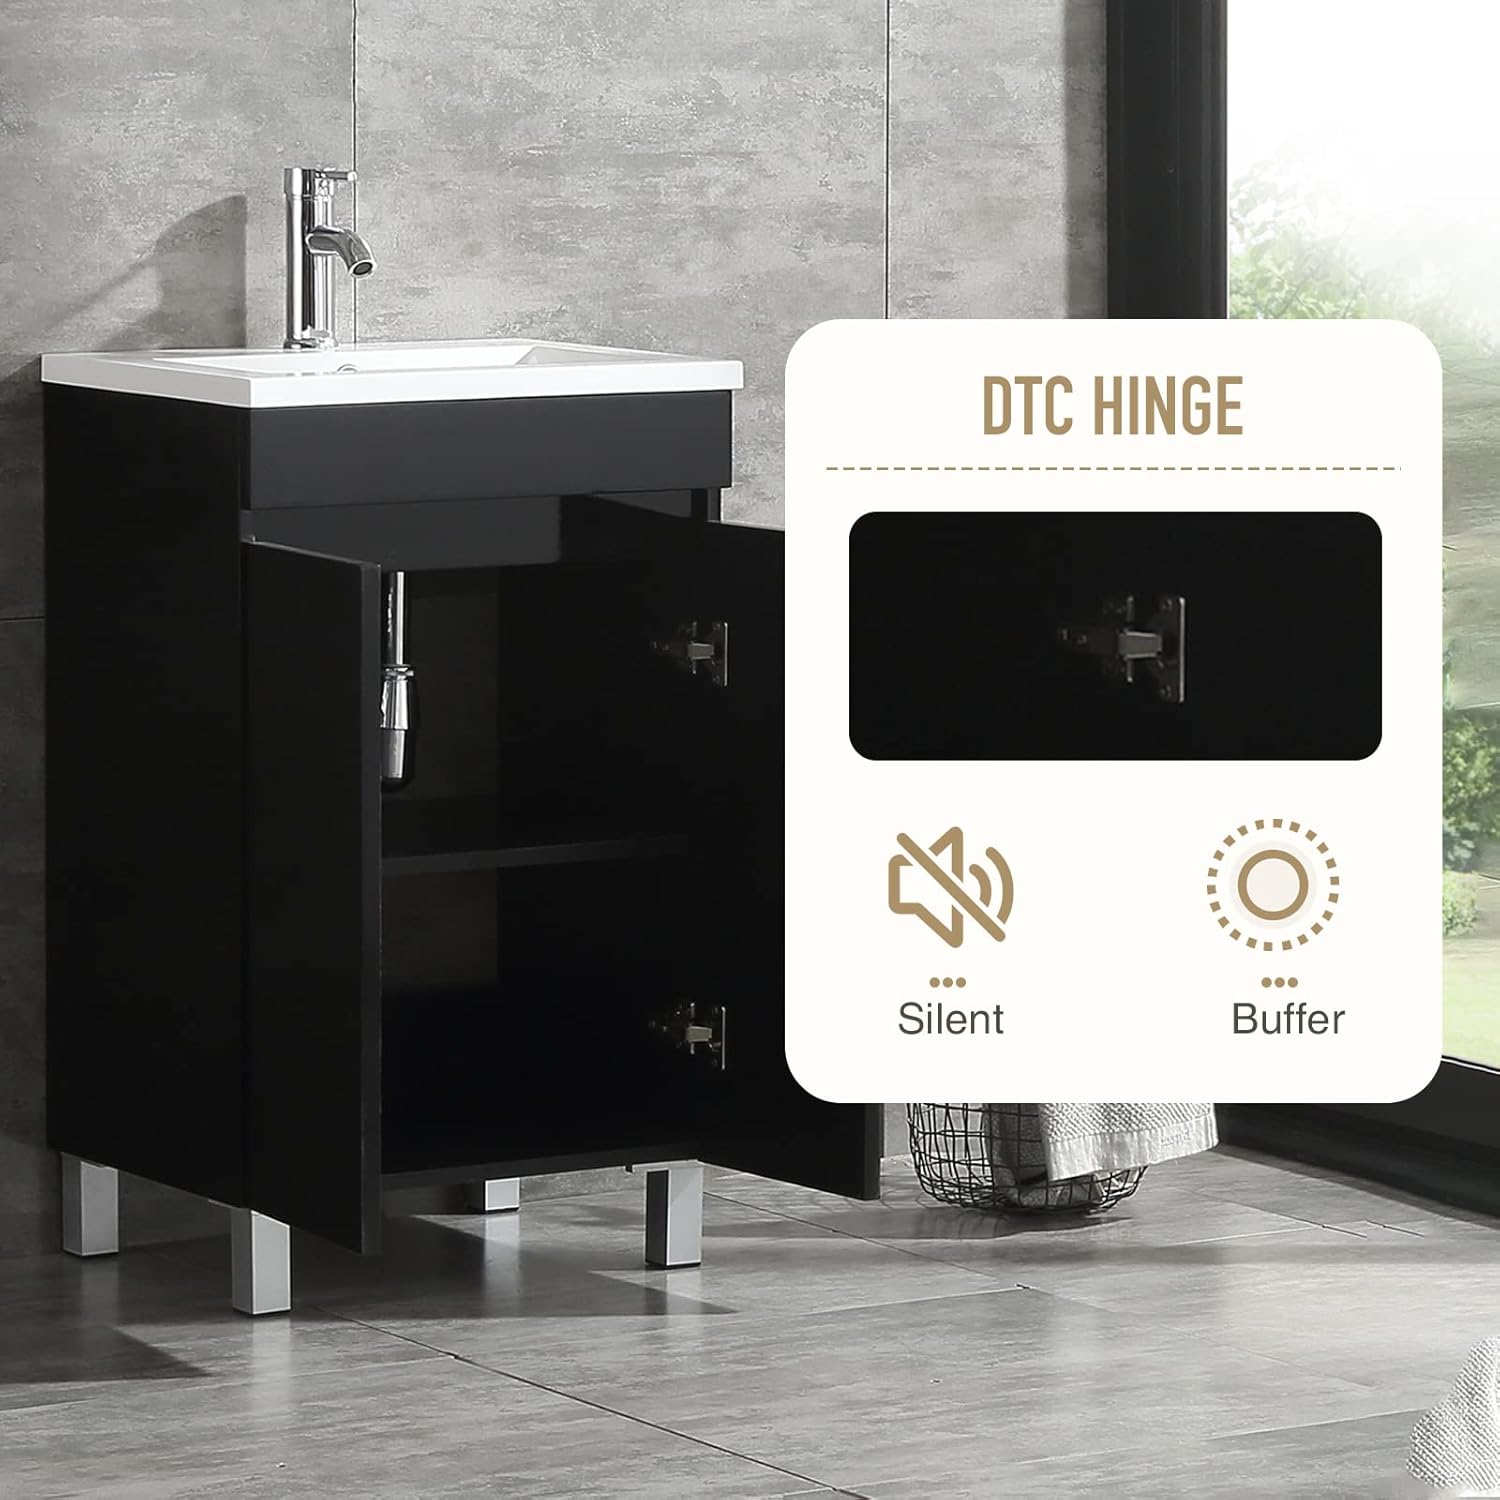
Image 4.3: DTC Hinge mechanism, highlighting silent and buffered closing functionality.
4.3 Sink and Faucet Installation
- Place the resin sink onto the assembled cabinet. Ensure it is properly aligned and level.
- Install the faucet into the designated hole on the sink. Connect the hot and cold water supply lines to the faucet according to manufacturer instructions.
- Install the pop-up drain into the sink's drain opening. Connect the drain assembly to your existing plumbing P-trap.
- Apply a bead of silicone sealant around the perimeter of the sink where it meets the cabinet to prevent water infiltration.

Image 4.4: Details of the sink, including the pop-up drain, chrome faucet, and anti-spill overflow hole.
4.4 Final Placement
- Carefully move the assembled vanity to its final position.
- Connect the water supply lines to the wall shut-off valves.
- Connect the drain P-trap to the wall drain pipe.
- Turn on the water supply and check for any leaks at all connections. Tighten as necessary.
5. Operation
Your wonline bathroom vanity is designed for daily use, providing convenient storage and a functional sink area.
- Cabinet Use: The spacious cabinet with soft-close hinges provides ample storage for bathroom essentials. The soft-close mechanism ensures quiet and smooth operation, preventing slamming.
- Sink Use: The resin sink is designed for everyday washing. The integrated faucet provides hot and cold water. The pop-up drain allows for easy water retention and release. An anti-spill hole is included to prevent overflow.
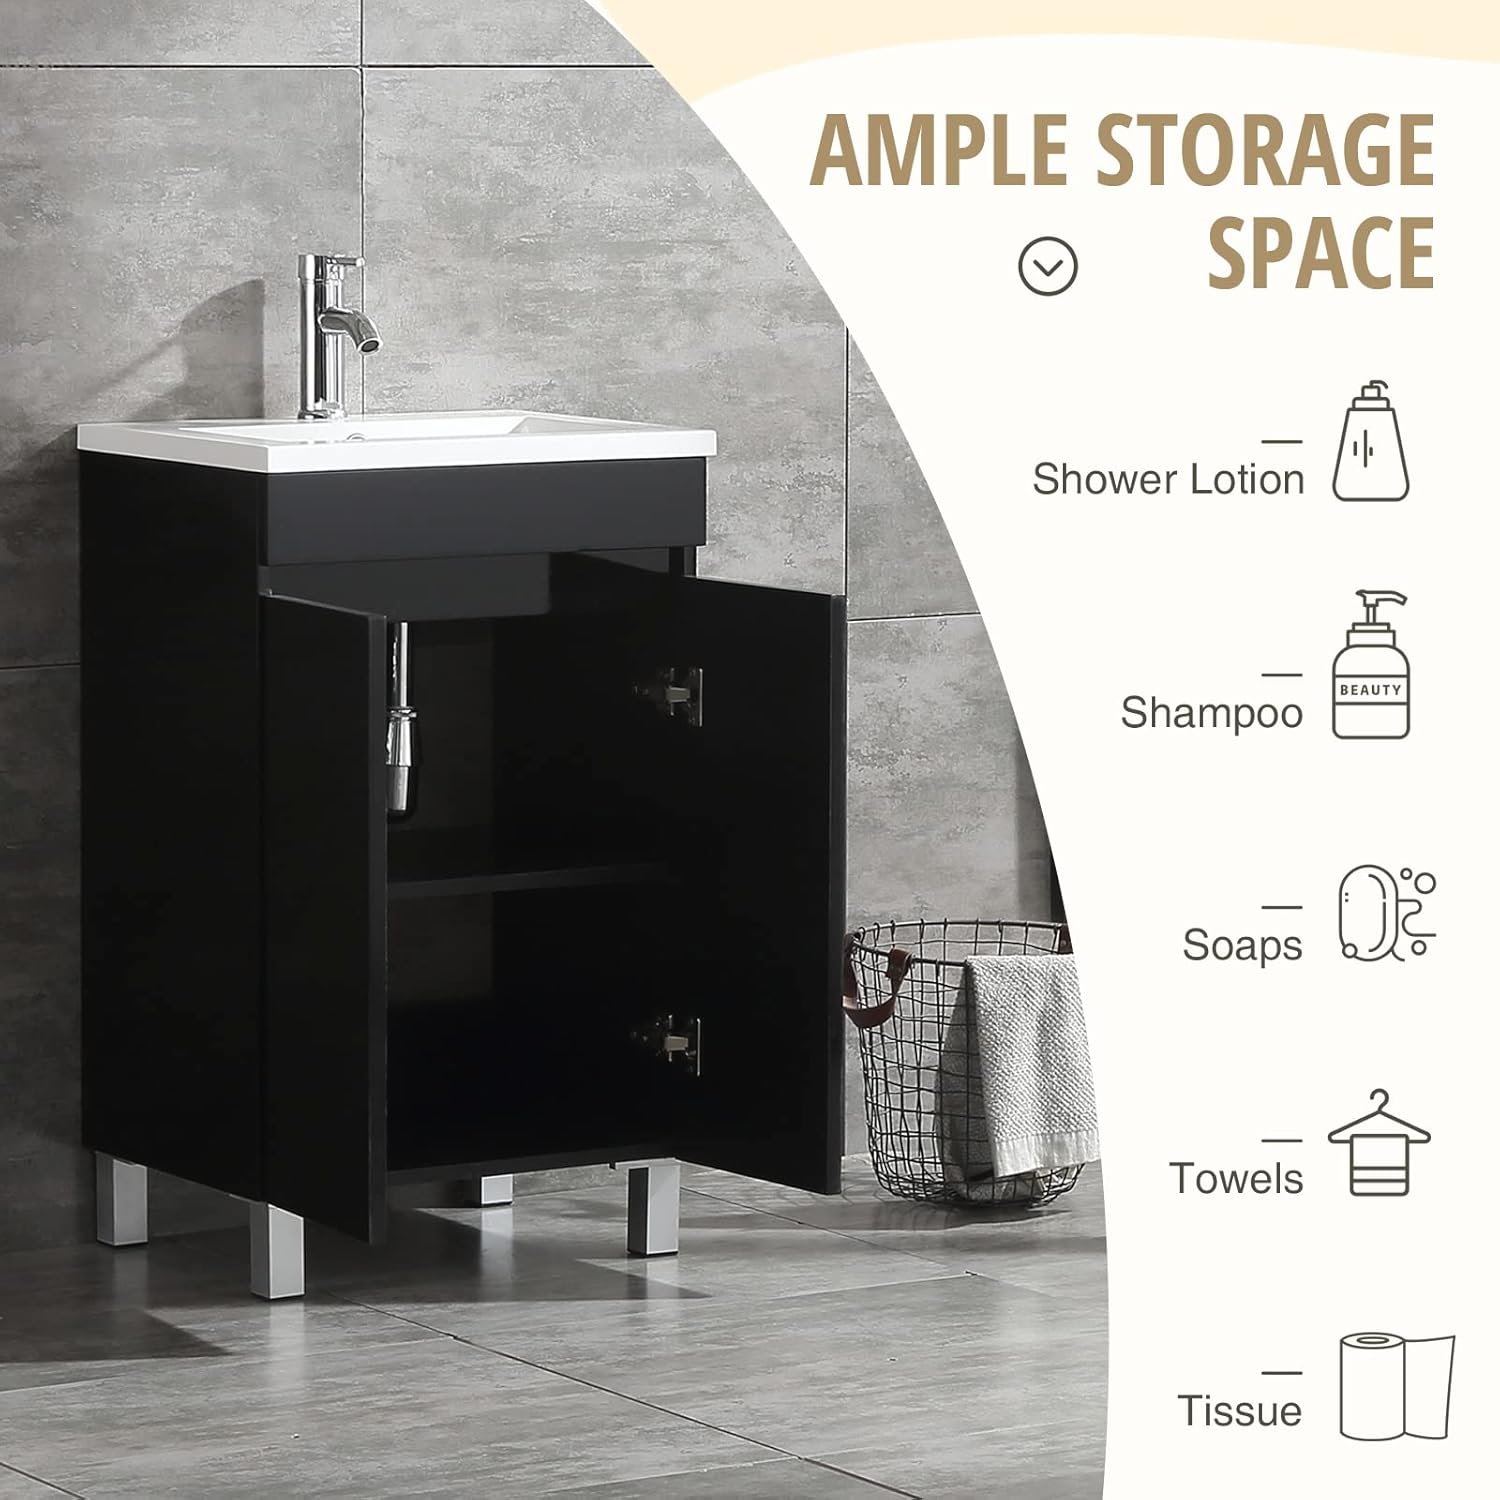
Image 5.1: Illustration of the vanity's storage capacity with cabinet doors open.
6. Maintenance and Care
Proper care will ensure the longevity and appearance of your wonline bathroom vanity.
- Cleaning the Cabinet: Wipe the MDF cabinet surfaces with a damp cloth. Avoid abrasive cleaners or harsh chemicals, as these can damage the painted finish. Promptly wipe away any water spills to prevent moisture damage.
- Cleaning the Sink: The high-quality resin sink is non-porous and easy to clean. Use mild soap and water with a soft cloth. Avoid abrasive pads or strong chemical cleaners that could scratch or dull the surface.
- Faucet Care: Clean the chrome faucet with a soft cloth and mild soap. Do not use abrasive cleaners or polishes.
- General Care: Regularly check for leaks under the sink and around connections. Tighten fittings if necessary.

Image 6.1: Product features emphasizing durability and ease of maintenance.
7. Troubleshooting
This section addresses common issues you might encounter with your vanity.
- Leaking Faucet or Drain:
- Check all connections for tightness.
- Ensure plumber's tape or sealant was properly applied during installation.
- Inspect O-rings and washers for damage and replace if necessary.
- Cabinet Doors Not Aligning:
- Adjust the soft-close hinges. Most hinges have screws for horizontal, vertical, and depth adjustments.
- Ensure the vanity is level on the floor.
- Slow Drainage:
- Check the pop-up drain for obstructions (e.g., hair, debris).
- Inspect the P-trap for clogs.
8. Specifications
| Brand | wonline |
| Model Name | USBR4006 |
| Color | Black |
| Overall Dimensions (L x W x H) | 20.1" x 15.75" x 32.9" |
| Sink Dimensions (L x W x H) | 15.9" x 9.25" x 4.72" |
| Cabinet Dimensions (L x W x H) | 19.7" x 15.35" x 31.9" |
| Materials | Engineered Wood (MDF) cabinet, High-quality Resin sink |
| Mounting Type | Freestanding (with legs) |
| Assembly Required | Yes |
| Item Weight | 69.4 pounds |
| Number of Shelves | 1 |
| Care Instructions | Wipe with Damp Cloth |
9. Warranty and Customer Support
For warranty information or assistance with your wonline product, please contact our customer support team. Details for contacting support are typically found on the product packaging or the retailer's website where the product was purchased.
Please have your model number (USBR4006) and purchase date available when contacting support.

