1. Introduction
Thank you for choosing the ODOTOINO Rechargeable Digital Hearing Aid. This device is designed to enhance hearing for seniors and adults, featuring 16-channel digital sound processing, automatic noise reduction, and a portable charging case. This manual provides essential information for the proper setup, operation, and maintenance of your hearing aids.

Image 1.1: ODOTOINO Rechargeable Digital Hearing Aids and Charging Case.
This image displays the two black ODOTOINO hearing aids resting inside their compact black charging case. The case is open, revealing the devices and the brand logo.
2. Product Overview and Components
Familiarize yourself with the main components of your ODOTOINO hearing aid.

Image 2.1: Hearing Aid Structure and Introduction.
This diagram illustrates the key parts of the hearing aid: the microphone, sound tube, multi-function buttons (A and B), charging port, and silicone ear domes (S/M/L sizes). It also shows the 360-degree rotation capability of the sound tube.
- Microphone: Captures sound from the environment.
- Sound Tube: Transmits amplified sound to the ear canal.
- Multi-function Button A: Used for various controls.
- Multi-function Button B: Used for various controls.
- Charging Port: Connects to the charging case for power.
- Silicone Ear Domes (S/M/L): Different sizes to ensure a comfortable and secure fit in the ear canal.
3. Setup
3.1 Initial Charging
Before first use, fully charge both the hearing aids and the charging case.
- Place the hearing aids into their respective slots in the charging case.
- Connect the charging case to a power source using the provided USB cable.
- The indicator lights on the charging case will show the charging status. Four white lights indicate a full charge.
- A full charge for the hearing aids takes approximately 1-2 hours, providing up to 30 hours of continuous use. The charging case itself can provide up to 150 hours of additional power for the hearing aids.

Image 3.1: Charging and Battery Life Information.
This image illustrates the charging times and battery life: 1-2 hours for hearing aid charging, 30 hours working time per charge, and the charging case providing 150 hours of power. It also shows the indicator lights for fully charged and low battery status.
3.2 Fitting the Hearing Aids
Proper fitting is crucial for comfort and optimal sound quality.
- Select Ear Domes: Choose the silicone ear dome size (S, M, or L) that provides the most comfortable and secure fit in your ear canal. A good seal helps prevent whistling.
- Positioning: Gently place the hearing aid behind your ear, ensuring the main body rests comfortably.
- Insert Ear Dome: Carefully insert the ear dome into your ear canal until it feels snug and secure.

Image 3.2: Small and Comfortable Design.
This image shows a person wearing the hearing aid, emphasizing its small, discreet design and comfortable fit. It also highlights features like 3 modes adjustment, no noise, and ear protection.
4. Operation
4.1 Power On/Off
- To turn on the hearing aid, long press either Multi-function Button A or B for 5 seconds.
- To turn off the hearing aid, long press either Multi-function Button A or B for 5 seconds.
4.2 Volume Adjustment
- Quickly press either Multi-function Button A or B to adjust the volume level. There are 6 volume levels available.
4.3 Mode Selection
- Long press either Multi-function Button A or B for 3 seconds to cycle through the 3 available sound modes. Select the mode best suited for your environment.
4.4 Usage Scenarios
The ODOTOINO hearing aids are designed for various daily situations to improve your listening experience.

Image 4.1: Hearing Aids in Daily Life.
This image shows individuals engaging in common activities such as watching TV, chatting with friends, and attending a family party, illustrating how the hearing aids can enhance communication in these environments.
The 16-channel digital sound processor and noise reduction technology work to provide clear and natural sound, making conversations easier to follow in various environments.

Image 4.2: Double Noise Reduction and No Squealing.
This graphic explains the hearing aid's advanced digital chip for noise reduction, showing a comparison of sound clarity before and after noise reduction, and highlighting features like natural sound and feedback cancellation.
5. Maintenance
5.1 Cleaning
- Regularly clean your hearing aids to ensure optimal performance and hygiene.
- Use a soft, dry cloth to wipe the main body of the hearing aid.
- Remove the silicone ear domes and clean them with a mild soap and water solution. Ensure they are completely dry before reattaching.
- Use the provided cleaning brush (if included) to clear any wax or debris from the sound tube and microphone openings.
- Do not use alcohol, solvents, or abrasive cleaners.
- Do not immerse the hearing aids in water.
5.2 Storage
- When not in use, store the hearing aids in their charging case to protect them from dust, moisture, and physical damage.
- Store the charging case in a cool, dry place away from direct sunlight and extreme temperatures.
6. Troubleshooting
If you encounter any issues with your hearing aids, refer to the following common problems and solutions:
| Problem | Possible Cause | Solution |
|---|---|---|
| No sound or weak sound |
|
|
| Whistling or feedback sound |
|
|
| Charging issues |
|
|
| Distorted or unclear sound |
|
|
7. Specifications
| Feature | Detail |
|---|---|
| Model Number | TM-516 OE |
| Brand | ODOTOINO |
| Type | Behind-The-Ear (BTE) Digital Hearing Aid |
| Channels | 16-Channel Sound Processor |
| Peak Gain | Up to 38 dB |
| Max Sound Output | 115 dB |
| Noise Reduction | Automatic Noise Reduction, Feedback Suppression |
| Volume Levels | 6 levels |
| Sound Modes | 3 modes |
| Battery Type | Rechargeable Lithium-Ion |
| Hearing Aid Working Time | Up to 30 hours (per full charge) |
| Charging Case Capacity | Provides up to 150 hours of additional power |
| Charging Time (Hearing Aids) | 1-2 hours |
| Dimensions (Product) | 3 x 1 x 2 inches |
| Weight (Product) | 8.78 ounces |
| Material | Plastic |
| Color | Black |
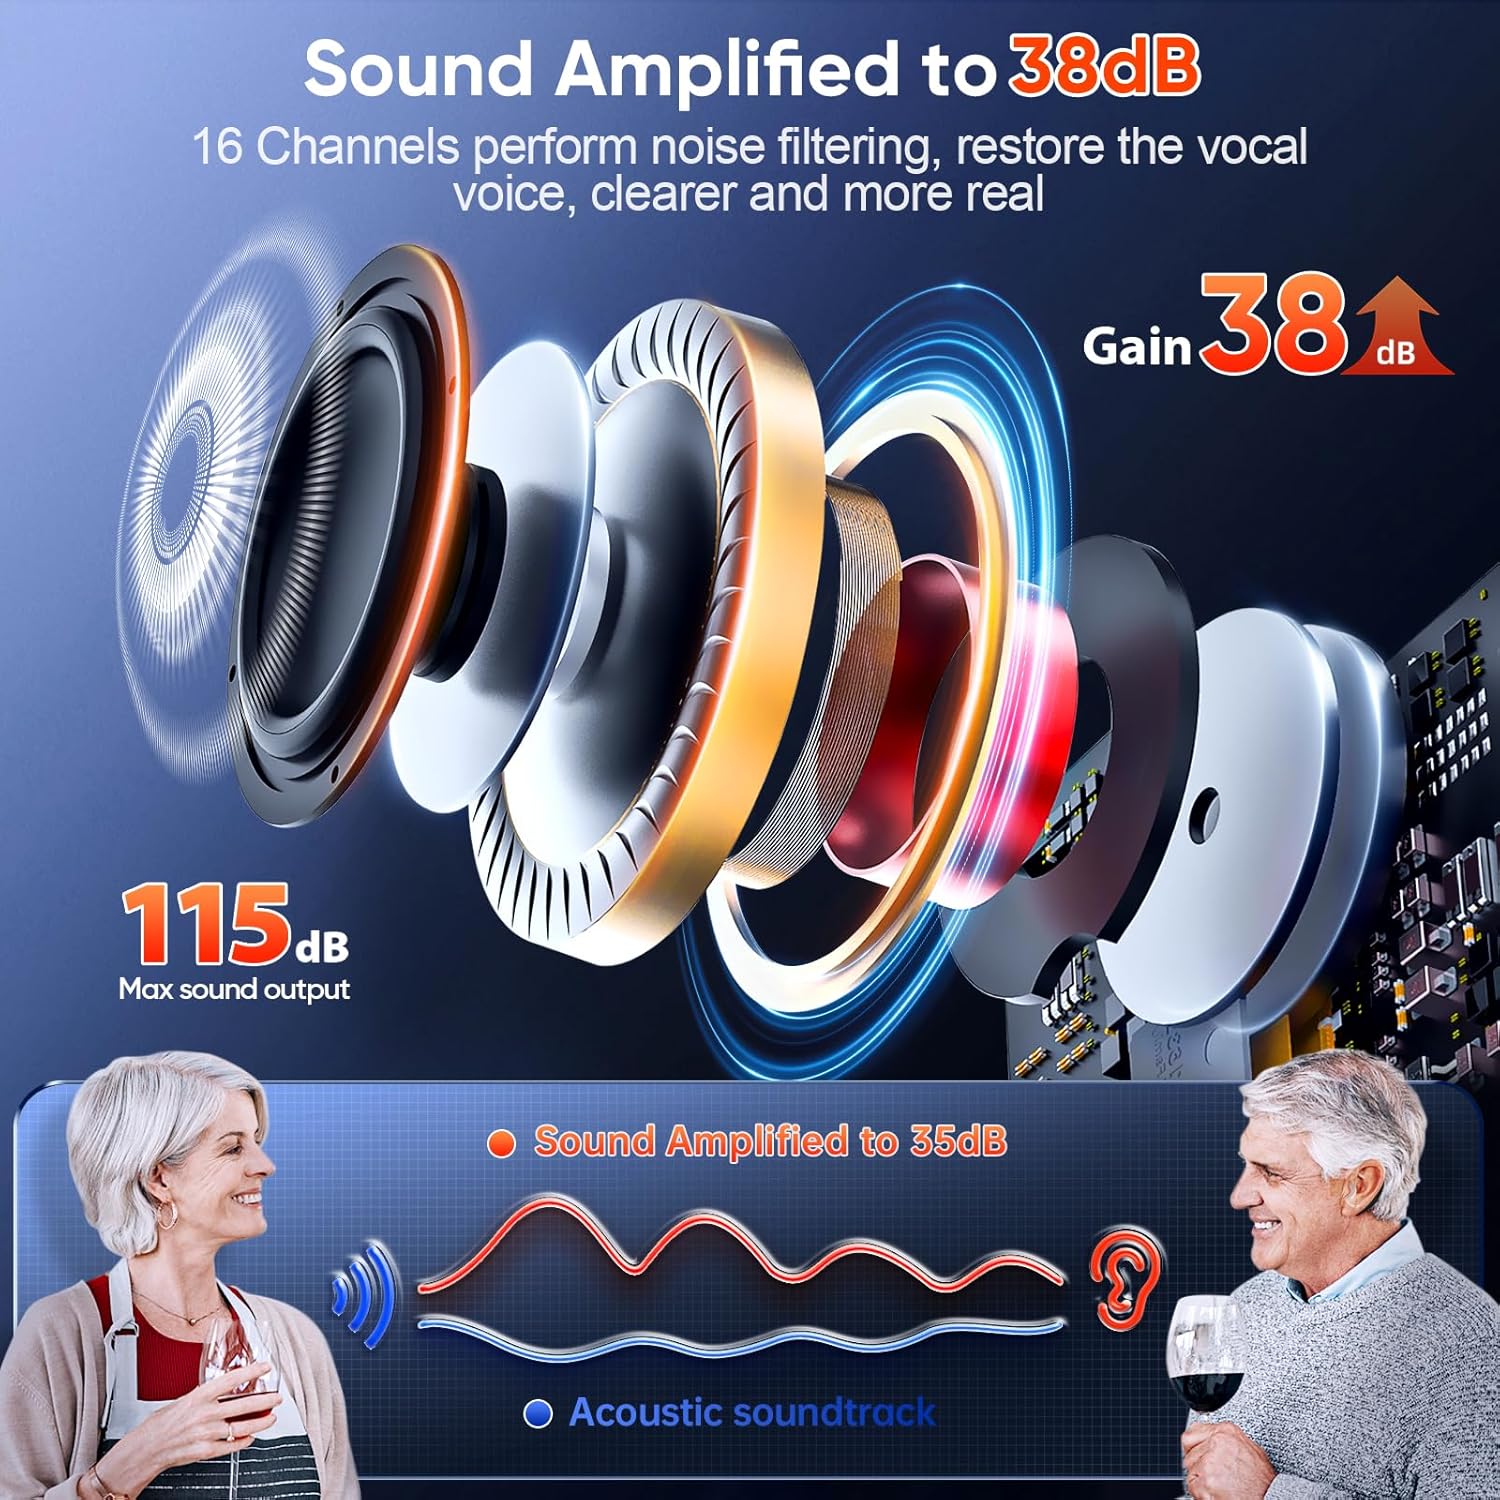
Image 7.1: Sound Amplification Details.
This image visually represents the hearing aid's capability to amplify sound up to 38dB and its 16-channel processing for noise filtering and vocal restoration, resulting in clearer and more realistic sound.
8. Warranty and Support
For warranty information or technical support, please refer to the contact details provided with your product packaging or visit the official ODOTOINO website. If you encounter problems with your hearing aid, please feel free to contact us.
Protection plans are available for purchase separately to extend coverage beyond the standard warranty.