1. Introduction
Thank you for choosing the Lixada Cordless Robotic Pool Cleaner. This automatic pool cleaner is designed to provide efficient and hassle-free cleaning for various flat-bottom pool types. Please read this manual thoroughly before operating the device to ensure proper use, maintenance, and optimal performance.
2. Product Features
- Cordless Design: Eliminates tangled cables, offering freedom of movement and ease of use.
- Powerful Suction: Equipped with two powerful motors and an oversized intake area to effectively collect debris such as leaves, sand, and gravel.
- Surface Control System: Adapts to the pool surface type, enabling a maximum climbing capacity of 18° for thorough cleaning.
- Independent Scrapers: Two independent scrapers assist in scrubbing the pool floor for enhanced cleaning.
- Long Operating Time: Features a built-in 5200 mAh battery, providing up to 120 minutes of cleaning after a 3-4 hour charge.
- Automatic Retrieval: Automatically stops near the pool wall when the battery is low, allowing for easy retrieval with the included hook.
- Versatile Compatibility: Suitable for flat-bottom pools, including indoor rectangular pools and outdoor rectangular, elliptical, or circular pools.

Image: The Lixada Cordless Robotic Pool Cleaner offers a hassle-free experience compared to traditional wired pool cleaners with messy hoses.

Image: The cleaner is equipped with powerful dual-motors that propel the device and filter pool water.

Image: Illustrates the cyclonic vacuum technology for powerful debris capture and the surface control system for maximum wall climbing performance.
3. Package Contents
Please check the package carefully to ensure all items are present and undamaged:
- 1 x Lixada Robotic Pool Cleaner
- 1 x Power Adapter (110-220V)
- 2 x Floor Scrapers
- 2 x Screws
- 1 x Handle
- 1 x Hook
- 1 x User Manual
4. Setup Instructions
4.1 Charging the Device
- Ensure the pool cleaner is dry before charging.
- Connect the power adapter to the charging port on the cleaner.
- Plug the power adapter into a standard electrical outlet (110-220V).
- The charging indicator light will illuminate. A full charge typically takes 3-4 hours.
- Once fully charged, disconnect the adapter.

Image: The pool cleaner being charged using the provided power adapter. Ensure the device is dry before charging.
4.2 Attaching the Handle and Scrapers
- Align the handle with the designated slots on the top of the cleaner.
- Secure the handle using the provided screws.
- Attach the two floor scrapers to the underside of the cleaner as indicated in the diagram (refer to the physical manual for detailed diagrams if available).
5. Operating Instructions
5.1 Starting the Cleaning Cycle
- Ensure the cleaner is fully charged.
- Gently lower the cleaner into the pool. It will sink to the bottom.
- Press the power button to start the cleaning cycle. The cleaner will begin moving and filtering water.
- The cleaner will operate for up to 120 minutes on a full charge.

Image: Gently lower the cleaner into the pool using the handle.

Image: The cleaner operating on the pool floor, collecting debris.
5.2 Setting Cleaning Patterns
The cleaner offers different cleaning patterns suitable for various pool shapes. Adjust the front and rear dials on the device to select the desired pattern:
- Mode 1: A-B - Recommended for oval pools.
- Mode 2: A-C - Recommended for free-formed pools.
- Mode 3: B-C - Default setting, suitable for most pools.

Image: Instructions for adjusting front and rear dials to set the desired cleaning pattern based on pool shape.
5.3 Retrieving the Cleaner
When the battery is low, the cleaner will automatically move to the nearest pool wall. Use the provided hook to carefully lift the cleaner out of the water. Ensure to turn off the device before charging or cleaning.
6. Maintenance
6.1 Cleaning the Filter
- After each cleaning cycle, remove the cleaner from the pool.
- Open the filter compartment (refer to the physical manual for location).
- Remove the filter basket and empty any collected debris.
- Rinse the filter basket thoroughly with clean water.
- Reinsert the clean filter basket and close the compartment securely.
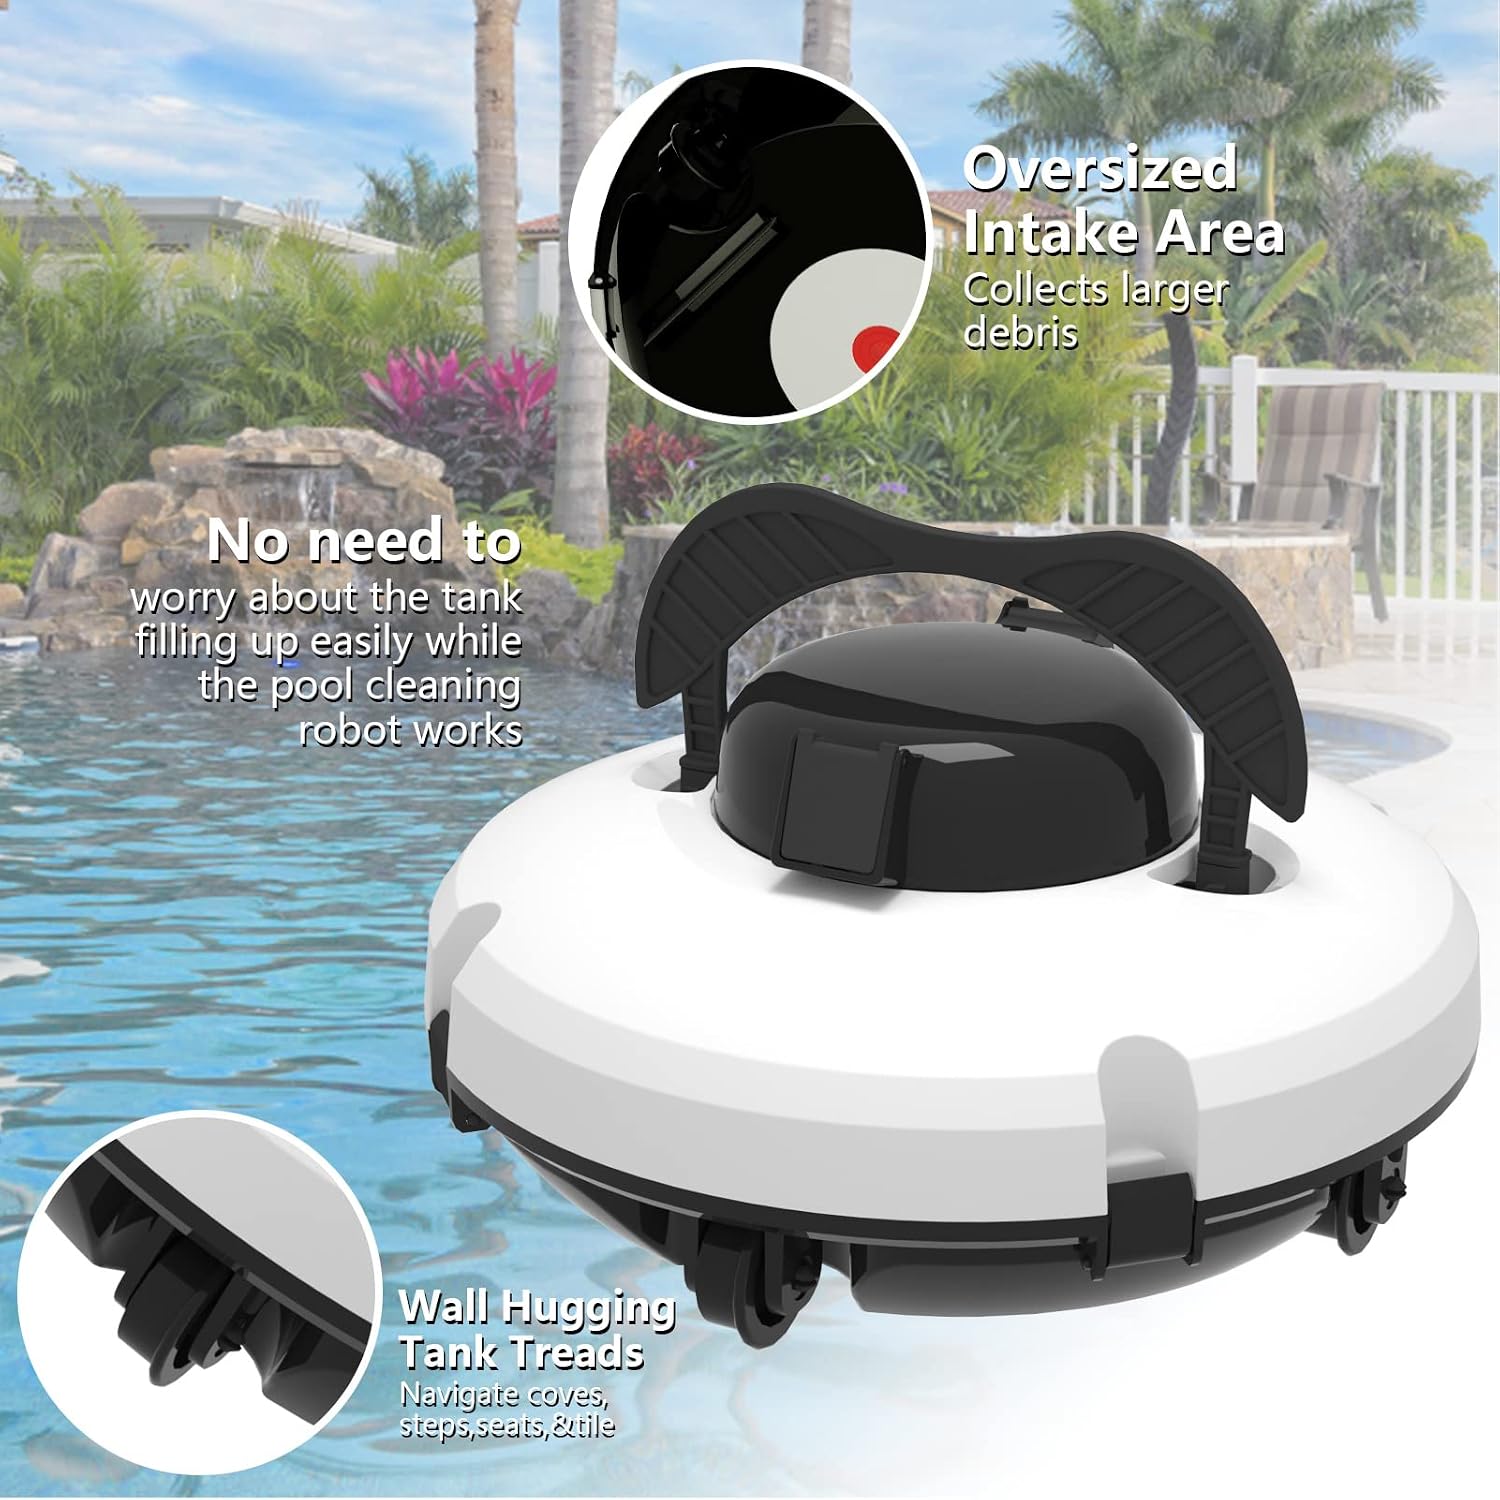
Image: The cleaner features an oversized intake area for collecting larger debris, reducing the frequency of filter emptying.
6.2 General Cleaning and Storage
- Wipe the exterior of the cleaner with a soft, damp cloth. Do not use harsh chemicals.
- Store the cleaner in a cool, dry place away from direct sunlight and extreme temperatures.
- Ensure the battery is charged periodically during long storage periods to maintain battery health.
7. Troubleshooting
| Problem | Possible Cause | Solution |
|---|---|---|
| Cleaner does not turn on. | Low battery; Power button not pressed correctly. | Charge the cleaner fully. Press the power button firmly. |
| Cleaner moves slowly or stops. | Low battery; Filter basket is full; Obstruction in motors/wheels. | Recharge the battery. Clean the filter basket. Check for and remove any obstructions. |
| Poor cleaning performance. | Filter basket is full; Incorrect cleaning pattern selected; Scrapers are worn. | Clean the filter basket. Adjust the cleaning pattern according to your pool shape. Inspect and replace scrapers if necessary. |
| Cleaner stirs up debris instead of collecting it. | Cleaner moving too fast for fine debris. | Ensure the filter is clean. For very fine debris, a slower pass or multiple cycles might be needed. |
8. Specifications
| Feature | Detail |
|---|---|
| Model Number | KFN5103152288932EF |
| Material | ABS (Acrylonitrile Butadiene Styrene) |
| Battery Capacity | 5200 mAh |
| Charging Time | 3-4 hours |
| Operating Time | Up to 120 minutes |
| Waterproof Rating | IPX8 |
| Filter Fineness | 180um |
| Rated Operating Voltage | 11.5 V |
| Adapter Input Frequency | 50/60 Hz |
| Adapter Output Voltage | 12.6 V |
| Dimensions (L x W x H) | 33 x 33 x 15 cm (13 x 13 x 5.9 inches) |
| Net Weight | 3.5 kg |
9. Warranty & Support
Information regarding specific warranty terms and availability of spare parts is not provided in the product data. For warranty claims, technical support, or inquiries about spare parts, please contact your original retailer or the Lixada customer service directly. Keep your purchase receipt as proof of purchase.
Note: Some marketplace purchases may have different warranty conditions. Please verify with your seller.