
1. Introduction
Thank you for choosing the Homeiju Over The Toilet Storage Cabinet. This versatile and space-saving organizer is designed to enhance your bathroom, restroom, or laundry area by providing ample storage above your toilet or washing machine. Its rustic brown finish and durable construction ensure both functionality and aesthetic appeal. Please read this manual carefully before assembly and use to ensure proper installation and longevity of your product.
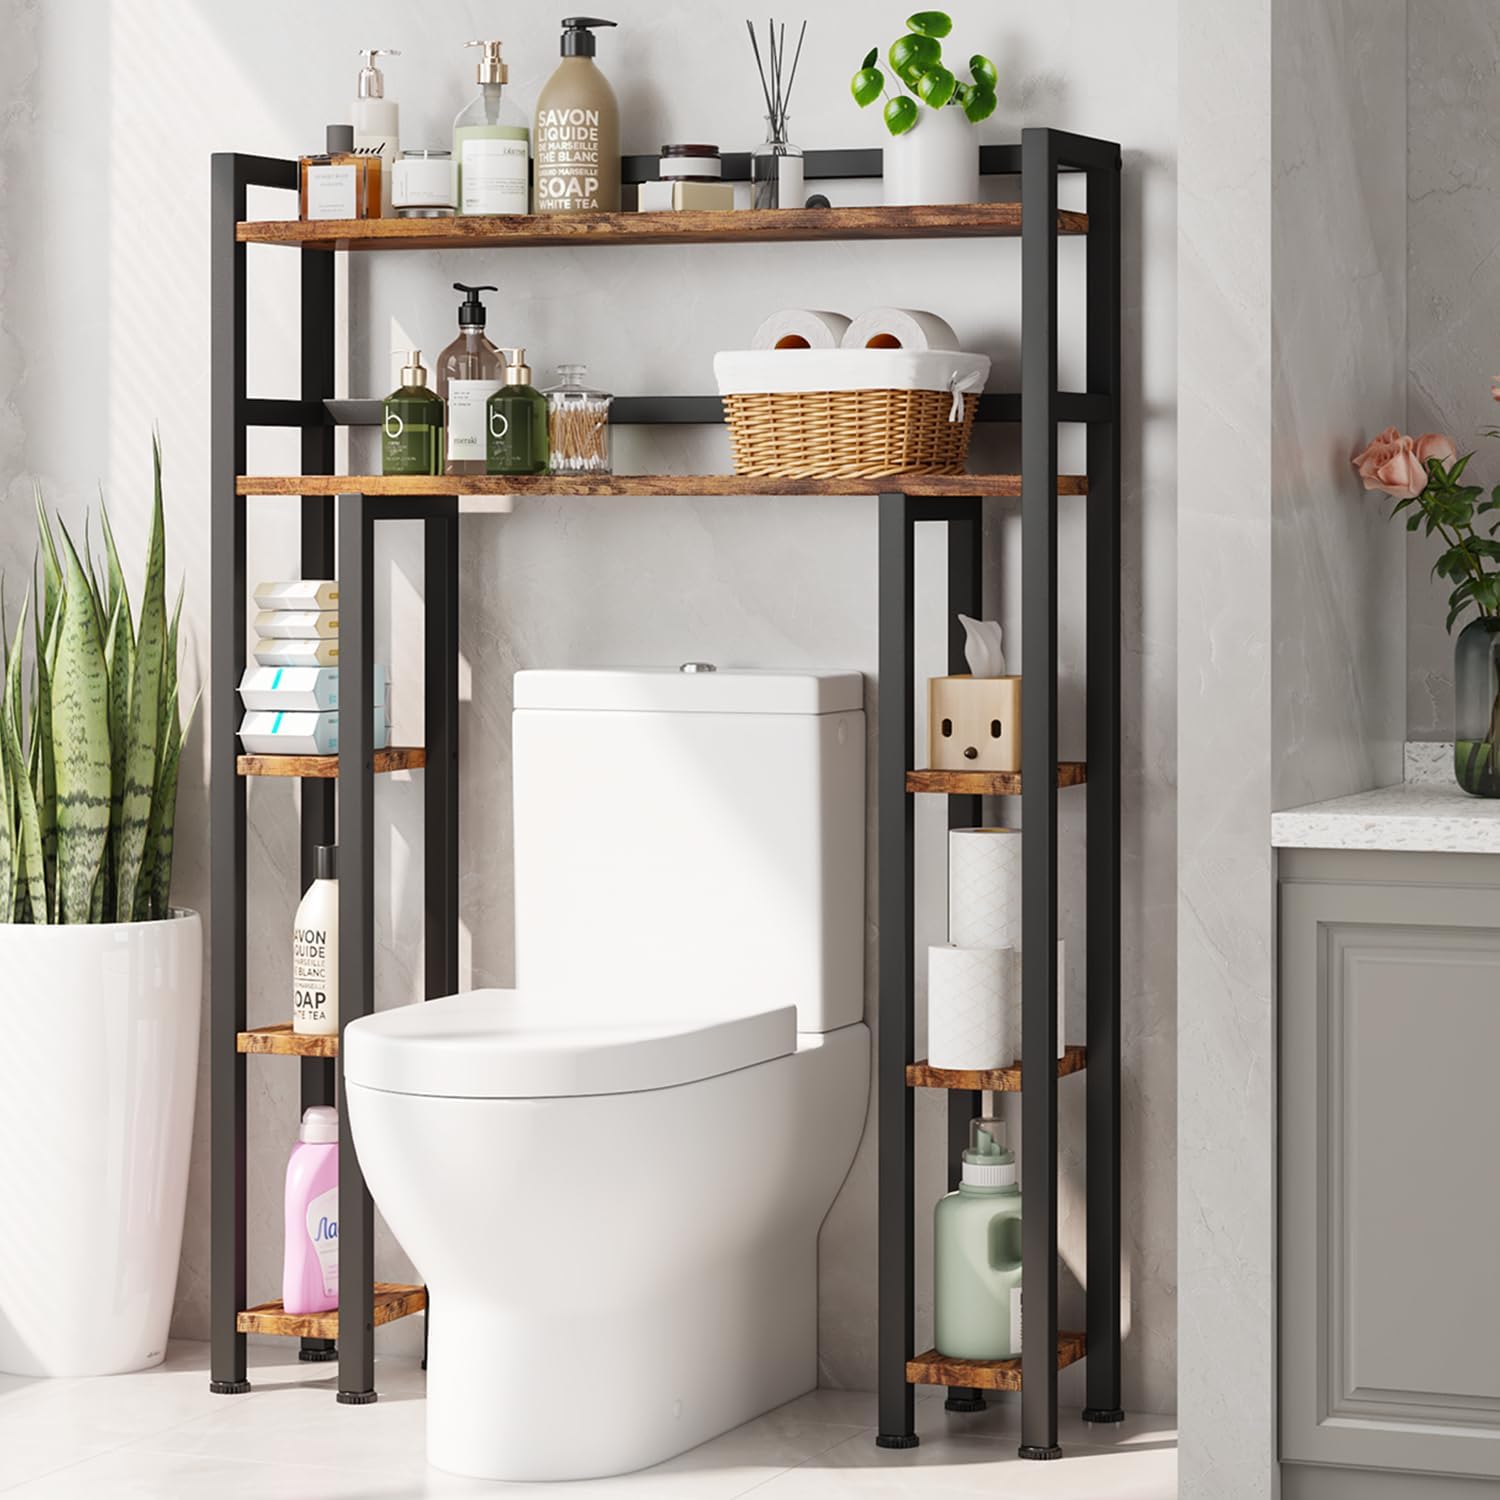
Image 1.1: The Homeiju Over The Toilet Storage Cabinet in a bathroom setting, showcasing its storage capabilities for various items like soaps, shampoos, and towels.
2. Safety Information
- Always assemble the unit on a soft, clean surface to prevent scratches.
- Ensure all screws and fasteners are securely tightened before use. Periodically check and re-tighten as necessary.
- Do not exceed the maximum weight limit of 220 pounds (approximately 100 kg) for the entire rack. Distribute weight evenly across shelves.
- Keep small parts and packaging materials away from children and pets to prevent choking hazards.
- This product is designed for indoor use only.
- Use the included anti-tipping hardware to secure the unit to the wall, especially if placed in an area with children or pets, to prevent accidental tipping.
3. Package Contents
Please verify that all components listed below are present before beginning assembly. If any parts are missing or damaged, please contact Homeiju customer support.
- Main Frame Components (Vertical and Horizontal Metal Bars)
- Large Shelves (2)
- Small Side Shelves (6)
- Adjustable Foot Pads (4)
- Hardware Pack (Screws, L-wrench, Anti-tipping kit)
- Instruction Manual
4. Specifications
| Feature | Detail |
|---|---|
| Product Dimensions | 9"D x 35.4"W x 47.2"H (22.86 cm D x 89.9 cm W x 119.9 cm H) |
| Weight Limit | 220 Pounds (approx. 100 kg) |
| Number of Shelves | 8 (2 large, 6 small) |
| Material | MDF Board and Premium Metal |
| Style | Retro / Rustic Brown |
| Installation Type | Freestanding |
| Assembly Required | Yes |
| Item Weight | 22.5 Pounds (approx. 10.2 kg) |
| Compatible Toilet Height | Fits most standard toilets under 34.64 inches (88 cm) |
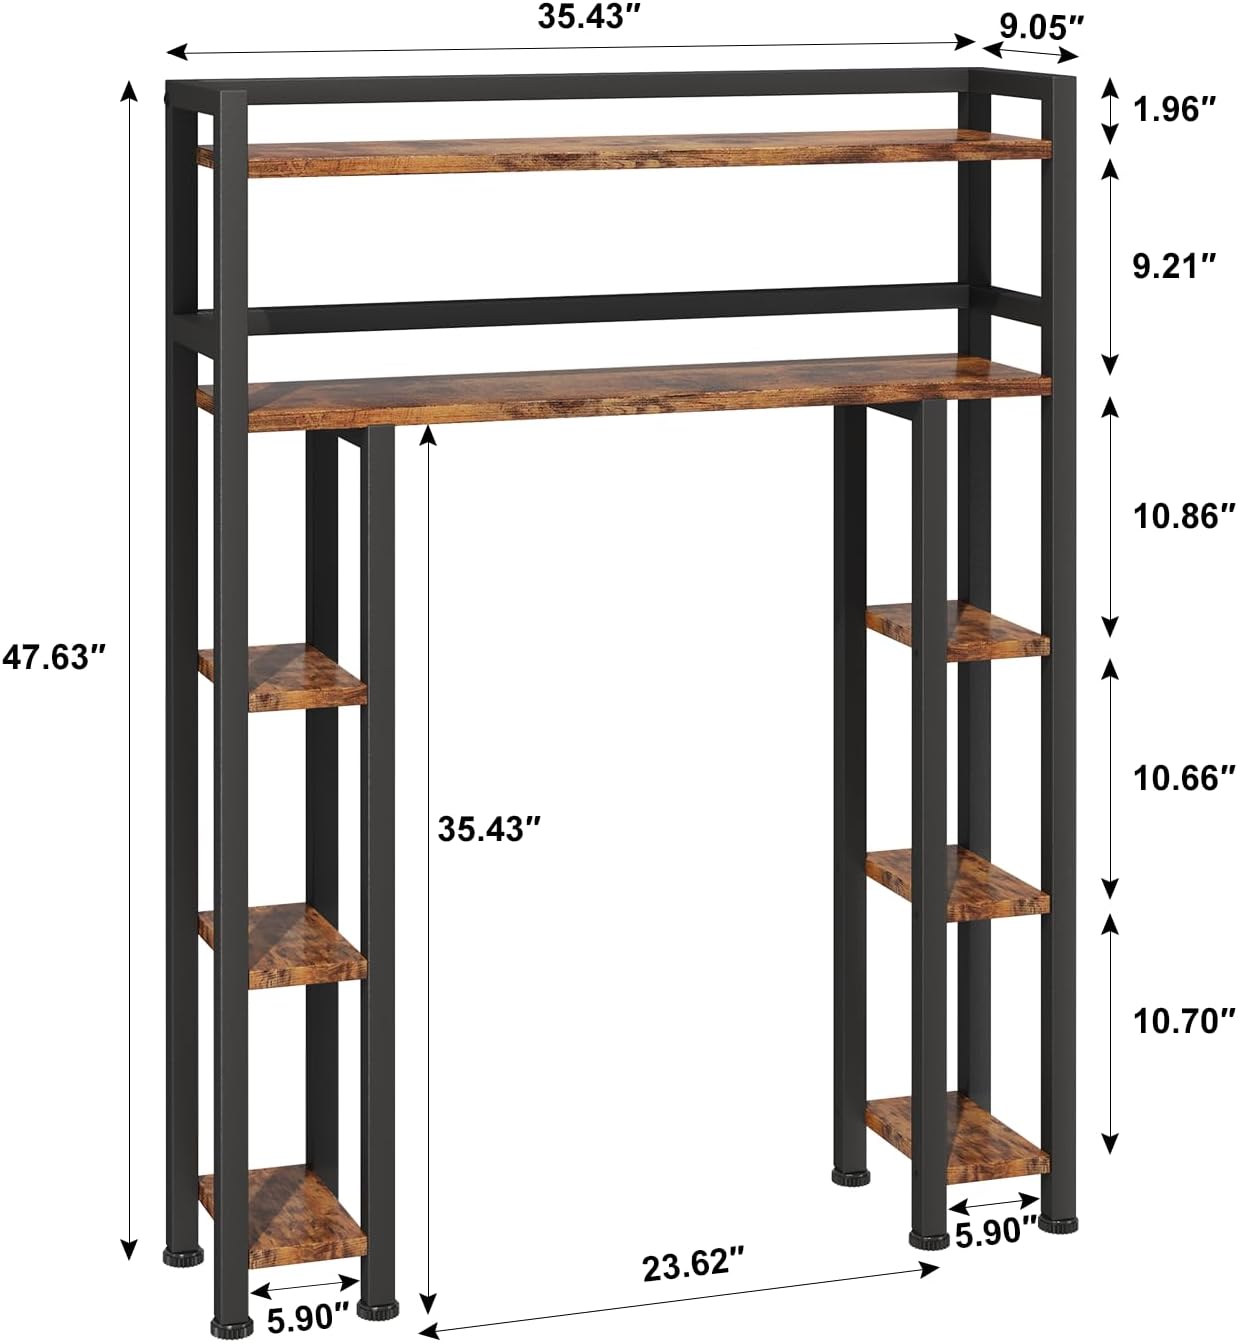
Image 4.1: Dimensional drawing of the storage cabinet, indicating overall height, width, depth, and shelf spacing.
5. Assembly Instructions
Assembly is required for this product. Please follow these steps carefully. An L-wrench is provided; no other tools are typically needed.
- Unpack and Identify Parts: Lay out all components on a soft, clean surface. Compare them with the 'Package Contents' list to ensure everything is present and undamaged.
- Assemble the Main Frame: Connect the vertical metal bars using the horizontal support bars. Ensure all connections are aligned before tightening screws.
- Attach Large Shelves: Secure the two large shelves to the designated positions on the main frame using the provided hardware. These form the primary storage surfaces.
- Install Side Shelves: Attach the six smaller shelves to the side vertical bars. These shelves are designed for smaller items or toilet paper rolls. Note that one board can be removed if space is needed for a toilet brush.
- Attach Foot Pads: Screw the adjustable foot pads into the bottom of the vertical metal bars. These help prevent moisture damage and ensure stability on uneven floors.
- Secure to Wall (Optional but Recommended): Use the included anti-tipping hardware to secure the top of the unit to a wall stud. This provides additional stability and safety.
- Final Check: Once assembled, gently shake the unit to ensure all connections are secure and the structure is stable. Re-tighten any loose screws.

Image 5.1: A detailed view of the cabinet's construction, highlighting the metal frame and the rustic brown shelves.
6. Usage and Placement
The Homeiju Over The Toilet Storage Cabinet is designed for versatile use in various rooms.
- Over-the-Toilet Storage: Place the unit directly over your toilet. Ensure your toilet height is under 34.64 inches for proper fit. The design allows easy movement in and out.
- Laundry Room Organizer: This rack can also be placed over a washing machine up to 25 inches wide, providing convenient storage for laundry essentials.
- Plant Stand: Utilize the multiple shelves to display plants, creating a green and vibrant space.
- General Storage: The cabinet is suitable for organizing various items in bathrooms, restrooms, laundry rooms, or even on balconies.
The side horizontal tube not only adds to the aesthetic but also helps prevent items from falling off the shelves. The detachable plank design allows for customization, such as removing a board to accommodate a toilet brush.

Image 6.1: Cabinet used for bathroom storage, holding toiletries, towels, and decorative items.

Image 6.2: Cabinet repurposed as a laundry room organizer above a washing machine.

Image 6.3: Cabinet functioning as a plant display stand, showcasing its versatility.

Image 6.4: Visual representation of various items that can be stored on the cabinet's shelves.
7. Maintenance
To ensure the longevity and appearance of your Homeiju storage cabinet, follow these simple maintenance guidelines:
- Cleaning: Wipe the surfaces with a dry cloth to remove dust and dirt. For stubborn marks, a slightly damp cloth can be used, followed immediately by a dry cloth to prevent moisture damage.
- Avoid Harsh Chemicals: Do not use abrasive cleaners, strong detergents, or chemical solvents, as these can damage the finish.
- Moisture Protection: While the foot pads help, avoid prolonged exposure to excessive moisture. Promptly wipe up any spills.
- Regular Checks: Periodically inspect all screws and connections to ensure they remain tight. Re-tighten if necessary.
8. Troubleshooting
| Problem | Possible Cause | Solution |
|---|---|---|
| Unit is wobbly or unstable. | Screws are loose; uneven floor; weight not distributed evenly. | Ensure all screws are tightened. Adjust the foot pads to level the unit. Distribute items evenly on shelves. Secure to wall using anti-tipping kit. |
| Parts do not fit together. | Incorrect orientation of parts; manufacturing defect. | Double-check the assembly instructions and part orientation. If parts are defective, contact customer support. |
| Missing hardware or components. | Packaging error. | Contact Homeiju customer support with your purchase details for replacement parts. |
| Shelves cracking during assembly. | Screws overtightened; incorrect screw size used. | Do not overtighten screws. Ensure you are using the correct screws for each part as per the assembly guide. Contact support for replacement shelves if damaged. |
9. Warranty and Support
Homeiju is committed to providing high-quality products. While specific warranty details are not provided in this manual, please retain your proof of purchase. For any questions, concerns, or to report missing/damaged parts, please contact Homeiju customer support through the retailer where you purchased the product or visit the official Homeiju store page online.
Visit the Homeiju Store: Homeiju Store on Amazon