8544771
Instruction Manual: Compatible Dryer Heater Heating Element
Model: 8544771 | Brand: Generic
1. Product Overview
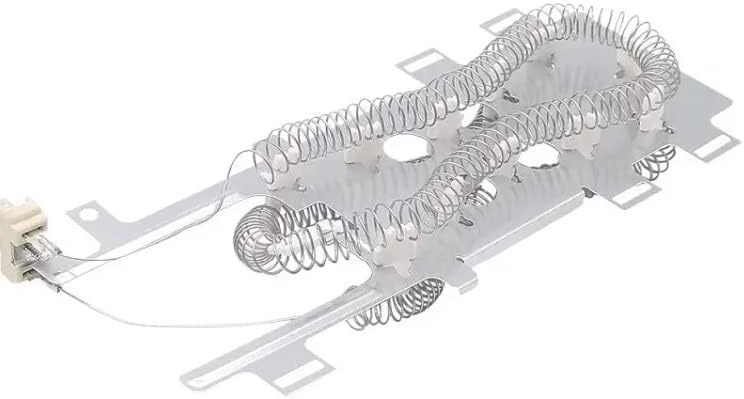
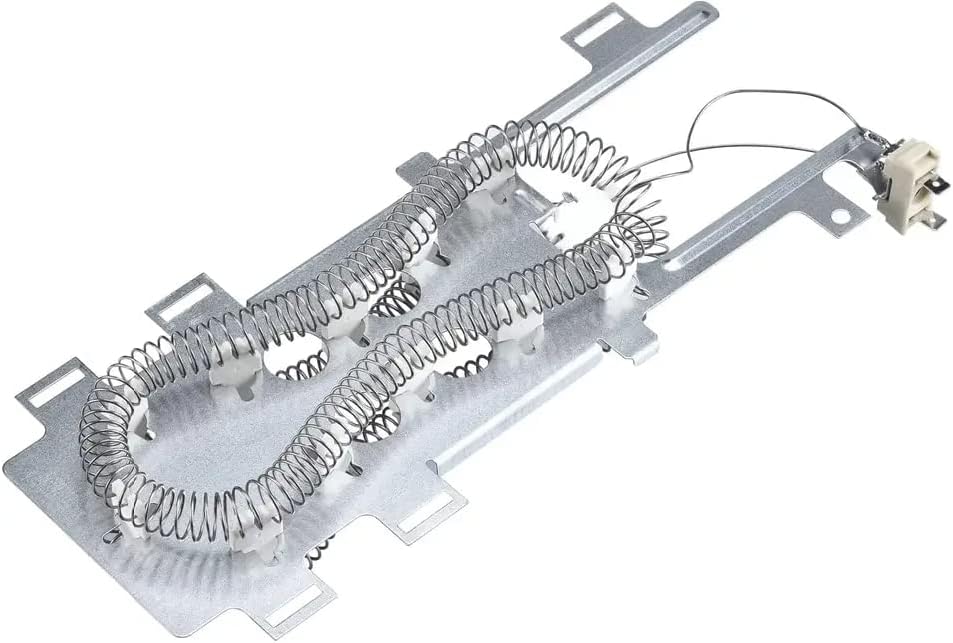
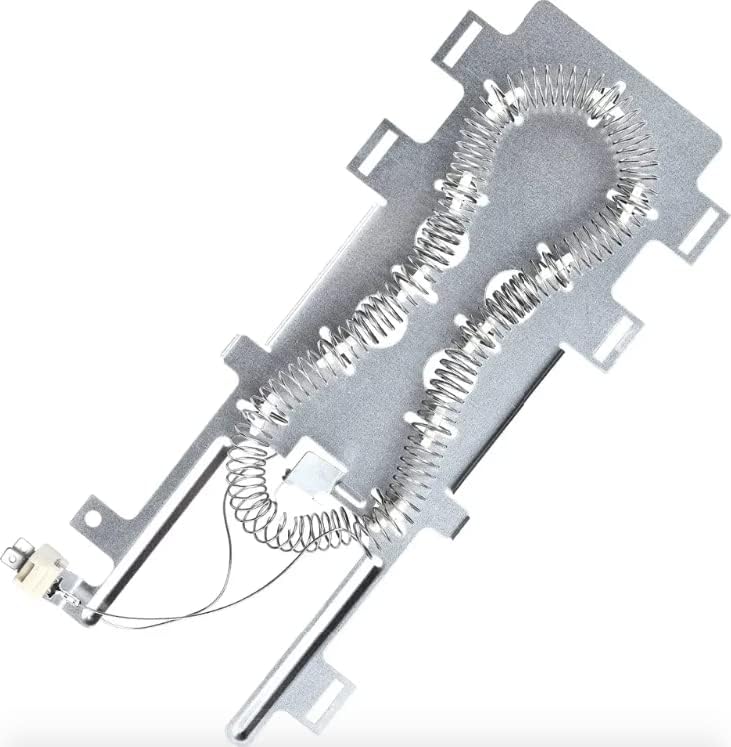
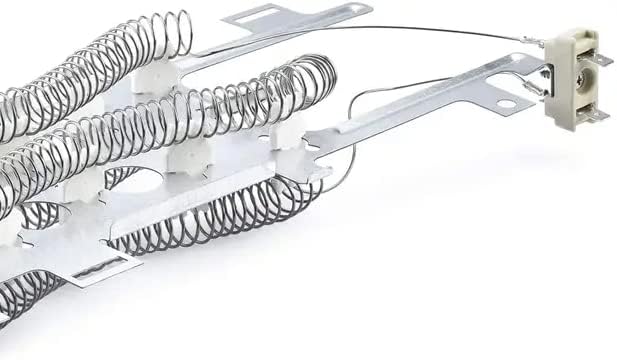
This document provides essential information for the installation and maintenance of your new compatible dryer heater heating element, model 8544771. This component is designed as a replacement part for specific Whirlpool manufactured dryers, including various Kenmore and Maytag models. It is crucial to ensure compatibility with your appliance before proceeding with installation.
This heating element is rated at 5400 Watts and 240 Volts, featuring two 5/16" male terminals for electrical connection. It is a non-OEM replacement part manufactured to meet OEM standards for fit and function.
2. Product Features and Compatibility
- Part Number: 8544771. This element replaces original part numbers 8544771R, AP6013115, AP3866035, PS11746337, and PS990361.
- Electrical Rating: 5400 Watts, 240 Volts.
- Terminals: Equipped with two 5/16" male terminals for secure electrical connections.
- Compatibility: Designed to fit specific dryer models manufactured by Whirlpool, including various Kenmore and Maytag dryers. Refer to your dryer's service manual or part list to confirm compatibility.
- Type: Non-OEM replacement part, manufactured to meet or exceed original equipment standards.

3. Safety Information
WARNING: Risk of Electric Shock and Injury.
- Always disconnect power to the dryer by unplugging it or turning off the circuit breaker before attempting any repair or installation.
- Wear appropriate personal protective equipment, including gloves, to protect against sharp edges and potential electrical hazards.
- Ensure the work area is well-lit and clear of obstructions.
- If you are not comfortable performing this repair, it is highly recommended to consult a qualified appliance technician.
- Do not operate the dryer with the heating element exposed or improperly installed.
4. Installation Guide
This section provides a general guide for replacing a dryer heating element. Specific steps may vary depending on your dryer model. Always refer to your dryer's service manual for precise instructions.
- Disconnect Power: Unplug the dryer from the electrical outlet or turn off the circuit breaker supplying power to the dryer. Verify power is off before proceeding.
- Access the Heating Element: Depending on your dryer model, you may need to remove the back panel, front panel, or top panel to access the heating element housing. This often involves removing screws and disconnecting wire harnesses.
- Locate and Remove Old Element: Identify the old heating element. It is typically housed within a metal chamber. Disconnect any wires attached to the element's terminals. Carefully unmount the old element from its housing.
- Install New Element: Position the new 8544771 heating element into the housing, ensuring it seats correctly. Secure it with any mounting screws or clips that were removed from the old element.
- Reconnect Wiring: Reattach the electrical wires to the terminals of the new heating element. Ensure connections are secure and correctly matched.
- Reassemble Dryer: Carefully reassemble the dryer panels, ensuring all screws are tightened and wire harnesses are reconnected where applicable.
- Test Operation: Plug the dryer back into the electrical outlet or restore power at the circuit breaker. Run a short cycle to confirm the heating element is functioning correctly and producing heat.
If you encounter any difficulties or are unsure about any step, consult a professional appliance repair technician.
5. Specifications
| Attribute | Detail |
|---|---|
| Part Number | 8544771 |
| Replaces Part Numbers | 8544771R, AP6013115, AP3866035, PS11746337, PS990361 |
| Electrical Rating | 5400 Watts, 240 Volts |
| Terminals | Two 5/16" male terminals |
| Product Dimensions | Approximately 14 x 6 x 2 inches |
| Included Components | 1 x 8544771 Dryer Heater Heating Element |
| Manufacturer | HomePartsStore |
| Date First Available | April 19, 2023 |
6. Troubleshooting
If your dryer is not heating or not heating sufficiently after replacing the element, consider the following common issues:
- No Heat:
- Ensure the dryer is receiving full 240V power. Check the circuit breaker.
- Verify all electrical connections to the heating element are secure and correctly attached.
- Inspect the thermal fuse and thermostat for continuity. A blown thermal fuse or faulty thermostat will prevent the element from heating. These components often need to be replaced along with the heating element if the original element failed due to overheating.
- Insufficient Heat:
- Check for proper airflow. Restricted airflow due to clogged lint traps or vent ducts can cause the dryer to overheat and trip thermal cut-offs, leading to insufficient heat or extended drying times.
- Ensure the element is correctly seated and not touching any metal parts that could cause a short.
If troubleshooting steps do not resolve the issue, it is advisable to contact a qualified appliance technician for further diagnosis.
7. Warranty Information
This compatible dryer heating element comes with a 1-month warranty from the date of purchase. This warranty covers manufacturing defects and ensures the product is free from defects in material and workmanship under normal use.
Important Note:
This is a generic product and not an OEM (Original Equipment Manufacturer) product. It is not covered under any OEM manufacturer's warranty. The use of OEM brand names and logos in this manual is solely for purposes of demonstrating compatibility. Any issues arising from the installation or use of this non-OEM part should be directed to the seller or manufacturer of this specific replacement part.
8. Customer Support
For any questions regarding the installation, compatibility, or performance of this heating element, please contact the seller directly through the platform where the purchase was made. Provide your order details for faster assistance.