1. Introduction
This manual provides detailed instructions for the operation and maintenance of your Tech Collector Hi8 8mm Video Cassette Recorder/Camcorder. This device is designed to play back your old 8mm and Hi8 video tapes and facilitate their digitization for modern viewing and archiving.

Figure 1: The Tech Collector Hi8 8mm Video Cassette Recorder/Camcorder in use, demonstrating tape playback and the concept of digitization to a USB drive.
2. Package Contents
Please verify that all items listed below are included in your package. If any items are missing or damaged, please contact customer support.
- Hi8 8mm Camcorder (Video Cassette Recorder)
- AC Adapter
- AV Cable (RCA composite)
- S-Video Cable
- Firewire Cable (IEEE 1394)
- AV to USB Adapter
- Digitizing Software (typically provided via download link or CD, check packaging for details)
- 8mm Tape (for recording or testing)

Figure 2: All components included in the Tech Collector Hi8 8mm Video Cassette Recorder package.
3. Tape Compatibility
Your Tech Collector device is specifically designed for playing and digitizing 8mm, Hi8, and Digital8 format tapes. It is important to understand which tape formats are compatible and which are not.
3.1 Compatible Tape Formats
- 8mm (Video8): The original analog 8mm video format.
- Hi8: An improved analog 8mm format offering higher resolution.
- Digital8: A digital format that records digital video on Hi8 or 8mm tapes.
3.2 Non-Compatible Tape Formats
This device is not compatible with the following tape formats:
- VHS: Standard full-size VHS tapes.
- VHS-C: Compact VHS tapes.
- MiniDV: Digital Video tapes.

Figure 3: Visual guide to compatible and non-compatible video tape formats.
4. Setup Instructions
Follow these steps to set up your Hi8 8mm Video Cassette Recorder for playback or digitization.
4.1 Power Connection
- Connect the AC adapter to the DC input jack on the camcorder.
- Plug the AC adapter into a standard electrical outlet.
- Ensure the battery (if present and charged) is also securely inserted, though AC power is recommended for stable operation.
4.2 Connecting for Playback (to TV/Monitor)
- Using AV Cable (RCA Composite):
- Connect the yellow plug (video), white plug (left audio), and red plug (right audio) from the AV cable to the corresponding output jacks on the camcorder.
- Connect the other end of the AV cable to the matching input jacks on your television or monitor.
- Select the correct AV input channel on your TV/monitor.
- Using S-Video Cable (for improved video quality):
- Connect the S-Video cable to the S-Video output jack on the camcorder.
- Connect the other end of the S-Video cable to the S-Video input jack on your television or monitor.
- For audio, you will still need to use the white and red RCA audio plugs from the AV cable, connecting them to the audio input jacks on your TV/monitor.
- Select the correct S-Video input channel on your TV/monitor.
4.3 Connecting for Digitization (to Computer)
There are two primary methods for connecting your camcorder to a computer for digitization:
- Using AV to USB Adapter (for analog capture):
- Connect the yellow, white, and red RCA plugs from the AV cable to the corresponding input jacks on the AV to USB adapter.
- Connect the other end of the AV cable to the camcorder's AV output jacks.
- Plug the USB end of the adapter into an available USB port on your computer.
- Install and open the provided digitizing software on your computer. Follow the software's instructions to select the USB capture device as the input source.
- Using Firewire Cable (for Digital8 camcorders, if applicable):
- If your camcorder is a Digital8 model and your computer has a Firewire (IEEE 1394) port, connect the Firewire cable between the camcorder and the computer.
- Open your video editing or capture software (e.g., iMovie for Mac, Windows Movie Maker for older Windows, or third-party software). The software should detect the camcorder as a digital video source.
- Follow the software's instructions to import the video.
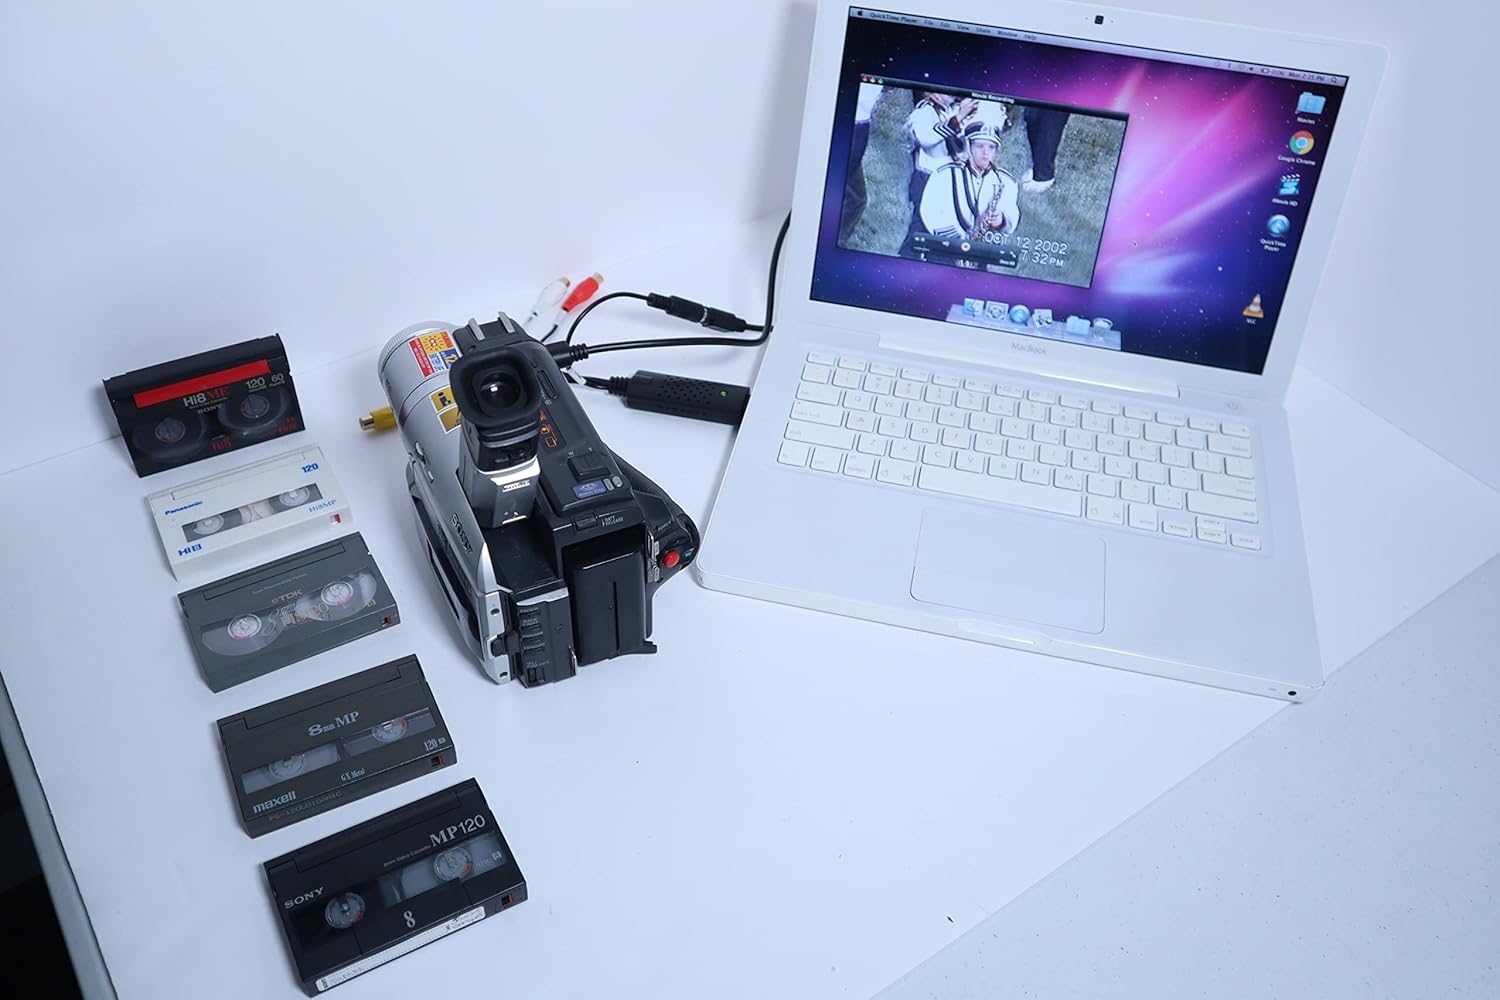
Figure 4: Camcorder connected to a laptop for video digitization.
5. Operating Instructions
5.1 Inserting and Ejecting Tapes
- Open the tape compartment door on the camcorder.
- Gently insert the 8mm or Hi8 tape with the window facing up, until it clicks into place. Do not force the tape.
- Close the tape compartment door.
- To eject, press the "Eject" button (location varies by specific camcorder model, refer to the camcorder's original manual if available). The tape will partially eject, allowing you to remove it.
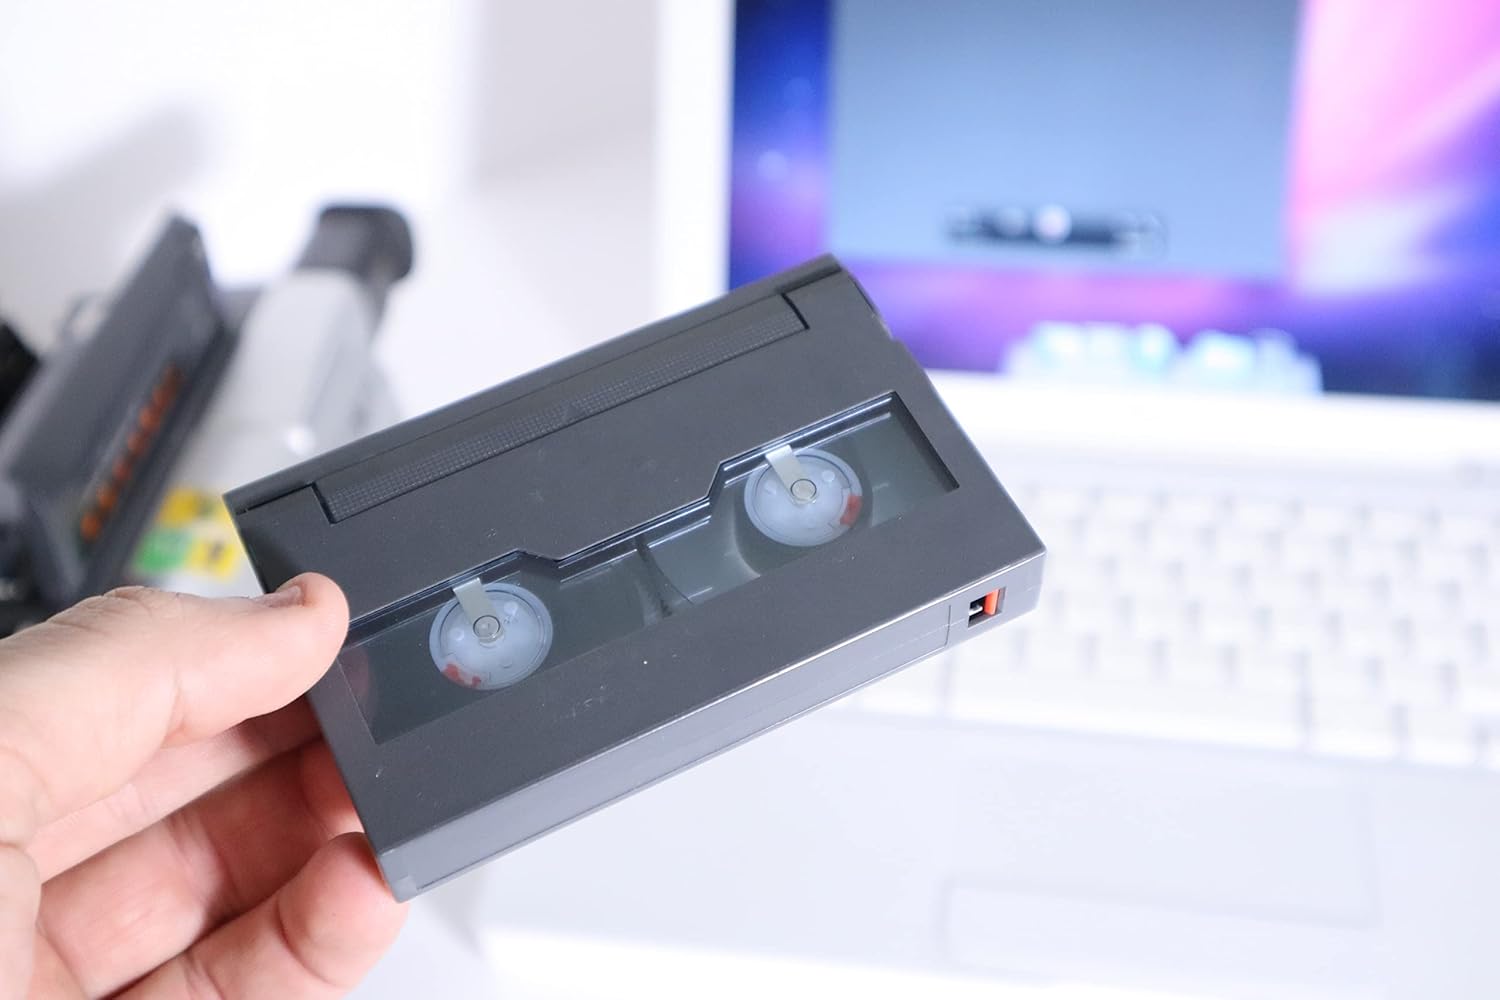
Figure 5: Proper handling of an 8mm video cassette tape.
5.2 Playing Tapes
- Ensure the camcorder is powered on and connected to a TV/monitor or computer as described in Section 4.
- Insert a compatible tape.
- Locate the playback controls on the camcorder (typically "Play", "Stop", "Rewind", "Fast Forward", "Pause"). These are often found near the tape compartment or on the side of the camcorder.
- Press the "Play" button to begin playback. The video will appear on your connected display.
- Use the "Rewind" and "Fast Forward" buttons to navigate the tape.
- Press "Stop" to end playback.
5.3 Digitizing Tapes
Digitizing your tapes involves playing them through the camcorder while simultaneously capturing the video signal on your computer using the AV to USB adapter and software.
- Ensure the camcorder is connected to your computer via the AV to USB adapter (or Firewire for Digital8) as described in Section 4.3.
- Insert the tape you wish to digitize.
- Open the digitizing software on your computer.
- In the software, select the correct input source (e.g., "USB Capture Device" or "Firewire/DV Camcorder").
- Start the recording function within the software.
- Immediately press "Play" on the camcorder to begin playing the tape.
- Monitor the video on your computer screen to ensure proper capture.
- Once the tape has finished playing, stop the recording in the software and then press "Stop" on the camcorder.
- Save the captured video file according to your software's instructions.

Figure 6: The process of digitizing 8mm, Hi8, and Digital8 tapes to a digital format.
6. Troubleshooting
This section addresses common issues you might encounter and provides solutions.
| Problem | Possible Cause | Solution |
|---|---|---|
| No power | AC adapter not connected or faulty; battery depleted. | Ensure AC adapter is securely plugged into camcorder and outlet. Check battery charge. |
| No video/audio on TV | Incorrect cable connection; wrong TV input selected; incompatible tape format. | Verify AV/S-Video cables are correctly connected. Select the correct input channel on your TV. Confirm tape is 8mm, Hi8, or Digital8. |
| Video appears distorted or "tracking" issues | Dirty video heads; tape damage; camcorder malfunction. | Try cleaning the camcorder's video heads with a specialized cleaning tape. Test with a different tape. If issues persist, contact support. |
| Computer not detecting camcorder/capture device | USB adapter not properly connected; software driver issues; incorrect software settings. | Ensure USB adapter is firmly plugged into computer. Reinstall capture software drivers. Check software settings to select the correct input device. Try a different USB port. |
| Tape will not eject | Mechanism jam; power issue. | Ensure camcorder has power. Gently try pressing the eject button multiple times. Do not force the tape. If stuck, contact support. |
7. Specifications
- Brand: Tech Collector
- Model: Hi8 8mm Video Cassette Recorder/Camcorder
- Compatible Tape Formats: 8mm (Video8), Hi8, Digital8
- Output Ports: RCA Composite (Video/Audio), S-Video, Firewire (IEEE 1394, on Digital8 models)
- Power Source: AC Adapter (included), Lithium Ion Battery (included)
- Item Weight: Approximately 3 pounds
- Package Dimensions: Approximately 10 x 8 x 1 inches
- ASIN: B0C2VT6ZBX
8. Warranty and Support
Your Tech Collector Hi8 8mm Video Cassette Recorder/Camcorder comes with a 1-year warranty from the date of purchase. This warranty covers manufacturing defects and ensures the product is 100% working upon arrival.
For technical assistance, troubleshooting, warranty claims, or any questions regarding your product, please contact Tech Collector customer support. Refer to the contact information provided in your product packaging or visit the official Tech Collector Store on Amazon.
Please have your purchase details and product ASIN (B0C2VT6ZBX) ready when contacting support to expedite the process.