1. Overview
The PGYTECH Camera Shoulder Strap is designed for photographers using DSLR and SLR cameras, offering a secure, comfortable, and highly adjustable carrying solution. This manual provides detailed instructions for setup, operation, and maintenance to ensure optimal performance and safety of your equipment.

Figure 1: PGYTECH Camera Shoulder Strap (Dark Blue)
2. Key Features
- Original Quick Connector: Features a dead-center locking mechanism to prevent accidental camera detachment. The quick bead can be installed and removed with one hand by pressing the upper part of the connector.
- Strong Load-bearing Capacity: Constructed from UHMWPE material, which is 10 times stronger than steel wire, capable of supporting loads up to 90 KG (198 lbs).
- Replace Warning System: The lanyard features a three-layer structure. Visible wear on the outer layers indicates when it's time to replace the lanyard, ensuring continued gear safety.
- Quick Adjusters: Equipped with adjusters at both ends, allowing for rapid length modification to suit various carrying preferences and body shapes.
- Hands-free Storage: The left and right quick connectors can be fixed to each other, preventing the strap from dangling when the camera is detached.
- Integrated Arca-type QR Plate: Includes a PGYTECH Arca-type quick release plate for direct attachment to your camera's tripod mount, offering additional secure connection points.
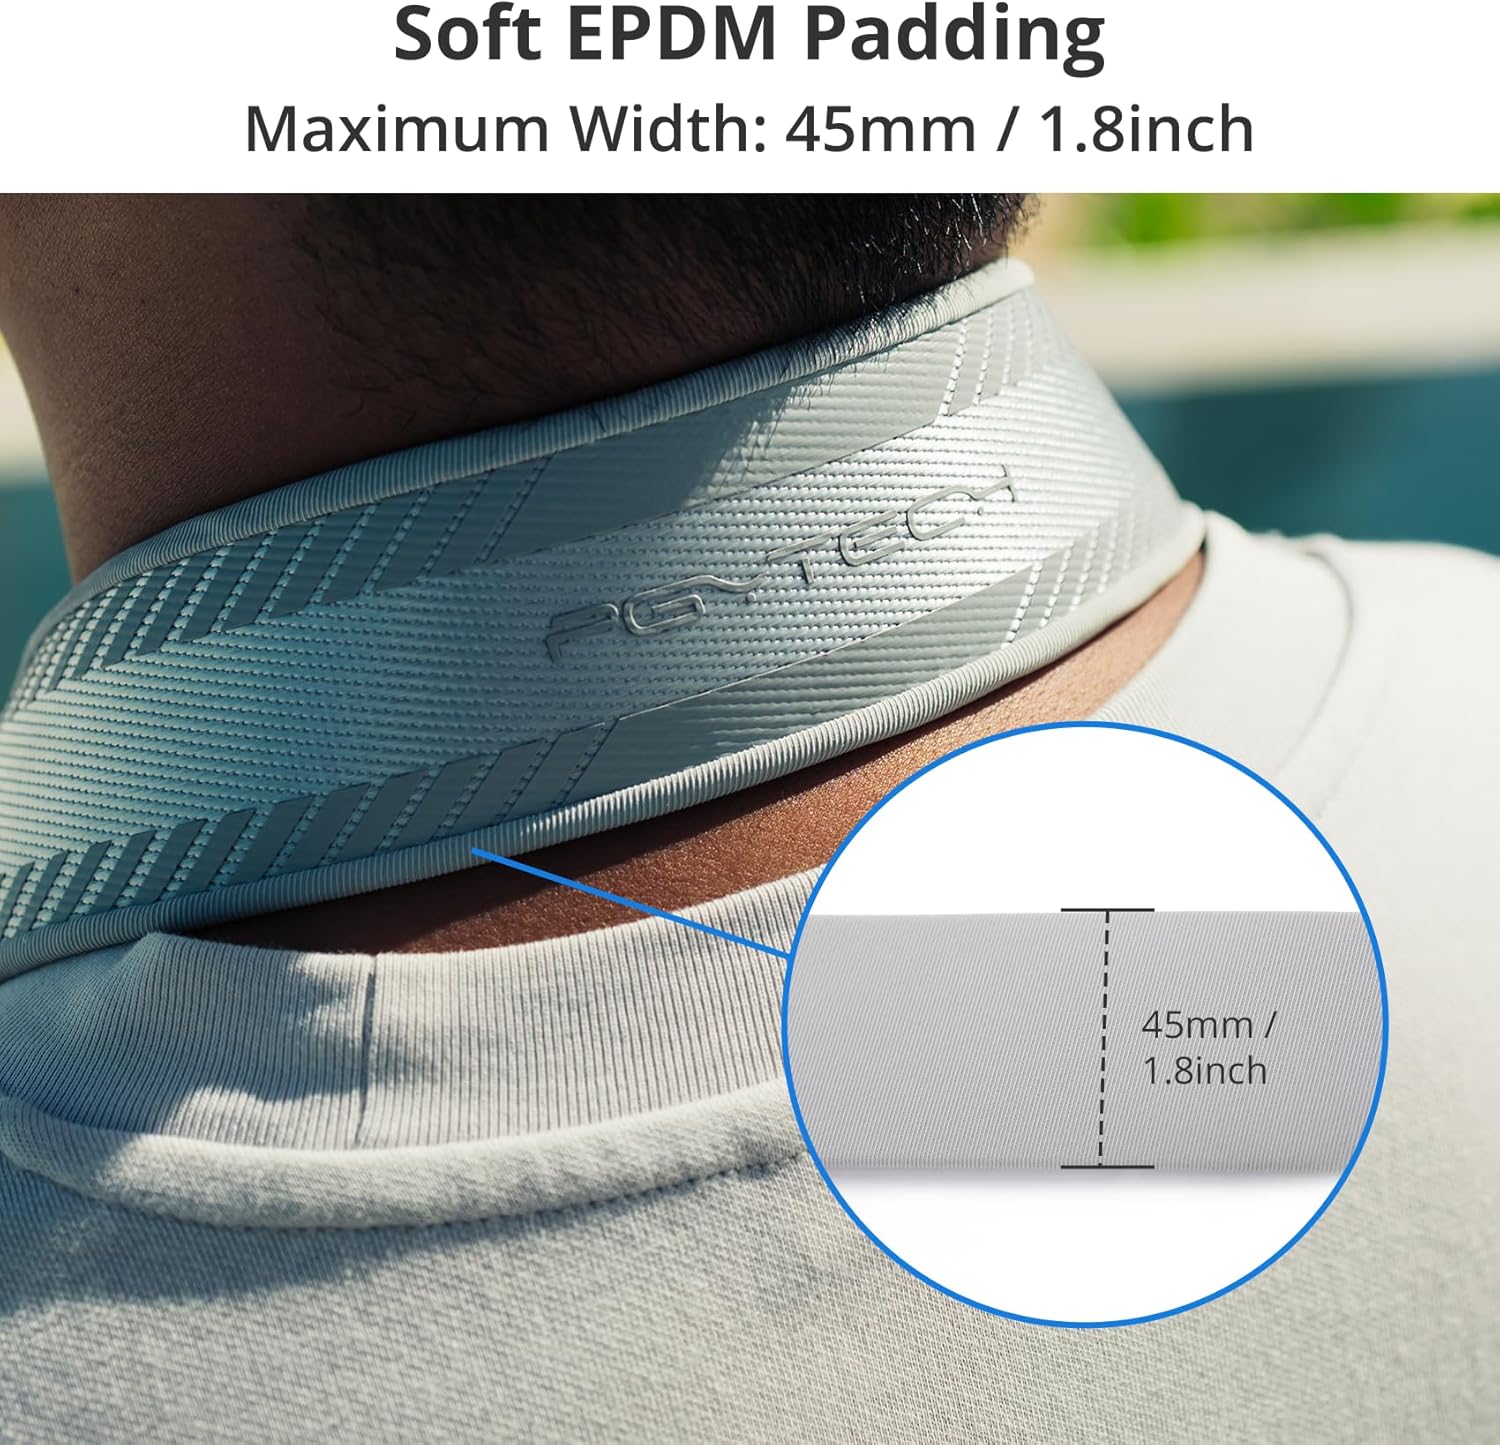
Figure 2: Detail of the Quick Connector

Figure 3: Load-bearing and Replace Warning Layers

Figure 4: Arca-type Quick Release Plate in Use
3. Setup
3.1 Attaching Quick Release Beads
- Locate the strap lugs on your camera body.
- Thread the thin loop of the quick release bead through the camera lug.
- Pass the larger bead end through the loop you just created and pull tight to secure. Ensure the bead is fully seated and the loop is taut.
- Repeat for the second quick release bead on the other camera lug.
3.2 Attaching the Arca-type QR Plate (Optional)
- Locate the 1/4"-20 tripod screw mount on the bottom of your camera.
- Align the PGYTECH Arca-type QR plate with the screw mount.
- Use the provided hex wrench to tighten the screw on the QR plate into the camera's tripod mount until secure. Do not overtighten.
- The QR plate provides an additional attachment point for the quick release beads, allowing for different carrying configurations.
3.3 Connecting the Strap
- Hold one end of the shoulder strap. Press the upper part of the quick connector.
- Insert the quick release bead (attached to your camera or QR plate) into the quick connector until it clicks securely into place.
- Gently tug on the camera to ensure the connection is firm before use.
- Repeat for the other end of the strap.
Video 1: Demonstrating the quick connector attachment and detachment.
4. Operating Instructions
4.1 Adjusting Strap Length
The strap features quick adjusters on both ends. To adjust the length, simply pull on the strap webbing through the buckle to shorten or lengthen as desired. This allows for quick changes to suit different carrying positions or preferences.

Figure 5: Strap Length Adjustment Range
4.2 Wearing Styles
The PGYTECH Camera Shoulder Strap can be worn in multiple ways for comfort and accessibility:
- Shoulder Strap: Worn over one shoulder, allowing the camera to rest at your side.
- Crossbody Strap: Worn across the body, distributing weight evenly and keeping the camera secure against your hip or back.
- Neck Strap: Worn around the neck, providing quick access to the camera. The soft EPDM padding enhances comfort for extended use.

Figure 6: Versatile Wearing Options
4.3 Detaching the Camera
To quickly detach your camera, simply press the upper part of the quick connector and pull the quick bead out. This allows for rapid removal of the camera when needed, such as for tripod mounting or storage.
4.4 Hands-free Strap Storage
When the camera is detached, the two quick connectors on the strap can be clipped together. This creates a closed loop, preventing the strap from dangling and making it easier to manage while walking or moving without the camera attached.
5. Maintenance
To ensure the longevity and safety of your PGYTECH Camera Shoulder Strap, follow these maintenance guidelines:
- Inspect Regularly: Periodically check the quick release beads and the strap webbing for any signs of wear, fraying, or damage.
- Replace Warning: The lanyard features a three-layer structure. If the outer layer shows significant wear, revealing the inner layers, it is time to replace the quick release beads to maintain maximum load-bearing capacity and safety.
- Cleaning: Clean the strap with a damp cloth and mild soap if necessary. Avoid harsh chemicals or abrasive materials that could damage the fabric or components. Allow to air dry completely.
- Storage: Store the strap in a clean, dry place away from direct sunlight and extreme temperatures when not in use.
6. Troubleshooting
This section addresses common concerns. If you encounter issues not listed here, please refer to the Warranty & Support section for assistance.
- Strap feels loose or slips: Ensure the quick adjusters are properly tightened. The anti-slip EPDM padding should provide a secure grip on your shoulder.
- Difficulty attaching/detaching quick connectors: Ensure the quick release bead is correctly aligned with the connector and that the button is fully pressed. Avoid forcing the connection.
- Visible wear on lanyard: Refer to the 'Replace Warning' in the Maintenance section. Replace the quick release beads immediately if the inner layers are visible.
7. Specifications
| Attribute | Detail |
|---|---|
| Brand Name | PGYTECH |
| Model Number | P-CB-121 |
| Item Weight | 139 Grams |
| Material Type | Polyester, EPDM, fiber-reinforced nylon |
| Fastener Type | Magnetic |
| Color | Dark Blue |
| Size | Standard |
| Longest Length | 142 cm / 55.9 inches |
| Shortest Length | 100 cm / 39.3 inches |
| Maximum Width (Padding) | 45 mm / 1.8 inches |
| Load-bearing Capacity | Up to 90 KG / 198 lbs |
8. Warranty & Support
For warranty information and customer support, please refer to the official PGYTECH website or contact your retailer. Keep your proof of purchase for any warranty claims.