TOOLIOM LY500BS
TOOLIOM Auto Darkening Welding Helmet LY500BS User Manual
Model: LY500BS
1. Introduction
This manual provides instructions for the safe and effective use of your TOOLIOM Auto Darkening Welding Helmet, model LY500BS. Please read this manual thoroughly before operation and retain it for future reference. This helmet is designed to protect your eyes and face from sparks, spatter, and harmful radiation under normal welding conditions.
The helmet features an auto-darkening filter (ADF) that automatically changes from a light state to a dark state when an arc is struck, and returns to the light state when welding stops. It is suitable for various welding processes including TIG, MIG, and Stick welding.
2. Safety Precautions
WARNING: Failure to read, understand, and follow all instructions can result in serious injury or death.
- Always wear appropriate eye and face protection during welding operations.
- Do not use this helmet for laser welding or oxyacetylene welding/cutting applications.
- Ensure the helmet is properly adjusted and fits securely before use.
- Inspect the helmet and filter lens regularly for damage. Replace any damaged parts immediately.
- Do not immerse the auto-darkening filter in water.
- Keep the helmet clean and free from dirt, dust, and moisture.
- Store the helmet in a dry, cool place away from direct sunlight.
3. Product Components
The TOOLIOM Auto Darkening Welding Helmet LY500BS includes the following components:
- Welding Helmet shell with Flaming Skull-N design
- Auto-Darkening Filter (ADF)
- Adjustable Headgear
- 2x Replacement Outer Lenses
- 1x Replacement Inner Lens
- User Manual

Figure 1: TOOLIOM Auto Darkening Welding Helmet (Flaming Skull-N design)

Figure 2: Included components: Welding Helmet, 2 Replacement Outer Lenses, 1 Replacement Inner Lens.
4. Setup and Adjustment
4.1 Headgear Adjustment
Proper adjustment of the headgear is crucial for comfort and safety. The headgear allows for adjustments in circumference, flip tension, and vertical position.

Figure 3: Headgear adjustment points.
- Head Circumference Knob: Rotate the knob at the back of the headgear to adjust the fit around your head.
- Flip Adjustment: Adjust the tension of the side knobs to control how easily the helmet flips up and down.
- Head Wear Range Adjustment: Use the pins on the top strap to adjust the vertical position of the helmet on your head.
- 130° Rotation: The helmet can rotate up to 130 degrees for optimal positioning.
4.2 Auto-Darkening Filter (ADF) Settings
The ADF features controls for sensitivity and delay, allowing customization for different welding tasks.

Figure 4: Auto-Darkening Filter controls and dimensions.
- Sensitivity: Adjust the sensitivity knob (Lo-Hi) to control how much light is required to trigger the darkening function. Higher sensitivity is suitable for low amperage TIG welding.
- Delay: Adjust the delay knob (F-S) to control the time it takes for the filter to return from dark to light after welding stops. A longer delay is useful for high amperage welding to prevent eye fatigue from afterglow.
- Shade Range: The helmet offers an adjustable shade range of 4/9-13.
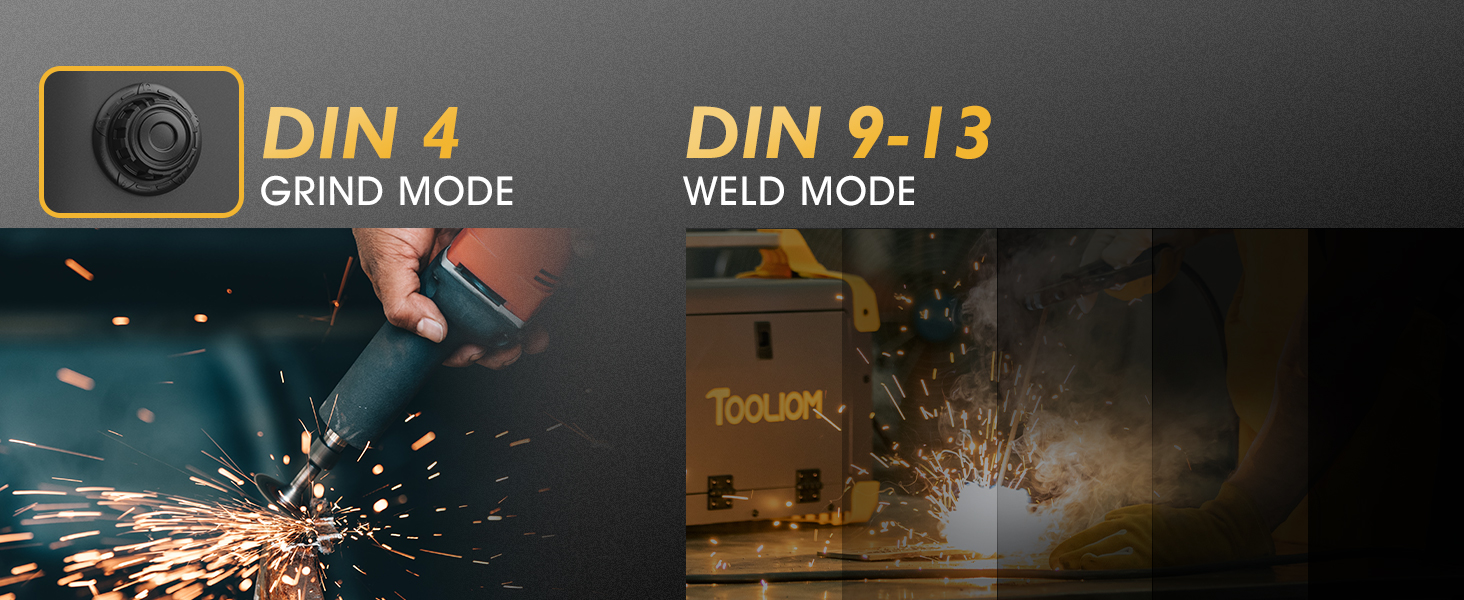
Figure 5: Grind Mode (DIN 4) and Weld Mode (DIN 9-13).
The helmet also features a grind mode (DIN 4) for grinding operations, which prevents the filter from darkening. Ensure you switch back to weld mode (DIN 9-13) before welding.
4.3 Battery Installation/Replacement
The helmet is solar-powered with a backup lithium-ion battery (CR2450 included). A low battery indicator is present on the ADF.
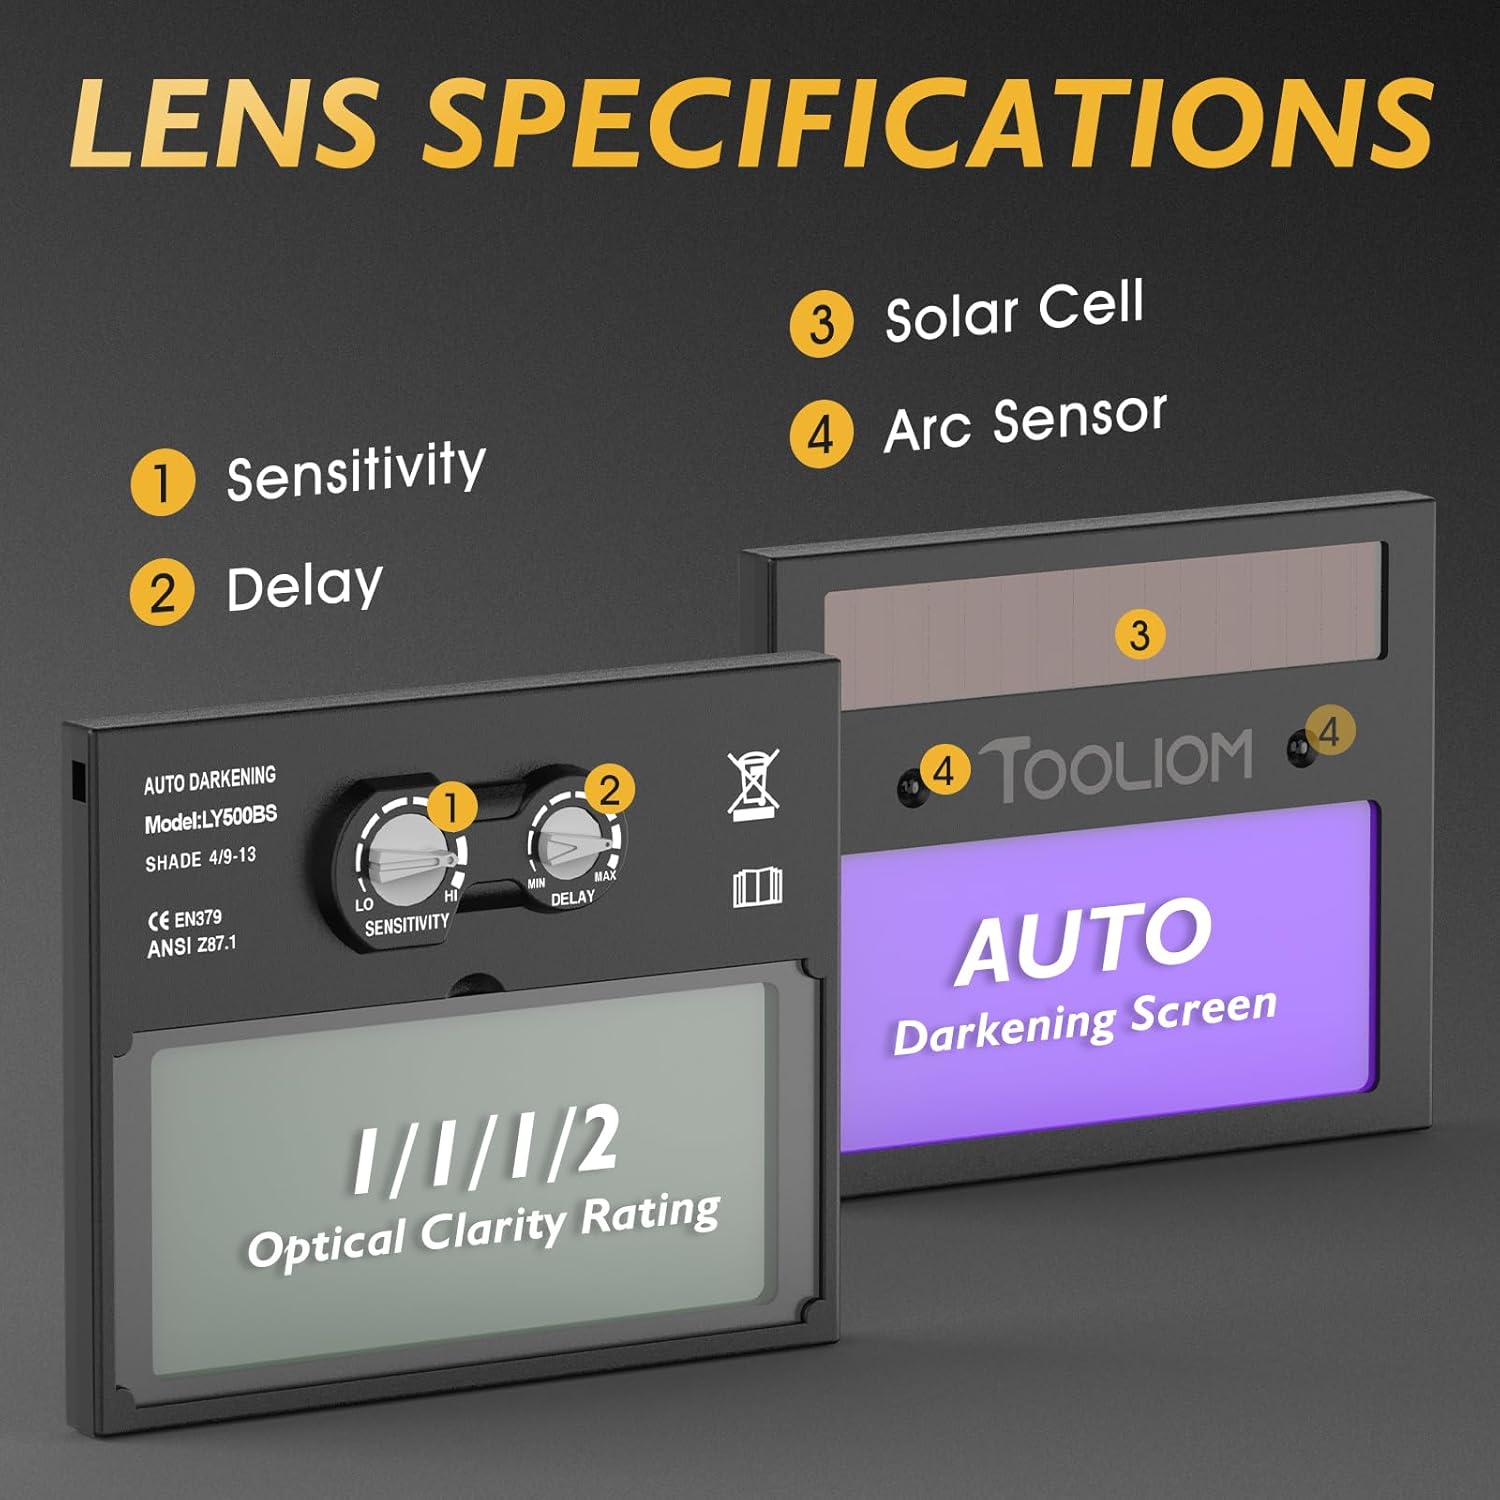
Figure 6: Solar cell and arc sensors on the ADF.
To replace the battery:
- Locate the battery compartment on the ADF.
- Open the compartment and remove the old battery.
- Insert a new CR2450 lithium-ion battery, ensuring correct polarity.
- Close the battery compartment securely.
5. Operating Instructions
5.1 Pre-Operation Check
- Ensure the helmet is clean and free from damage.
- Verify the ADF is functioning correctly by exposing it to a bright light source (not welding arc) and observing it darken momentarily.
- Adjust the headgear for a comfortable and secure fit.
- Set the sensitivity and delay controls according to your welding application.
5.2 Welding Process
The TOOLIOM LY500BS helmet is suitable for TIG, MIG, and Stick welding.

Figure 7: Welding applications: MIG, Stick, and TIG.
- Position the helmet comfortably on your head.
- Lower the helmet into the viewing position. The filter will be in the light state (shade 4).
- Begin welding. The ADF will automatically darken to the selected shade (9-13) within 0.1 to 1.0 seconds when the arc is struck.
- When welding stops, the filter will return to the light state after the set delay time.

Figure 8: Auto-darkening speed demonstration.
The helmet's true color technology provides a clear and natural view of the weld puddle, enhancing visibility and control.

Figure 9: True Color Technology vs. Traditional Lens.
6. Maintenance
6.1 Cleaning
- Clean the helmet shell with a mild soap and water solution. Avoid harsh solvents.
- Wipe the outer and inner protective lenses with a soft, clean cloth. Do not use abrasive materials.
- Keep the arc sensors and solar cell clean to ensure proper function.
6.2 Lens Replacement
Replace protective lenses when they become scratched, pitted, or too dirty to clean effectively.

Figure 10: Protective lens replacement process.
The helmet is compatible with magnifying/cheater lenses (not included) for users requiring vision correction.

Figure 11: Cheater lens compatibility.
7. Troubleshooting
| Problem | Possible Cause | Solution |
|---|---|---|
| Filter does not darken. | Low battery, dirty sensors, incorrect sensitivity setting, grind mode active. | Replace battery, clean sensors, increase sensitivity, switch to weld mode. |
| Poor visibility. | Dirty or scratched protective lenses. | Clean or replace protective lenses. |
| Helmet slips or is uncomfortable. | Improper headgear adjustment. | Adjust head circumference, flip tension, and vertical position. |
8. Specifications
| Feature | Specification |
|---|---|
| Model Name | LY500BS |
| Shade Range | DIN 4 / 9-13 (Adjustable) |
| Switching Time (Light to Dark) | 0.1s to 1.0s (Adjustable) |
| Arc Sensors | 2 |
| Power Supply | Solar Powered with Lithium Ion Battery (CR2450) |
| Material | Plastic |
| Item Weight | 1.83 pounds |
| Optical Clarity Rating | 1/1/1/2 |
| Applications | TIG, MIG, Stick (MMA) Welding |
9. Warranty and Support
For warranty information or technical support, please contact TOOLIOM customer service. Refer to your purchase documentation for specific warranty terms and contact details.
You can also visit the official TOOLIOM store for more products and support: TOOLIOM Store
10. Product Videos
Quality is a must when it comes to welding
This video highlights the importance of quality in welding equipment and showcases the TOOLIOM welding helmet's features and design. It provides a visual overview of the helmet's exterior and interior components, emphasizing its robust construction and user-friendly adjustments.
Lightweight Helmet with Pro-Level Features
This video demonstrates the lightweight nature and professional features of the TOOLIOM welding helmet. It illustrates how the helmet's design contributes to user comfort and ease of use during extended welding sessions, including quick transitions between weld and grind modes.
Ask a question about this manual
Ask about setup, troubleshooting, compatibility, parts, safety, or missing instructions. Manuals+ will review the question and use this page’s manual context to help answer it.