ADVANCE OUTDOOR 05DGY-03
ADVANCE OUTDOOR 6x6 ft Portable Storage Shelter Instruction Manual
Model: 05DGY-03
Brand: ADVANCE OUTDOOR
1. Introduction
This manual provides detailed instructions for the assembly, operation, and maintenance of your ADVANCE OUTDOOR 6x6 ft Portable Storage Shelter. Please read this manual thoroughly before assembly and use to ensure proper setup and safe operation. Retain this manual for future reference.
This portable shelter is designed to provide protection for motorcycles, ATVs, bicycles, lawnmowers, firewood, and other outdoor equipment or tools. Its robust construction and weather-resistant cover offer reliable outdoor storage.
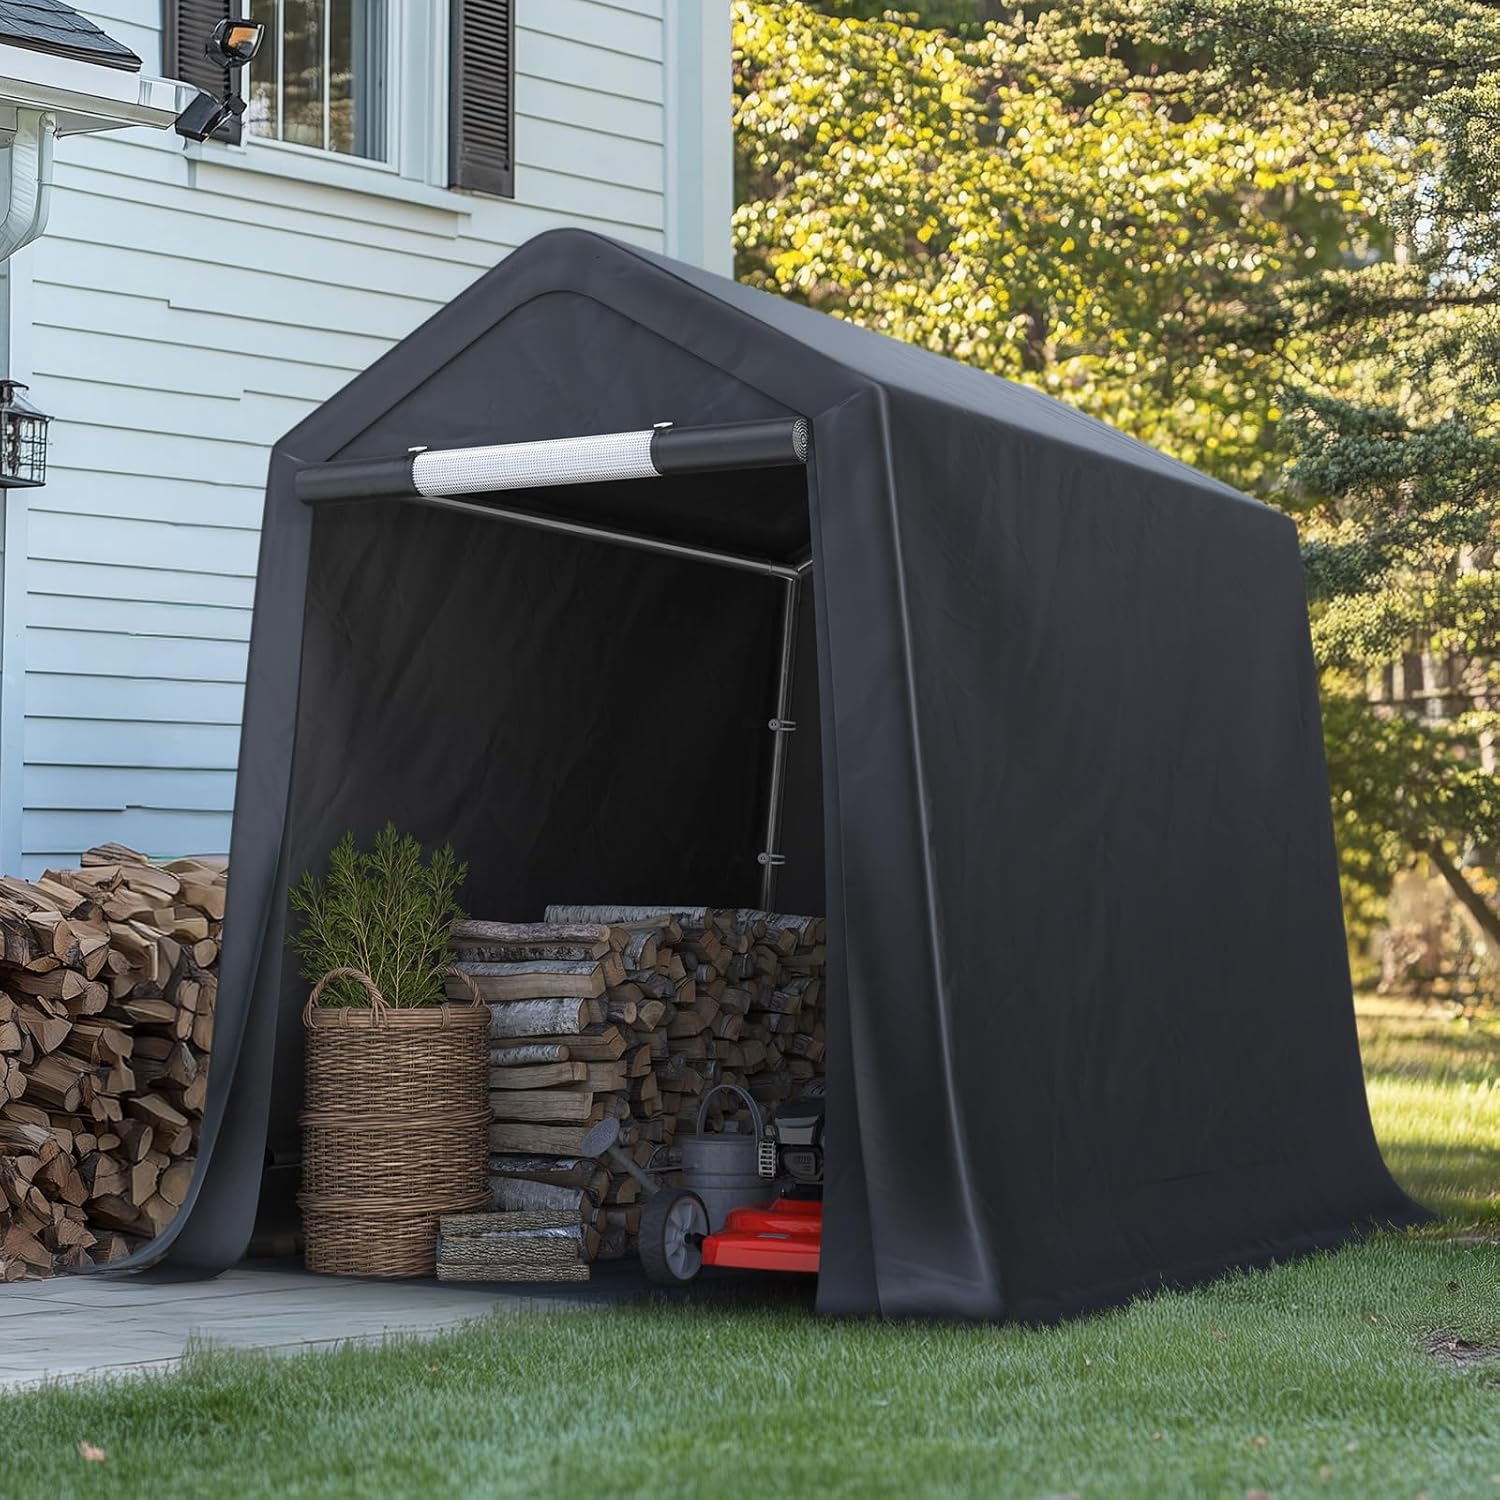
Image: The ADVANCE OUTDOOR 6x6 ft Portable Storage Shelter, showcasing its use for storing outdoor equipment.
2. Safety Information
WARNING: Failure to follow these safety instructions may result in serious injury or property damage.
- Assembly: Always assemble with at least two people. Wear appropriate safety gear, such as gloves, during assembly.
- Anchoring: Ensure the shelter is securely anchored to the ground using the provided L-Type pegs. In areas prone to high winds, additional anchoring methods may be required (e.g., concrete anchors, heavy-duty straps).
- Location: Choose a level, clear area for installation, away from overhead power lines, trees, or structures that could fall onto the shelter.
- Weather Conditions: While designed for various weather conditions, extreme weather (heavy snow accumulation, severe winds, hurricanes) may require temporary disassembly or additional reinforcement. Clear snow accumulation promptly from the roof to prevent collapse.
- Ventilation: The shelter includes vents for airflow. Ensure they are not obstructed to prevent moisture buildup and condensation.
- Fire Hazard: Do not store flammable materials or operate open flames inside the shelter. Keep heat sources away from the cover material.
- Weight Limit: Do not hang heavy objects from the frame. The structure is designed for shelter, not for supporting significant suspended loads.
- Children and Pets: Keep children and pets away from the assembly area. Do not allow them to play inside the shelter unsupervised.
3. Package Contents
Verify all components are present before beginning assembly. If any parts are missing or damaged, contact customer support.
- Steel Frame Poles (various lengths and shapes)
- Connectors
- Triple Layer 240g PE Cover (main canopy)
- 2 Removable Roll-up Zipper Doors
- L-Type Ground Pegs (0.32X11.81 inch / 8X300mm)
- Ratchet Straps (for tightening cover)
- Bungee Balls (for door attachment)
- Assembly Manual
Note: Some components may be pre-assembled or packaged together.
4. Assembly Instructions
Assembly typically requires two people and can be completed in approximately 30 minutes. No special tools are required beyond a rubber mallet for ground pegs.
Step 1: Install the Top Frame
Connect the roof frame poles according to the diagrams. Ensure all connections are secure. This forms the upper structure of the shelter.

Image: Step 1 of assembly, illustrating the connection of the top frame components.
Step 2: Install the Legs
Attach the vertical leg poles to the assembled top frame. Ensure the frame is upright and stable before proceeding.
Image: Step 2 of assembly, showing the attachment of the vertical support legs to the roof structure.
Step 3: Place Cover On & Install Ground Bar
Drape the main PE cover over the assembled frame. Ensure it is centered and aligned. Install the ground bar poles along the base of the shelter, sliding them through the designated sleeves in the cover. This helps secure the bottom edge of the cover.
Image: Step 3 of assembly, illustrating the placement of the main cover and the installation of the base frame bar.
Step 4: Secure Doors
Attach the two removable roll-up zipper doors to the front and back openings of the shelter using the bungee balls and buckles. Ensure the zippers are functional and the doors can be securely rolled up or closed.
Image: Step 4 of assembly, detailing the attachment of the front and rear doors to the shelter frame.
Final Anchoring
Once the frame and cover are in place, use the provided L-Type ground pegs to firmly anchor each foot of the shelter to the ground. Use a rubber mallet to drive the pegs securely. Utilize the ratchet straps to tighten the main cover around the frame for a snug fit, preventing flapping in windy conditions.

Image: Close-up of L-shaped ground pegs for secure fixation and a ratchet mechanism for tightening the shelter cover.
5. Operating Instructions
5.1. Using the Roll-Up Zipper Doors
- To open: Unzip both zippers on the door. Roll the door panel upwards and secure it using the integrated straps or buckles at the top.
- To close: Unfasten the straps/buckles, unroll the door panel, and zip both zippers down completely to secure the opening.
- The doors are fully removable if desired for open access or increased airflow.

Image: Various door configurations, including fully open, partially rolled, and fully closed, demonstrating versatility.
5.2. Utilizing the Vents
The shelter is equipped with double-layer vents on each door to facilitate airflow and prevent condensation. Ensure these vents are clear of obstructions.
- The vents can be opened or closed using their integrated holders.
- A mesh inner layer prevents insects from entering while allowing air circulation.
- Proper ventilation is crucial to avoid moisture buildup, especially in humid conditions or when storing items that may release moisture.
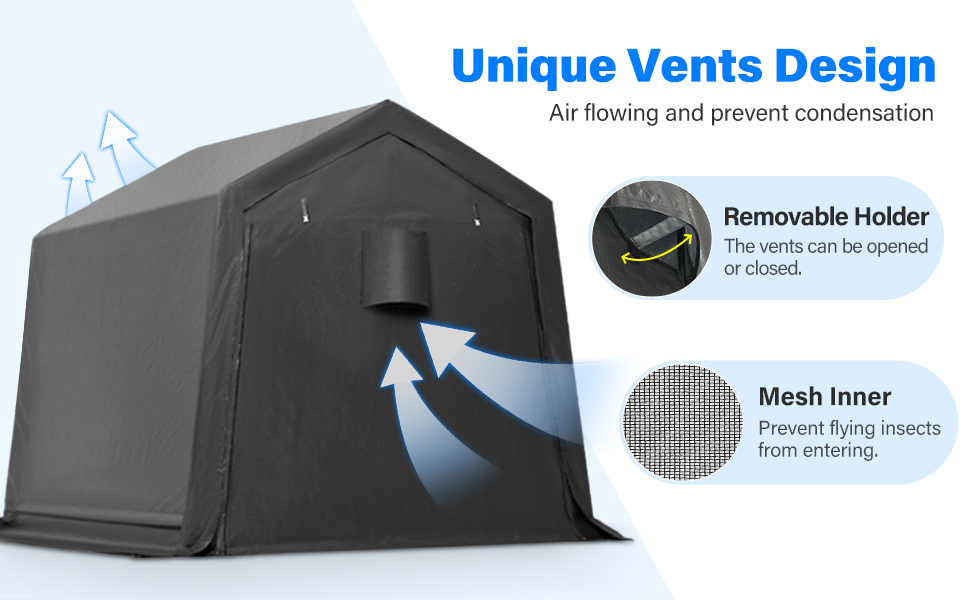
Image: Detailed view of the shelter's unique vent design, highlighting airflow and the mesh insect screen.
6. Maintenance
- Cleaning: Clean the PE cover periodically with mild soap and water. Avoid harsh chemicals or abrasive cleaners, which can damage the material. Rinse thoroughly and allow to air dry completely before closing the shelter for extended periods.
- Frame Inspection: Regularly inspect the steel frame for any signs of rust, bending, or loose connections. Tighten any loose bolts or connections.
- Cover Inspection: Check the cover for tears, punctures, or signs of wear. Small repairs can be made with appropriate patch kits.
- Anchoring: Periodically check the ground pegs and anchoring system to ensure they remain secure, especially after strong winds or heavy rain.
- Snow Removal: In snowy conditions, promptly remove accumulated snow from the roof to prevent excessive weight and potential structural damage.
7. Troubleshooting
| Issue | Possible Cause | Solution |
|---|---|---|
| Shelter unstable/wobbly | Loose frame connections; insufficient anchoring; strong winds. | Ensure all frame connections are tight. Re-secure ground pegs. Consider additional anchoring in windy conditions. |
| Water pooling on roof | Improper cover tension; excessive snow/debris accumulation. | Adjust ratchet straps to ensure the cover is taut. Clear any debris or snow from the roof. |
| Condensation inside shelter | Lack of ventilation; high humidity. | Ensure vents are open and unobstructed. Consider opening doors for short periods to increase airflow. |
| Zippers sticking/difficult to operate | Dirt/debris in zipper teeth; lack of lubrication. | Clean zipper teeth with a brush. Apply a silicone-based zipper lubricant. |
8. Specifications
- Model: 05DGY-03
- Dimensions (L x W x H): 72" x 72" x 84" (6 ft x 6 ft x 7 ft)
- Frame Material: 1-1/2-inch diameter Alloy Steel / Metal
- Cover Material: Triple Layer 240g PE (Polyethylene)
- Color: Dark Gray
- Item Weight: 49 Pounds
- UV Protection: 98%
- Water Resistance Level: Water Resistant
- Assembly Required: Yes
- Ground Pegs: 0.32" x 11.81" (8mm x 300mm) L-Type

Image: Visual representation of the shelter's dimensions, indicating length, width, and height.
9. Warranty and Support
ADVANCE OUTDOOR provides the following coverage for this product:
- Poles and Canopy Covers: One (1) year coverage from the date of purchase.
- Other Accessories: Connectors, foot pads, pegs, anchors, and elastic bungees are eligible for replacement.
For warranty claims, missing parts, or technical support, please contact ADVANCE OUTDOOR customer service. Please have your model number (05DGY-03) and proof of purchase available.
For more information, visit the ADVANCE OUTDOOR Store.
Ask a question about this manual
Ask about setup, troubleshooting, compatibility, parts, safety, or missing instructions. Manuals+ will review the question and use this page’s manual context to help answer it.