Stealth Cam STC-BT18
STEALTH CAM Browtine 18MP Trail Camera Instruction Manual
Model: STC-BT18
Brand: Stealth Cam
1. Product Overview
The STEALTH CAM Browtine Trail Camera is designed for outdoor surveillance and wildlife monitoring, offering 18-megapixel photo resolution and 480P video recording at 30 frames per second. It features a rapid 0.8-second trigger speed and an 80-foot detection and infrared (IR) range, making it ideal for capturing fast-moving game in various lighting conditions. The camera's robust design and camouflage finish ensure discreet operation in natural environments.

Figure 1: Front view of the STEALTH CAM Browtine Trail Camera, showcasing its compact and camouflaged design.
2. Key Features
- High Resolution Imaging: Captures 18MP still photos and 480P video at 30FPS.
- Fast Trigger Speed: Responds to motion in 0.8 seconds to minimize missed shots.
- Extended Detection & IR Range: Features an 80ft detection and infrared range for clear night vision.
- Burst Mode: Configurable to take 1-3 photos per triggering event.
- Adjustable Recovery Time: Settings for 5s, 15s, 30s, 60s, or 120s recovery times between triggers.
- Infrared LEDs: Equipped with 18 pieces of 850nm LEDs for vibrant imaging and nighttime illumination.
- Image Stamp: Photos are stamped with time, date, and moon phase information.
- SD Card Support: Supports SD memory cards up to 32GB.
- Durable Design: Integrated Python Lock Latch provision for security and robust construction.
3. Initial Setup
3.1 Inserting Batteries
The Browtine Trail Camera requires 8 AA batteries (not included) for operation. Ensure correct polarity when inserting the batteries.
- Locate the battery compartment at the bottom of the camera.
- Gently pull the latch to open the battery tray.
- Insert 8 AA batteries, paying close attention to the positive (+) and negative (-) indicators within the compartment.
- Close the battery tray securely until it clicks into place.
3.2 Inserting SD Card
An SD card (up to 32GB, not included) is required to store photos and videos. The camera supports Class 10 SD cards.
- Open the main camera housing by unlatching the side clip.
- Locate the SD card slot, typically labeled "SD CARD", near the control panel.
- Insert the SD card into the slot until it clicks into place. Ensure it is inserted in the correct orientation.
- Close the main camera housing and secure the side latch.

Figure 2: The camera's interior, showing the battery compartment and SD card slot for easy access during setup.
3.3 Mounting the Camera
The camera comes with an adjustable strap for secure mounting to trees or posts.
- Thread the provided strap through the mounting slots on the back of the camera.
- Wrap the strap around a sturdy tree or post at the desired height and angle.
- Tighten the strap securely to prevent any movement, ensuring the camera is stable and pointed towards the desired monitoring area.
- The camouflaged strap blends with natural surroundings for discreet placement.

Figure 3: The trail camera securely mounted to a tree, demonstrating its discreet profile in a natural setting.
4. Operating Your Trail Camera
4.1 Powering On/Off
To power on the camera, slide the ON/OFF switch located inside the main housing to the 'ON' position. To power off, slide it to the 'OFF' position.
4.2 Programming Settings
The camera features a simple control panel for programming. Use the 'MENU' button to navigate through options, the arrow buttons (up/down) to adjust settings, and the 'ENTER' button to confirm selections.
- Photo Resolution: Select from 18MP, 8MP, or 4MP.
- Video Resolution: Set to 480P.
- Burst Mode: Choose to capture 1, 2, or 3 photos per trigger.
- Recovery Time: Adjust the delay between triggers (5s, 15s, 30s, 60s, 120s).
- Image Stamp: Ensure time, date, and moon phase stamping is enabled for detailed records.
4.3 Capturing Images and Videos
Once powered on and configured, the camera will automatically detect motion within its 80ft range and capture images or videos based on your programmed settings. The 0.8-second trigger speed ensures minimal delay in capturing activity.
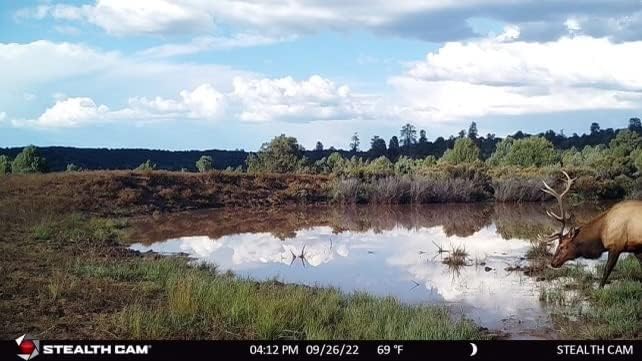
Figure 4: Example of a daytime image captured by the trail camera, showing a deer in its natural habitat.

Figure 5: Example of a daytime image captured by the trail camera, featuring an elk near a water source.

Figure 6: Example of a nighttime image captured by the trail camera using its infrared capabilities.
5. Maintenance
- Battery Replacement: Regularly check battery levels and replace all 8 AA batteries when low to ensure continuous operation.
- SD Card Management: Periodically remove the SD card to transfer data to a computer and format the card to maintain optimal performance and storage space.
- Cleaning: Use a soft, dry cloth to clean the camera lens and IR emitters. Avoid abrasive materials or harsh chemicals.
- Storage: When not in use for extended periods, remove batteries and store the camera in a cool, dry place.
6. Troubleshooting Common Issues
6.1 Camera Not Powering On
- Ensure 8 fresh AA batteries are correctly inserted with proper polarity.
- Verify the ON/OFF switch is in the 'ON' position.
- Check that the battery compartment is securely closed.
6.2 Settings Not Saving or Resetting
- Some trail cameras may reset settings upon battery removal. Re-enter desired settings after replacing batteries.
- Ensure the SD card is properly inserted and not full or corrupted, as this can sometimes affect setting retention.
6.3 SD Card Issues (Not Reading/Working)
- Ensure you are using a standard SD card (not microSD with adapter) with a maximum capacity of 32GB and Class 10 speed.
- Format the SD card using the camera's menu (if available) or on a computer before first use and periodically thereafter.
- Check if the SD card's write-protect tab is in the locked position.
6.4 Inaccurate Time/Date Stamp
- Access the camera's menu settings to manually set the correct time and date.
- If settings reset frequently, refer to the 'Settings Not Saving' troubleshooting step.
6.5 Connectivity (Wi-Fi)
While product specifications indicate Wi-Fi connectivity, user feedback suggests this model may not feature direct Wi-Fi for remote access or control. The term "Wireless Communication Technology" may refer to internal wireless components for motion detection rather than user-facing Wi-Fi. For specific wireless capabilities, consult the official Stealth Cam support resources.
7. Technical Specifications
| Feature | Specification |
|---|---|
| Photo Resolution | 18MP / 8MP / 4MP |
| Video Resolution | 480P at 30 FPS |
| Trigger Speed | 0.8 Seconds |
| Detection & IR Range | 80 Feet |
| LEDs | 18pcs 850nm LEDs |
| LED Flash Type | Infrared |
| Burst Mode | 1-3 Photos Per Trigger |
| Recovery Time | 5s/15s/30s/60s/120s |
| Image Stamp | Time/Date/Moon Phase |
| SD Card Support | Up to 32GB (Class 10 recommended) |
| Batteries Required | 8 AA (not included) |
| Lock Latch | Integrated Python Provision |
| Dimensions (L x W x H) | 2 x 1 x 5 inches |
| Weight | 12.6 ounces |
| Model Number | STC-BT18 |
| UPC | 888151039786 |
8. Warranty and Customer Support
For specific warranty information and detailed customer support, please refer to the official Stealth Cam website or contact their customer service directly. Keep your purchase receipt as proof of purchase for any warranty claims.
Additional protection plans may be available for purchase separately to extend coverage beyond the standard manufacturer's warranty. Please check with your retailer for details on these plans.
Related Documents - STC-BT18
 |
Stealth Cam 2024 Catalog: Cellular Trail Cameras & Accessories Explore the latest Stealth Cam 2024 lineup of cellular trail cameras, featuring advanced AI subject tagging, on-demand viewing, and robust accessories for optimal outdoor surveillance and hunting. |
 |
Stealth Cam Revolver PRO Quick Start Guide Quick start guide for the Stealth Cam Revolver PRO trail camera, covering setup, features, mounting, and cellular settings. |
 |
Stealth Cam STC-I840IR User Manual and Guide User manual for the Stealth Cam STC-I840IR digital video scout camera. Learn about setup, features, programming, and troubleshooting for your trail camera. |
 |
Stealth Cam STC-I540IR User's Manual User's manual for the Stealth Cam STC-I540IR digital video scouting camera. This guide covers setup, programming, features like infrared capabilities and burst mode, operation, and technical specifications for optimal use. |
 |
Stealth Cam STC-1590 User Manual: Setup, Features, and Operation Detailed user manual for the Stealth Cam STC-1590 digital scouting camera. Covers setup, programming features like burst mode and video, power options (C batteries, 12V external), memory card installation, image viewing/deletion, technical specifications, and warranty information. |
 |
Stealth Cam STC-PX18CMO Digital Scouting Camera Instruction Manual This is the instruction manual for the Stealth Cam STC-PX18CMO digital scouting camera. It provides detailed information on setup, operation, programming, memory card management, battery installation, image viewing, troubleshooting FAQs, FCC compliance, and warranty information. |
Ask a question about this manual
Ask about setup, troubleshooting, compatibility, parts, safety, or missing instructions. Manuals+ will review the question and use this page’s manual context to help answer it.