
1. Introduction
Thank you for choosing the MIDTY FSP500-60GMN 500W IPC Power Supply. This manual provides essential information for the safe installation, operation, and maintenance of your power supply unit (PSU). Please read this manual thoroughly before installation and keep it for future reference.
2. Safety Information
- Electrical Hazard: This unit contains high voltage components. Do not open the power supply casing. Refer all servicing to qualified service personnel.
- Ventilation: Ensure adequate ventilation around the PSU. Do not block any ventilation openings.
- Environment: Operate the PSU in a dry, well-ventilated environment, away from direct sunlight, heat sources, and moisture.
- Power Cord: Use only the provided power cord. Ensure it is properly grounded.
- Installation: Install the PSU securely within the computer chassis according to standard procedures.
- Disposal: Do not dispose of this product with household waste. Follow local regulations for electronic waste disposal.
3. Package Contents
Verify that all items are present in the package:
- MIDTY FSP500-60GMN 500W IPC Power Supply
- AC Power Cord (may vary by region)
- Mounting Screws
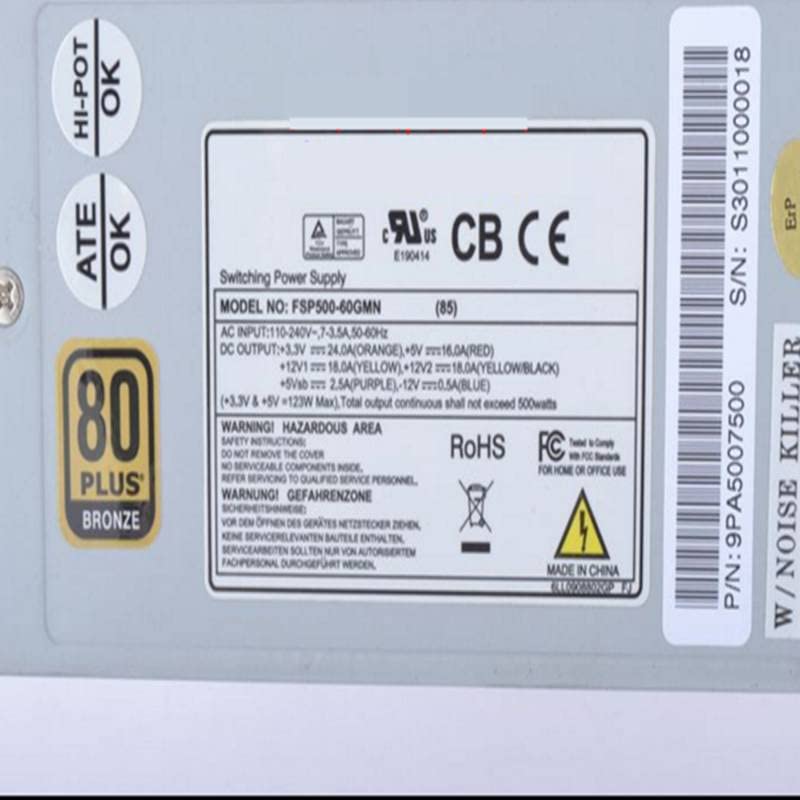
Figure 3.1: The MIDTY FSP500-60GMN 500W IPC Power Supply shown in its protective packaging, with various power cables visible.
4. Setup and Installation
Follow these steps to install the power supply unit into your system:
- Prepare Your System: Turn off your computer and disconnect the AC power cord from the wall outlet. Open the computer case.
- Remove Old PSU (if applicable): Disconnect all power cables from the motherboard, graphics card, and other components. Unscrew and remove the old power supply.
- Install New PSU: Carefully place the MIDTY FSP500-60GMN into the PSU bay of your computer case. Ensure the fan is oriented correctly for optimal airflow (usually facing downwards or towards the rear vent). Secure the PSU with the provided mounting screws.
- Connect Power Cables:
- 24-pin ATX Motherboard Connector: Connect the main 24-pin connector to your motherboard.
- CPU Power Connector: Connect the 4-pin or 8-pin CPU power connector (EPS12V) to the appropriate socket on your motherboard.
- PCIe Power Connectors: If your graphics card requires additional power, connect the 6-pin or 8-pin PCIe power connectors.
- SATA Power Connectors: Connect SATA power cables to your hard drives, SSDs, and optical drives.
- Peripheral (Molex) Connectors: Connect Molex connectors to any other peripherals that require them.
- Cable Management: Route cables neatly to improve airflow and aesthetics.
- Close Case and Connect AC Power: Close your computer case. Connect the AC power cord to the PSU and then to a grounded wall outlet.
5. Operating Instructions
After successful installation, operating the power supply is straightforward:
- Power On: Press the power button on your computer case. The PSU will provide power to all connected components.
- Power Off: Shut down your computer through the operating system. The PSU will automatically power down. For complete power disconnection, switch off the power switch on the PSU (if available) and unplug the AC power cord from the wall outlet.
6. Maintenance
Proper maintenance ensures the longevity and optimal performance of your PSU:
- Cleaning: Periodically clean the exterior of the PSU and its fan grille using a soft, dry cloth. For internal cleaning, use compressed air to remove dust from the fan and vents. Always disconnect the AC power cord before cleaning.
- Ventilation: Ensure that the computer case has good airflow and that the PSU's vents are not obstructed.
- Cable Inspection: Occasionally check all power cables for any signs of wear, fraying, or loose connections.
7. Troubleshooting
If you encounter issues with your power supply, refer to the following common problems and solutions:
- No Power:
- Ensure the AC power cord is securely connected to both the PSU and the wall outlet.
- Check if the power switch on the PSU (if present) is in the 'ON' position.
- Verify that the wall outlet is functional by plugging in another device.
- Confirm all internal power connectors (24-pin, CPU, PCIe) are firmly seated.
- System Instability/Random Shutdowns:
- This could indicate an overloaded or failing PSU. Ensure your system's power requirements do not exceed the PSU's 500W capacity.
- Check for proper ventilation to prevent overheating.
- Loud Fan Noise:
- Dust accumulation can cause fan noise. Clean the fan and vents as described in the Maintenance section.
- If the noise persists, the fan may be faulty. Contact support if under warranty.
If problems persist after attempting these solutions, contact customer support or a qualified technician.
8. Specifications
The MIDTY FSP500-60GMN 500W IPC Power Supply features the following specifications:
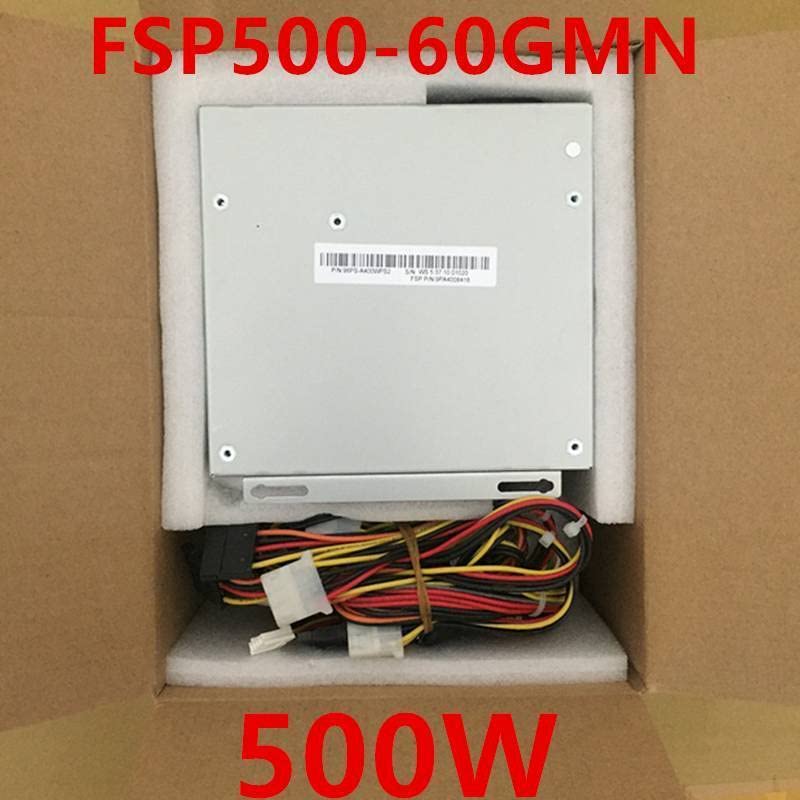
Figure 8.1: The product label detailing the electrical specifications and certifications for the FSP500-60GMN power supply.
| Feature | Detail |
|---|---|
| Brand | MIDTY |
| Model Number | FSP500-60GMN (Manufacturer Part Number: MiDTY_Ser_12067) |
| Output Wattage | 500 Watts |
| Compatible Devices | Personal Computer |
| Input Voltage | 110-240V~, 7-3.5A, 50-60Hz (as per label) |
| DC Output | +3.3V === 24.0A (ORANGE) +5V === 16.0A (RED) +12V1 === 18.0A (YELLOW) +12V2 === 18.0A (YELLOW/BLACK) -12V === 0.8A (BLUE) +5Vsb === 2.5A (PURPLE) (+3.3V & +5V = 122W Max) Total output continuous shall not exceed 500Watts (as per label) |
9. Warranty and Support
For warranty information and technical support, please refer to the documentation provided with your purchase or contact your retailer. Keep your proof of purchase for warranty claims.