1. Introduction
Thank you for choosing the WORKPRO Portable Tire Inflator W125218A. This device is designed for convenient and efficient inflation of tires for cars, motorcycles, bicycles, and various sports balls. It features a digital display, auto shut-off, multiple inflation modes, an LED light, and a power bank function. Please read this manual thoroughly before use to ensure safe and optimal operation.

Image: The WORKPRO Portable Tire Inflator is suitable for a wide range of applications, including car tires, motorcycle tires, bicycle tires, swimming rings, and various sports balls.
2. Safety Information
Always observe the following safety precautions to prevent injury or damage to the device:
- Do not leave the inflator unattended during operation.
- Ensure the correct pressure setting for the item being inflated to avoid over-inflation, which can cause bursting and serious injury.
- The inflation hose and nozzle may become hot during prolonged use. Allow them to cool before handling.
- Keep the device away from children and pets.
- Do not operate the inflator in wet conditions or near flammable liquids or gases.
- Use only the provided accessories and adapters.
- If the device overheats, allow it to cool down before resuming operation.
- Wear appropriate eye and hearing protection during use.
3. Package Contents
Verify that all items are present in the package:
- WORKPRO Portable Tire Inflator
- Inflation Hose
- Needle Valve Adapter (for balls)
- Presta Valve Adapter (for some bicycles)
- Wide Nozzle Adapter (for inflatables)
- USB Charging Cable
- Storage Bag

Image: The WORKPRO Portable Tire Inflator shown with its included accessories: inflation hose, various nozzle adapters, USB charging cable, and a storage bag.
4. Product Overview
Familiarize yourself with the components of your tire inflator:
- Digital Display: Shows current pressure, target pressure, battery level, and selected mode.
- Control Buttons: Power, Mode selection, Pressure adjustment (+/-).
- Inflation Port: Where the inflation hose connects.
- LED Light: For illumination in low-light conditions.
- USB-C Charging Port: For recharging the device.
- USB-A Output Port: Functions as a power bank.

Image: A detailed view of the inflator's digital display, showing pressure readings, battery indicator, and the three-color LED indicators for pressure status (red, yellow, green).
5. Setup
5.1 Initial Charging
Before first use, fully charge the tire inflator. The device is powered by three 2500mAh rechargeable batteries.
- Connect the provided USB charging cable to the USB-C charging port on the inflator.
- Connect the other end of the USB cable to a suitable USB power adapter (not included) or a powered USB port.
- The battery indicator on the digital display will show charging progress. A full charge typically takes 3 to 5 hours.
- Once fully charged, disconnect the charging cable.

Image: The inflator connected to a car tire, highlighting its 7500 mAh battery capacity, capable of inflating multiple car tires on a single charge.
6. Operating Instructions
6.1 Powering On/Off
- To power on, press and hold the power button (usually the 'O' button) for a few seconds.
- To power off, press and hold the power button again. The device will also automatically power off after a period of inactivity.
6.2 Selecting Inflation Mode
The inflator offers 4 smart preset modes and 1 manual mode:
- Press the 'M' (Mode) button to cycle through the available modes: Car, Motorcycle, Bicycle, Ball, and Manual.
- Each preset mode has a default pressure value (e.g., Car: 36 PSI, Motorcycle: 35 PSI, Bicycle: 45 PSI, Ball: 8 PSI, Manual: 60 PSI).
- In any mode, you can adjust the target pressure using the '+' and '-' buttons. The maximum adjustable pressure is 150 PSI.
- To change pressure units (PSI, BAR, KPA), press the 'M' button and '+' button simultaneously.

Image: The inflator's screen showing the selection of different inflation modes (Car, Motorcycle, Bicycle, Ball, Manual) with their respective default PSI values.
6.3 Connecting to the Item for Inflation
- Screw the inflation hose securely into the inflation port on the top of the device.
- For car, motorcycle, or bicycle (Schrader valve) tires, attach the other end of the hose directly to the tire valve stem. Ensure a tight connection to prevent air leakage.
- For Presta valves (some bicycles), balls, or other inflatables, attach the appropriate adapter to the inflation hose before connecting to the item.
- Once connected, the digital display will show the current pressure of the item.
6.4 Starting and Stopping Inflation
- After setting the desired pressure and connecting the hose, press the power button (usually the 'O' button) to start inflation.
- The inflator will automatically stop when the preset target pressure is reached. This is the auto shut-off feature.
- To manually stop inflation at any time, press the power button again.
- After inflation, carefully disconnect the hose from the item and then from the inflator. Be aware that the hose may be hot.

Image: The inflator in use, demonstrating its fast inflation capability for a 195/60R16 car tire, indicating inflation from 25-35 PSI in under 1 minute and 0-35 PSI in under 5 minutes.
6.5 Pressure Indicator Lights
The device features three-color LED indicators for real-time pressure status:
- Green Light: Pressure is between 90% and 110% of the preset value.
- Yellow Light: Pressure is below 90% of the preset value.
- Red Light: Pressure exceeds 110% of the preset value.
6.6 LED Flashlight Function
The built-in LED light can be used for illumination:
- Press the dedicated light button (if available, or a combination of buttons as per device markings) to turn on the flashlight.
- Cycle through different modes: steady light, flashing light, and SOS emergency mode.
- Press the button again to turn off the light.
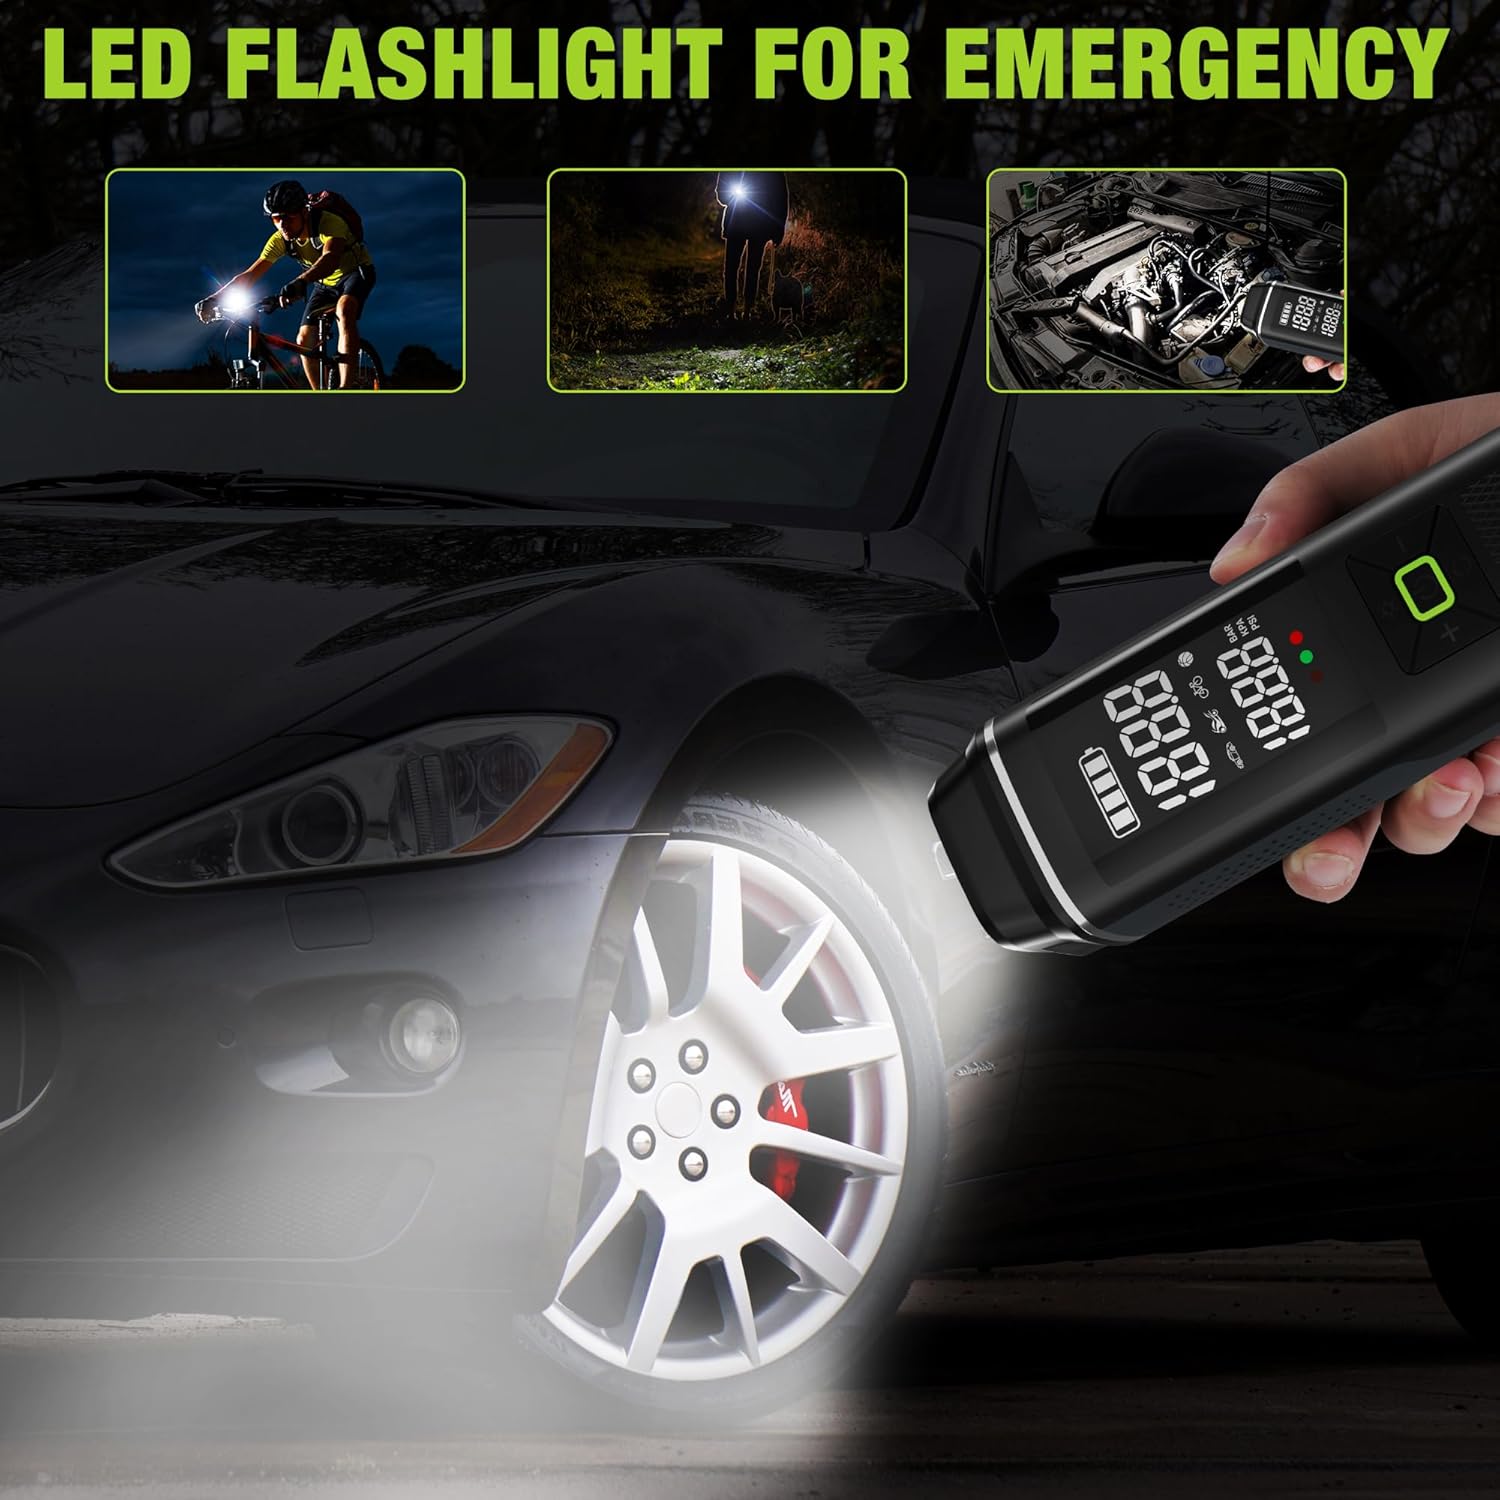
Image: The inflator's LED flashlight function demonstrated for night cycling, general illumination, and under-hood car inspection.
6.7 Portable Power Bank Function
The inflator can also serve as a power bank to charge electronic devices:
- Ensure the inflator is powered on.
- Connect your electronic device (e.g., smartphone) to the USB-A output port using a compatible charging cable (not included).
- The inflator will begin charging your device.
- Disconnect your device when charging is complete or when the inflator's battery is low.

Image: The inflator being used to charge a smartphone via its USB output port, illustrating its portable power bank capability.
7. Maintenance
- Cleaning: Wipe the device with a soft, damp cloth. Do not use harsh chemicals or abrasive cleaners. Ensure the device is off and disconnected from any power source before cleaning.
- Storage: Store the inflator and its accessories in the provided storage bag in a cool, dry place, away from direct sunlight and extreme temperatures.
- Battery Care: To prolong battery life, avoid fully discharging the battery frequently. Recharge the device periodically if not used for extended periods (e.g., every 3-6 months).
8. Troubleshooting
| Problem | Possible Cause | Solution |
|---|---|---|
| Inflator does not turn on. | Low battery. | Charge the device fully. |
| Slow inflation or weak airflow. | Low battery; hose not securely connected; item too large for continuous inflation. | Ensure battery is fully charged. Check hose connections for leaks. For large items, inflate in stages, allowing the device to cool. |
| Device overheats during use. | Prolonged continuous operation. | Stop operation and allow the device to cool down for at least 10-15 minutes before resuming. Avoid continuous use for more than 5 minutes. |
| Air leaks from connection. | Hose not tightened properly; worn adapter. | Ensure the inflation hose and adapters are screwed on very tightly. Replace worn adapters if necessary. |
| Inaccurate pressure reading. | Loose connection; sensor issue. | Ensure the connection to the tire valve is secure. If the issue persists, contact customer support. |
9. Specifications
| Model Name | Tire Inflator |
| Model Number | W125218A |
| Brand | WORKPRO |
| Voltage | 12 Volts |
| Power Source | Corded Electric (for charging), Battery Powered (for operation) |
| Battery Capacity | 3 x 2500mAh (7500mAh total) |
| Max Pressure | 150 PSI |
| Charging Time | 3-5 hours |
| Continuous Inflation Time | Over 30 minutes (on full charge) |
| Material | Plastic, Aluminum |
| Item Weight | 930 g |
| UPC | 820909686958 |
10. Warranty and Support
For warranty information, technical support, or service inquiries, please contact WORKPRO customer service. Refer to the product packaging or the official WORKPRO website for contact details.
Please retain your proof of purchase for warranty claims.