1. Introduction
The AotuLink 7-Inch Wireless Car Stereo (Model C7) is designed to enhance your driving experience by integrating smartphone functionalities directly into your vehicle. This portable device supports wireless Apple CarPlay and Android Auto, allowing seamless access to navigation, music, calls, and messages. It also features wireless mirror link for both iOS and Android devices, multimedia playback, and various audio output options including Bluetooth, FM transmission, built-in speaker, and AUX connection. The device can be mounted on your dashboard or windshield for optimal viewing.
2. What's in the Box
Please verify that all items listed below are included in your package:
- AotuLink 7-Inch Wireless Car Stereo Device
- Suction Cup Bracket
- Car Charger
- Dashboard Pad Mounting Disk
- 3.5mm Audio Cable
- USB-C to USB-A Cable
- User Manual

Figure 2.1: Package Contents
3. Product Overview
Familiarize yourself with the device's components and ports:

Figure 3.1: Device Ports and Dimensions
- Power Button: Turns the device on/off.
- AUX: 3.5mm audio output port for connecting to your car's AUX input.
- TF Card: Slot for a TransFlash (microSD) card for multimedia playback.
- AV IN: Audio/Video input port.
- TYPE-C: USB Type-C port for power input.
4. Setup
4.1 Mounting the Device
The AotuLink car stereo offers flexible mounting options for your dashboard or windshield.
4.1.1 Suction Cup Bracket Installation
- Attach the device to the suction cup bracket.
- Clean the desired mounting surface (windshield or dashboard) thoroughly.
- Press the suction cup firmly against the surface and engage the locking lever to secure it.
- Adjust the angle of the bracket for optimal viewing.

Figure 4.1: Suction Cup Bracket Adjustments and Mounting
4.1.2 Dashboard Pad Mounting (Optional)
If your dashboard surface is not suitable for direct suction cup mounting, use the provided dashboard pad:
- Clean the dashboard area where you intend to place the pad.
- Peel off the protective film from the adhesive side of the dashboard pad.
- Firmly press the pad onto the dashboard and hold for 30 seconds to ensure strong adhesion. Allow 30 minutes for the adhesive to set before attaching the suction cup.
- Attach the suction cup bracket to the dashboard pad.

Figure 4.2: Dashboard Pad Mounting Steps
4.2 Power Connection
Connect the provided car charger to the TYPE-C port on the device and plug the other end into your car's 12V power outlet (cigarette lighter socket). The device will power on automatically.
5. Operating Instructions
5.1 Wireless Apple CarPlay
Connect your iPhone wirelessly to access maps, messages, calls, music, and more.
- Turn on Wi-Fi and Bluetooth on your iPhone.
- On your iPhone, go to Bluetooth settings and select the device starting with "T88******".
- Confirm pairing when prompted.
- Select "Use CarPlay" on your iPhone.
- Wait approximately 30 seconds for the device to enter CarPlay mode.

Figure 5.1: Wireless Apple CarPlay Connection Steps
5.2 Wireless/Wired Android Auto
Connect your Android phone to use Android Auto features. Newer phones support wireless, while older phones may require a wired USB connection.
- Turn on Wi-Fi and Bluetooth on your Android phone.
- On your Android phone, go to Bluetooth settings, click "Pair new device", and select the device starting with "T88******".
- Confirm pairing when prompted.
- Once "T88******" is displayed under "Connected devices", wait approximately 30 seconds for the device to enter Android Auto mode.
- For wired connection, connect your Android phone to the device's USB-C port using a USB cable.

Figure 5.2: Wireless Android Auto Connection Steps
5.3 Wireless Mirror Link (AirPlay & Android Cast)
Mirror your phone's screen to the car stereo for viewing content.
5.3.1 iOS AirPlay Connection
- Turn on Wi-Fi on your iPhone.
- Select the Wi-Fi device starting with "CARLINK******" and enter the password "12345678".
- Open your iPhone's Control Center and tap the "Screen Mirroring" icon.
- Select "SmartScreen" from the list.
- Wait for a moment to enter AirPlay mode.

Figure 5.3: iOS AirPlay Connection Steps
5.3.2 Android Cast Connection
- Turn on Wi-Fi on your Android phone.
- Scan the QR code displayed on the Android Cast interface of the car stereo and install the required app.
- In the app, select "Wi-Fi Direct" and click "CONNECT".
- Select "Start Now" when prompted.
- Wait for a moment to enter Android Cast mode.

Figure 5.4: Android Cast Connection Steps
5.4 Audio Output Options
The device offers several ways to output audio to your car's sound system:
- Bluetooth: Connect your phone via Bluetooth for high-quality audio streaming.
- FM Transmitter: Transmit audio to your car's FM radio by tuning both devices to the same FM frequency.
- Built-in Speaker: The device has its own speaker for direct audio output.
- AUX Connection: Use the provided 3.5mm audio cable to connect the device's AUX output to your car's AUX input.

Figure 5.5: Audio Output Options
5.5 Voice Control
Utilize voice commands through Siri (for Apple CarPlay) or Google Assistant (for Android Auto) for hands-free operation of navigation, calls, messages, and music.

Figure 5.6: Siri & Google Voice Control
5.6 Multimedia Playback
The device supports playback of various media formats from a TF card or mirrored from your smartphone.
- Music: Supports .mp3, .wav, and other audio formats.
- Video: Supports .f4v, .mov, .ts, .mp4, and other video formats.
- Pictures: View images stored on your TF card or mirrored from your phone.
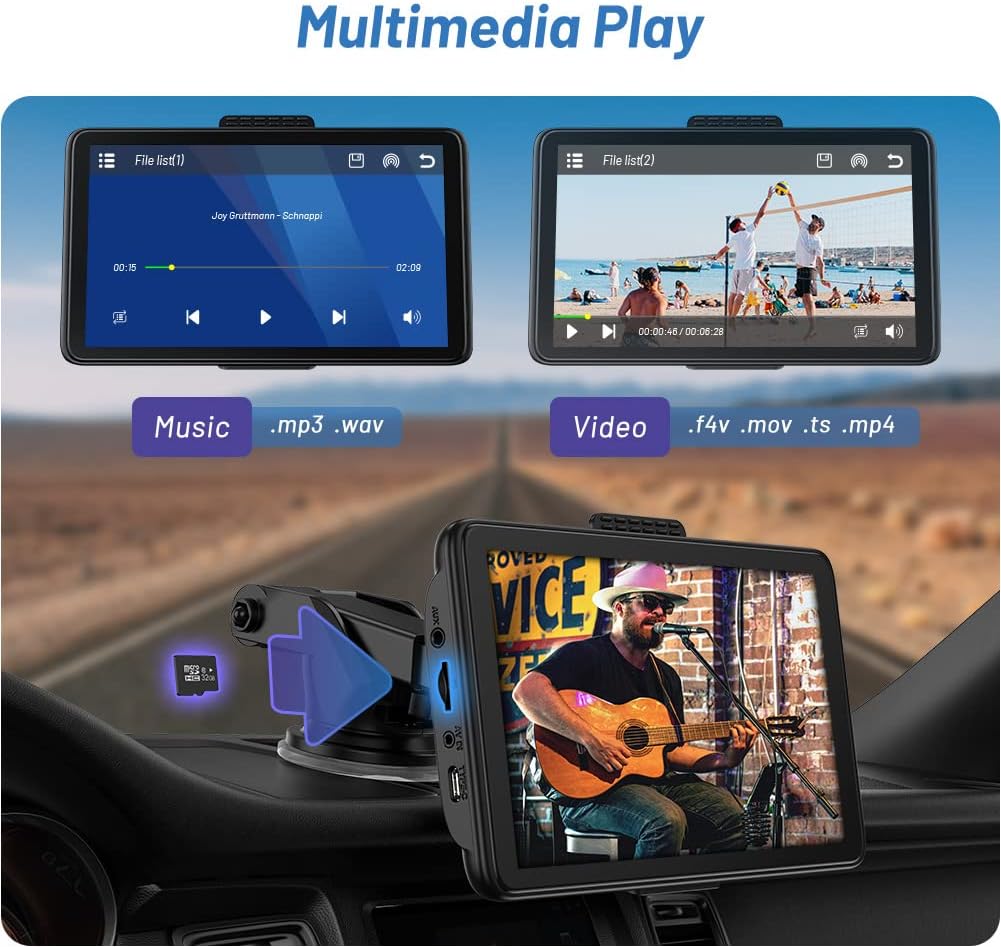
Figure 5.7: Multimedia Playback
5.7 Navigation
Utilize your preferred mobile navigation apps like Google Maps or Waze through Apple CarPlay or Android Auto for real-time directions on the 7-inch HD IPS display.
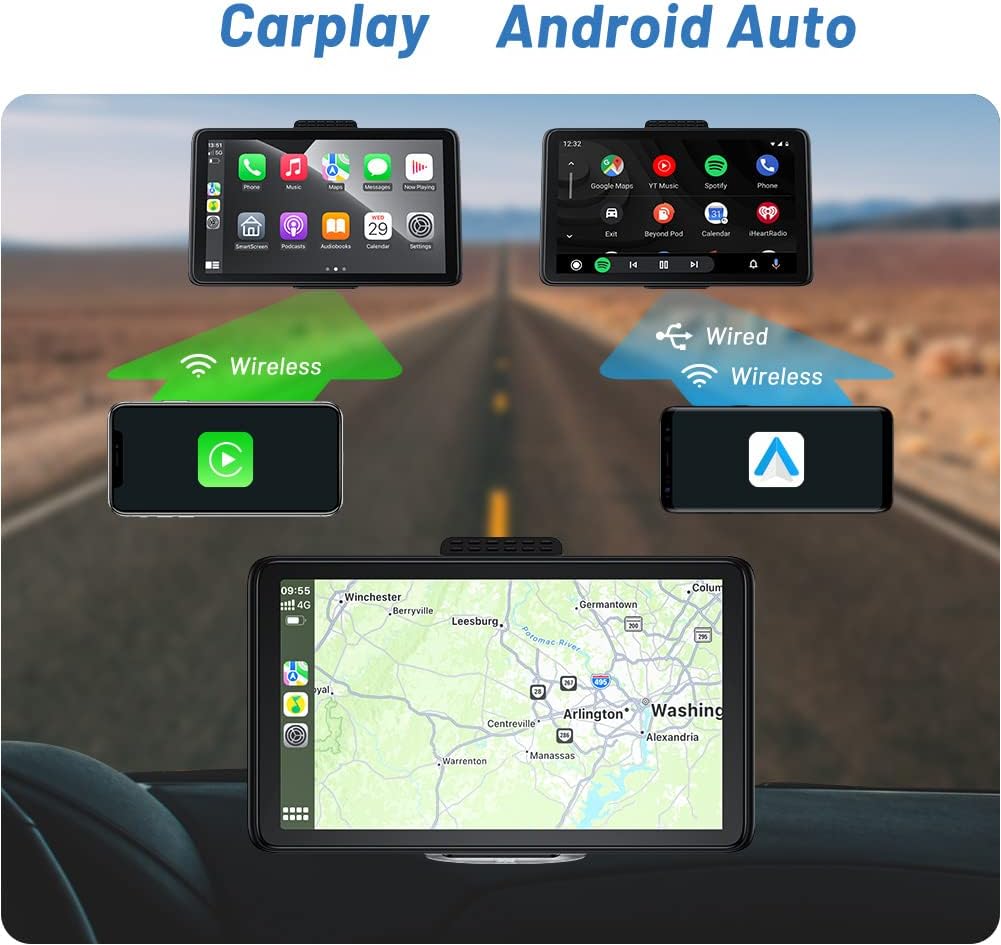
Figure 5.8: Navigation via Apple CarPlay and Android Auto
Video 5.1: Demonstration of Portable Carplay & Android Auto features, including navigation and interface interaction.
6. Maintenance
- Cleaning: Use a soft, dry cloth to clean the screen and exterior of the device. Avoid using abrasive cleaners or solvents.
- Storage: When not in use for extended periods, store the device in a cool, dry place away from direct sunlight and extreme temperatures.
- Temperature: Avoid exposing the device to extreme hot or cold temperatures, as this can affect its performance and lifespan.
- Cable Care: Ensure all cables are connected securely and are not bent or pinched, which could cause damage.
7. Troubleshooting
| Problem | Possible Cause | Solution |
|---|---|---|
| Device does not power on. | No power from car charger or faulty connection. | Check car charger connection to device and 12V outlet. Ensure car's 12V outlet is functional. |
| Wireless CarPlay/Android Auto not connecting automatically. | Bluetooth/Wi-Fi interference or initial pairing issue. | Ensure phone's Bluetooth and Wi-Fi are on. Try turning Bluetooth off and on again on your phone. Re-pair the device if necessary. |
| Poor audio quality (static, low volume). | FM transmitter interference, loose AUX cable, or car's audio settings. | If using FM, try a different frequency. Ensure AUX cable is fully inserted. Adjust volume on both the device and your car stereo. Consider using your car's Bluetooth for audio if available. |
| Touch screen unresponsive. | Temporary software glitch. | Restart the device by unplugging and re-plugging the power cable. |
8. Specifications
- Brand: AotuLink
- Model Number: C7
- Screen Size: 7 Inches
- Connectivity Technology: Bluetooth
- Controller Type: Android (Compatible with Apple CarPlay)
- Special Feature: Portable
- Compatible Devices: Smartphone, Speaker
- Total HDMI Ports: 1 (Note: JSON indicates 1 HDMI port, but device diagram shows AV IN, not HDMI. Assuming AV IN is the intended video input.)
- Connector Type: 3.5mm Jack, USB (Type-C for power)
- Audio Output Mode: Stereo
- Surround Sound Channel Configuration: 2
- Color: Black
- Item Weight: 1.98 pounds
- Package Dimensions: 8.9 x 5.71 x 4.88 inches
- Date First Available: April 15, 2023
9. Warranty and Support
The AotuLink 7-Inch Wireless Car Stereo comes with a full one-year warranty. If you encounter any issues or require technical assistance, please contact the AotuLink Professional Team. They provide dedicated support and guidance to help resolve any technical problems or difficulties you may experience.
For support, please refer to the contact information provided in your product packaging or on the official AotuLink website.


