1. Important Safety Instructions
Please read these instructions carefully before using your Bosch ErgoMaster Series 4 Immersion Blender. Keep this manual for future reference.
- Electrical Safety: Ensure the voltage indicated on the appliance matches your local mains voltage before connecting. Do not immerse the motor unit in water or other liquids.
- Children and Vulnerable Persons: This appliance can be used by persons with reduced physical, sensory or mental capabilities or lack of experience and knowledge if they have been given supervision or instruction concerning use of the appliance in a safe way and understand the hazards involved. Children shall not play with the appliance.
- Blades: The blades are very sharp. Handle with extreme care when assembling, disassembling, and cleaning.
- Hot Liquids: Exercise caution when blending hot liquids to prevent scalding due to sudden steam.
- Damage: Do not use the appliance if the power cord or plug is damaged, or if the appliance itself is faulty. Contact authorized service personnel for repairs.
- Attachments: Only use original Bosch accessories and attachments.
2. Product Overview
The Bosch ErgoMaster Series 4 Immersion Blender is designed for versatile food preparation, featuring an 800-watt motor and a durable ceramic coupling for long-lasting performance.

Figure 2.1: The Bosch ErgoMaster Series 4 Immersion Blender, including the motor unit, blending foot, mixing beaker, chopper attachment, and whisk attachment.
Key Features:
- 800-Watt Motor: Provides powerful performance for blending various ingredients.
- Variable Speed Control: Adjust blending speed by applying more or less pressure to the control lever.
- QuattroBlade System: Four stainless steel blades and a unique bell design ensure efficient and splash-free blending.
- Durable Ceramic Coupling: The ceramic coupling between the motor and the blending foot transmits power efficiently to the blades, ensuring long-lasting performance without wear.
- Ergonomic Design: Comfortable grip for easy handling.
Included Components:
- Motor Unit
- Immersion Blending Foot (Stainless Steel)
- Graduated Mixing Beaker (500 ml capacity)
- Chopper Attachment (for vegetables, herbs, nuts, meat)
- Whisk Attachment (for whipping eggs or cream)
3. Setup and Assembly
Before first use, clean all parts that will come into contact with food as described in the 'Maintenance and Cleaning' section.
3.1 Attaching the Immersion Blending Foot
- Align the blending foot with the motor unit.
- Twist the blending foot clockwise until it clicks securely into place.
- To detach, twist counter-clockwise and pull apart.
3.2 Attaching the Chopper Attachment
- Carefully place the chopper blade onto the central pin inside the chopper bowl.
- Add ingredients to the chopper bowl.
- Place the chopper lid onto the bowl, ensuring it is properly seated.
- Align the motor unit with the chopper lid and twist clockwise until it locks.
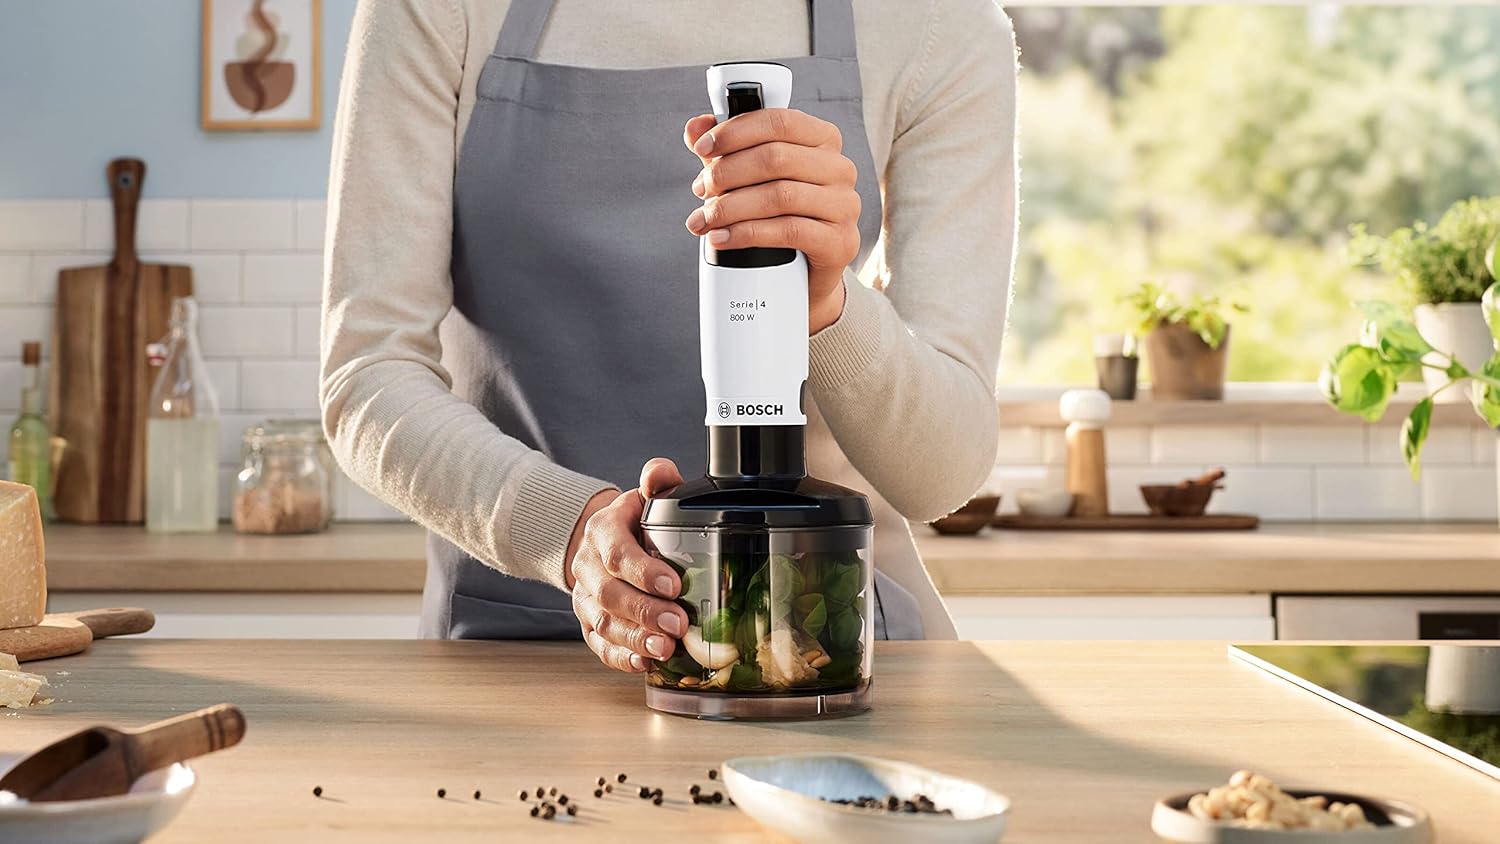
Figure 3.1: Assembling and using the chopper attachment for processing ingredients like herbs and nuts.
3.3 Attaching the Whisk Attachment
- Insert the whisk into the gear housing.
- Align the gear housing with the motor unit.
- Twist the gear housing clockwise until it clicks securely into place.
4. Operating Instructions
Always ensure the appliance is unplugged before changing attachments or cleaning.
4.1 Using the Immersion Blender
- Assemble the blending foot to the motor unit.
- Plug the appliance into a power outlet.
- Immerse the blending foot into the ingredients. Ensure the liquid level is below the maximum fill line of the mixing beaker or container.
- Press the control lever to start blending. The speed is variable; press harder for higher speed.
- Move the blender gently up and down to ensure even blending.
- Release the control lever to stop.
- Unplug the appliance after use.
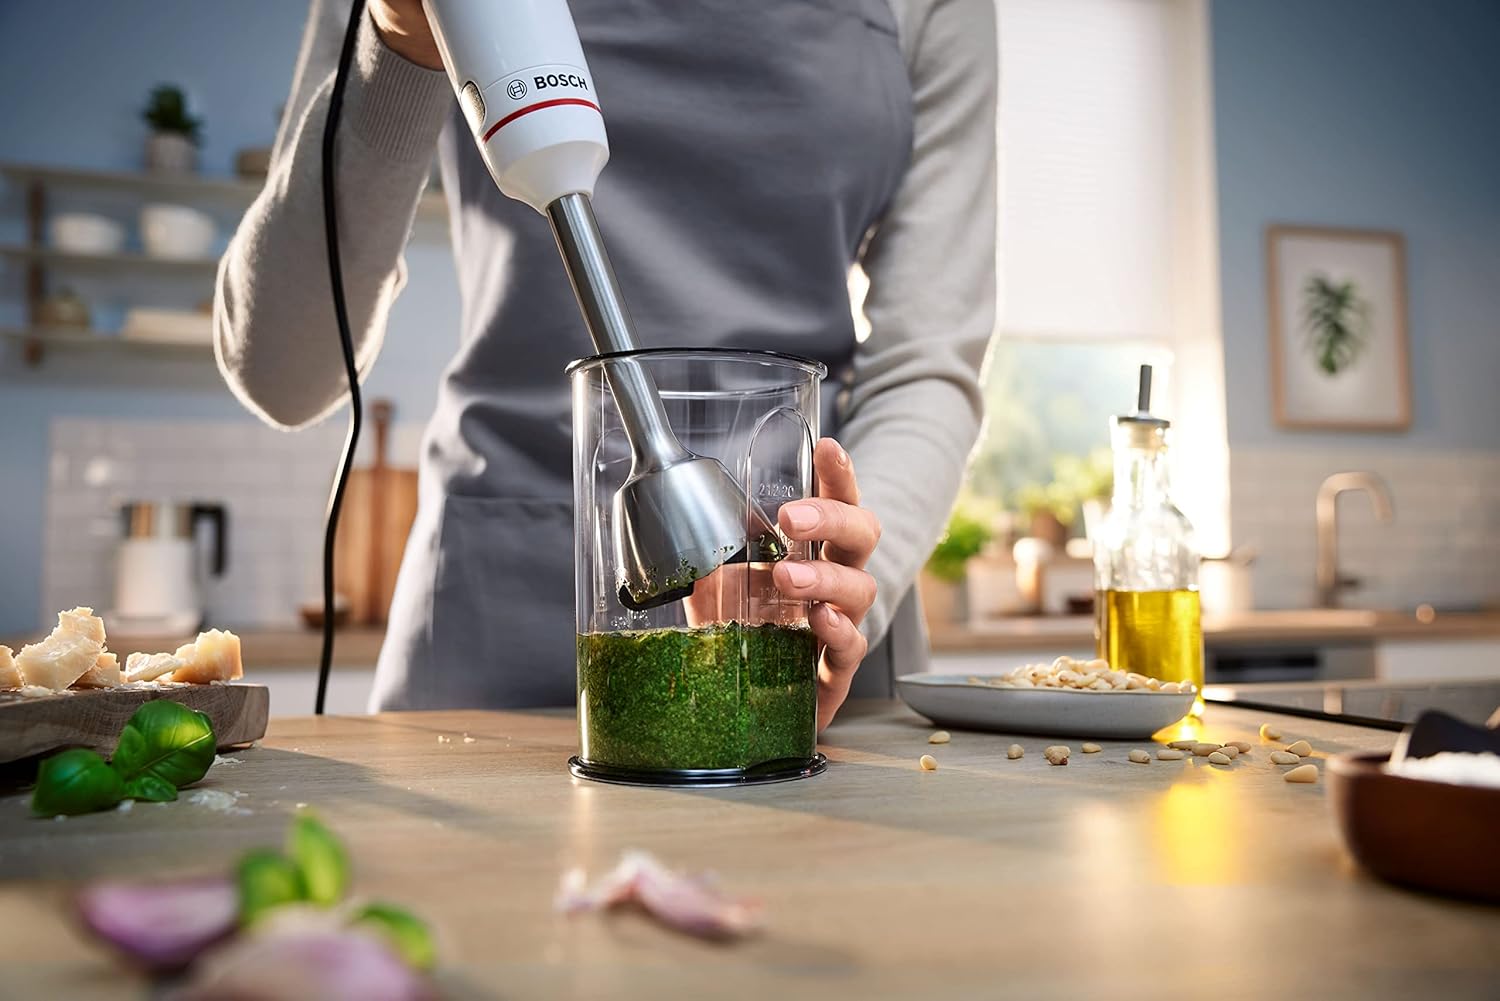
Figure 4.1: Blending ingredients directly in the graduated mixing beaker using the immersion blending foot.
4.2 Using the Chopper Attachment
- Assemble the chopper attachment with the blade and ingredients.
- Attach the motor unit to the chopper lid.
- Plug the appliance into a power outlet.
- Press the control lever in short pulses for coarse chopping, or continuously for finer results.
- Release the control lever to stop.
- Unplug the appliance, then carefully remove the motor unit, lid, and blade before emptying the contents.
4.3 Using the Whisk Attachment
- Assemble the whisk attachment to the motor unit.
- Plug the appliance into a power outlet.
- Place the whisk into the ingredients (e.g., egg whites, cream) in the mixing beaker or a suitable bowl.
- Press the control lever to start whisking. Adjust speed as needed.
- Move the whisk gently to incorporate air evenly.
- Release the control lever to stop.
- Unplug the appliance after use.

Figure 4.2: Whipping ingredients like cream or egg whites using the whisk attachment.
5. Maintenance and Cleaning
Proper cleaning ensures the longevity and hygiene of your appliance.
5.1 Cleaning the Motor Unit
- Always unplug the appliance before cleaning.
- Wipe the motor unit with a damp cloth. Do not immerse it in water or wash it under running water.
5.2 Cleaning Attachments
- The blending foot, mixing beaker, chopper bowl, chopper blade, whisk, and whisk gear housing are dishwasher-safe.
- Alternatively, wash these parts in warm soapy water, then rinse thoroughly and dry.
- For the blending foot, a quick rinse under running water immediately after use can prevent food from drying on the blades.

Figure 5.1: Cleaning the blending foot by rinsing under water and placing it in a dishwasher.
5.3 Storage
Store the appliance and its accessories in a clean, dry place, out of reach of children.
6. Troubleshooting
| Problem | Possible Cause | Solution |
|---|---|---|
| Appliance does not switch on. | Not plugged in; power outage; attachment not correctly assembled. | Check power connection; check circuit breaker; ensure attachments are securely locked. |
| Motor stops during operation. | Overload protection activated; ingredients too tough or quantity too large. | Unplug, remove some ingredients, let cool down, then restart. |
| Poor blending results. | Insufficient liquid; ingredients too large; blending time too short. | Add more liquid; cut ingredients into smaller pieces; blend for a longer duration. |
| Excessive vibration or noise. | Attachment not properly secured; damaged blade. | Check attachment assembly; if blade is damaged, contact service. |
7. Technical Specifications
| Feature | Specification |
|---|---|
| Brand | Bosch |
| Model Number | MSM4W421 |
| Color | White |
| Dimensions (L x W x H) | 7.8 x 5.7 x 38.5 cm |
| Weight | 1.3 Kilograms |
| Capacity (Mixing Beaker) | 500 Milliliters |
| Power | 800 Watts |
| Voltage | 240 Volts |
| Material | Stainless Steel, Plastic |
| Noise Level | 75 dB |
| Special Features | Multiple attachments, Dishwasher safe parts, Corded operation |
| Spare Parts Availability | 7 Years |
8. Warranty and Support
Bosch appliances are manufactured with high-quality materials and undergo strict quality control. For detailed warranty information, please refer to the warranty card included with your product or visit the official Bosch website for your region.
For technical support, spare parts, or service inquiries, please contact Bosch Customer Service. Information regarding spare parts availability is typically 7 years from the date of purchase.
You can find contact details for your local Bosch service center on the official Bosch website: www.bosch-home.com