1. Product Overview
The sloHEXtted H208 is an industrial-grade wireless remote control system designed for various lifting and material handling applications, including overhead cranes, bridge cranes, chain hoists, monorails, concrete pump trucks, and mobile lifting equipment. This system provides reliable and safe operation with a robust design and user-friendly features.
This manual specifically covers the 1 Transmitter + 1 Receiver, 12-65V DC model.

Image 1.1: sloHEXtted H208 Industrial Wireless Crane Remote Control System, showing the transmitter, receiver, and included gloves.
Key Features:
- Dual Speed 8-Channel Control: Provides precise control over crane movements with 8 momentary buttons, configurable via USB programming cable (sold separately).
- Extended Control Range: Operates up to 100 meters (328 feet) with 360-degree barrier-free signal penetration.
- Enhanced Safety: Equipped with an EU standard Emergency Stop button and quality circuit boards for reliable operation.
- Durable Construction: IP65 rated for dust and water resistance, featuring a fiberglass-reinforced nylon shell and robust silicone-wrapped buttons.
- User-Friendly Design: Ergonomic transmitter for comfortable handling, with clear LED indicators for status and troubleshooting.
- Easy Installation: Includes Y-type fork terminals, reserved brass mounting holes, and cheese head slotted screws for convenient setup.
2. Safety Information
Read and understand all safety instructions before operating the sloHEXtted H208 remote control system. Failure to follow these instructions may result in serious injury or equipment damage.
General Safety Precautions:
- Always ensure the Emergency Stop button is accessible and functional. Pressing this button will immediately halt all controlled movements.
- Do not operate the system if the transmitter or receiver appears damaged.
- Ensure the power supply to the receiver matches the specified voltage (12-65V DC for this model).
- Keep the transmitter dry and clean. Although IP65 rated, prolonged exposure to extreme conditions should be avoided.
- Only qualified personnel should install, maintain, or repair the system.
- Before operation, verify that the remote control functions correspond correctly to the crane's movements.
- Never leave the transmitter unattended in an area where unauthorized personnel could access it.

Image 2.1: Close-up of the Emergency Stop button on the transmitter, designed for immediate cessation of operations.
3. Setup and Installation
This section outlines the steps for installing and preparing your sloHEXtted H208 remote control system.
3.1 Unpacking and Inspection
Upon receiving your product, carefully unpack all components and inspect them for any signs of damage. The package should contain:
- 1 x Transmitter
- 1 x Receiver
- 1 x Button Sticker Sheet
- 1 x Transmitter Cover
- Fasteners (bolts, nuts, washers, spring)
- User Manual (this document)

Image 3.1: Overview of package contents, including the transmitter, receiver, and accessories, with dimensions.
3.2 Receiver Mounting
- Select a suitable location for the receiver, ensuring it is protected from excessive vibration and physical impact, yet accessible for wiring.
- Utilize the reserved brass mounting holes on the back of the receiver for secure attachment.
- Use the provided fasteners (bolts, nuts, washers, and spring) to mount the receiver firmly. The spring is designed to absorb vibrations.

Image 3.2: Details of the receiver's mounting features, including Y-type fork terminals, reserved brass mounting holes, and cheese head slotted screw.
3.3 Wiring the Receiver
Refer to the wiring diagram provided on the receiver unit and in the included documentation. Ensure all connections are secure and correctly matched to your crane's control system.
- Connect the power supply (12-65V DC) to the designated power terminals on the receiver.
- Connect the control output wires from the receiver to the corresponding inputs of the crane's control panel. The system uses Y-type fork terminals for easy connection.
- Ensure proper grounding according to local electrical codes.
Warning: Incorrect wiring can cause severe damage to the system or the crane. If unsure, consult a qualified electrician.
3.4 Transmitter Battery Installation
The transmitter requires batteries (not included). Open the battery compartment, insert the batteries according to the polarity markings, and close the compartment securely.
3.5 Pairing and Reprogramming
The transmitter and receiver are typically pre-paired from the factory. If re-pairing is necessary or if you wish to reprogram button functions, a USB programming cable (not included, sold separately) is required. Refer to the separate programming guide for detailed instructions.

Image 3.3: Button sticker sheet for customizing button labels on the transmitter to match specific crane functions.
4. Operating Instructions
This section details the operation of the sloHEXtted H208 wireless remote control.
4.1 Transmitter Layout

Image 4.1: Annotated view of the transmitter, highlighting the Emergency Stop button, LED indicators (Low Battery, Error, Status), and silicone control buttons.
- Emergency Stop Push Button: Red button at the top. Press to immediately stop all operations. Twist to reset.
- LED 1 (Low Battery): Indicates low battery status.
- LED 2 (Error): Indicates system error.
- Status LED: Provides operational status feedback.
- Silicone Buttons: Eight momentary buttons for controlling crane movements (e.g., Up, Down, Left, Right, Forward, Backward, Speed 1, Speed 2).
- ON/HORN (START) Button: Green button at the bottom to activate the transmitter and potentially trigger a horn function.
4.2 Starting Operation
- Ensure the receiver is powered on and correctly wired to the crane.
- Verify the Emergency Stop button on the transmitter is in the released (unpressed) position.
- Press the green START button on the transmitter to activate it. The Status LED should illuminate, indicating it is active.
- Confirm that the crane responds correctly to the transmitter's commands before commencing full operation.
4.3 Controlling Crane Movements
Use the silicone buttons to control the crane's functions. The buttons are momentary, meaning the function is active only while the button is pressed.
- Directional Buttons: Typically control Up, Down, Left, Right, Forward, and Backward movements.
- Speed Buttons (1 & 2): These buttons provide dual-speed control. Pressing '1' might activate slow speed, and '2' might activate fast speed, or they might be used in combination with directional buttons for speed control. Refer to your specific crane's configuration.
The control range is up to 100 meters (328 feet) with 360-degree coverage, allowing flexible operation without direct line of sight.
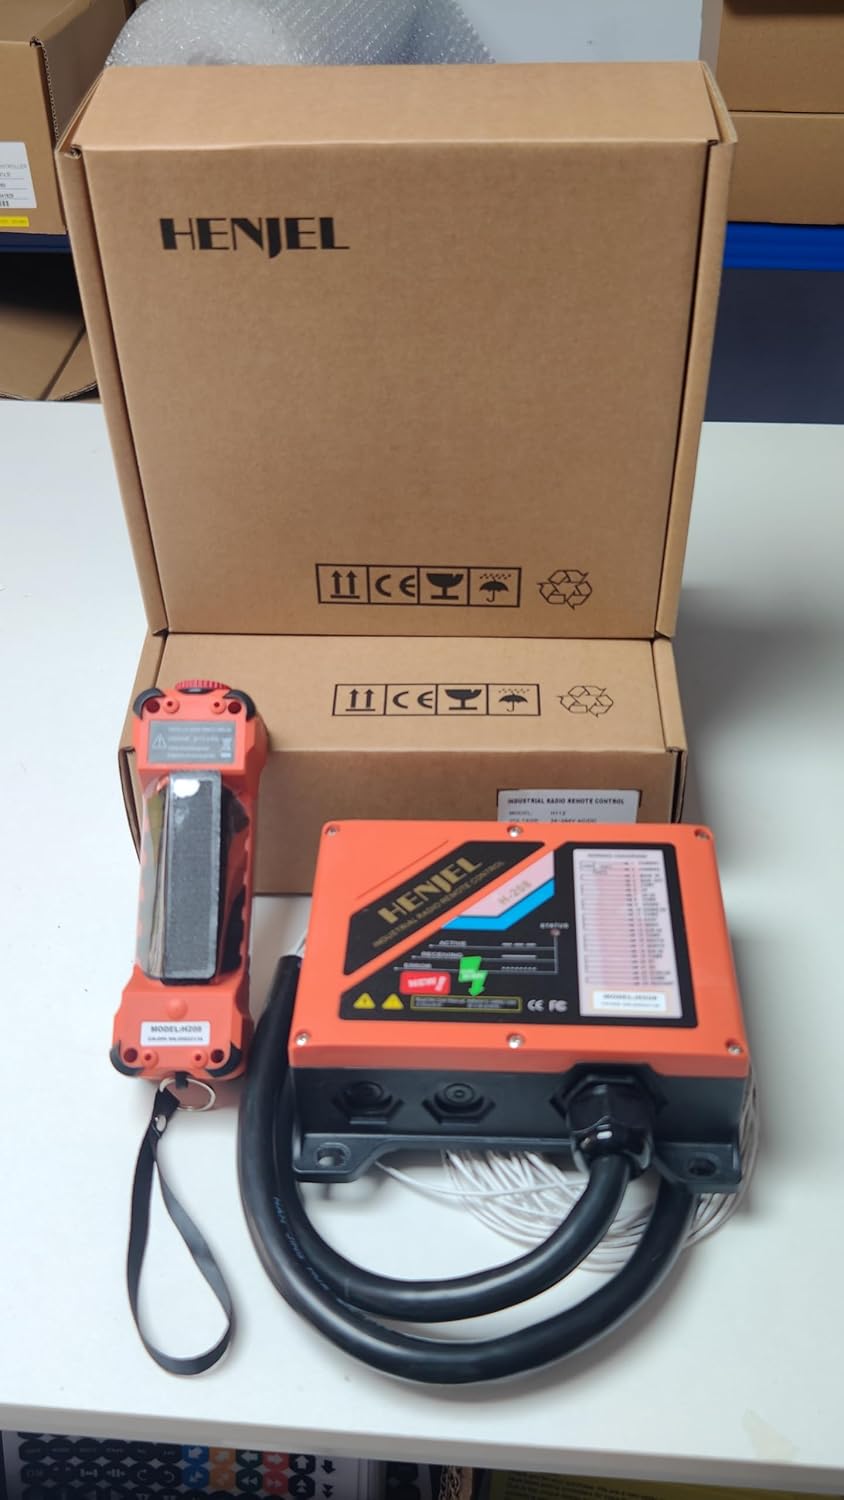
Image 4.2: Illustration of the 100-meter (328 feet) control range and 360-degree operation capability of the remote control system.
4.4 Emergency Stop Procedure
In case of an emergency or unexpected movement, immediately press the red Emergency Stop button on the top of the transmitter. This will cut power to the control outputs, stopping all crane functions.
5. Maintenance
Regular maintenance ensures the longevity and reliable operation of your sloHEXtted H208 remote control system.
5.1 Cleaning
- Wipe the transmitter and receiver with a soft, damp cloth. Do not use abrasive cleaners or solvents.
- Ensure no dust or debris accumulates around the buttons or the Emergency Stop mechanism.
5.2 Battery Replacement
When the Low Battery LED (LED 1) on the transmitter illuminates, replace the batteries promptly to avoid interruption of service. Use only recommended battery types.
5.3 Inspection
- Periodically inspect the transmitter and receiver for any physical damage, cracks, or loose components.
- Check all wiring connections to the receiver for tightness and corrosion.
- Verify the functionality of the Emergency Stop button before each use.
6. Troubleshooting
This section provides solutions to common issues you might encounter with your sloHEXtted H208 remote control system.
| Problem | Possible Cause | Solution |
|---|---|---|
| Transmitter not responding / No power |
|
|
| Crane not responding to commands |
|
|
| Error LED (LED 2) on transmitter is lit | Internal system error. |
|
The transmitter and receiver are equipped with LED signals to assist in troubleshooting. Observe these indicators for initial diagnosis.

Image 6.1: LED indicators on both the transmitter and receiver provide visual cues for system status and error conditions, aiding in troubleshooting.
7. Specifications
| Feature | Specification |
|---|---|
| Model Number | H208 |
| Control Channels | 8 (Dual Speed) |
| Control Range | Up to 100 meters (328 feet) |
| Receiver Voltage | 12-65V DC |
| Material | Fiberglass reinforced nylon |
| Protection Rating | IP65 (Dust-proof and Waterproof) |
| Item Weight | Approximately 3 pounds (total system) |
| Product Dimensions | 11 x 8.2 x 3.9 inches (overall package) |
| Batteries Required | Yes (not included) |
| Special Features | Brass mounting hole reserved on receiver back |
8. Warranty and Support
For warranty information, technical support, or service inquiries, please contact sloHEXtted customer service through the retailer where the product was purchased or visit the official sloHEXtted website. Please have your product model number (H208) and purchase date available when contacting support.
Manufacturer: sloHEXtted
Model: H208
ASIN: B0C2H192KJ