1. Product Overview
This manual provides instructions for the 12V Fuel Shut Off Solenoid Valve, designed to control the fuel supply in various diesel engines and equipment. The solenoid is an essential component for engine operation, ensuring proper fuel flow and shutdown. It is compatible with a range of John Deere riding mowers, lawn tractors, compact utility tractors, turf mowers, Gators, and select series tractors, as well as Yanmar engines (3TNE84, 3TNE88, 4TNE84, 3TNV70, 3TNV76, 4TNV84) and Hyundai/Komatsu excavators (R55-7, R60-7, PC40-10, PC40-8, PC45, PC50, PC55).
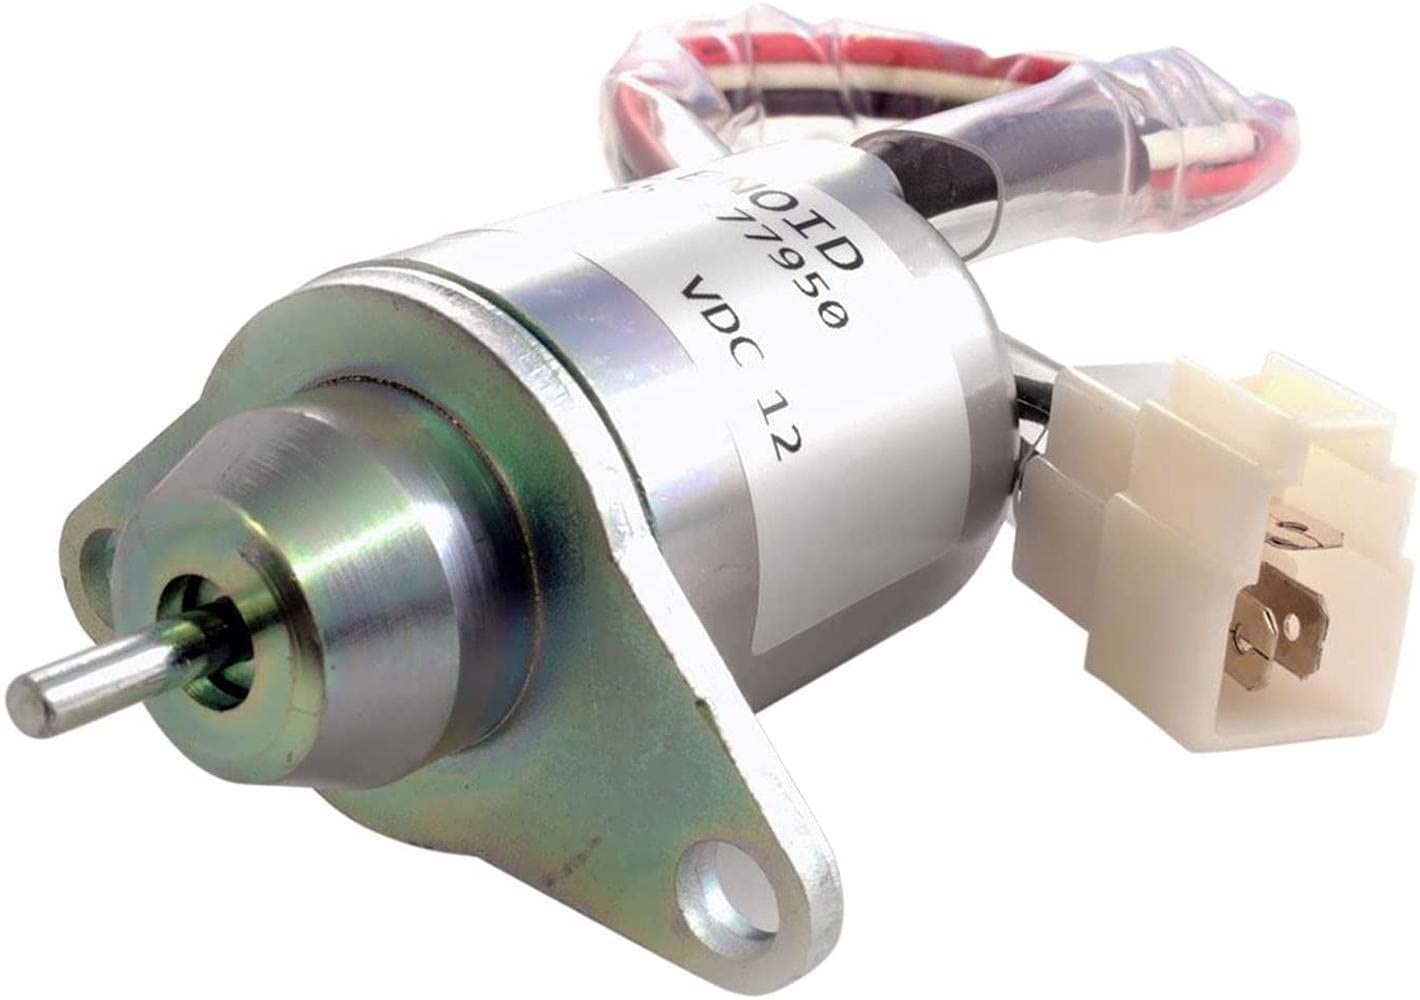
Image 1.1: The 12V Fuel Shut Off Solenoid Valve, showing its compact design and electrical wiring. The '12V' marking indicates its operating voltage.
2. Safety Information
- Always disconnect the vehicle's battery before attempting any installation or maintenance to prevent electrical shock or damage.
- Ensure the engine is cool before working on fuel system components to avoid burns.
- Wear appropriate personal protective equipment (PPE), such as gloves and eye protection.
- Handle fuel with care in a well-ventilated area, away from open flames or sparks.
- If you are unsure about any installation steps, consult a qualified mechanic or technician.
3. Package Contents
- 1 x 12V Fuel Shut Off Solenoid Valve
4. Setup and Installation
The installation of a fuel shut-off solenoid requires careful attention to detail. Refer to your equipment's specific service manual for detailed instructions and torque specifications. The following are general steps:
- Preparation: Park the equipment on a level surface, engage the parking brake, and turn off the engine. Disconnect the negative terminal of the battery.
- Locate the Old Solenoid: Identify the existing fuel shut-off solenoid, typically located near the fuel injection pump or carburetor.
- Disconnect Wiring: Carefully disconnect the electrical connector(s) from the old solenoid. Note the wiring configuration if necessary.
- Remove Old Solenoid: Unscrew and remove the mounting bolts or nuts securing the old solenoid. Extract the solenoid from its housing.
- Install New Solenoid: Insert the new 12V Fuel Shut Off Solenoid Valve into position. Ensure it seats correctly.
- Secure Solenoid: Reinstall the mounting bolts or nuts and tighten them to the manufacturer's specified torque.
- Connect Wiring: Reconnect the electrical connector(s) to the new solenoid. Ensure a secure and proper connection.
- Reconnect Battery: Reconnect the negative terminal of the battery.
- Test: Start the engine and check for proper operation and any fuel leaks.

Image 4.1: A view of the solenoid, highlighting the label with model and part numbers (1503ES-12S5UC5S, 119653-77950), crucial for verifying compatibility during installation.
5. Operating Instructions
The 12V Fuel Shut Off Solenoid Valve operates automatically in conjunction with your equipment's electrical system. When the ignition is turned ON, the solenoid receives 12V power, which energizes its coil and opens the fuel passage, allowing fuel to flow to the engine. When the ignition is turned OFF, power to the solenoid is cut, causing it to de-energize and close the fuel passage, effectively shutting off the engine.
- Engine Start: Turn the ignition key to the ON position. The solenoid should activate, allowing fuel flow.
- Engine Run: The solenoid remains active, maintaining fuel flow during engine operation.
- Engine Shut Down: Turn the ignition key to the OFF position. The solenoid deactivates, stopping fuel flow and shutting down the engine.
6. Maintenance
Regular maintenance helps ensure the longevity and reliable operation of your fuel shut-off solenoid:
- Visual Inspection: Periodically inspect the solenoid and its wiring for any signs of damage, corrosion, or loose connections.
- Cleanliness: Keep the area around the solenoid clean and free from dirt, debris, and fuel spills.
- Connection Check: Ensure all electrical connectors are securely attached and free of moisture.
7. Troubleshooting
If you experience issues with your engine's fuel system related to the solenoid, consider the following:
- Engine Fails to Start (No Fuel):
- Check for 12V power at the solenoid's electrical connector when the ignition is ON.
- Inspect the solenoid's wiring for breaks, shorts, or loose connections.
- Listen for a distinct 'click' sound from the solenoid when the ignition is turned ON. Absence of a click may indicate a faulty solenoid or lack of power.
- Engine Shuts Off Unexpectedly:
- Verify that the solenoid is continuously receiving 12V power when the engine is running. Intermittent power can cause unexpected shutdowns.
- Check for loose or corroded battery terminals or ground connections.
- Fuel Leaks:
- Ensure all fuel lines and connections around the solenoid are properly tightened and free from cracks or damage.

Image 7.1: An alternative view of the solenoid, showing the base and electrical connection point, useful for identifying potential leak points or connection issues.
8. Specifications
| Feature | Specification |
|---|---|
| Voltage | 12V |
| Part Numbers | M806808, SA4562T, SA4850, SA-4562T, 1503ES-12S5UC5S, 119653-77950, EEZQ_PHX20510 |
| Application (John Deere) | Compact Utility Tractor: 790, 990, 2020, 2030, 2030A, 2210, 2305, 2320, 2520, 2305, 2720, 3005, 4005, 4010, 4100, 4110, 4115, 1023E, 1025R, 1026R, 2027R, 3033R, 3038R, 3045R, 4049M, 4049R Turf Mower: 500, 1505, 1515, 1905, 2320, 2500, 2500A, 2500B, 2500E, 2520, 2653A, 2653B, 3215, 3215A, 3215B, 3225B, 3225C, 3235, 3235A, 3235C, 3245C, 7200A, 7400, 7400A, 7500, 7500A, 7700, 7700A, 8500, 8700, 8700A, 8800, 8800A, 8900A Riding Mower: 1435, 1445, 1515, 1545, 1565, 1580, 1585 Wide Area Mower: 1600, 1620 ZTrak Mower: Z997R Gator: 4X2 Gator, 6X4 Gator, HPX 4X2 Gator, HPX 4X4 Gator, Pro 2030A Gator, TH 6X4 Gator Utility Vehicle: XUV 850D, 855D, XUV855M, XUV855E, Military Gator Utility Vehicle A3T Select Series Ultimate Tractor: X740, X744, X748, X749 Signature Series Tractor: X750, X754, X758 Lawn Tractor: X950R OEM Engines and Accessories: 3009, 3011, 3012, 3013, 3014, 3015, 3016, 4019, 4020 |
| Application (Engines) | Yanmar Engines: 3TNE84, 3TNE88, 4TNE84, 3TNV70, 3TNV76, 4TNV84 |
| Application (Excavators) | Hyundai Excavator: R55-7, R60-7, R80-7 Komatsu Excavator: PC40-10, PC40-8, PC45, PC50, PC55 |
9. Warranty and Support
For specific warranty information or technical support, please refer to the retailer or manufacturer from whom you purchased this product. Keep your purchase receipt as proof of purchase.


